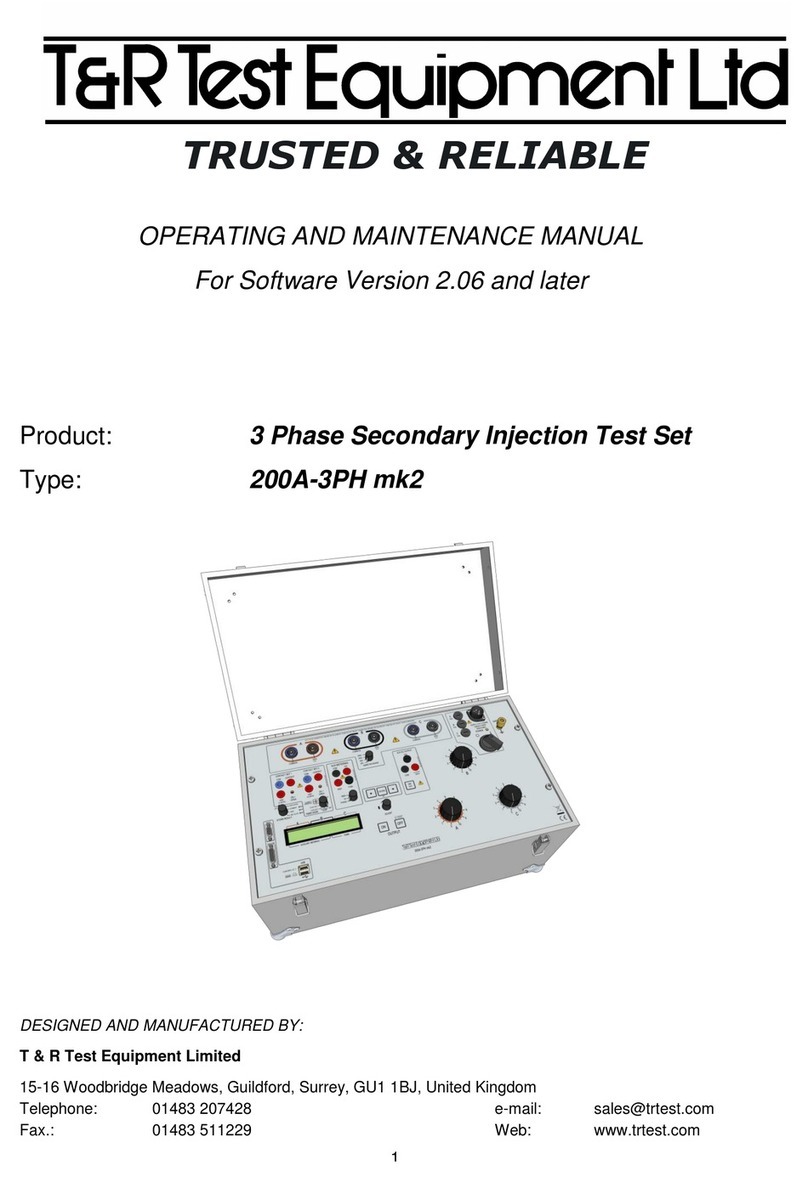
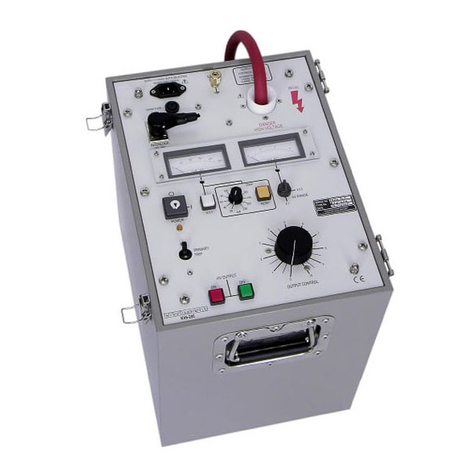
T&R 200A-3PH Operating instructions

OPERATING AND MAINTENANCE MANUAL
Product: 3 Phase Secondary Current Injection Test Set
Type: 200A-3PH/E
DESIGNED AND MANUFACTURED BY:
T & R Test Equipment Limited
Keens Lane, Worplesdon, Guildford, Surrey, GU3 3LS, United Kingdom
Telephone: 01483 235757 e-mail: [email protected]
Fax.: 01483 235759 Web: www.trtest.com

2

3
GENERAL SAFETY STATEMENT
The following safety precautions should be reviewed to avoid injury to the user and damage to the
product (and other products connected to it). To avoid potential hazards only use this product as
specified.
Only suitably qualified personnel should use this equipment. Servicing of this product should only
be carried out by suitably qualified service personnel.
Hazardous voltages and currents are present on the outputs of this unit.
To Avoid Fire Hazards and Personal Injury
Use the correct power supply lead. Only use a suitably rated and approved power supply lead for
the country of use.
Ensure that systems that the unit is to be connected to are dead.
Do not connect and disconnect leads whilst outputs are switched on.
Ensure that the product is grounded. To avoid electric shock it is essential that the grounding
conductor is connected to the earth ground. If an additional earth terminal is provided on the
equipment that may be connected to a local earth. Ensure that the product is properly grounded
before making any connections to inputs or outputs.
Terminal ratings must be observed to prevent fire hazards and risk of injury to the operator.
Consult the product manual for ratings information before making connections to any terminal.
It is ESSENTIAL to consult the product manual for rating information before making any
connection to a terminal or terminal group marked with a warning triangle.
Only use fuses of a type and rating specified for this product.
Do not operate the unit out of its case or with any covers or panels removed.
Do not touch exposed connections and components when power is present.
Do not operate the product if any damage is suspected. Refer the unit to qualified service
personnel to be checked.
Do not operate the unit in wet or damp conditions
Do not operate the unit in an explosive atmosphere
If any further queries occur regarding the usage and maintenance of the
equipment detailed in this manual, please refer these to the supplier of the
equipment in the first case or to:
T & R Test Equipment Limited

4

5
CONTENTS
1. Description of Equipment
2. Operation of Equipment
3. Maintenance Instructions
4. Standard Accessories
5. Overall Performance Specification
6. Calibration Results
7. Test Certificate
8. Revision

6

7
1. DESCRIPTION OF EQUIPMENT
1.1 Electrical Specification
1.2 Variable 3 Phase Supply
1.3 Timer Control
1.4 Output Control
1.5 Construction

8
1.1 Electrical Specification
1.1.1 The supply voltage for the equipment is 415V (380v if requested) , 3 phase, 50/60Hz.
The unit will tolerate an input voltage variation of ± 6%.
IMPORTANT:
The Unit Must be Connected to a 4 Wire Supply.
1.1.2 The maximum power supply requirements will be 1100VA per phase.
1.1.3 The maximum current output from each phase is:
200A at 0 - 5V
1.1.4 Output current duty cycles:
Current 1 (50A) continuously rated
Current 2 (100A) 5 minutes ON load followed by 15 minutes OFF load
Current 3 (200A) 1 minute ON load followed by 15 minutes OFF load
1.1.5 Output current metering:
The analogue ammeters are scaled 0-50 & 0-100
There are 3 selectable ammeter ranges:- 0-50A, 0-100A & 0-200A
The metering accuracy is better than 1.5% of FSD.
IMPORTANT:
If the output current exceeds the maximum of each or any range by 15%, the
output from the unit will be automatically switched off.
1.1.6 The fully isolated auxiliary fixed output supply is:
240V at 0.05A
1.1.7 The maximum voltage appearing on the relay contact test sockets
is 24V DC. The maximum current flowing in the test circuit when the relay contacts
are connected will be 0.3A DC. The contact test circuits are fully isolated.

9
1.2 Variable Three Phase Output
1.2.1 There are three independently controllable outputs available from the equipment.
These outputs are 120º apart electrically.
1.2.2 The equipment's output terminals are located on the top edge of the front panel.
Each terminal is clearly marked showing the output phase and polarity.
1.2.3 Each output phase is controlled by moving the appropriate regulator control knob in a
clockwise direction. The output currents will be indicated on the ammeters.

10
1.3 Timer Control
1.3.1 The timer system will have the following parameters:
Range: 0-999.999 seconds (Quartz locked)
Resolution: 0.001 seconds
Accuracy: Contact mode ± 2ms
Current mode ± 3ms for test currents 20-40% on each range
Current mode +3ms or -1ms for test currents 40-100% on each range
NOTE: Timing results obtained with test currents below 20% of the selected
ammeter range, and on measured times of 19ms and below, are of
doubtful accuracy and should be ignored.
1.3.2 The timer system has three modes of operation which are as follows:
a. Timing relays with normally closed contacts. (N/C)
b. Timing relays with normally open contacts. (N/O)
c. Timing circuit breakers both electromagnetic and thermal types where no
auxiliary contacts are available. (I)
1.3.3 The external contacts may be voltage free or may have a DC voltage applied
(220V DC maximum).
NOTE: See Section 2 for connection procedure for live contacts.
1.3.4 In the Iposition an additional control selector switch is provided to enable the timer
system to operate either from A, B or C phase injected current.

11
1.4 Output Control
1.4.1 The output from the unit is controlled by the illuminated output ON and OFF
push-buttons. Thesepush-buttons are located on the front panel of the unit.
1.4.2 The output is automatically switched off by the following actions:
a. Depressing the OFF push-button.
b. By the operation of external contacts changing state, i.e. N/C to open,
when in contact mode of timer operation.
c.By the collapse of the injected current once the device under test has operated,
when in current operated mode of timer operation.

12
1.5 Construction
1.5.1 The unit is housed in a steel case complete with a detachable lid and carrying
handles located at each end of the case.

13
2. OPERATION
2.1 Supply Voltage Connections
2.2 Front Panel Control Functions
2.3 Connections and Timing Functions
2.4 Method of Operation

14
2.1 Supply Voltage Connections
2.1.1 The 200A-3PH/E is provided with a5 core supply cable. These cores are marked
to ensure the correct phase rotation . The mains input lead is marked as follows:
L1 Brown
L2 Black
L3 Black
Neutral Blue
Earth Green and Yellow
Connections for Mains Input Socket

15
2.2 Front Panel Control Functions (Figure 1)
2.2.1 ITEM FUNCTION
Supply ON/OFF switch To isolate all supply leads
from the mains supply .
Supply ON lamp To indicate supply is connected,
(RED) the ON/OFF switch is closed and
that the supply fuse is healthy.
Output OFF illuminated push-button Indicates output is OFF
(GREEN) Switches OFF output when
pressed
Output ON illuminated push-button Indicates output is ON
(RED) Switches ON output when
pressed
Timer mode switch This 4 position switch selects the
method of timer/output control
IPosition phase selector Will select a phase for timer under
current control.

16
Figure 1 Front Panel Layout - 200A-3PH/E scits
A B CE
N
O
M
D
F
H
G
I
JKL
AEarth terminal
BInput socket
CSupply ON/OFF switch
DOutput fuses
EOutput terminals
FAuxiliary supply sockets, fuse and ON/OFF switch
GTimer
HContact sockets
ITimer mode switch
JOutput ON push-button
KOutput OFF push-button
LCurrent operated phase selector switch
MControlling Regulators
NOutput ammeters
OAmmeter range selectors

17
2.3 Connections and Timing Functions
2.3.1 The following figures give the connections and associated timing functions
for various relay types.
2.3.2 Figure 3a Over current relays
2.3.3 Figure 3b Devices with no auxiliary contacts
2.3.4 Figure 3c Phase relationships
IMPORTANT NOTES
When connecting live contacts to the contact terminals ensure that care is taken
when making the connection. Also ensure that the POSITIVE input is connected to the
RED socket and the NEGATIVE input is connected to the BLUE socket. If the connections
are reversed the 0.25A fuse will rupture for load currents greater than 0.25A and the
system will not function correctly for load currents below 0.25A

18
Figure 3a Over Current Relays
Relay coils under test
Relay
Contacts
CONNECTIONS
1. Timer mode switch setting to N/C or N/O
2. Relay contacts to red and blue contact terminals
3. Relay coils to the desired outputs
TEST PROCEDURES
1. Switch on the main supply switch
2. Select timer mode switch to theOFF position
3. Ensure that the output regulators are in the zero position
4. Select the desired output range
5. Check that connections are made as above
6. Press output ON push-button and adjust output regulators until the desired
output levels are indicated
7. Press output OFF push-button
8. Select N/O or N/C position on the timer mode switch and ensure timer is
reading zero
9. Press output ON push-button
10. Relay will trip after a set time, which will be displayed on thetimer, and the
outputs will be switched off automatically

19
Figure 3b Timing Devices with No Auxiliary Contacts
Device under test
CONNECTIONS
1. Timer mode switch setting toI
2. Connect the device to the desired outputs
TEST PROCEDURES
1. Switch on the main supply switch
2. Select timer mode to theOFF position
3. Ensure that the output regulators are in the zero position
4. Select the desired output range also select desired current operated time phase
5. Check that the connections are made as above and that the device is closed
6. Press output ON push-button and adjust to the desired output level
7. Press output OFF push-button
8. Select Iposition on the timer mode switch and ensure the timer is reading zero
9. Press the output ON push-button
10. Current will now flow through the device.
11. Once the device has tripped the timer will stop and the output will be
switched off
NOTE: Timing results obtained with test currents below 20% on each ammeter range,
and on measured times of 19ms and below, are of doubtful accuracy and should
be ignored.

20
Figure 3c Phase Relationships
SUPPLY 200A-3PH/E
A
A
A
B
B
B
C
C
C
L1
L2L3
L1
L1
L2
L2
L3
L3
N
N
N
N
N
N
N
N N
NOTE
1. Other phases can be shifted by 180° by connection reversal
2. DELTA output connections are not valid
3. Diagrams above show equal output currents. Unequal currents are valid
This manual suits for next models
1
Table of contents
Other T&R Test Equipment manuals

T&R
T&R TPT9000 Operating instructions

T&R
T&R KV30-40D mk3 Operating instructions

T&R
T&R PT15-10s Operating instructions

T&R
T&R PT18-10 mk2 Operating instructions

T&R
T&R KV5-100 mk3 Operating instructions

T&R
T&R KV mk2 Series Operating instructions

T&R
T&R PT30-10 mk2 Operating instructions

T&R
T&R PCU2 mk5 Operating instructions

T&R
T&R PT30-10 Operating instructions

T&R
T&R CU-Ps Operating instructions