TARAL 6314 ATOMIC User manual
TSE-EN-ISO 9001:2000
KBK-520-2005612-2
Yayýn Tarihi: 03.05.2004
Revizyon Tarihi: 01.04.2007
6314 ATOMIC
MOTORLU SIRT ATOMÝZÖRÜ
Tanýtma ve Kullanma Kýlavuzu
KNAPSACK MISTBLOWER
Owner’s Manual
‘’FARMERS FRIENDLY’’

BU KILAVUZU DÝKKATLÝCE OKUYUNUZ !
PLEASE READ THIS MANUAL THOROUGHLY!
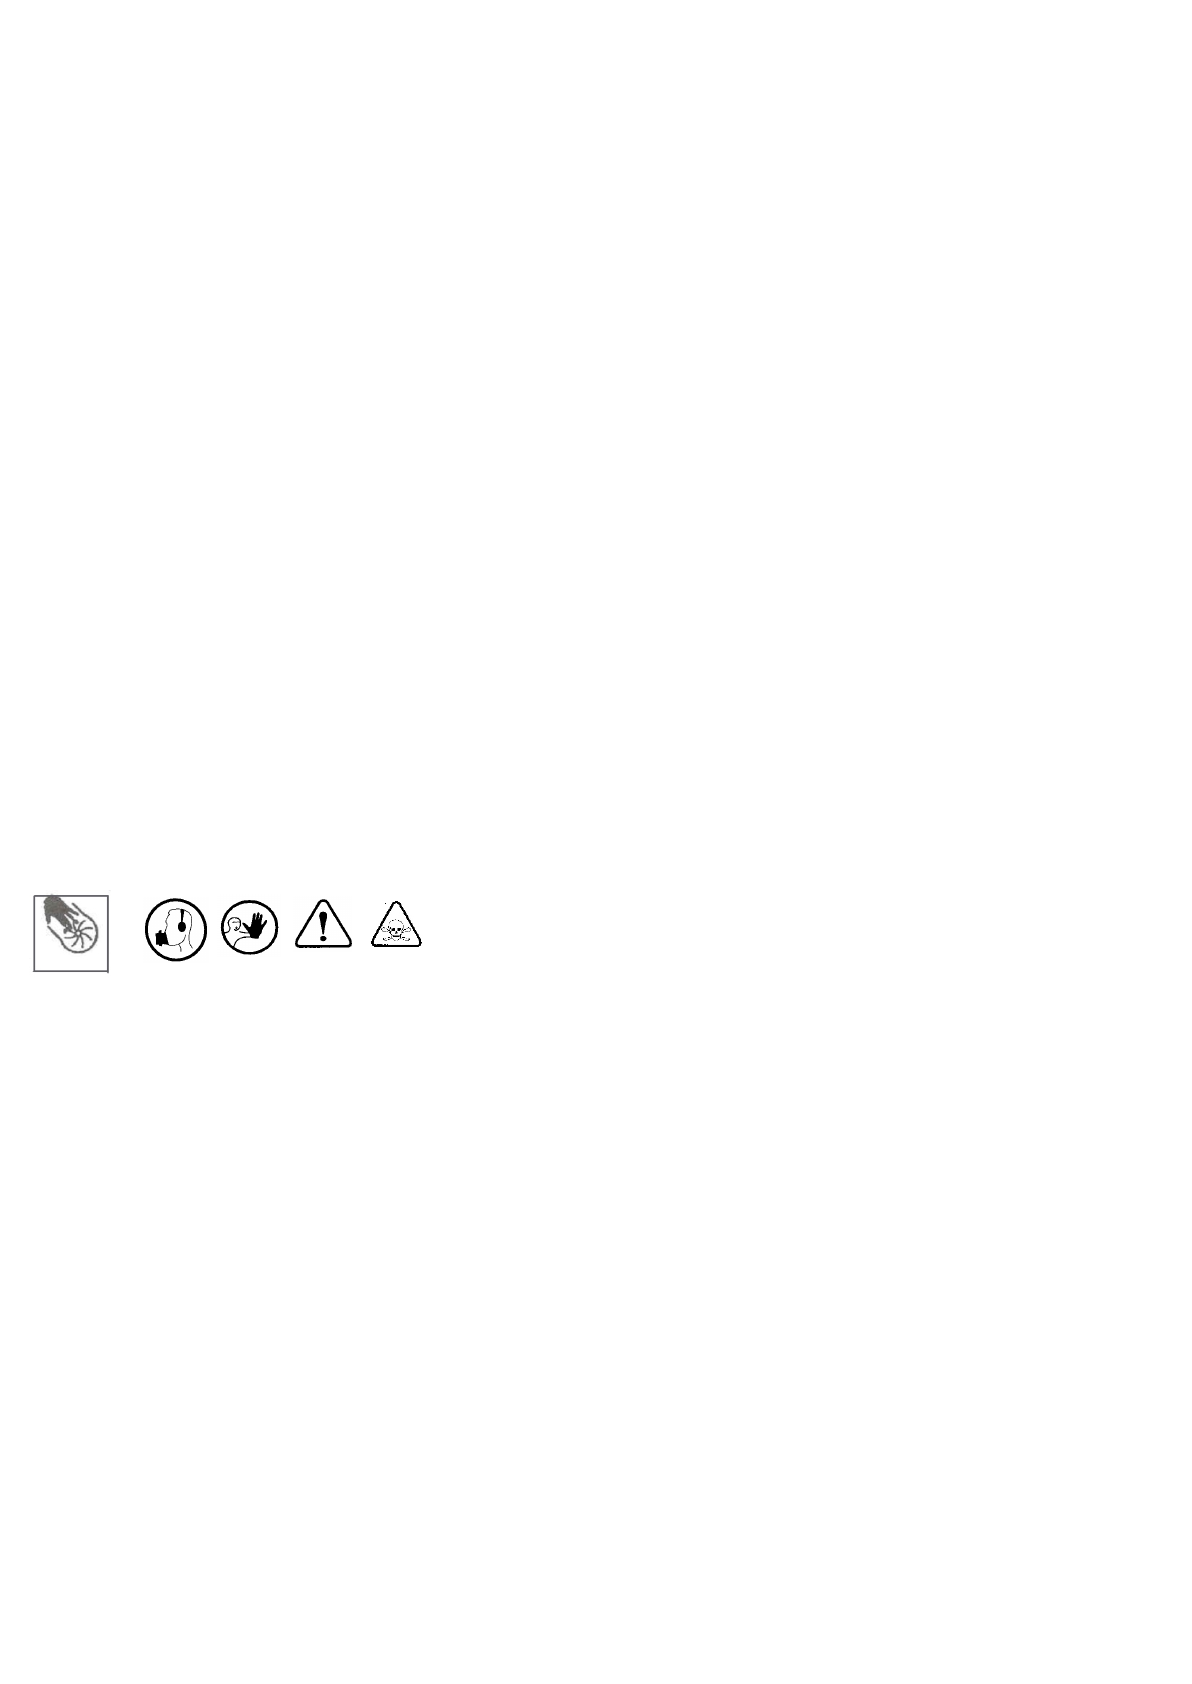
Bu sembol önemli güvenlik kurallarýna dikkat etmek için kullanýlmýþtýr. Eðer bu uyarýlar ihmal
edilirse kullanýcýnýn, çevresindeki nesnelerin ve canlýlarýn zarar görmesine yol açabilecek durumlar
oluþabilir./This symbol is used to point out the important safety rules.If these rules are disregarded,situations
that may lead to harms to the user and the nearby objects and living creatures may occur.
Bu sembol önemle dikkat edilmesi gereken konularda kullanýlmýþtýr.
This symbol is used for subjects required to note seriously.
Makine tanýtma ve kullanma kýlavuzu./Machine introduction and operating manual.
Emniyet mesafesini koruyunuz./Please keep the safety distance.
Ýþitme kaybý riski./The risk of hearing loss.
Kullanma komutlarýný okuyun./Read carefully.
‘’Tehlike’’ çocuklarý makinadan uzak tutun./Keep children away.
Dönen parçalar çalýþýrken el ve ayaklarýnýzý uzak tutun/Risk of cut.Keep your foot away from blades.
Yanma tehlikesi./Hot zone.
Dikkat! Zehirli madde./Danger! Poisonous material.
Dikkat! Yangýn riski./Danger! Fire risk.
Parmaklarýnýzý fan kýsmýna sokmayýnýz./Do not approach your fingers to the suction side of the blowes.
ALETÝN MARKASI/TRADEMARK OF THE MACHINE :TARAL
ALETÝN MODELÝ/MODEL OF THE MACHINE :6314 ATOMIC
ALETÝN CÝNSÝ/TYPE OF THE MACHINE :MOTORLU SIRTATOMÝZÖRÜ/
KNAPSACK MISTBLOWER
(2)
ÝÇÝNDEKÝLER/INDEX
1-KULLANIM ÞARTLARI/ ............................................................................................3
2-ALETÝN MONTAJI/ ..............................................................................................................................4
3-YAKITIN HAZIRLANMASI/ .......................................................................................5
3.1-YAKITIN BÝDON ÝLE HAZIRLANMASI/PREPARING THE FUEL BY USING A TANK.....................................5
3.2-YAKITIN ÖLÇEK KABI ÝLE HAZIRLANMASI/PREPARING THE FUEL BY USING A MEASURING CUP....5
4-ALETÝN KULLANIMI/ .......................................................................................................................5
4.1-MOTORUN ÇALIÞTIRILMASI/STARTING THE ENGINE ...................................................................................5
4.1.1-SOÐUK MOTORUN ÇALIÞTIRILMASI/STARTING COLD THE ENGINE.......................................................5
4.1.2-SICAK MOTORUN ÇALIÞTIRILMASI/STARTING THE HOT ENGINE...........................................................6
4.1.3-MOTORUN DURDURULMASI/STOPPING THE ENGINE...............................................................................6
5-ÝLAÇLAMA/ .....................................................................................................................................6
5.1-ÝLACIN HAZIRLANMASI/PREPARING THE FORMULA....................................................................................6
5.2-DEBÝ AYARI/HOW TO CHANGE DOSAGE RATE.................................................................................................7
5.3-KULLANIM/OPERATION.......................................................................................................................................7
5.4-TOZLAMA KÝTÝNÝN MONTAJI/POWDER SPRAYING EQUIPMENT ASSEMBLY.............................................8
6-TEMÝZLÝK ve BAKIM/ ...............................................................................9
6.1-HAVA FÝLTRESÝ/ .............................................................................................................................9
6.2-YAKIT FÝLTRESÝ/ ...........................................................................................................................9
6.3-BUJÝ/ ..................................................................................................................................................9
7-DEPOLAMA/ ...........................................................................................................................................9
8-GARANTÝ/ ............................................................................................................................................10
8.1-ÝLK ÇALIÞTIRMA/FIRST OPERATION................................................................................................................10
9-ARIZA BULMA TABLOSU/ ...........................................................................................11
10-TEKNÝK ÖZELLÝKLER/ .....................................................................................................11
11-CE UYGUNLUK BEYANI/ ................................................................12
12-FÝRMA ADRESÝ/ ....................................................................................12
CONDITIONS OF USAGE
ASSEMBLY
PREPARING THE FUEL
OPERATION
PESTICIDING
CLEANING AND MAINTENANCE
AIR CLEANER
FUEL FILTER
SPARK PLUG
STORAGE
WARRANTY
TROUBLE SHOOTING
TECHNICAL DATA
CE DECLARATION OF CONFORMITY
CONTACT INFO OF THE COMPANY
1-KULLANIM ÞARTLARI/CONDITIONS OF USAGE
1.Sýrt atomizörünün kontrol ve kullanýmýný tamamýyla anlayana kadar bu kýlavuzu okuyun. Makinanýn nasýl kontrol ve stop
ettirileceðini öðrenin.
2.18 yaþýndan küçükler ve aleti yeterince tanýmayanlar bu aleti kullanamazlar.
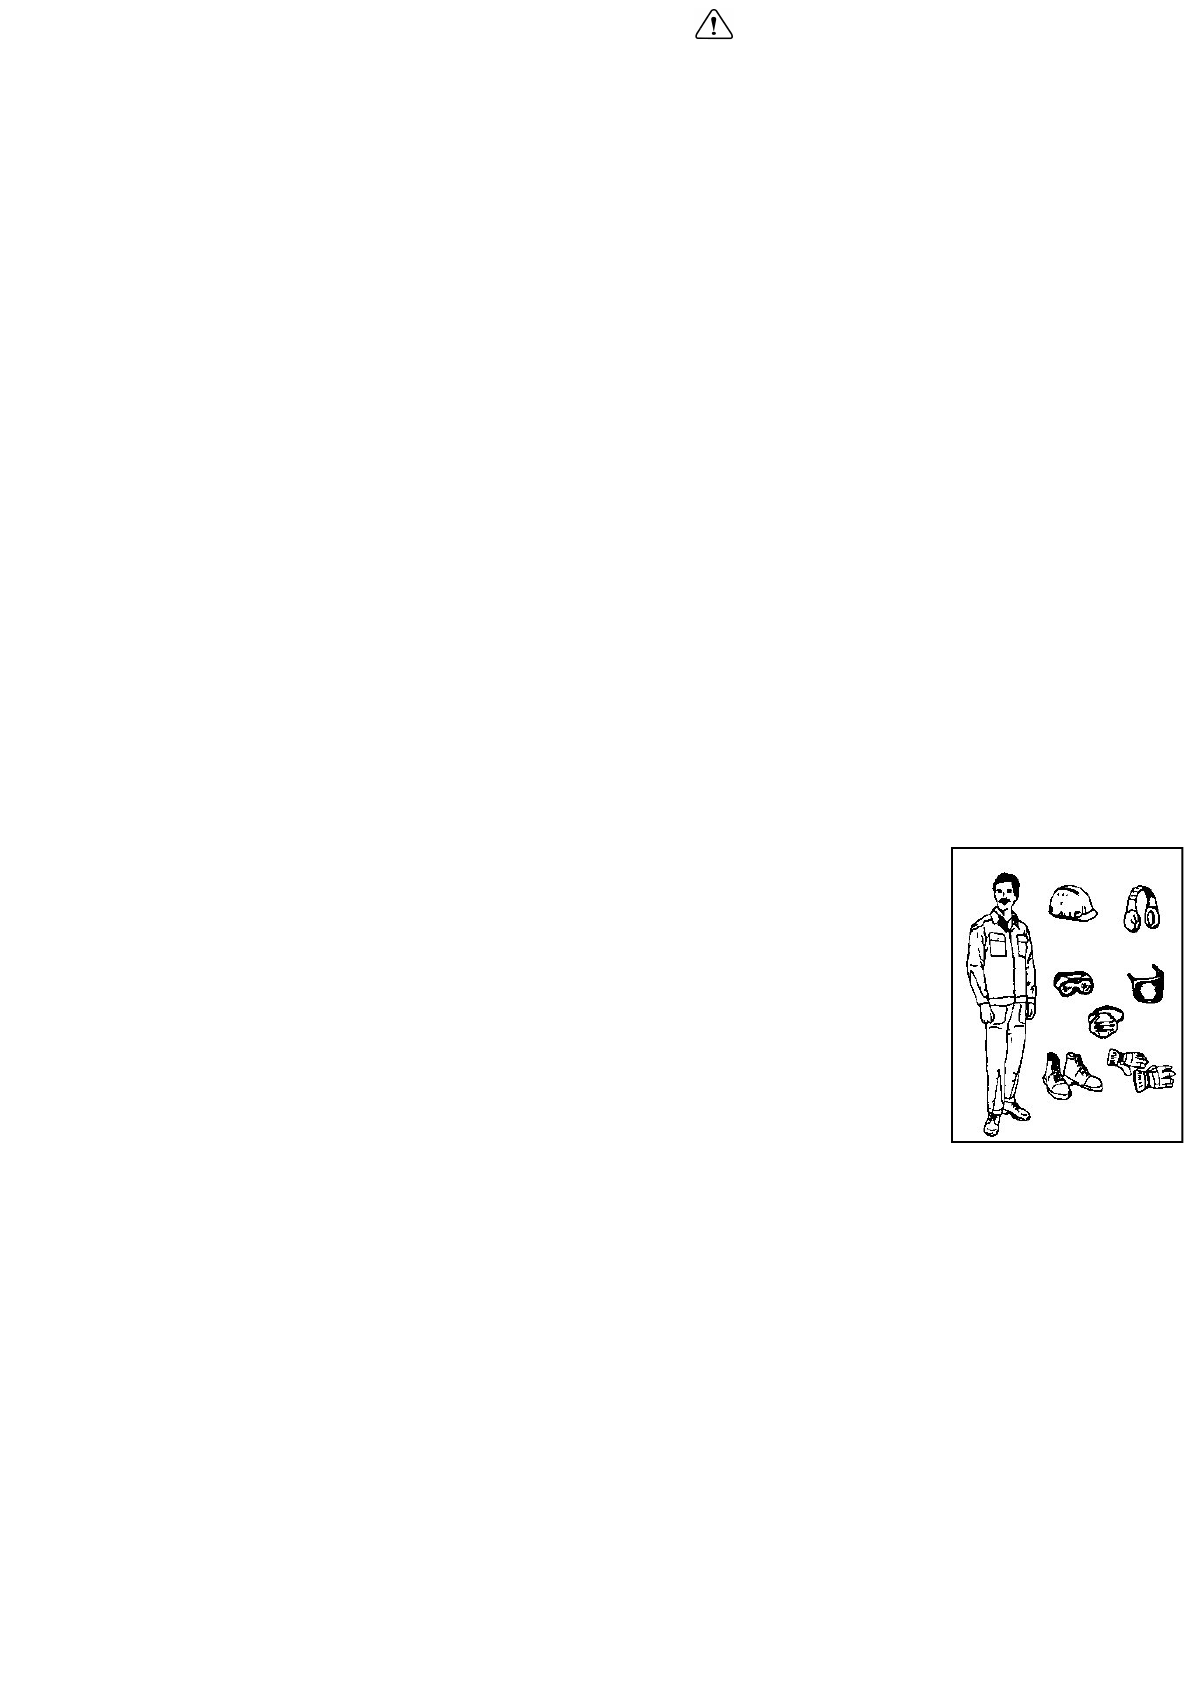
3.Aletle ilaçlama yaparken kulaklýk, kapalý elbise, kapalý ayakkabý, koruyucu gözluk, ilaçlamaya uygun eldiven ve maske
kullanýn (Þek. 1).
4.Aleti kullanan kiþi çalýþýrken diðer insanlar ve eþyalardan yeterince uzak olduðundan emin olmalýdýr. Direkt ve dolaylý
hasarlardan kullanýcý sorumludur.
5.Aský baðlantýlarýný ve kayýþlarýný her kullanýmda kontrol edin.
6.Gün ýþýðýnda ve yeterince aydýnlatýlmýþ ortamlarda çalýþýn.
7.Aleti çalýþýrken devirmeyin.
8.Aleti çalýþýr durumda asla yalnýz býrakmayýn.
9.Aleti kapalý alanlarda asla çalýþtýrmayýn ve kullanmayýn. Egzoz gazý saðlýða zararlýdýr.
o
10.Motorun egzoz çevresindeki sýcaklýðý 80 C yi aþtýðý için yanma tehlikesi mevcuttur. Egzoza dokunmayýn.
11.Eðer çalýþýrken bir cisme çarpýlýrsa aleti durdurun ve hasarý gidermeden çalýþtýrmayýn.
12.Yangýn tehlikesinden korunmak için;
·Yakýt Deposunu seviye iþaretinden fazla doldurmayýn.
·Motor ve Þasiye yakýt dökülmemesi için aletle beraber verilen ölçü kabý ve huniyi kullanýn.
·Yakýt deposunu doldururken sigara içmeyin.
·Yanýcý maddelerden uzak durun.
·Aleti parlayýcý ve patlayýcý ortamlarda kullanmayýn.
·Bakým ve ayar yapmak için yakýt deposunda yakýt varsa aleti devirmeyin.
·Motor çalýþýrken yakýt deposunu doldurmayýn.
·Motor çalýþýrken veya sýcak iken yakýt hortumunu sökmeyin.
·Aleti buji baþlýksýz çalýþtýrmayýn.
·Kükürtle tozlamada ince kükürt tozlarý sýcak motor ve aletin üzerine siner ve kükürtün alev almasý kolay olduðundan
tutuþabilir bu nedenle aleti sýk sýk fýrça ile temizleyin.
13.Sýrt Atomizörü üzerinde hiçbir parçayý iptal etmeyin.
14.Alette alýþýlmýþýn dýþýnda tireþim hissederseniz aleti durdurun ve yetkili servise müracaat edin.
15.Ýlaçlama yaparken aleti rüzgara karþý kullanmayýn.
16.Aleti direkt güneþ ýþýðýndan uzak bir yere koyarak ultraviyole ýþýnlarýndan zarar görmesini engelleyin.
17.Her kullaným sonunda ilaç deposunu su ile yýkayarak temizleyin.
18.Her kullaným sonunda yakýt deposunu boþaltýn.
19.Güvenli bir kullaným için daima orijinal yedek parça kullanýn.
20.Orjinal parça kullanýlmamasýndan doðacak sorumluluklar tümü ile kullanýcýya aittir.
21.Temizlik haricinde her türlü tamir ve bakým iþlemlerini yetkili servise yaptýrýn. Bunun dýþýndaki
uygulamalardan doðacak hasarlardan kullanýcý sorumludur.
22.Aletle iþiniz bittiðinde buji baþlýðýný çýkartýn.
23.Her ilaçlamadan sonra temizlenin.
24.Atomizörünüzü dirseksiz çalýþtýrmayýn.
25.Depoda kalan ilacýn ve tortusunun yok edilmesi geçerli emniyet kurallarýna göre olmalýdýr.
Bu konuda ilaç üreticilerinin geçerli koruma yöntemlerini tatbik ediniz.
26.Atomizörü kullanýlmadan önce ve her 100 saatlik kullanýmdan sonra o-ring ve contalarý kontrol
edin ve aþýnmalarý durumda yenileri ile deðiþtirin.
27.Bu aleti kullanýrken diðer insanlarla ve nesnelerle aranýzda 15m'lik mesafeyi koruyun.
1.Read this manual until fully understanding the control and operation techniques of the mistblower. Learn to control and
stop the machine.
2.People younger than age 18 and people, who are not familiar to the machine enough,cannot use it.
3.Wear protective clothing, ear cap, overshoe, safety goggles, and protective gloves during poeticizing and use a breathing
mask. (Fig. 1)
4.While operating the device, be sure of keeping distance from other people as well as items.Operator is responsible of the
direct and indirect harms resulting from disobeying this regulation.
5.Control the carrying strap and their connection points.
6.Operate under daylight and in well-illuminated areas.
7.Do not overturn the device while operating it.
8.Never leave the device while it is in operation.
9.Never start up or operate the device in closed areas.The exhaust gases are harmful to the health.
0
10.Do not touch the muffler. Since the temperature around the muffler of the engine is above 80 C, there is a danger of
hurting yourself.
11.During the operation if you hit any item with the device, stop the engine and do not operate before repair.
(3)
Þekil.1(Figure.1)
12.To avoid fire,
-Do not fill the fuel tank above the fuel level sign.
-To prevent pouring of fuel onto the engine and frame use the measuring cup as well as the funnel.
-While filling the tank with funnel do not smoke and keep flammable materials away.
-Do not operate the device in areas with explosive materials.
-Do not overturn the machine during servicing,when there is fuel in the fuel tank.
-Do not fill the fuel tank while the engine is operating.
-Do not pull out the fuel hose while the engine is operating or when it is hot.
-Do not start up the device without ignition plug.
13.Do not omit any of the parts on the knapsack mistblower.
14.Stop the engine if you feel an unusual vibration and apply to the authorized service agent.
15.Do not operate the device against the wind.
16.Keep the product out of the direct sunlight to protect it against the influences of ultraviolet radiation.
17.Clean the formula tank after each use with clean water.
18.Empty the fuel tank after every use.
19.For a safety operation, always use original spare parts.
20.The operator will carry all responsibilities resulting from not using original spare parts.
21.Except cleaning, for all the maintenance operations, ask for an authorized service agent. The operator is responsible
from the consequences of not obeying this instruction.
22.Pull out the ignition plug after finishing the operation.
23.Wash yourself after each operation with clean water.
24.Do not operate the device without its elbow.
25.The excess saturated formula left in the tank have to be removed by observing the safety rules. Apply the valid security
methods of the formula producers.
26.Check the O-rings and gaskets before using mistblower, after 100 hours of operation and in case of wearing out they
must be replaced with new ones.
27.While operating this device, keep a distance of 15 m. from other people and items.
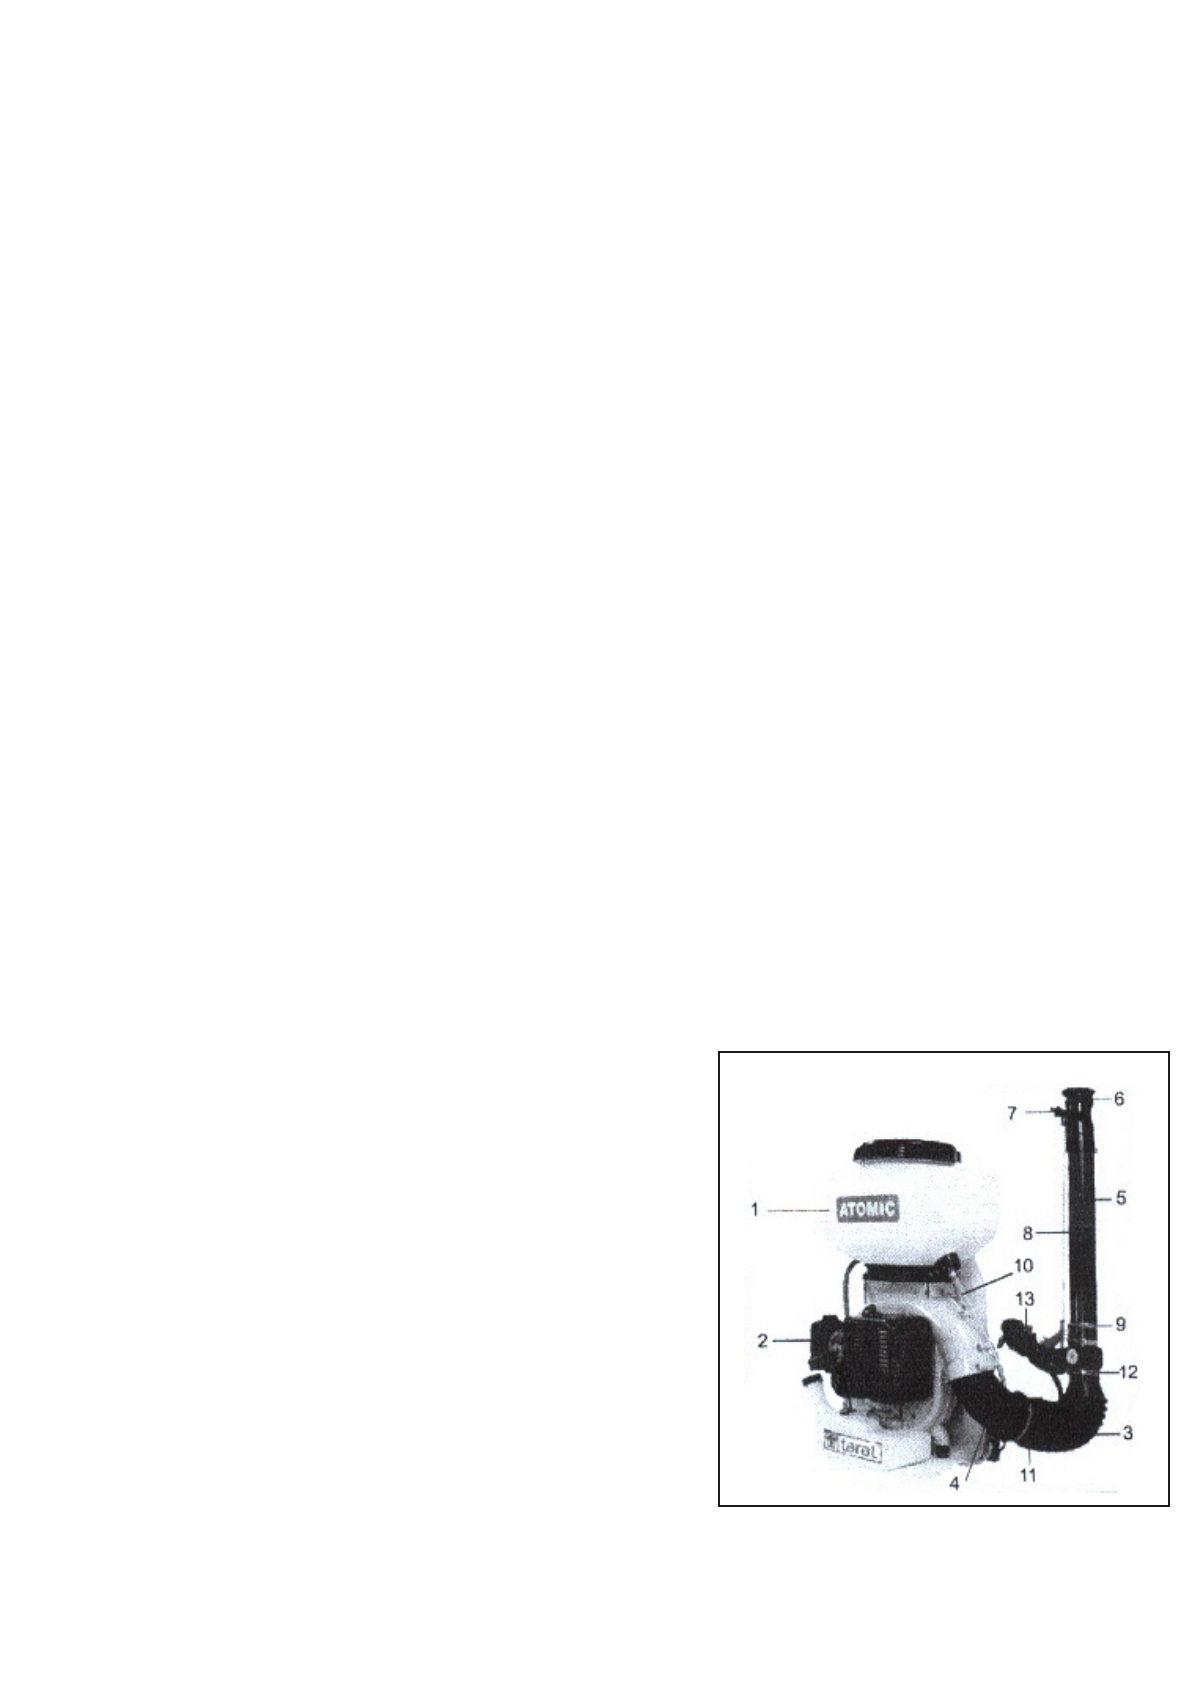
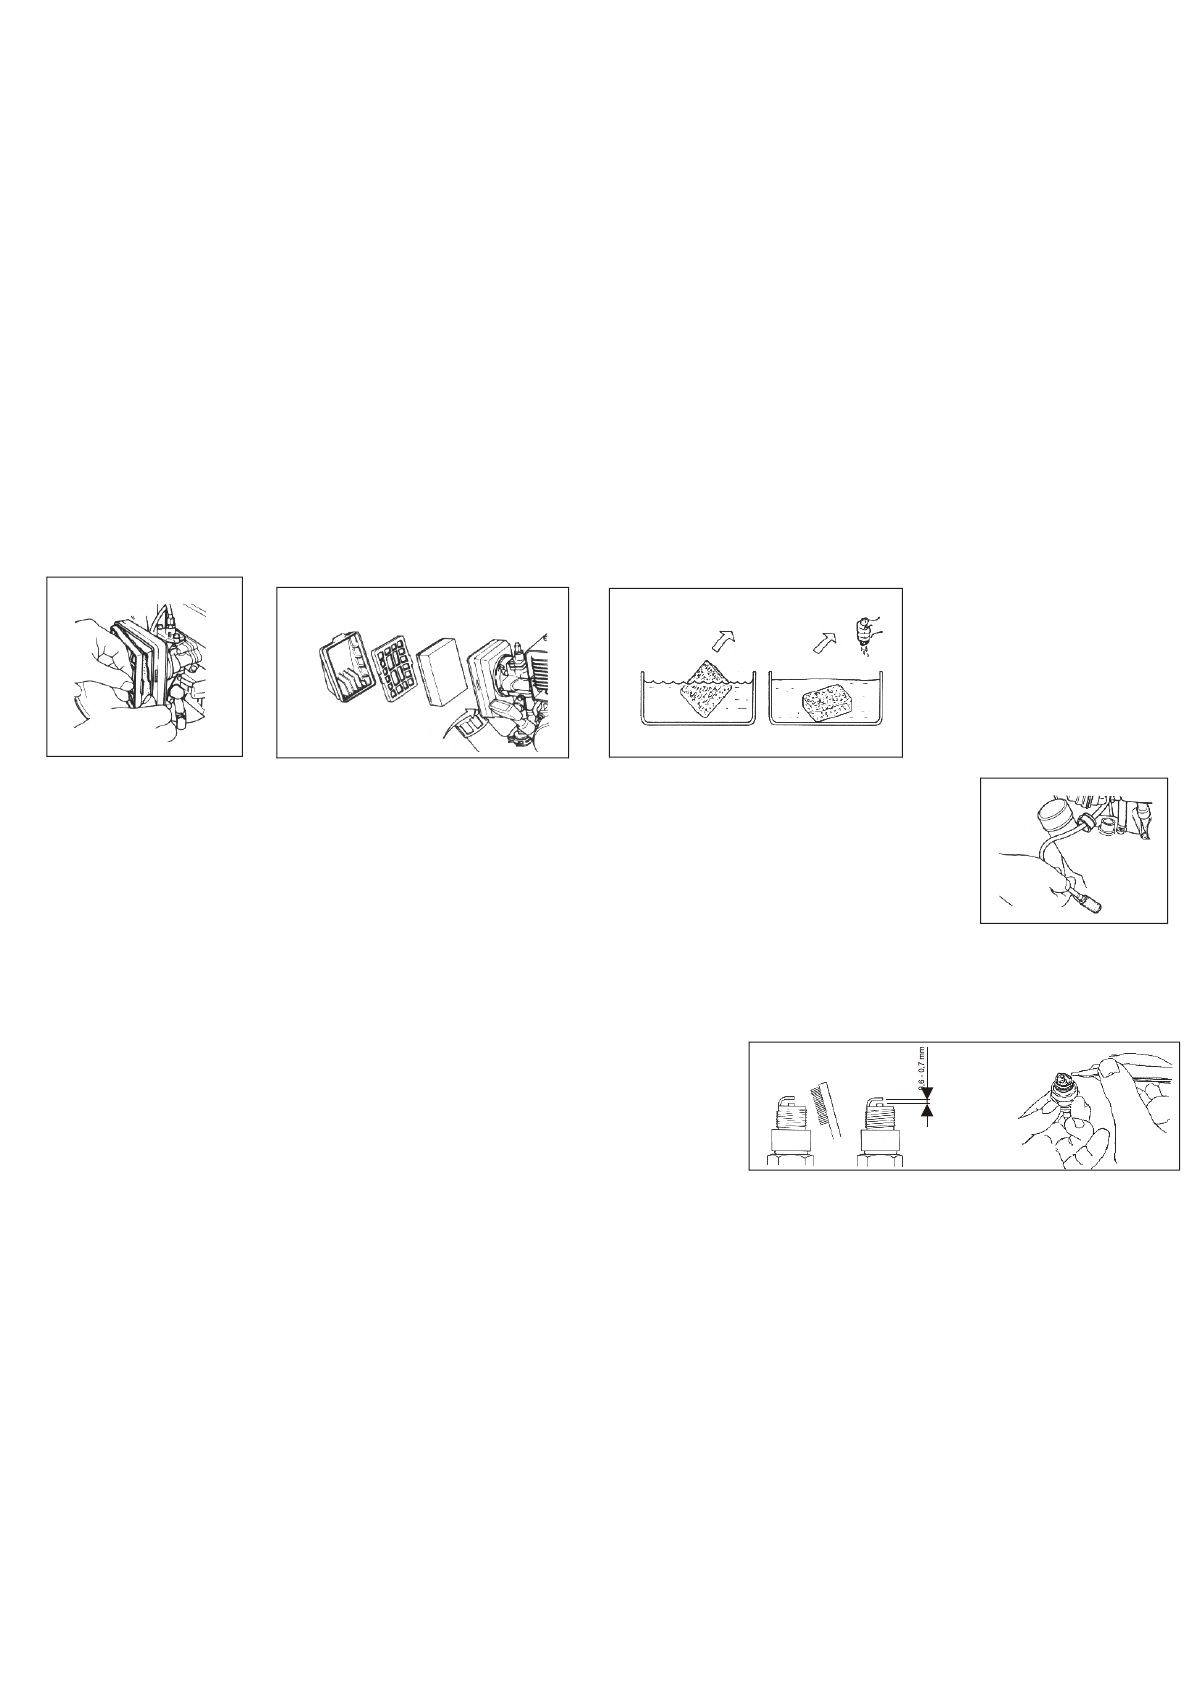
2-ALETÝN MONTAJI Þekil. 2 /ASSEMBLY(Figure.2)
Boðumlu hortumu (3) dirseðe (4) geçirin.Kelepçe-1 (11) takýp sýkýn.Püskürtme borusunu boðumlu hortuma geçirerek
kelepçeye-12 yi sýkýn.Ýlaç hortumu-1 (10) musluðun çýkýþýný ve debi ayar musluðunu(7)birleþtirin.Ýlaçlama hortumunu
hortum tutucuya,sývý emiþ borusuna ise hava nipeline takýn.Püskürtme borusunun(5)ucuna,püskürtme baþlýðýný(6)monte
edin.Ayar somunu vasýtasý ile püskürtme baþlýðýný ileri ve geriye doðru hareket ettirebilirsiniz.Bu size geniþ ve dar açýda
ilaç atma imkaný saðlayacaktýr.
Connect flexible hose (3) to elbow of the machine and tighten the clamp-1 (11).Connect spray tube to flexible hose and
tighten clamp-2.Connect chemical hose-2 to inlet side of on-off tap and also chemical hose-1 to outlet side of on-off tap
chemical hose-1 (10) to outlet side of on-off tap and dosage sleeve.Connect chemical hose to the holder and liquid suction
pressure hose to air outlet nipple.Plase the tank strainer.Assemble spray nozzle(6)to spray tube(5).To obtain wide or short
angle spraying loosen plastic nut and move the nozzle forth and back.
(4)
Parçalarýn Tanýmý (Þek.2)/Parts Description (Fig.2)
1-Depo/Tank
2-Motor/Engine
3-Boðumlu Hortum/Flexible Tube
4-Dirsek/Elbow
5-Püskürtme Borusu/Spray Tube
6-Püskürtme Baþlýðý/Nozzle
7-Debi ayar musluðu/Dosage Tap
8-Ýlaç hortumu-2/Chemical Hose-2
9-Musluk(On-Off)/Tap (On-Off)
10-Ýlaç hortumu-1/Chemical hose-1
11-Kelepçe-1/Clamp-1
12-Kelepçe-2/Clamp-2
13-Kabza/Handle
Þekil.2(Figure.2)
3.YAKITINHAZIRLANMASI/PREPARING THE FUEL
Yakýtýn hazýrlanmasýnda güvenli kullaným kurallarýna uyunuz.
In the fuel preparation, apply the safety regulations.
TARALiki zamanlý motor yaðý kullanýmýný tavsiye eder.
TARALrecommends two-cycle engine oil to be used.
3.1-YAKITIN BÝDON ile HAZIRLANMASI/PREPARING THE FUEL BY
USINGATANK
1.Yakýtýnýzý yalnýz temiz kaplara boþaltýn ve aletin orjinal hunisini kullanýn.
Süper benzin kullanmayýn. Kursunsuz benzin kullanýn.
2.Tablo 1 'de verilen oranlarda yakýt yað karþýmýný hazýrlayýn (Örnek 10Lt. benzine 0.4 Lt. iki zamanlý motor yaðý
karýþtýrýn).
3.Karýþýmý hazýrladýktan sonra bidonu (Þek.3) 'deki gibi çalkalayýn.
4.Süzgeçli huni yardýmý ile karýþýmý aletin yakýt deposuna doldurun.
1.Pour the fuel only in a clean container and use the original funnel of the device. Do not use super gasoline. Unleaded
gasoline is recommended.
2.Prepare the fuel by using fuel and oil in the ratios shown in table 1. (e.g. with 10 Lt. fuel, mix 0,4 Lt. two cycle engine oil.)
3.After preparing the mixture, shake the container. (Fig. 3)
4.By using a strainer funnel, fill the fuel tank with the mixture.
3.2- YAKITIN ÖLÇEK KABI ile HAZIRLANMASI/PREPARING THE FUEL BY USING A MEASURING CUP
1.Eðer iki zamanlý motor yaðý kullanýyorsanýz ölçek kabýnýn içindeki 1:25 yazýsýna kadar yað doldurun.
2.Ölçek kabýnýn içine koyduðunuz yaðýn üzerine benzin dökerek kabý iþaretli yere kadar doldurun.
Ölçek kabýnýn üzerine süzgeçli huniyi geçirin.
3.Huninin aðzýný parmakla kapatarak iyice çalkalayýn (Þekil. 4)
4.Hazýrlanmýþ olan yakýtý huniyi çýkartmadan kabý çevirerek yakýt deposuna doldurun.
Not: Yakýt yað karýþýmýný kesinlikle direkt olarak yakýt deposu içinde hazýrlamayýn. Aksi taktirde
motorunuz zarar görebilir.
1.If you are using two-cycle engine oil, fill the measuring cup up to the 1:25 sign.
2.Add gasoline to the oil that has already been put in the measuring cup and thus fill the cup up to the marked level.Put the
strainer funnel on the measuring cup.
3.Block the funnel with your finger and shake it well (Fig. 4).
4.Pour the prepared fuel into the fuel tank while keeping the funnel on the cup.
Note: Never prepare the fuel oil mixture in the fuel tank. The engine can be damaged.
4.ALETÝNKULLANIMI/OPERATION
4.1-MOTORUN ÇALIÞTIRILMASI/STARTING THE ENGINE
4.1.1-SOÐUK MOTORUN ÇALIÞTIRILMASI/STARTING THE
COLD ENGINE
Atomizörü çalýþtýrýrken üfleme borusunun etrafýnda kimsenin
bulunmadýðýna dikkat edin.
1.Kabza üzerindeki butonu (1) pozisyonuna getirin. (Þekil.5-2)
2.Gaz tetiðini (Þekil.5-1) yarým gaz pozizyonuna getirip kilitleme mandalý ile tetiði sabitleyin. (Þekil.5)
3.Karbüratör üzerindeki pompaya yakýt taþýncaya kadar basarak yakýtýn karbüratöre dolmasýný saðlayýn. (Þekil.6)
4.Jikle kolunu kapalý pozisyona getirin.(Þekil.7)
5.Makinanýzýn saðlam bir þekilde tutarken diðer elinizle starter kolunu hýzla çekin.(Þekil.8)
6.Motor çalýþsýn veya çalýþmasýn starter kolunu yavaþca býrakarak ipin düzgün bir þekilde sarýlmasýný saðlayýn.
7.Motor çalýþtýktan sonra jikleyi yavaþca açýn,gaz tetiðini serbest býrakarak motorun bir süre
rolentide çalýþarak ýsýnmasýný saðlayýn.
2 zamanlý
motor
yaðý/2cycle
engine oil
Benzin/Fuel
(lt)
1:25 % 4
50.200
10 0.400
15 0.600
20 0.800
25 1.000
Tablo 1(Table 1)
Þekil.3(Figure.3)
(5)
Þekil.4(Figure.4)
ÝÞÝTME KAYBI RÝSKÝ
NORMAL ÞARTLARDABU MOTORUN KULLANIMI
SIRASINDA KULLANICI GÜNLÜK
85 dB (A)
VE ÜSTÜ GÜRÜLTÜYE MARUZ KALABÝLÝR.
RISK OF HEARING LOSS
IN STANDARD CONDITIONS THE OPERATOR CAN BE
EXPOSED TO ADAILYNOISE LEVEL OF
85 dB (A)
>
Þekil.6(Figure.6)
Þekil.7(Figure.7)
Þekil.5(Figure.5) Þekil.8(Figure.8)
(6)
While starting switch the engine keep other people away from blower pipe.
1.Push the swich on the control unit to start (1) position (Fig:5)
2.Move the throttle trigger (Fig:5-1) to half open position and lock it with locking knob (Fig:5)
3.Push the premier fuel pump several times until overflow fuel flows out (Fig:6)
4.Pull up the choke lever (Fig:7) to close.
5.While holding down the unit firmly,pull out the starter rope quickly (Fig:8)
6.Let the starter grip slowly back to starter housing with smooth orientation,whether the engine has started or not.
7.After the engine has started,open the choke gradually,move the throttle trigger to bottom position and allow the engine to
warm up.
8.While in operation,move the throttle lever to desired position and lock it.
4.1.2- SICAK MOTORUN ÇALIÞTIRILMASI/STARTING THE HOT ENGINE
1.Kabza üzerindeki start butonunu (1) pozisyonuna getirin (Þekil.5)
2.Gaz tetiðini (Þekil.5-1) yarým gaz pozisyonuna getirip kilitleme mandalý ile tetiði sabitleyin (Þekil.5)
3.Makinanýzýn saðlam bir þekilde tutarken diðer elinizle starter kolunu hýzla çekin (Þekil.8)
4.Motor çalýþsýn veya çalýþmasýn starter kolunu yavaþca býrakarak ipin düzgün þekilde sarýlmasýný saðlayýn.
5. ilaçlama esnasýnda gaz tetiðini istediðiniz seviyeye getirip sabitleyerek ilaçlama yapýn.
NOT: Motorun rolenti devri 2500 dev/dak civarýdýr.
1.Push the switch on the control unit to start (1) position (Fig:5)
2.Move the trigger (Fig:5-1) to half open position and lock it with locking knob (Fig:5)
3.While holding down the unit firmly,pull out the starter rope quickly.(Fig:8)
4.Let the starter grip slowly back to starter housing with smooth orientation,whether though the engine has started or not.
5.While in operation,move the throttle trigger to desired position.
NOTE: Engine idle speed is approximately 2500 rpm.
4.1.3-MOTORUN DURDURULMASI/STOPPING THE ENGINE
1.Kabza üzerindeki gaz verme(Þekil.5-3) ve sabitleme kolunu (Þekil.5-1) yukarý kaldýrarak motoru rölanti devrine getirin.
2.Kabza tertibatý üzerinde bulunan durdurma düðmesini (Þekil.5-2) (0) pozisyonuna getirerek motoru durdurun.
Not:Motorun tekrar çalýþtýrýlabilmesi için stoplama (5-3) düðmesini mutlaka (1) pozisyonunda olmasý gereklidir.
1.Adjust the engine rpm to idling by lifting up the throttle trigger (Fig.5-3) and locking knob.(Fig:5-1)
2.Stop the engine by pushing the switch on the throttle lever to positon (0).
Note:To be able to start the engine again (5-2), the switch (5-3) must be in the position (1).
5.ÝLAÇLAMA/PESTICIDING
Not:Atomizör kapalý mekanda çalýþtýrmayýn.
Etrafýnýzda bulunan diðer canlýlara ve zarar görebilecek nesnelere ilaçlama esnasýnda dikkat ediniz
Parmaklarýnýzý fan kýsmýna sokmayýnýz.
Atomizörünüzü rüzgara karþý kullanmayýn.
Do not use the mistblower against wind.While operating,be sure of keeping distance from other people as well as
items,which could be harmed.
Do not approach your fingers to the suction side of the blower.
Note: To start the engine again the switch should bring to start (1) position again.
Do not use the mistblower in close spaces.
5.1- ÝLACIN HAZIRLANMASI/PREPARING THE FORMULA
1.Ýlaç, ilaç deposunun dýþýnda, ilaç firmasýnýn direktifleri ve geçerli güvenlik kurallarý çerçevesinde hazýrlanmalýdýr.
2.Ýlacý hazýrlamak için mutlaka eldiven, gerekiyorsa maske kullanýn.
3.Ýlacý temiz kaplar içerisinde hazýrlayýn.
4.Ýlaç hortumundaki musluðu kapalý konuma getirin (Þek.2-9).
5.Hazýrlanan ilacý ilaç deposuna depo aðzýndan taþmayacak þekilde doldurun.Ve deponun kapaðýný sýkýca kapatýn.
1.The formula must be prepared by observing the directives of the chemical producers and valid safety rules have to be
taken.
2.To prepare the formula you must wear protective gloves and mask if necessary.
3. Prepare the formula in clean containers.
4.Close chemical tap on the chemical tank (Fig:2-9)
5.Fill the prepared formula into the chemical tank so that it will not pour out of it and close the tank lid tightly.

5.2-DEBÝAYARI/HOW TO CHANGE DOSAGE RATE
Debi ayar musluðuna ve püskürtme konumuna göre püskürtme miktarlarý Tablo-2' de verilmiþtir.Ayar pozisyonlarýnda
debi ayar musluðunun (Þekil.2-7) köþelerinin baþlýktaki köþe ile üstüste gelmesine dikkat edilmelidir.
The quantity of sprayed formula in accordance with the dosage tap (Fig.2-7) and spraying cone position is shown in
Table- 2 for dosage tap position see.In adjustment positions special attention should be paid to that the corners of dosage
tap (Fig:2-7) Corhcide with the corners of the cap.
5.3-KULLANIM/OPERATION
1.Motoru çalýþtýrýn ve aleti sýrtýnýza alýn.
2.Püskürtme borusunu sað eliniz ile kabza tertibatýndan tutunuz.
Ýlaç hortumundaki musluðu açýn ve istenilen bölgeyi ilaçlamaya
baþlayýn.
3.Ýlaçlama iþiniz bittikten sonra ilaç hortumundaki musluðu
kapatarak motoru durdurun.
1. Start the engine as described above and take the machine on to
your shoulder.
2. Hold up spray tube by means of handle and open the chemical tap and spray the desired area.
3. At the end of work close the chemical tap and stop the engine.
(7)
Tablo:2
(lt/dak.)
(Lt/min)
Flowrate
Adjustment numbers
5.4-TOZLAMA KÝTÝNÝN MONTAJI/SPRAYING KITASSEMBLY
Sývý atar pozisyon/Liquid spraying position
Depo kapaðýný açarak süzgeci ve
hortumu çýkarýn./By opening tank
cover remove the filter and hose.
Hava nipeli ve hortum tutucuyu hortumlarla
birlikte hava daðýtýcý adaptörünün üzerinden
sökün. Rekoru sökerek içindeki ara nipeli
çýkarýn./Dismantle the air nipple and hose holder
together with hoses from the air distributing
adaptor.By releasing the nut,remove the
intermediate nipple.
Tozlama borucuðunu oringi depo içine
girecek þekilde takýn ve rekorla
sýkýn./Assemble the powder spraying pipe so
that the O-ring fits into the body and tighten
with the nut.
Hava daðýtýcýyý adaptör üzerine takýn./ Put
the air distributor on to the adaptor.
1
2
3
4
5

Toz ilaç atarken oluþan statik elektriði topraklama için topraklama zincirini aþaðýdaki þekilde monte ediniz.
1-Dirseðin üzerindeki tapayý yerinden (13) çýkarýn.
2-Kaþýk statiðe (3), tel statiði (2) civata ile yukarýdan, þekildeki gibi baðlayýp,dirseðin içine civata delikten geçecek ve
dirseðin radyüsüne uygun gelecek þekilde kaþýk statiði yerleþtirin.
3-Civatanýn,dirseðin altýndan çýkan ucuna zincir statiði (4) arasýna gelecek pul (5) ile birlikte somun (6) ile baðlayýn.
To be able to make earthing because of the static electric, assemble the earthing chain according to the following
steps.
1-Detach the tap from the elbow (13)
2-After connecting the wire static element (2) to the plate static element (3) with a bolt from the upper side as in the
figure, put the plate static element into the elbow sothat it fits to the fillet of the radius and the bolt fits into the hole.
3-Connect the wire static element (4) to the tip of the bolt which is located under the elbow together with the washer
(5) and the nut (6).
Dirsek
1
4
5
3
6
13
1
2
Dirsek(Elbow)
12
Toz Akma Yuvasý
13
Þekil.10(Figure.10)
Þekil.9(Figure.9)
(8)
Toz atar pozisyon./ Powder spraying
Tozlama dirseðini, tozlama borucuðu üzerine
takýn./Put the powder spraying elbow on to the
powder spraying pipe.
Toz boþaltma hortumunu tozlama borucuðuna
ve dirsekteki adaptöre takarak kelepçelerle
sýkýn./Connect the powder drainage hose to the
powder spraying pipe and to the adaptor at the
elbow using the clamps.
67
8
(9)
6-TEMÝZLÝK ve BAKIM/CLEANING AND MAINTENANCE
Atomizörünüzü temizlerken yada herhangi bir tamirden önce motorunun durmuþ ve soðuk olduðundan emin olun.
Before cleaning or servicing the mistblower make sure that engine is stopped and cooled.
6.1-HAVA FÝLTRESÝ/ AIR CLEANER
Temizlik ve bakým sýrasýnda güvenli kullaným kurallarýna uyun.
1. Hava filtresini motor üzerinden sökün. Hava filtresini iyice temizleyip kuruladýktan sonra yerine takýn.
(Þekil.11-12-13).
2. Ýlaç depo kapaðýndaki contayý arasýra yaðlayarak bakým yapýn.
3. Orjinal parça kullanýlmamasýndan doðacak sorumluluklar tümü ile kullanýcýya aittir.
4. Atomizörü her kullanýmdan sonra temiz su ile yýkayarak temizleyin.
5. Ýlaç deposunda ilaç býrakmayýn.
6.Eðer hava filtreniz yýrtýlmýþ veya küçülmüþse yenisi ile deðiþtirin.
Before servicing your mistblower,apply the safety regulations.
1.Remove air cleaner of the engine,clean and dry thoroughly and install it back (Fig:11-12-13).
2.Lubricate the gasket on the chemical tank cover.
3.The consumer will carry all responsibilities resulting from not using original spare parts.
4.Wash and clean your misblower after each use with clean water.
5.Do not leave any chemicals in the chemical tank.
6.If the air cleaner is torn, or becomes smaller change it with a new one.
Þekil.11(Figure.11) Þekil.12(Figure.12) Þekil.13(Figure.13)
6.2-YAKIT FÝLTRESÝ/FUEL FILTER
Motorunuz çalýþmadýðýnda yakýt gurubunun ve yakýt filtrenizin týkalý olup olmadýðýný kontrol
edin (Þekil. 14).
If the engine does not start, check the fuel filter and the fuel system around for any blockages.
(Fig:14)
6.3-BUJÝ/SPARK PLUG
Buji týrnak aralýðý 0,6 - 0,7 mm olmalýdýr. (Þek.15) Buji týrnak aralýðý zamanla karbon yada kurum kaplayacaðýndan bujinizi
kontrol edip, temizleyin. (Þek.15) Buji týrnaðýnda oluþan karbon yada kurum motorunuzun performansýnýn düþmesine yol
açabilir.
The spark plug end clearance should be around 0,6 to 0,7mm.(Fig:15)
Since the end will be covered either carbon or other deposists, check the
spark plug and clean with suitable brush.The carbon formation and deposits
at the spark plugs can degrade the performance of your engine.
7-DEPOLAMA/STORAGE
1.Aleti kullanýmdan sonra temiz su ile yýkayarak temizleyin.
2. Ýlaç deposunda ilaç býrakmayýn.
3.Yakýt deposunda kalan benzini temiz bir kaba koyun ve motoru duruncaya kadar çalýþtýrýn. Aksi halde benzin buharlaþýr
ve içinde karbüratör memelerini týkayabilir.
4.Bujiyi çýkartýn, silindirin içine pas önleyici veya motor yaðý koyun, kranký birkaç kez döndürerek karýþýmýn daðýlmasýný
saðlayýn. Bujiyi tekrar yerine takýn.
5.Tekrar kullanacaðýnýz zaman bujiyi çýkartýn ve temizleyin. Kranký bir kaç kez döndürün.
1. After every use of machine clean the chemical tank with water.
2.Do not leave chemical in the tank.
3.Put the remaining fuel into a clean cap, run the engine until it stops.Otherwise gasoline vaporize and may clog the
carburettor orifices.
4.Take the spark plug out and pour corrosion inhibitor or thin engine oil into the cylinder.Revolve the crankshaft for a few
times to diffuse oil in the cylinder.Put the plug back to its position.
5.Before using the device again,take out spark and clean it.Revolve the crankshaft a few times.
Þekil.14(Figure.14)
Þekil.15(Figure.15)

(10)
8-GARANTÝ/WARRANTY
Makine tanýtma ve kullanma kýlavuzundaki talimatlara uygun þekilde kullanýlmasý ve normal koþullarda çalýþtýrýlmasý
þartýyla,Taral firmasý tarafýndan imal edilmiþ olan ve özellikler garanti belgesinde belirtilen makine,satýþ tarihinden
itibaren 2 yýl süre ile garanti edilmiþtir.
23.02.1995 Tarihli 4077 nolu tüketicinin korunmasý hakkýnda kanun ile belirlenmiþtir.
1.Sanayi ve Ticaret Bakalnlýðý Ýstanbul Sanayi ve Ticaret Ýl Müdürlüðünce verilen 17.Mayýs.2002 tarih ve 34-2836 no ile
verilen garanti belgelerinde belirtilen garanti þartlarý geçerlidir.
2.Garantinin baþlangýç tarihi,satýcý firma tarafýndan alýcýya teslim tarihini Garanti belgesinde kendine ayrýlan yere yazarak
imzaladýðý tarihtir.
3.Ýmalatçý firmanýn sorumluluðu,defo veya imalat hatalarýna baðlý olsa bile,aracýn kullanýmý esnasýnda kiþilere ve eþyalara
verilen zararý kapsamaz.Buna baðlý olarak dolaylý ve doðrudan verilen zarar ve hasarýn bedeli ödenmeyecektir.
4.Makine üzerine damgalanmýþ seri numarasý deðiþtirilmiþ ise herhangi bir deðiþiklik yapýlmýþ ise,makine bir kazaya
uðramýþ ise satýn alan sözleþmedeki ödeme yükümlülüklerine gerektiði gibi uymamýþ ise montaj firmanýn yetkili
elemanlarý tarafýndan yapýlmamýþ ise,imalatçý firmanýn onayý alýnmadan deðiþiklik veya onarým yapýlmýþ ise,garanti
geçerli deðildir.
5.Herhangi bir anlaþmazlýk durumunda Tüketici,Sanayi ve Ticaret Bakanlýðý tüketicinin ve rekabetinin korunmasý genel
müdürlüðüne baþvurulabilir.Taral A.Þ. Garanti kapsamýna giren her türlü isteði dikkate alacaktýr.
6.Aletin kullaným ömrü (10) yýldýr.
7.Makinanýz ile birlikte size ‘’TARALYETKÝLÝ SERVÝS KÝTAPÇIÐI’’ verilecektir.Servis ve yedek parça ihtiyaçlarýnýz
için bu kitapçýktan yararlanabilirsiniz.
The machine which is produced by TARAL and of which specifications are given in the warranty certificate has a
warranty period of 2 year beginning from the date of sale with the condition of using the machine according to the
instructions in the owner's manual and working in standard conditions.It is determined by the law about the consumer
rights with the date of 23.02.1995 and the number 4077.
1- The warranty conditions are valid which are explained in the warranty certificate given with the permission of the
Ministry of Industry, Istanbul Industry and Trade Office in the document no.34-2836 with the document permission
date of 17.May.2002.
2- The date of beginning of the warranty corresponds to the date when the seller firm writes down the date of delivery
to the buyer and signs on the warranty certificate.
3- The responsibility of the producer company does not include the damages to the human beings and other items
during operation, even if they depend on the flaw or production errors. Therefore in the case of a request of the price
of any direct damage and loss the price will not be paid.
4- If the serial number stamped on the machine is changed, or any modification is made, or the machine is involved in
an accident, or the buyer does not obey the responsibilities in the contract appropriately, or the assembly is not done
by theauthorized personnel of the producer company,or any modification or maintenace is performed without the
permission of the producer company,the warranty is not valid.
5- In the case of any disagreement, the consumer can apply to the Protection of the Competition General Office of the
Industry and Trade Ministry.
6- The operation life of the machine is 10 years.TARAL will regard all the requests in the framework of the warranty.
7-TARAL AUTHORIZED SERVICE BOOKLET will be given to you with the machine.You can make use of this booklet
for your service or spare parts needs.
8.1-ÝLK ÇALIÞTIRMA/FIRST OPERATION
Deðerli müþterimiz, ürünümüzü kullanmaya baþlamadan önce, ürünle birlikte verilen ÝLK ÇALIÞTIRMA KUPONU
ile birlikte size en yakýn TARAL Yetkili Servisine baþvurarak makinenizin ÝLK ÇALIÞTIRMASINI yaptýrýnýz. Bu
iþlem için, makinaya eklenecek yað, yakýt vb. sarf malzemeleri hariç herhangi bir ücret ödemeyeceksiniz. Bu iþlem
sýrasýnda size makinanýn kullanýmý ve bakýmý hususunda bilgi verilecektir. TARAL Yetkili Servisince Ýlk Çalýþtýrma
iþlemi yapýlmamýþ makineler GARANTÝ KAPSAMI DIÞINA ÇIKACAKTIR.
Dear consumers, before starting to use our product, make the first operation of your machine by visiting the TARAL
authorized service, which is nearest to your location, together with the FIRST OPERATION COUPON supplied with
the machine. You will not be charged for this, except for the materials to be added to the machine like oil, fuel, etc.
During this procedure you will be informed about the operation and maintenance of the machine. The machines,
which are not gone through the first operation procedure performed by TARAL authorized service, will be
EXCLUDED FROM THE SCOPE OF WARRANTY.
Atomizörü her kullandýðýnýzda koruyucu gözlüðünüzü ve kulaklýðýnýzý mutlaka takýnýz.Bu sizi bazý
tehlikelerden koruyacaktýr.
Bu makina dýþ mekanlarda kullanmak için imal edilmiþtir. Havalandýrmasý olmayan yerlerde
kullanýlmamasý gereklidir.
Make sure that you wear your eyeglass and earphone. This will protect you from injuries. This machine is
produced for outdoor usage. It cannot be used in places without air ventilation.
DÝKKAT
DANGER!
(11)
Problem/Problem Sebep/Couse Çözüm/Remedies
Motor /Engine Zor çalýþýyor
Çalýþmýyor/ Difficult
starting Fails to start
Karbüratörde yakýt var
Fuel in carburetor
Karbüratörde yakýt yok
No fuel in carburetor
Benzin filtresi t ýkalý / Fuel filter is dirty or stuck
Benzin hortumu týkalý / Fuel hose is dirty or stuck
Karbüratör / Carburetor
Temizle / Clean
Temizle / Clean
Servis / Service
Silindirde yakýt var
Fuel in cylinder
Silindirde yakýt yok
No fuel in cylinder
Karbüratör / Carburetor
Servis / Service
Egsoz yakýt la ýslak
Muffler is wet by the fuel
Yakýt karýþýmýçok zengin / The mixture is rich in fuel
Jikleyi aç / Open the choke
Hava filtresini t emizle/deðiþtir
Clean/Replace the air filter
Karbüratör ayarý/Adjust the carburetor
Servis / Service
Buji kablosund a kývýlcým
var
Spark in the spark plug
cable
Buji kablosu ucund a
kývýlcým yok
No spark in the spark
plugcable
Ateþleme düðmesi kapalý konumda/ The knob on the
handle unit is on ‘’STOP’’ position
Elektirik problemi/ Electrical failure
Kilitlenmiþ veya arýzalýateþleme düðmesi/Defect
knob on the control unit
Açýk konuma getir/Push to ‘’START’’position
Servis / Service
Servis / Service
Bujide kývýlcým var
Spark in the spark plug
Bujide kývýlcým yok
No spark in the spark
plug
Buji týrnak ara lýðý ayarsýz/ Spark plug clearence is not
adjusted
Buji týrnaðý karb onla kaplanmýþ/ Deposit on spark
plug end
Boðulmuþ/Too much mixture in the engine
Buji bozuk/Defect spark plug
Servis/Service
Temizle / Deðiþtir/ Clean/Replace
Bujiyi temizle / Deðiþtir/Clean the spark
plug/Replace
Bujiyi temizle / De ðiþtir/ Clean the spark
plug/ Replace
Motor iç problemi / Internal engine problem Servis / Service
Motor ça lýþýyor
Engine runs
Boðuluyor veya sto p
ediyor/Stops
Gaz almýyor/Accelerate
slowly
Hava filtresi k irli/The air filter is dirty
Yakýt filtres i kirli/The fuel filer is dirty
Buji/Spark plug
Karbüratör/Carburetor
Temizle / Deðiþtir / Clean / Replace
Deðiþtir / Replace
Temizle/Ayarla/Desðiþtir/Clean/
Adjust/Replace
Servis/Service
Problem / Problem
Sebep / Cause Çözüm / Remedies
Motor hýzý yetersiz/Engine rpm is not
enough.
Kötü yakýt kulla nýmý / Dirty fuel usage Doðru yakýt ka rýþýmý , Kalites iz benzin kullanma /
Proper fuel oil mixture,no quality fuel usage
Motor ýsýnmýþ/ Hot engine Buji arýzalý / Defective spark plug Deðiþtir / Replace
Motor soð utucu kanatla r aþýrý kirli, t ýkalý hava akýmý ye tersiz.
Engine cooling fins are too dirty,air flow is not sufficient
Temizle/Clean
Ateþleme arýzalý/Faulty ignition Buji arýzalý / Defective spark plug Deðiþtir/Te mizle / Replace / Clean
Arýzalý buji ka blosu nedeniyle sýkýþtýrma düþ ük/Compression is low because of
flawed spark plug cable.
Kabloyu kontrol et / Check cable
Diðer arýzalar/Other problems Servis / Service
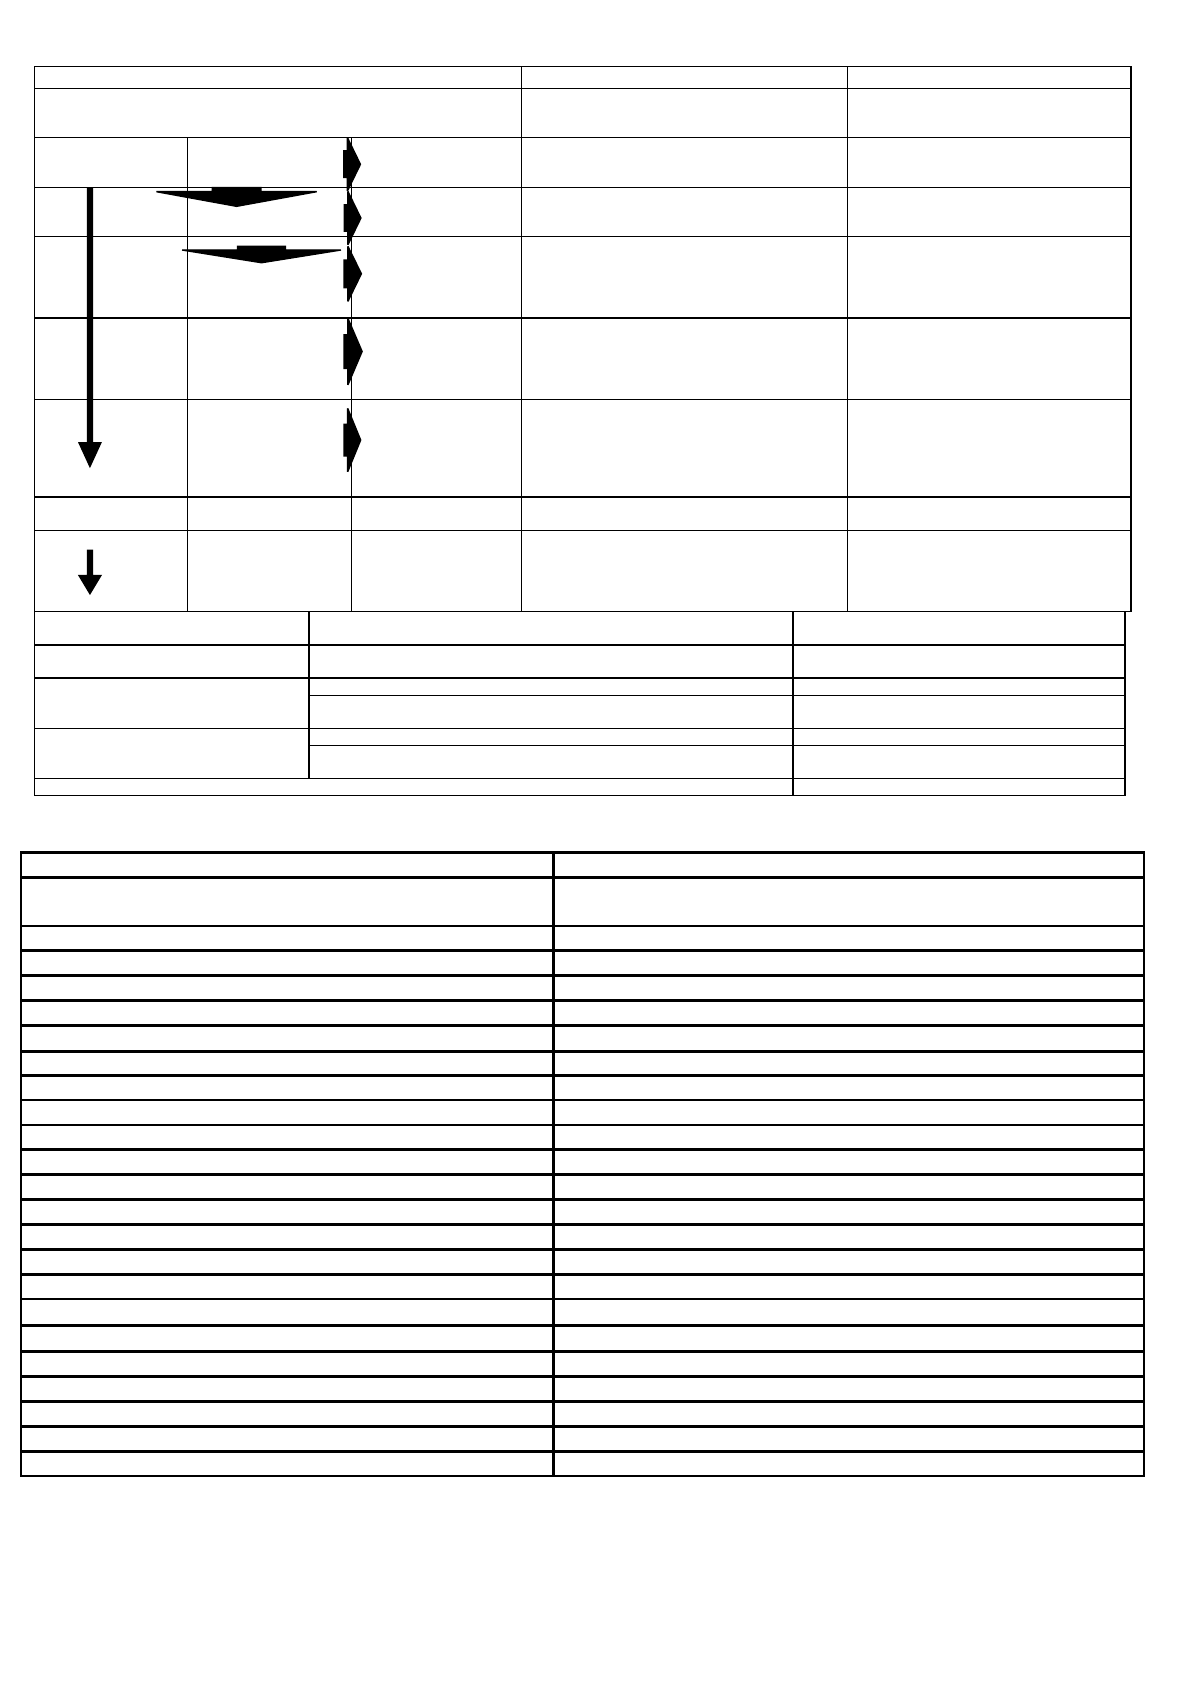
9-ARIZA BULMA TABLOSU/TROUBLE SHOOTING
10-TEKNÝK ÖZELLÝKLER/TECHNICAL DATA
Model / Model
Ölçü ler (YxUxG)
Dimension (HxLxW) (mm)
Að ýrlýk / Weight (kg)
Ýlaçlama mesafesi/Spraying Distance (m)
Deb i (lt/ da k) / Output (lt/min)
Motor / Engi ne
Tip / Type
Gü ç / Power (HP)
Hacim / Displacement (cc)
Çap / Bor e ( mm)
Strok/ Stroke (mm)
Devir / RPM
Yaký t / Fuel
Yakýt serfiyatý (g/bg saat) / Fuel Consumption (g/hp-h)
Yakýt tanký Kapasitesi (lt)/ Fuel Tank Capacity (lt)
Starter
Ateºleme / Ignition
Karbüratör / Carburetor
Gaz Verme / Accelerating
Rotor
Çap / Dimen sio n ( mm)
Hava debisi / Air volume(m³/h)
Hav a Çýkýþ ý Hýzý (m/s an ) / Air velocity (m/sec)
Vantilatörün rotor u direkt olarak kra nk milinin ucuna baðlanmýþtýr. Va ntilatör ve motor bir ünite te þkil eder.Bu ünite titreþimleri söndürmek
için,taþýyýcý çelik çerçeveye lastik elemanlarla baðlanmýþtýr.Kauçuklu sýrt ve omuz yastýklarý da çalýþmayý kolaylaþtýrýr./
The fan wheel directly coupled to the crankshaft.The blower housing and the engine form one unit.This unit is connected to
the stee l frame with rubber c onnecting piece s.Back c ushion and stra ps fa cilitate the operation of the mist blower .
TARA L A.Þ. GEREK BU KILAVUZDA GEREKSE MAM ÜLÜNDE HERHANGÝ BÝR DEÐÝÞÝKLÝK YAPMA HAKKINI SA KLI TUTAR./
TARAL RESERVESTHE RIGHT TOMAKE ANYCHANGE IN THIS MANUAL AND PRODUCTWITHOUT PRIOR NOTICE
5
(Max.)2,44
Taral
Teksilindirli,2 zamanlý, hava soðutmalý/Single cylinder,2 stroke,aircooled
6314
Ýlaç Depo Kapasitesi / Chemical Tank Capacity (lt)
Dikey / Vertical:8-10Yatay / Horizontal:12-15
14
770x480x400
14
48
40
63
7000
Yað-benzin karýþýmý / Gasoline-oil mixture
260
1,4
Otomatik/ Rewind
Elektronik/ Electronic
Membranlý / Diaphragm
100
Gaz te li ile / Via gas cable
Radyal / Radial
254
600
TS-EN-ISO 9001-2000
Mail: [email protected]
Web : www.taral.com
Fabrika ve Genel Daðýtým
Factory and General Distribution Taral Tarým Makine ve Aletleri Sanayii
Gümüþsuyu Cad. Hastane Yolu No:1
34020 Topkapý-Maltepe-ÝSTANBUL
Tel/Phone: (0212) 567 95 50 (10Hat/Lines)
Fax : (0212) 612 12 39
(0212) 674 06 79
ÝRTÝBAT BÜROLARI/LIAISON OFFICES
ANKARA TEL/PHONE: (0312) 427 71 82 FAX: (0312) 467 73 82
ÝZMÝR TEL/PHONE: (0232) 479 33 36 FAX: (0232) 479 17 40
GSM: (0536) 314 87 61
BÖLGE TEMSÝLCÝLÝKLERÝMÝZ/REGIONAL OFFICES
TARALBATI AKDENÝZ BÖLGE TEMSÝLCÝLÝÐÝ
TARALWESTERN MEDITERRANEAN REGIONAL AGENCY GSM: (0536) 314 87 60
TARALDOÐU KARADENÝZ BÖLGE TEMSÝLCÝLÝÐÝ
TARALEASTERN BLACK SEA REGIONAL AGENCY GSM: (0532) 525 23 15
TARALDOÐU AKDENÝZ TEMSÝLCÝLÝÐÝ
TARALEASTERN MEDITERRANEAN REGIONAL OFFICE GSM: (0537) 424 56 88
(12)
11-CE UYGUNLUK BEYANI/CE DECLARATION OF CONFORMITY
Table of contents
Other TARAL Farm Equipment manuals


