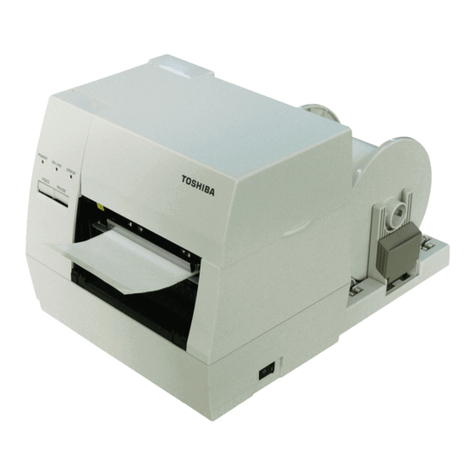
TEC TRST-56 SERIES User manual

TECThermal Printer
TRST-56 SERIES
Original Mar., 2001
(Revised )
Document No. EO18-13004
PRINTED IN JAPAN
Maintenance Manual

EO18-13004
TABLE OF CONTENTS
Page
1. UNPACKING ---------------------------------------------------------------------------------------------1-1
1.1 Procedure---------------------------------------------------------------------------------------------------1-1
1.2 Checks ------------------------------------------------------------------------------------------------------1-1
1.3 Power Cord-------------------------------------------------------------------------------------------------1-2
2. INSTALLATION PROCEDURE ---------------------------------------------------------------------2-1
2.1 Connecting the TRST-56 to the POS Terminal----------------------------------------------------2-1
2.2 Connecting the Drawer----------------------------------------------------------------------------------2-3
2.3 Separating the Power Supply Unit (AC Adapter)--------------------------------------------------2-4
3. DISASSEMBLY AND REASSEMBLY------------------------------------------------------------- 3-1
3.1 Maintenance Tools ---------------------------------------------------------------------------------------3-1
3.2 Disassembling the Main Body -------------------------------------------------------------------------3-2
3.2.1 Removing the Power Case SA---------------------------------------------------------------3-2
3.2.2 Removing the Printer Cover SA--------------------------------------------------------------3-2
3.2.3 Removing the Top Cover SA-----------------------------------------------------------------3-3
3.2.4 Removing the Mechanism Unit---------------------------------------------------------------3-3
3.2.5 Removing the IF PCB Ass’y and Control PCB Ass’y -----------------------------------3-4
3.2.6 Removing the AC Adapter --------------------------------------------------------------------3-4
3.2.7 Removing the Operation Panel SA and Front Cover -----------------------------------3-5
3.2.8 Removing the Operation PCB Ass’y--------------------------------------------------------3-5
3.3 Disassembling the Mechanism Unit------------------------------------------------------------------3-6
3.3.1 Removing the Top Chassis SA --------------------------------------------------------------3-6
3.3.2 Removing the Platen SA-----------------------------------------------------------------------3-6
3.3.3 Removing the Center Frame SA-------------------------------------------------------------3-7
3.3.4 Removing the Gears----------------------------------------------------------------------------3-8
3.3.5 Removing the Auto Cutter SA----------------------------------------------------------------3-9
3.3.6 Removing the Lock Levers--------------------------------------------------------------------3-9
3.3.7 Removing the Pressure Arms---------------------------------------------------------------3-10
3.3.8 Removing the Stepping Motor and Brake ------------------------------------------------3-10
3.3.9 Removing the Top Chassis SA -------------------------------------------------------------3-11
3.4 Reassembling Procedure------------------------------------------------------------------------------3-12
3.5 Lubrication-------------------------------------------------------------------------------------------------3-12
3.5.1 Lubricant------------------------------------------------------------------------------------------3-12
3.5.2 Where to Lubricate-----------------------------------------------------------------------------3-12
EO18-13004
4. DIP SWITCH FUNCTION.......................................................................................................4-1
4.1 DIP Switch--------------------------------------------------------------------------------------------------4-1
4.1.1 DIP Switch 1--------------------------------------------------------------------------------------4-1
4.1.2 DIP Switch 2--------------------------------------------------------------------------------------4-2
4.1.3 DIP Switch 3--------------------------------------------------------------------------------------4-2
5. SELF TEST PRINT ----------------------------------------------------------------------------------------------5-1
6. TROUBLESHOOTING------------------------------------------------------------------------------------------6-1
6.1 Troubleshooting Procedure-----------------------------------------------------------------------------6-1
6.2 Troubleshooting Guide ----------------------------------------------------------------------------------6-1
7. PERIODIC MAINTENANCE-----------------------------------------------------------------------------------7-1
7-1Periodic Maintenance Procedure ---------------------------------------------------------------------7-1
Copyright © 2001
by TOSHIBA TEC CORPORATION
All Rights Reserved
570 Ohito, Ohito-cho, Tagata-gun, Shizuoka-ken, JAPAN

1.UNPACKING EO18-13004
1.1 Procedure
1- 1
1. UNPACKING
1.1 Procedure
1. Open the Carton.
2. Take the accessories out of the carton.
3. Take out the TRST-56 printer and remove the pads.
4. Place the TRST-56 printer on a level surface.
1.2 Checks
1. Check for damage or scratches on the machine.
2. Confirm that none of the accessories are missing.
NOTE: Keep the original carton and pads for future transportation of the TRST-56 printer.
Fig. 1-1
TECThermal Printer
TRST-56SERIES
TOSHIBATEC CORPORATION
Owner's Manual
TRST-56 Printer
Pad
Accessories
Carton
Pad

1. UNPACKING EO18-13004
1.3 Power Cord
1- 2
1.3 Power Cord
As the power cord is not supplied with this printer, locally purchase the power cord which meets the
following standard.
For USA and Canada:
Power Supply Cord – UL and CSA approved, type SVT, 18/3AWG, rated min. 125V, 10A
Attached Plug and Appliance Coupler – UL and CSA approved, molded on type.
The plug is parallel-blade grounding type, NEMA 5-15P configuration. The appliance coupler is
Female configuration.
Both attachment plug and appliance coupler are rated minimum 125V, 10A.
For European countries:
Power Supply Cord – HAR or domestic approved where the equipment is used,
Type H05VV-F, rated minimum 250V, 10A
Attachment Plug and Appliance Coupler – Domestic approved where the equipment is used,
molded on type, having grounding terminal rated minimum 250V, 10A. The appliance coupler is
Female configuration.
For the other countries:
Domestic approved, having suitable electrical ratings and characteristics for the end-product
specifications and use.
The table below shows the sample of domestic safety approval markings.
Major safety approval marking (as of Mar., 2001)

2. INSTALLATION PROCEDURE EO18-13004
2.1 Connecting the TRST-56 to the POS Terminal
2- 1
2. INSTALLATION PROCEDURE
2.1 Connecting the TRST-56 to the POS Terminal
1. Turn the printer power OFF.
2. Insert the power cord into the AC inlet.
3. Connect and secure the interface cable to the interface connector in the correct orientation.
Serial interface: Secure the connector with the screws.
Parallel interface: Secure the connector with the locking tabs.
Serial Interface Parallel Interface
WARNING!
1. Turn the POS terminal OFF before connecting the TRST-56 printer.
2. Plug the TRST-56 power cord into the AC outlet on the wall for power supply. Do not obtain th
e
AC power from the AC outlet of the POS terminal such as ST-5500, ST-5600, etc., because th
e
rush current at the TRST-56 power on may exceed the rating of the power switch of the POS
terminal. Failure to do this may shorten the life of the power switch of the POS terminal.
CAUTION!
1. Use a locally purchased power cord which meets the standard.
2. Firmly plug the AC adapter cable and the power cord.
Fig. 2-1
AC Inlet
Power Cord
Serial Interface Cable
Parallel Interface Cable
Parallel Interface Connector
Serial Interface Connector
Screw Locking Tab
Fig. 2-2

2. INSTALLATION PROCEDURE EO18-13004
2.1 Connecting the TRST-56 to the POS Terminal
2- 2
4. Connect the interface cable to the POS terminal, and then insert the power cord into the AC outlet.
NOTE: The above figure shows the example of the interface cable which is connected to the LPT1
port (Parallel interface) on the ST-5600.
LPT1
Interface Cable
Fig. 2-3
POS Terminal

2. INSTALLATION PROCEDURE EO18-13004
2.2 Connecting the Drawer
2- 3
2.2 Connecting the Drawer
Connectable drawers must meet the following conditions.
• The drawer which includes the Drawer Drive Circuit (DC 24V specification).
• The drawer which has 6-pin modular connector.
Pin Signal
1 FG
2 DRAWER1
3 DRSW
4 VDR
5 DRAWER2
6 GND
1. Turn the printer power OFF.
2. Connect the drawer cable to the drawer interface connector in the correct orientation.
3. Secure the ground wire of the drawer to the ground terminal on the rear of the printer.
WARNING!
1. The solenoid included in the drawer to be connected should have the minimum of 36 ohm
resistance. Under-specified solenoid may cause a machine failure.
2. The output current of the drawer should not exceed 0.8A, as there is a risk of a machine
failure.
3. The drawer interface connector is exclusively for connecting a drawer. Do not connect a
phone line or any other cables than the specified drawer cable. Doing so may cause a failure
of the phone line and the printer.
4. The drawers which are provided with TOSHIBA TEC standard drawer interface (4-pin
modular type connector) cannot be connected to this printer.
61
Fig. 2-4
Ground Wire
Ground Terminal
Drawer Interface Connector
Drawer Cable

2. INSTALLATION PROCEDURE EO18-13004
2.3 Separating the Power Supply Unit (AD Adapter)
2- 4
2.3 Separating the Power Supply Unit (AC Adapter)
1. Disconnect the AC adapter cable from the printer.
NOTE: Before disconnect the AC adapter cable, unlock the connector.
2. Remove the four ST-3x8 screws to detach the power case SA.
3. Cut the cable band which ties the AC adapter cable.
4. Lift the AC adapter to remove it from the power case SA.
5. Take out the AC adapter cable from the power case SA.
6. Pass the connector of the AC adapter cable through the hole in the bottom of the power case SA.
Power Case SA
Cable Band ST-3x8
AC Adapter Cable
Fig. 2-5
AC Adapter
Power Case SA
AC Adapter Cable
Fig. 2-6
Printer Unit

3. DISASSEMBLY AND REASSEMBLY EO18-13004
3.1 Maintenance Tools
3- 1
3. DISASSEMBLY AND REASSEMBLY
3.1 Maintenance Tools
• Philips-head screwdrivers
• Tweezers
• Round nose pliers
• Cutting nipper
• Brush for lubrication
• Lubricant (Molykote EM-10L)
WARNING!
1. Disconnect the power cord before disassembling the printer.
2. The print head becomes very hot while printing. Never touch the print head to avoid getting
burned.
CAUTION!
1. Do not disassemble or adjust the machine as far as it functions properly. Particularly, do not
loosen any screws unless it is necessary.
2. After the printer is disassembled and reassembled, be sure to check that there is no
abnormality before turning the power ON.
3. During maintenance, be careful not to leave the parts uninstalled or the screws un-tightened
inside the printer.
4. When handling the thermal head or electronic components, do not use gloves or other aids
which may build up static electricity.
5. When disassembling or reassembling the printer, check the wires and cables for any damage.
Do not run them into a narrow space or set them in improper positions.
6. After reassembling, apply lubricant as required.

3. DISASSEMBLY AND REASSEMBLY EO18-13004
3.2 Disassembling the Main Body
3- 2
3.2 Disassembling the Main Body
3.2.1 Removing the Power Case SA
1. Disconnect the AC adapter cable from the printer.
NOTE: Before disconnect the AC adapter cable, unlock the connector.
2. Remove the four ST-3x8 screws to detach the power case SA.
3.2.2 Removing the Printer Cover SA
1. Press down the ejector to unhook the printer cover SA.
2. Remove the two BT-3x8 screws which secure the printer cover SA.
3. Push up tabs A to unhook the printer cover SA, then unhook tabs B and remove the printer cover
SA.
ST-3x8
Power Case SA
AC Adapter Cable
CAUTION!
Care must be taken not to touch the print head element when removing the printer cover SA.
Fig. 3-1
Fig. 3-2
Printer Cover SA
Print Head
BT-3x8
A
B
Ejector

3. DISASSEMBLY AND REASSEMBLY EO18-13004
3.2 Disassembling the Main Body
3- 3
3.2.3 Removing the Top Cover SA
1. Remove the two ST-3x6 screws which secure the top cover SA. Unhook tabs B of the frame by
inserting a screw driver into the square holes. Lift the top cover SA so as not to catch the power
switch on the top cover SA.
2. Release the operation panel cable from the cable holder, and disconnect it from the control PCB
ass’y. Then, remove the top cover SA.
NOTES: 1. When reassembling the top cover SA, make sure that tabs B of the frame are fit into the
square hole securely.
2. When removing or reassembling the top cover SA, be careful not to catch the power
switch with the power switch access hole.
3.2.4 Removing the Mechanism Unit
1. Remove the two ST-3x6 screws which secure the mechanism unit to the bottom chassis SA.
2. Disconnect the five connectors A to E from the control PCB ass’y.
3. Lift the front side of the mechanism unit a little to unhook it from the two square holes in the bottom
chassis SA, and then remove the mechanism unit.
Cable Holder
Power Switch
T
ab
B
Operation Panel Cable
Top Cover SA
ST-3x6
Fig. 3-3
D
C
B
A
ABCDE
E
ST-3x6
Control PCB Ass’y
Bottom Chassis SA
Square Hole
Mechanism Unit
Fig. 3-4
Square Hole
A
A
Power Switch
Access Hole

3. DISASSEMBLY AND REASSEMBLY EO18-13004
3.2 Disassembling the Main Body
3- 4
3.2.5 Removing the IF PCB Ass’y and Control PCB Ass’y
1. Remove the two ST-3x6 screws which secure the IF PCB ass’y to the bottom chassis SA.
2. Disconnect the IF PCB ass’y from the control PCB ass’y.
3. Remove the two ST-3x6 screws which secure the control PCB ass’y to the bottom chassis SA.
4. Remove the control PCB ass’y.
NOTE: Be sure to remove the IF PCB ass’y before removing the control PCB ass’y. Pulling the
control PCB ass’y to separate from the IF PCB ass’y could damage the power switch.
3.2.6 Removing the AC Adapter
1. Cut the cable band to release the AC adapter cable.
2. Lift the AC adapter to remove it from the power case SA.
3. Take out the AC adapter cable from the power case SA.
4. Pass the connector of the AC adapter cable through the hole in the bottom of the power case SA.
NOTE: When reassembling the AC adapter, install the AC adapter cable so that the ferrite core is
located about 200 mm from the end of the connector.
ST-3x6
Control PCB Ass’y
Bottom Chassis SA
ST-3x6
IF PCB Ass’y
Fig. 3-5
Fig. 3-6 Fig. 3-7
AC Adapter
AC Adapter Cable
Power Case SA
AC Adapter
Ferrite Core
Cable Band
200mm 120mm

3. DISASSEMBLY AND REASSEMBLY EO18-13004
3.2 Disassembling the Main Body
3- 5
3.2.7 Removing the Operation Panel SA and Front Cover
1. Remove the operation panel SA from the front by pushing its back.
2. Remove the front cover from the top cover SA.
3.2.8 Removing the Operation PCB Ass’y
1. Remove the BT-2.6x6 screw to separte the operation PCB ass’y from the operation panel.
Fig. 3-8
Top Cover SA
Front Cover
Operation Panel SA
Fig. 3-9
BT-2.6x6
Operation PCB Ass’y Operation Panel

3. DISASSEMBLY AND REASSEMBLY EO18-13004
3.3 Disassembling the Mechanism Unit
3- 6
3.3 Disassembling the Mechanism Unit
3.3.1 Removing the Top Chassis SA
1. Remove the mechanism unit. (Refer to Section 3.2.4 Removing the Mechanism Unit.)
2. Release the head cable ass’y from the cable holders.
3. Remove the E-2 retaining ring from the left end of the chassis shaft.
4. Pull out the chassis shaft to the right.
5. Remove the top chassis SA.
NOTE: When reassembling, apply lubricant (Molykote EM-10L) to the surface of the brake disk.
3.3.2 Removing the Platen SA
1. While pressing the pressure arm in the direction of the arrow, turn the platen bushing 90 degrees
in either direction so that the flat ends of the left side platen bushing are set in vertical.
2. When the pressure arm is released, the left side platen SA is detached from the U-shaped groove
in the main chassis.
3. Pull the platen SA to the left to remove it from the main chassis.
Pressure Arm
Main Chassis
Platen SA
Platen Bushin
g
Flat End
Fig. 3-11
Fig. 3-10
E-2
Chassis Shaft
Brake Disk
Brake
Head Cable Ass’y
Cable Holder
Top Chassis SA
E-2

3. DISASSEMBLY AND REASSEMBLY EO18-13004
3.3 Disassembling the Mechanism Unit
3- 7
Removing the Platen
1. Remove the two E-4 retaining rings from both ends of the platen shaft.
2. Pull out the platen gear from the left side of the platen.
3. Pull out both platen bushings and remove the two E-4 retaining rings from the platen.
NOTES:
1. When reassembling, insert the two platen bushings so that their flat surfaces face inside.
2. When inserting the platen gear, align its hole with the D-cut on the platen shaft.
3. When reassembling, apply lubricant (Molykote EM-10L) to the shaded portions in Fig. 3-12.
3.3.3 Removing the Center Frame SA
1. Remove the four BT-3x6 screws which secure the center frame SA.
2. Lift the center frame SA to remove it from the main chassis.
NOTE: When reassembling, pass connectors A and B through openings A and B in the main chassis,
respectively.
Fig. 3-13
Center Frame SA
BT-3x6
Main Chassis
B
B
A
A
Fig. 3-12
Platen Gear
Platen Bushing
Platen
E-4

3. DISASSEMBLY AND REASSEMBLY EO18-13004
3.3 Disassembling the Mechanism Unit
3- 8
Removing the Center Frame
1. Remove the PNE lever ass’y, sensor plate, guide roller and DIP switch cover with the slider.
2. Remove the BT-2.6x6 screw to detach the sensor PCB ass’y.
3. Remove the slider from the DIP switch cover.
NOTE: When reassembling the sensor PCB ass’y, hook its one end and then install it with the
screw.
3.3.4 Removing the Gears
1. Remove the two ST-3x6 screws to detach the gear holder.
2. Remove the reduction gear and then idle gear from the gear holder.
NOTE: Apply lubricant (Molykote EM-10L) to the shafts of the gear holder (shaded portions) when
replacing the reduction gear, idle gear, or gear holder.
Slider
DIP Switch Cover
Guide Roller
BT-2.6x6
Sensor PCB Ass’y
Sensor Plate
PNE Lever Ass’y
Center Frame
Fig. 3-14
Main Chassis
Reduction Gear
Gear Holder
Idle Gear
ST-3x6
Fig. 3-15

3. DISASSEMBLY AND REASSEMBLY EO18-13004
3.3 Disassembling the Mechanism Unit
3- 9
3.3.5 Removing the Auto Cutter SA
1. Remove the four ST-3x6 screws to remove the auto cutter SA.
Removing the Auto Cutter and Its Peripheral Parts
1. Remove the two M-3x4 screws and slide the auto cutter in the direction of the arrow to
remove.
2. Remove the EXT spring-03.
3. Pull out the safety cover shaft from the cutter plate and the safety cover.
4. Remove the safety cover from the cutter plate.
3.3.6 Removing the Lock Levers
1. Remove the EXT spring 01 from the lock lever-R-SA.
2. Pull out the ejector.
3. Remove the lock lever-R-SA from the right end of the lock lever-L-SA.
4. Remove the lock lever-L-SA by pulling it to the left.
Auto Cutter SA
ST-3x6
Main Chassis
Fig. 3-16
Fig. 3-17
Safety Cover
Auto Cutter
Cutter Plate
M-3x4
EXT Spring-03
Safety Cover Shaft
EXT Spring-01
Fig. 3-18
Lock Lever-L-SA
Main Chassis Ejector
Lock Lever-R-SA

3. DISASSEMBLY AND REASSEMBLY EO18-13004
3.3 Disassembling the Mechanism Unit
3-10
3.3.7 Removing the Pressure Arms
1. Unhook the EXT spring-01and remove the pressure arm-L from the main chassis.
2. Unhook the EXT spring-01 and remove the pressure arm-R from the main chassis.
3. Remove the ST-3x6 screw from the right side of the main chassis.
NOTE: When reassembling the pressure arms, insert them into the screw heads firmly.
3.3.8 Removing the Stepping Motor and Brake
1. Remove the two M-3x6 screws to detach the stepping motor.
2. Remove the ST-3x6 screw to detach the brake.
NOTES:
1. When reassembling the brake, install it in the orientation as shown in the above figure.
2. When reassembling the stepping motor, install it so that the cable is positioned on the bottom of
the motor.
Fig. 3-19
Pressure Arm-R
EXT Spring-01
Main Chassis
Pressure Arm-L
EXT Spring-01
ST-3x6
Fig. 3-20
M-3x6
Main Chassis
ST-3x6
Brake
Stepping Motor

3. DISASSEMBLY AND REASSEMBLY EO18-13004
3.3 Disassembling the Mechanism Unit
3-11
3.3.9 Removing the Top Chassis SA
1. Release the head cable ass’y from the cable holder.
2. Remove the wire cover from the top chassis SA.
3. Remove the two BT-2.6x6 screws to detach the head cover.
4. Remove the two M-3x4 screws to detach the print head. Then, disconnect the head cable ass’y
from the print head.
5. Pass connectors A and B of the head able ass’y through square holes A and B in the top chassis
SA.
6. Remove the BT-3x6 screw to detach the damper block.
7. Remove the roller from the damper.
Fig. 3-21
Damper Block
ST-3x6
Head Cable Ass’y
Roller
BT-2.6x6
Top Chassis SA
Wire Cover
Print Head
Head Cover
Cable Holder
A
B
A
B
CAUTION!
Care must be taken not to touch the print head element when removing and reassembling it
from/to the top chassis SA.
Table of contents
Other TEC Printer manuals

TEC
TEC B-470-QQ Series User manual

TEC
TEC B-450-QQ Series User manual

TEC
TEC TEC EO1-33015 User manual

TEC
TEC B-SX4T Series User manual

TEC
TEC B-672 Series User manual

TEC
TEC TEC B-210 SERIES User manual

TEC
TEC TEC EO1-13016 User manual

TEC
TEC B-450 SERIES User manual

TEC
TEC B-680 Series User manual

TEC
TEC TEC B-670 SERIES User manual

TEC
TEC BRST-10 SERIES User manual

TEC
TEC CB-416 Series User manual

TEC
TEC B-SP2D Series User manual

TEC
TEC TEC B-670 SERIES User manual

TEC
TEC B-470 SERIES User manual

TEC
TEC TEC B-SX4T-QP User manual

TEC
TEC B-880 series User manual

TEC
TEC TEC CB-426-T3 User manual

TEC
TEC TEC B-670 SERIES User manual

TEC
TEC TEC B-870 SERIES User manual