Carefully remove the individual parts from the carton. You should have all of the items listed below. If any items are missing or damaged, contact
your retailer or customer service directly (See Pg. 4 of the User Manual section).
ASSEMBLY INSTRUCTIONS
Before you begin: These instructions will guide you in properly assembling the DEX IITM. Please review all the steps before beginning
assembly. Carefully adhere to the Assembly Instructions and User Manual to help ensure user security and product integrity.
1. It is your responsibility to familiarize yourself with the proper use of the equipment and the inherent risks of inversion, such as falling on your head
or neck, pinching, entrapment or equipment failure.
2. This product is NOT designed for persons over 6ft 6in (198 cm) or 300 lbs (136 kg). Structural failure could occur or head/neck may impact oor
during inversion. Serious injury or death could result.
3. DO NOT use the equipment without a licensed physician’s approval and a review of the medical contraindications, as noted in the User Manual
section.
4. Failure to assemble and/or use the equipment as directed may void the manufacturer’s warranty on this product and could result in injury or death.
5. DO NOT use the DEX IITM until you have thoroughly and carefully read the User Manual, reviewed all other accompanying documents, and
inspected the equipment.
6. Choose a level surface for assembling and operating the DEX IITM.
7. Follow each step in sequence. Do not skip ahead.
8. Make sure that all fasteners are secure.
9. PRIOR TO USE, test and inspect the equipment. Make sure the Lap Pad rotates smoothly.
10. Replace defective components immediately and/or keep the equipment out of use until repair.
PRE-ASSEMBLY
ITEMS FOR ASSEMBLY ITEM #’s
Leg Support Assembly H1-2000
Leg Width Adjustment Knob H1-2016
Two (2) Flat Washers (M8) H1-1414
Two (2) Hex Bolts (M8 x 25mm) H1-1415
Lap Pad Assembly H1-2005
Lap Pad Frame H1-2006
Lap Pad D1-1005
Four (4) Screws H1-2007
Hex Bolt (3/8-16) H1-1412
Hex Nut (3/8-16) H1-1304
Two (2) Flat Washers (3/8) H1-1302
Two (2) Spacers H1-2017
H1-2014 H1-2015
!WARNING
DEX IITM Assembly Instructions LD-2000 Pg. 2
Base Assembly H1-3008
Base Frame H1-2009
Height Adjustment Knob H1-2018
Two (2) Legs H1-2010
Two (2) Base Feet D1-1012
ITEMS FOR ASSEMBLY ITEM #’s
Two (2) Leg Feet D1-1013
Four (4) Threaded Bolts (3/8-16) H1-2011
Four (4) Bolt Caps (3/8-16) H1-2012
Four (4) Flat Washers (3/8) H1-2013
Four (4) Lock Washers (3/8) H1-1301
Hardware
Two (2) Wrenches (13/14mm) H1-2014
Screwdriver H1-2015
some parts shown may not be in proportion to other parts
H1-2010
H1-2000
D1-1012
D1-1013
H1-1414, H1-1415
(may come pre-assembled to
the Leg Support Shaft)
H1-2016
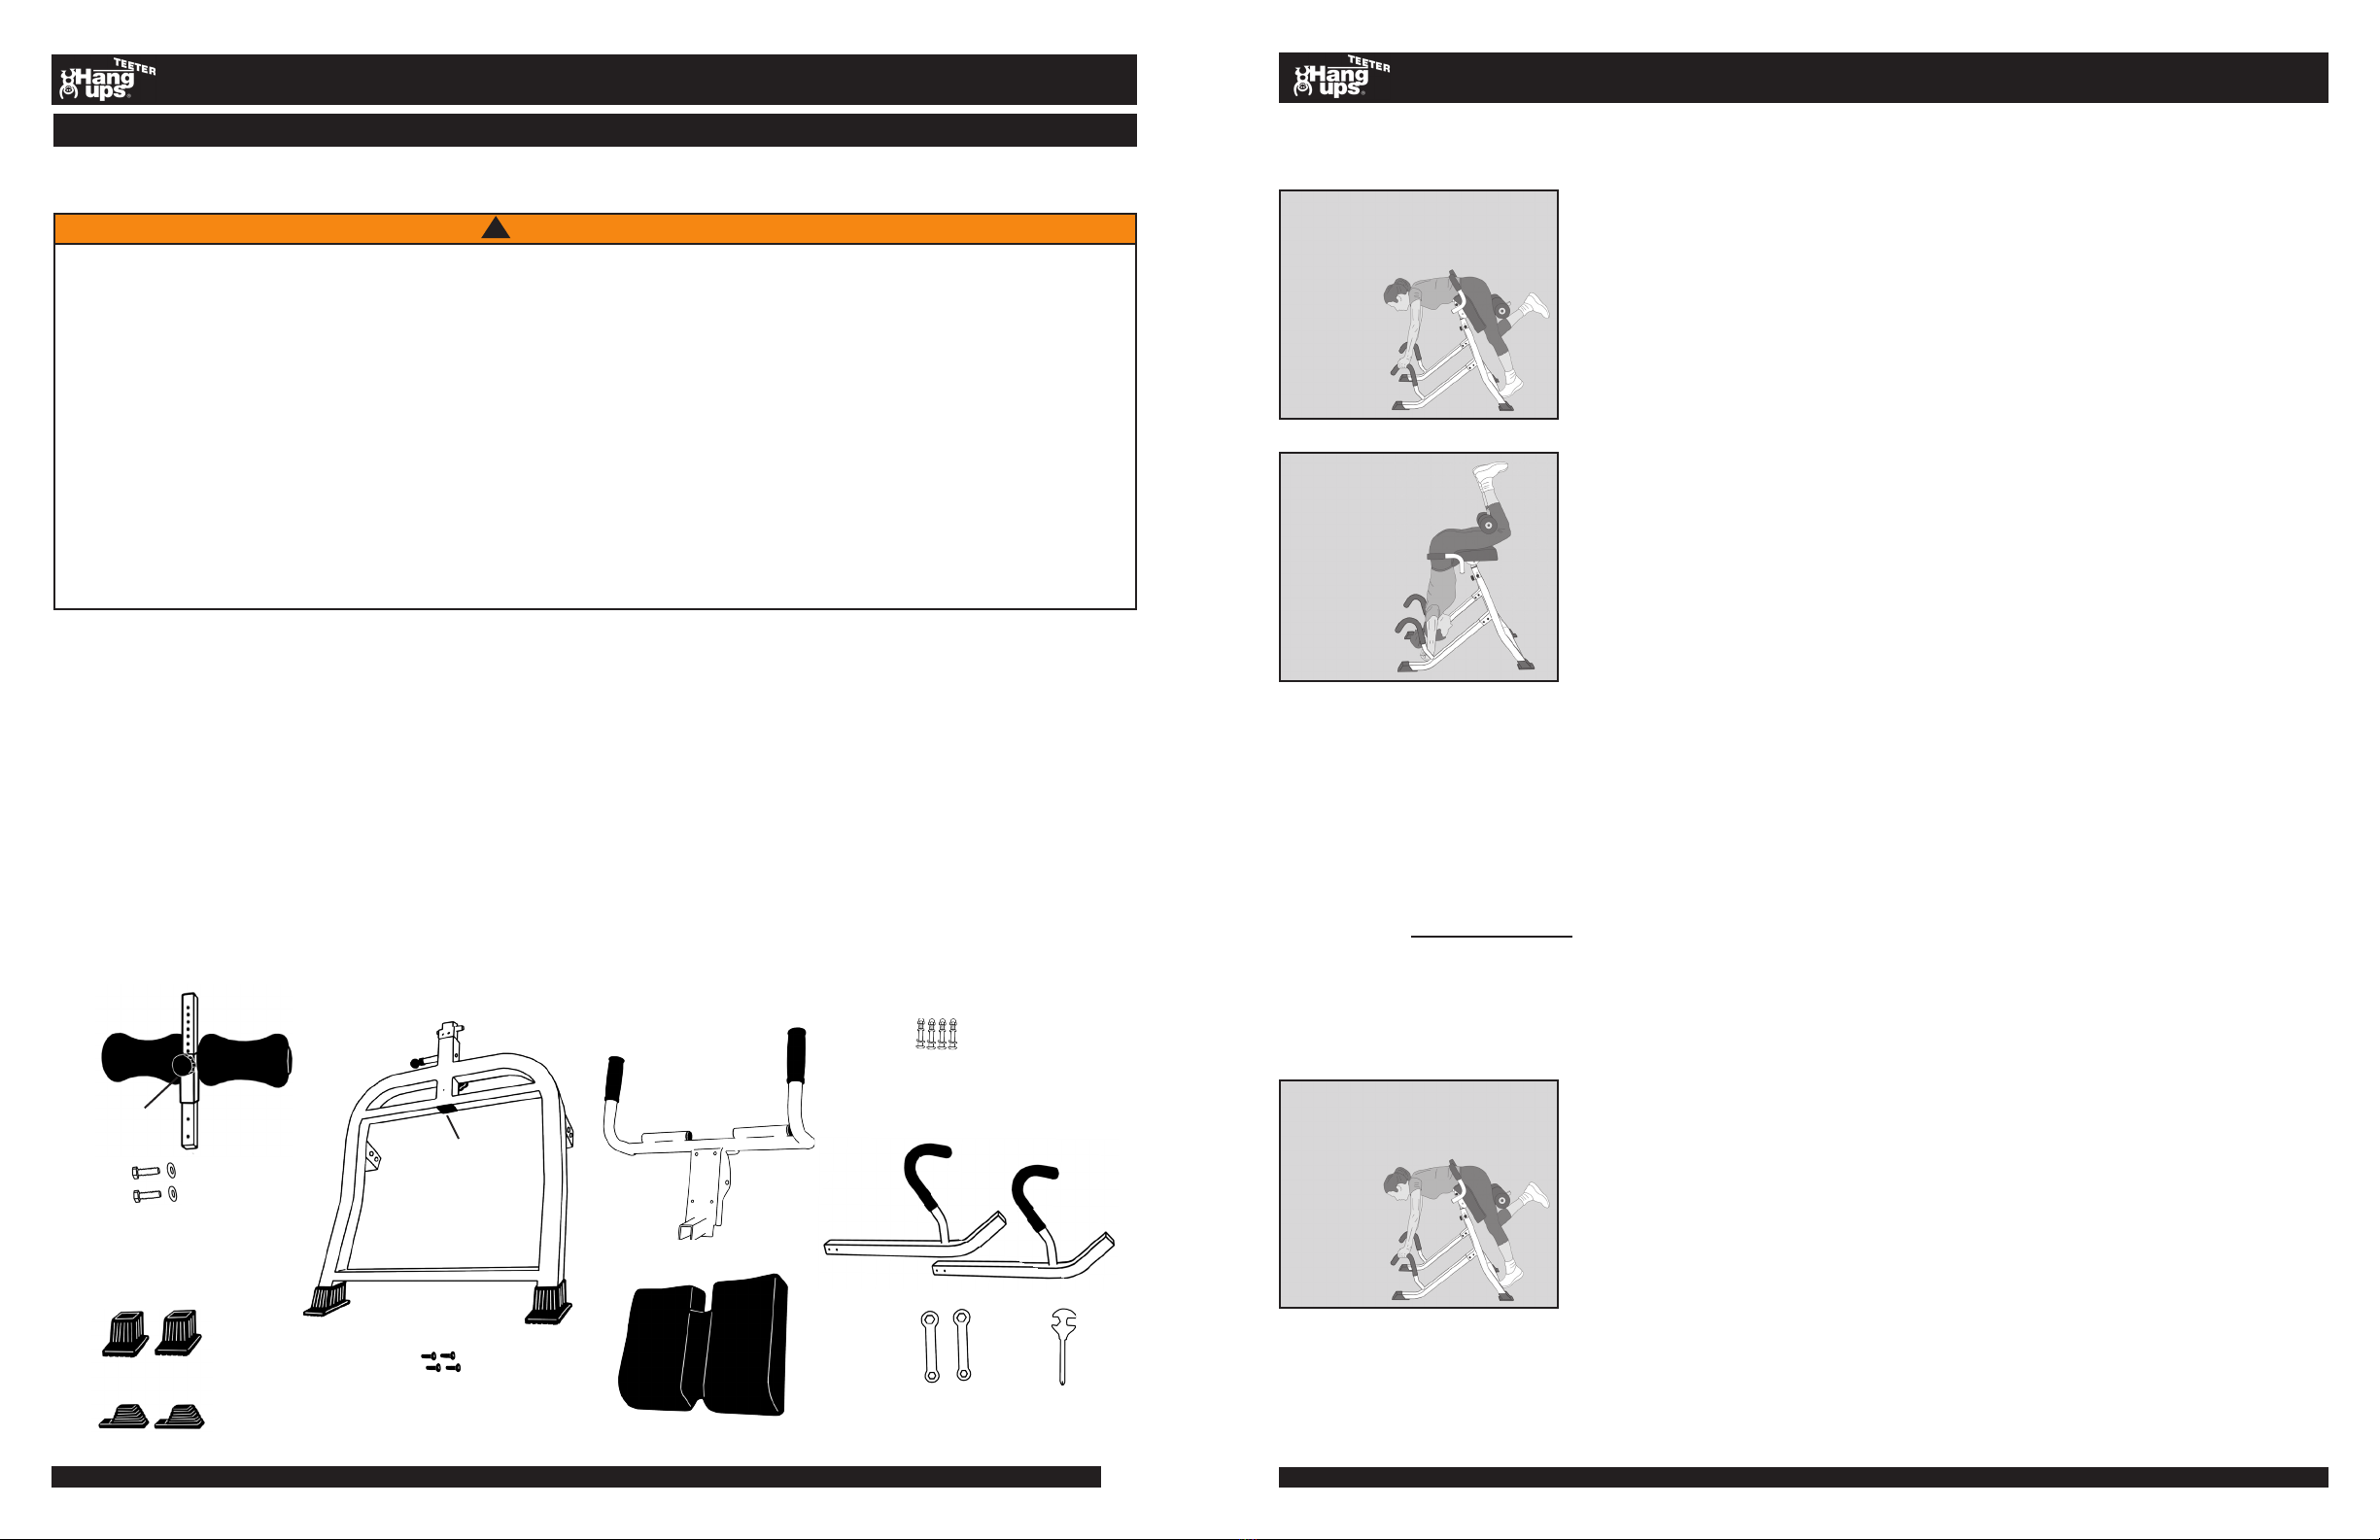
Step Two
• To begin inversion, bend one knee and slowly lean forward to grab hold of the Cane Shaped
Handles.
• While holding the Cane Shaped Handles, continue to slowly lean forward and rotate the Lap
Pad while lifting and bending the other leg.
Step Three
• Continue rotation until the Lap Pad reaches the stop position. Your body weight will be
supported by your thighs.
• Keep both knees bent around the Leg Rollers. Allow your hands to dangle on the oor or place
them folded behind your head.
It is important to maintain bent knees to help support your body while inverted. Failure to do so
could result in serious injury or death!
USER MANUAL
WHILE INVERTED
RELAX. BREATHE. STRETCH. DECOMPRESS. MOVE. EXERCISE. Here are some tips to achieve maximum benets when using the
DEX IITM:
• For maximum decompression, breathe deeply and relax the muscles in the lower back and shoulders.
• Movement is recommended to encourage relaxation, stimulation of circulation and lymph ow.
• It is important to listen to your own body. Everyone is unique and your own body will tell you when you’ve had enough.
• You may want to increase your duration of use over a period of time. However, inversion is NOT a no pain, no gain activity. Always listen
to your body’s response to inversion and ascend if you feel anxiety, discomfort, dizziness or pain.
• For a more active workout program consisting of stretching and exercise, see page 4 of the User Manual.
To return to an upright position, reverse the procedure explained above:
• Use the Cane Shaped Handles to gradually walk yourself upright, rotating the Lap Pad and
straightening your legs until standing at the start position.
RETURNING TO THE UPRIGHT POSITION
HOW TO INVERT cont...
DEX IITM User Manual LD-2000 Pg. 3
Return Upright:
Step Three
User rotates the Lap
Pad, inverting in the
90/90 position
Step Two
User bends one knee,
leans forward and
reaches for
the Cane
Shaped
Handles
User pushes
on the Cane
Shaped
Handles and
straightens
legs
D1-1005
H12006
H1-2009
H1-2011, H1-2012,
H1-2013, H1-1301
(come pre-assembled)
H1-2018
H1-2007
(come pre-assembled in lap
pad)
H1-2005


