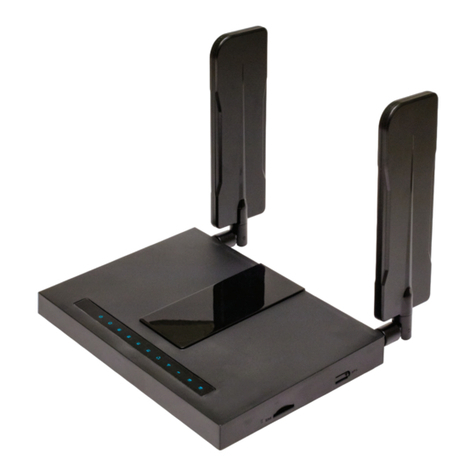
Teldat Connect-4GePlus User manual

Teldat Connect-4GePlus
Installation Manual
Copyright© Teldat Dm1058-I Version 1.0 02/2023 Teldat S.A.
Teldat S.A. Manual
Teldat Connect-4GePlus 1

Legal Notice
Warranty
This publication is subject to change.
Teldat S.A. offers no warranty whatsoever for information contained in this manual.
Teldat S.A. is not liable for any direct, indirect, collateral, consequential or any other damage connected to the deliv-
ery, supply or use of this manual.
Manual Teldat S.A.
2Teldat Connect-4GePlus

Table of Contents
I RelatedDocuments................................. 1
Chapter1 AboutThisGuide.................................. 2
1.1 SupportedDevices................................... 2
1.2 Who should read this manual? . . . . . . . . . . . . . . . . . . . . . . . . . . . . . . 2
1.3 When should this manual be read? . . . . . . . . . . . . . . . . . . . . . . . . . . . . 2
1.4 What can be found in this manual? . . . . . . . . . . . . . . . . . . . . . . . . . . . . 2
1.5 What cannot be found in this manual? . . . . . . . . . . . . . . . . . . . . . . . . . . . 2
1.6 How is the information organized? . . . . . . . . . . . . . . . . . . . . . . . . . . . . 2
1.7 TechnicalSupport ................................... 2
Chapter 2 Teldat Connect-4GePlus . . . . . . . . . . . . . . . . . . . . . . . . . . . . . 4
2.1 Characteristics..................................... 4
2.1.1 PowerSupply..................................... 4
2.1.2 HardwareMonitoring.................................. 4
Chapter 3 Components and Power Supply . . . . . . . . . . . . . . . . . . . . . . . . . . 5
3.1 Components...................................... 5
3.1.1 TopPanel....................................... 5
3.1.2 FrontPanel...................................... 6
3.1.3 SidePanels...................................... 8
3.1.4 UndersidePanel.................................... 8
3.2 Assembly....................................... 9
3.2.1 Standalone and anti-theft security cable . . . . . . . . . . . . . . . . . . . . . . . . . . 9
3.2.2 Wallmounting.................................... 10
3.2.3 Ceilingmounting................................... 11
3.3 PowerSource.................................... 12
3.3.1 ExternalPowerSource................................ 13
3.3.2 PoE......................................... 13
3.4 RESETButton.................................... 13
3.4.1 Rebootingthedevice................................. 14
3.4.2 DefaultConfiguration................................. 14
3.5 Connectingdata................................... 14
3.5.1 LANConnection................................... 14
3.5.2 Connecting the WWAN Antennas . . . . . . . . . . . . . . . . . . . . . . . . . . . . 15
3.6 InstallingtheSIMcard................................. 17
Teldat S.A. Table of Contents
Teldat Connect-4GePlus i

Chapter4 Compliance.................................... 19
4.1 ManufacturerInformation............................... 19
4.2 SafetyWarnings................................... 22
4.3 WEEEinformation.................................. 22
4.4 REACH....................................... 22
4.5 Power usage and energy efficiency . . . . . . . . . . . . . . . . . . . . . . . . . . . 22
4.6 PSUEnergyEfficiency ................................ 23
4.7 EC Declaration of Conformity. . . . . . . . . . . . . . . . . . . . . . . . . . . . . . 24
4.8 CEMarking..................................... 24
4.9 Nationalrestrictions.................................. 24
4.10 OperatingFrequency................................. 24
4.11 Intended use of the equipment . . . . . . . . . . . . . . . . . . . . . . . . . . . . . 25
Appendix A Technical Information . . . . . . . . . . . . . . . . . . . . . . . . . . . . . . 26
A.1 Troubleshooting................................... 26
A.2 Updatingthesoftware................................. 26
A.3 Connectors ..................................... 27
A.3.1 LANConnector.................................... 27
A.3.2 WWANConnector.................................. 27
A.3.3 PowerSupplyConnector ............................... 27
A.4 TechnicalSpecifications................................ 28
A.4.1 HardwareArchitecture................................. 28
A.4.2 LANInterface .................................... 28
A.4.3 WirelessWANinterface................................ 30
A.4.4 PowerSupply.................................... 30
A.4.5 Dimensionsandweight................................ 30
A.4.6 Environmental Specifications . . . . . . . . . . . . . . . . . . . . . . . . . . . . . . 30
AppendixB RadioInformation................................. 31
B.1 RFWANspecifications................................ 31
Table of Contents Teldat S.A.
ii Teldat Connect-4GePlus

I Related Documents
Teldat Dm704-I Configuration and Monitoring
Teldat Dm709-I LAN Interfaces
Teldat Dm748-I Software Updating
Teldat Dm772-I Configuration Interfaces
Teldat Dm781-I Cellular Interface
Teldat S.A. Related Documents
Teldat Connect-4GePlus 1

Chapter 1 About This Guide
This is the installation guide for the Teldat Connect-4GePlus. It contains information on how to correctly install the
device in a working environment.
1.1 Supported Devices
The information included in this installation guide only applies to the Teldat Connect-4GePlus.
1.2 Who should read this manual?
This manual should be read by the support personnel who need to configure, maintain and monitor the device.
1.3 When should this manual be read?
Read this guide as soon as you are ready to familiarize yourself with the device and its components.
This manual will help you understand your new device in greater depth.
1.4 What can be found in this manual?
This installation guide contains the following information:
• Description of the features that are available in the Teldat Connect-4GePlus device.
• Technical specifications.
• Power supply requirements.
• Elements you can connect to the device while it is running.
• Installation and removal procedures for modules and power supplies.
• Description of the device LEDs and connectors.
• Troubleshooting.
1.5 What cannot be found in this manual?
This manual does not contain information regarding the device software or its configuration. For information on how
to configure this device, please see the relevant protocol manuals found on the Teldat website: ht-
tp://www.teldat.com.
1.6 How is the information organized?
Each chapter focuses on a specific part of the hardware and its components. All descriptive, technical specifications
and information on a component can be found in the relevant chapter.
1.7 Technical Support
Teldat S.A. offers a technical support service. Device software can be upgraded on a regular basis for maintenance
purposes and for new features.
Contact information:
Web: http://www.teldat.com
Tel.: +34 918 076 565
1 About This Guide Teldat S.A.
2Teldat Connect-4GePlus

Fax: +34 918 076 566
Email: suppor[email protected]
Teldat S.A. 1 About This Guide
Teldat Connect-4GePlus 3

Chapter 2 Teldat Connect-4GePlus
2.1 Characteristics
2.1.1 Power Supply
For further information on the power supply for the Teldat Connect-4GePlus, please see Components and Power
Supply on page 5 under section Power Source on page 12.
2.1.2 Hardware Monitoring
The Teldat Connect-4GePlus device's hardware is monitored via the LED panel, which provides visual information
on what is happening in the device. The LEDs indicate the state of the hardware components, whether or not there is
connectivity, data flows, etc.
For further information on the LED panel, please see Components on page 5 in the following chapter.
2 Teldat Connect-4GePlus Teldat S.A.
4Teldat Connect-4GePlus

Chapter 3 Components and Power Supply
The following chapter provides detailed information on the Teldat Connect-4GePlus chassis and its components.
This information includes:
• Components.
• Information on assembly.
• Power supply.
• RESET button.
• Data connection.
• SIM card installation.
3.1 Components
3.1.1 Top Panel
The following figure shows the top panel.
Fig. 1: Top Panel
The top panel components are as follows:
Top panel components
Item Description
A LED panel.
The LED panel provides information on the status of the components (indicating whether they are active or not) and
on network activity.
LEDs
LED Status Description
PWR Monochrome green Green -> Device powered.
Teldat S.A. 3 Components and Power Supply
Teldat Connect-4GePlus 5

LAN1 / LAN2 Tricolor Green -> Link has been established.
Blinking: connection data activity.
Amber -> Test in progress.
Red -> Disconnected.
Off -> Interface off.
W Tricolor Off -> System stopped.
Red -> Interface is unavailable because it is installing, disabled
(shutdown), or due to an auto-test failure.
Amber -> Idle:
• Rapid blinking. The device has not registered in the network, or
the quality is insufficient.
• Slow blinking. WCDMA connection.
• Steady. LTE connection.
Green -> Connected. Blinking: connection data activity.
SIM Tricolor Off -> System stopped.
Amber -> SIM2 Selected.
Green -> SIM1 Selected.
3.1.2 Front Panel
The following figure shows the front panel. Here you will find the majority of Teldat Connect-4GePlus connectors
and the SIM card slots.
3 Components and Power Supply Teldat S.A.
6Teldat Connect-4GePlus

Fig. 2: Front Panel
The following table provides information on each connector, as well as a description:
Front panel elements
Item Description
A Power source connection (PSU).
Refer to External Power Source on page 13 for more information on Power con-
nection and Power Supply on page 30 for power specifications applicable to the
Teldat Connect-4GePlus device.
B LAN1/POE 2.5 Gigabit Ethernet.
Refer to PoE on page 13 for more information on PoE connection
For more information on the LAN interface, refer to:
-LAN Connection on page 14
-LAN Connector on page 27
-LAN Interface on page 28
C LAN2. 2.5 Gigabit Ethernet.
For more information on the LAN interface, refer to:
-LAN Connection on page 14
-LAN Connector on page 27
-LAN Interface on page 28
Teldat S.A. 3 Components and Power Supply
Teldat Connect-4GePlus 7

D Kensington security slot
For further information, please see Standalone and anti-theft security cable on
page 9.
E Reset. Reset button.
For further information on how the reset button works, please see RESET Button
on page 13.
F SIM Card 1-2. Slot where you can insert the SIM cards.
Refer to Installing the SIM card on page 17 for more information on SIM installa-
tion.
3.1.3 Side Panels
Up to four antenna connectors are located on the side panels.
Fig. 3: Side panels
The connectors are as follows:
Side panel connectors
Item Description
ANT1
ANT2
ANT3
ANT4
Antenna connectors.
For more information on the WWAN interface, refer to:
-Connecting the WWAN Antennas on page 15
-WWAN Connector on page 27
-Wireless WAN interface on page 30
3.1.4 Underside Panel
The following elements can be found on the underside panel:
3 Components and Power Supply Teldat S.A.
8Teldat Connect-4GePlus

Fig. 4: Underside panel
The following table contains details on the relevant elements found on the underside panel.
Underside panel elements table
Item Description
A Rubber feet.
B Slots for wall mounting.
C Slots for ceiling mounting. (Optional.)
3.2 Assembly
3.2.1 Standalone and anti-theft security cable
The Teldat Connect-4GePlus can be placed as a standalone device on a flat, stable surface.
Make sure there is enough space around the device for ventilation purposes and that electricity cables can reach it.
Teldat Connect-4GePlus devices have been equipped with a standard Kensington security slot to which a security
cable can be attached. The T-bar lock of the security cable allows the device to be attached to an anchor point, thus
preventing potential thefts.
The security slot is located on the front panel of the housing, as shown in the following figure.
Teldat S.A. 3 Components and Power Supply
Teldat Connect-4GePlus 9

Fig. 5: Front Panel, side view
3.2.2 Wall mounting
The Teldat Connect-4GePlus can be mounted on the wall.
There are two slots on the underside of the device, used to fix it to the wall. You can see this in Underside Panel on
page 8.
We recommend the following accessories for wall mounting, valid for solid and Gypsum board (plaster) walls:
• 2 screws: [3.5x30 coach screw with a 90-degree head angle].
Fig. 6: Screw
• 2 wall anchors: [8mm diameter white ribbed wall anchor].
Fig. 7: Wall anchor
Warning
The screws must go into a wall stud (wood) or a wall anchor of the appropriate type for the wall. Screws
into drywall are not strong enough to mount the device.
There are two slots on the underside of the device that can be used to fix it to the wall. You can see this in the follow-
ing figure:
3 Components and Power Supply Teldat S.A.
10 Teldat Connect-4GePlus

To mount the device on a wall or another surface, follow these steps:
Procedure
Step 1 Align the two screws (3.5x30) horizontally on a wall (or any other vertical surface) and install them 11.6 cm
(0.25 inches) apart.
The screws should protrude 0.6 cm (0.25 inch) from the wall surface.
Warning
If you are installing the screws into drywall, use hollow-wall anchors (8 mm – 5/16 inch) to secure the
screws. If the screws are not properly anchored, the strain of the cables connected to the device's back
panel could pull the device from the wall.
Step 2 Hang the device on the screws.
3.2.3 Ceiling mounting
To attach the Teldat Connect-4GePlus device to the ceiling, use the appropriate support (not included, must be
ordered separately).
Procedure
Step 1. Use the bracket as a template to mark out the drilling holes. Screw the bracket to the wall or ceiling with the
dowels and screws provided.
Step 2. When mounting the unit on the struts of an intermediate ceiling, screw the plastic clips supplied to the back of
Teldat S.A. 3 Components and Power Supply
Teldat Connect-4GePlus 11

the bracket.
Fig. 9: Ceiling mounting support
Step 3. Connect all necessary cables (Ethernet, power supply) to the device before inserting it into the bracket. Make
sure that the cables are not a source of danger!
Step 4. Fit the device onto the 3 metal pins and push it down until it clicks into place. When mounting on an interme-
diate ceiling, push the plastic clips against the braces so that they click into place too.
Step 5. If necessary, secure the device with a Kensington lock to safeguard against theft.
The following clips are included in the scope of delivery for attachment to intermediate ceiling struts:
Fig. 10: Ceiling clips
Warning
Make sure that there are no concealed pipes and cables at the desired drilling location before drilling
any mounting holes. Damage to electricity cables, gas, water and sewage pipes can result in death or
material damage. Choose the installation location so that as few obstacles or electrical appliances as
possible disturb the connection.
Warning
Hollow wall anchors are required for mounting on drywall to adequately secure the router against po-
tential tensile forces.
Warning
The bracing of an intermediate ceiling must be able to withstand a permanent tensile force. When
mounting the unit on an intermediate ceiling, make sure that the router fully engages in the brace with
the plastic clips. Incorrect installation can cause the router to fall from the ceiling and endanger people
and equipment.
3.3 Power Source
The Teldat Connect-4GePlus is powered though an external AC/DC source or through an Ethernet cable (provided
it complies with the POE 802.3at standard).
3 Components and Power Supply Teldat S.A.
12 Teldat Connect-4GePlus

Warning
The equipment must be used with the power supply provided by the manufacturer.
Workplace Conditions. Main Characteristics
• Avoid humid and/or dusty locations.
• Direct exposure to sunlight and to other heat sources should be avoided. The device should not be placed
amongst papers, magazines or other elements that could hinder natural air circulation.
• The device should not be placed near strong electromagnetic fields such as speakers, engines, etc.
• Knocks and/or strong vibrations should be avoided during transport, operation and storage.
3.3.1 External Power Source
To avoid electric shocks, residual current circulation, and other unwanted effects that also affect communications, the
following is recommended:
Warning
All interconnected communication devices should be plugged into THE SAME GROUNDED POWER
OUTLET, which should at the same time be of good quality (lower than 10 ohms).
We recommend connecting all data devices to the same power source regardless of whether the work-
place has an uninterrupted power supply system (UPS), a regulated supply or is independent of other
power supplies (such as lighting, etc.). This will help to prevent malfunctions and premature aging of
the drivers and other components.
3.3.2 PoE
The Teldat Connect-4GePlus device can be powered through an Ethernet cable, provided the latter complies with
the POE 802.3at standard (PoE+). The LAN1/PoE port is enabled for this.
The image below shows how to connect the PoE injector to the device.
Fig. 11: Connecting the PoE adapter to the device
Teldat S.A. offers an optional Phyhong POEA30U-1AT-2I-R PoE+ injector as an accessory. Please contact your
dealer for more information.
3.4 RESET Button
The different features of the RESET button are described below.
Teldat S.A. 3 Components and Power Supply
Teldat Connect-4GePlus 13

Fig. 12: Reset button
3.4.1 Rebooting the device
Once the device is operating normally, pressing the RESET button will restart the device.
3.4.2 Default Configuration
The RESET button allows you to boot the device with its default configuration through the following steps:
• With the device switched off, keep the RESET button pressed until the device switches on.
• The POWER LED (green) will light up and the LAN1 LED will begin to blink. This blinking will continue for 10
seconds.
• For the device to boot with the default configuration, release the Reset button while the LAN1 LED is blinking (i.e.,
before the 10 second period expires).
Once the default configuration is running, you need to know what type of license the device has. Depending on the li-
cense, the device will operate as:
• Router: If you have a Router License, the device will behave as a router. In this case, the default configuration es-
tablishes the following access IP address and mask:
IP address: 192.168.1.1
IP mask: 255.255.255.0
• Enabler: If you have an Enabler License, the device will have a special configuration. Please see manual Teldat
Dm1030-I - Teldat Connect-4GePlus User Manual for further information on how to access the device and its
configuration.
To find out what type of license you have, execute a ping to IP address 192.168.1.1. The device, previously con-
figured with the default configuration and duly connected by means of an Ethernet cable, will respond to the ping in-
dicating whether you are dealing with a Router or an Enabler.
Note
Some devices leave the factory with customized settings. As a result of this personalization, the device
may have a different default configuration to the one shown above.
3.5 Connecting data
The Teldat Connect-4GePlus has the following data connections.
3.5.1 LAN Connection
The Teldat Connect-4GePlus incorporates two Ethernet 10/100/1000/2500 BaseT ports with automatic MDI/MDIX.
3 Components and Power Supply Teldat S.A.
14 Teldat Connect-4GePlus

Fig. 13: Ethernet Ports
Note
Only the LAN1 connector is available during booting and in BIOS mode.
Note
An appropriate software license must be installed for the second LAN (LAN2) interface to work.
3.5.2 Connecting the WWAN Antennas
The Teldat Connect-4GePlus has four connectors for WWAN antennas on the side panels.
To assemble or dismantle the antennas, simply screw or unscrew them into or out of the connectors located on the
side panels of the device.
Installing these antennas in the Teldat Connect-4GePlus is essential to improve the quality of the signal received
and transmitted by the cellular model.
Note
To achieve good quality performance, the Teldat Connect-4GePlus device should always have the
WWAN antennas installed.
Some cellular telephony technologies use the antenna diversity technique to improve the quality of the received sig-
nal. The Teldat Connect-4GePlus family incorporates several WWAN connectors for this.
Fig. 14: WWAN connectors seen from the front side
Teldat S.A. 3 Components and Power Supply
Teldat Connect-4GePlus 15

Fig. 15: WWAN connectors seen from the bottom
Antenna usage
ANT4 ANT3 ANT2 ANT1
4G (Diversity) 4G (Main)
When the antennas are not directly connected to the device but installed through extension cords, the minimum dis-
tance between the two of them must be 7 cm. The maximum recommended distance between the two is 25 cm.
To achieve optimum performance, the radio frequency accessories installed (antennas and cables) should be those
recommended by Teldat.
Teldat has a series of accessories (90º mount antennas, antennas for exterior installation, antennas for ceiling install-
ation, extension cables, etc.) that allow you to install the devices in different locations.
3.5.2.1 Placing the antenna
The orientation of the antenna and its location with respect to other wireless devices and radiation sources (such as
communication devices, personal computers, etc.) can impact device performance.
Antennas transmit and receive radio signals. Environmental factors (such as the distance between the device and
the base station), physical obstacles and other RF interferences can impact their performance.
For optimum coverage, follow these steps:
• Whenever possible, place the antenna where there are no physical obstacles. Obstacles between the antenna and
the base station degrade the wireless signal. Place the antenna above ground level facing the nearest base sta-
tion.
• The density of materials also affects antennas. Place them away from any type of wall, metal screens, mirrors, etc.
• Do not place the antenna near columns, which may throw shadows and reduce the coverage area.
• Keep the antenna away from metal pipes (such as those used for plumbing, air-conditioning, etc.).
• Please bear in mind that other wireless devices (such as telephones, microwaves, etc.) can temporarily interfere
with the quality of the radio signal.
• We do not recommend installing antennas near, or between, racks containing communication devices, computers,
etc. Use an extension cable and place the device outside.
3 Components and Power Supply Teldat S.A.
16 Teldat Connect-4GePlus
Table of contents
Other Teldat Network Router manuals
Teldat
Teldat iM8 User manual

Teldat
Teldat H1 RAIL Series User manual
Teldat
Teldat 4Ge User manual

Teldat
Teldat H2 RAIL Lite User manual

Teldat
Teldat 4Ge User manual
Teldat
Teldat Connect-FW5G User manual
Teldat
Teldat WWAN Enabler User manual

Teldat
Teldat T200 User manual

Teldat
Teldat C1+LS User manual
Teldat
Teldat C User manual
Teldat
Teldat IMBER SMART User manual

Teldat
Teldat ATLAS 60 NW User manual
Teldat
Teldat H1 HSDPA User manual
Teldat
Teldat ATLAS X60 User manual
Teldat
Teldat RS123 Seies User manual

Teldat
Teldat RXL15000 User manual
Teldat
Teldat H2 RAIL User manual
Teldat
Teldat Teldat-3Ge User manual
Teldat
Teldat C1+L User manual

Teldat
Teldat G1N User manual
