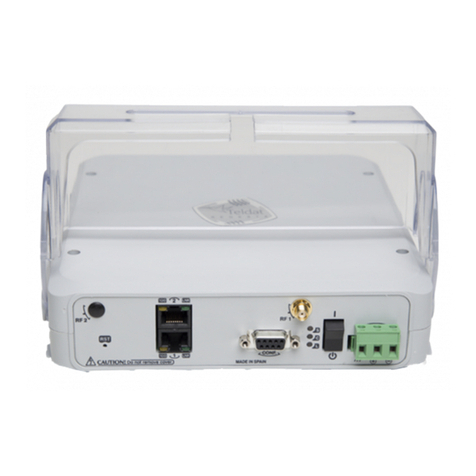
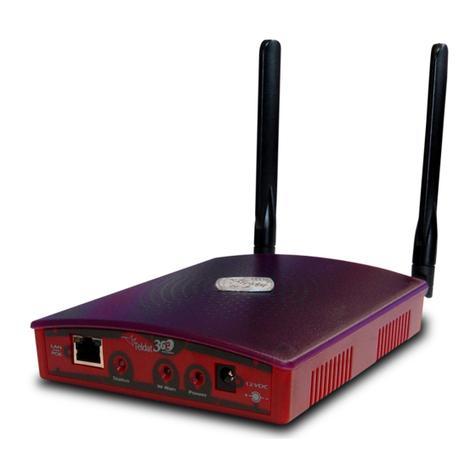
Teldat G1N User manual

Teldat Router G1N
Installation Manual
Copyright© Teldat-DM431-I Version 4.0 7/2015 Teldat S.A.
Teldat S.A. Manual
Teldat Router G1N 1

Legal Notice
Warranty
This publication is subject to change.
Teldat S.A. offers no warranty whatsoever for information contained in this manual.
Teldat S.A. is not liable for any direct, indirect, collateral, consequential or any other damage connected to the deliv-
ery, supply or use of this manual.
Manual Teldat S.A.
2Teldat Router G1N

Table of Contents
I ImportantInformation................................ 1
Chapter1 Description..................................... 2
1.1 Introduction...................................... 2
Chapter2 Installation...................................... 3
2.1 Connections...................................... 3
2.1.1 PowerSourceConnection................................ 3
2.1.2 DataConnection.................................... 4
2.1.3 Connecting the WWAN antenna . . . . . . . . . . . . . . . . . . . . . . . . . . . . . 4
2.1.4 Connecting to the WLAN antenna. . . . . . . . . . . . . . . . . . . . . . . . . . . . . 6
2.1.5 Connecting for configuration . . . . . . . . . . . . . . . . . . . . . . . . . . . . . . . 6
2.2 InstallingtheSIMcard.................................. 7
2.2.1 Installing the internal SIM . . . . . . . . . . . . . . . . . . . . . . . . . . . . . . . . 7
2.2.2 Installing the external SIM . . . . . . . . . . . . . . . . . . . . . . . . . . . . . . . . 8
Chapter3 MeaningoftheLEDs............................... 10
Chapter4 Microswitches................................... 11
4.1 Procedure to ignore the configuration . . . . . . . . . . . . . . . . . . . . . . . . . . 11
Appendix A Technical Information. . . . . . . . . . . . . . . . . . . . . . . . . . . . . . . 13
A.1 Troubleshooting................................... 13
A.2 Upgradingthesoftware................................ 13
A.3 Connectors ..................................... 13
A.3.1 LANConnector ................................... 14
A.3.2 WWANConnectors.................................. 14
A.3.3 WLANConnectors.................................. 14
A.3.4 ConfigurationConnector................................ 15
A.4 TechnicalSpecifications................................ 15
A.4.1 HardwareArchitecture ................................ 15
A.4.2 LANInterface .................................... 15
A.4.3 WirelessWANInterface................................ 15
A.4.4 WirelessLANInterface................................ 15
A.4.5 ConfigurationInterface ................................ 16
A.4.6 PowerSupply.................................... 16
A.4.7 ExternalPowerSource................................ 16
A.4.8 DimensionsandWeight................................ 16
Teldat S.A. Table of Contents
Teldat Router G1N i

A.4.9 Environmental Specifications . . . . . . . . . . . . . . . . . . . . . . . . . . . . . . 16
AppendixB Safetyinformation ................................ 17
B.1 Recycling and the Environment . . . . . . . . . . . . . . . . . . . . . . . . . . . . . 17
B.2 Translated Safety Warnings . . . . . . . . . . . . . . . . . . . . . . . . . . . . . . 17
Table of Contents Teldat S.A.
ii Teldat Router G1N

I Important Information
Caution
The manufacturer reserves the right to make changes and improvements to the appropriate features in
both the software and hardware of this product, modifying the specifications of this manual without prior
notice.
The images presented on the front and back panels of the devices are provided as information
guideline only. Some small modifications may exist in the actual device.
Warning
The equipment is intended to be installed by Service Personnel and only handled by qualified person-
nel. If not, the device may be damaged and malfunction.
This device contains elements that are sensitive to electrostatic surges and shocks. Therefore, it is es-
sential when handling the equipment that an antistatic wriststrap is connected to the device chassis and
that this is placed on an antistatic mat. Furthermore, it is crucial to avoid any kind of contact between
the device components and necklaces, bracelets, rings, ties etc.
Teldat S.A. Important Information
Teldat Router G1N 1

Chapter 1 Description
1.1 Introduction
The Teldat G1N routers family is composed of a range of IP routers for general purposes with a wide application
area: personal environments, SOHO/SME and corporative. The Teldat G1N is an additional member of this family.
The main characteristic of this router family lies in the possibility in accessing data networks through cellular or mo-
bile telephony technologies. The Teldat G1N routers are suitable for a wide variety of IP scenarios: from providing
simultaneous access to Internet for private LAN users to the adaptation of teleprocess networks. Their most common
applications are:
• Access router
• Backup for LAN networks
The Teldat G1N range gives answer to access needs for cellular technologies (GPRS, GPRS, and EDGE). This
range incorporates a four port Ethernet LAN Switch for local area networks (LAN) and can incorporate a Wireless
LAN MINI-PCI Module.
This manual will show you how to install and connect these devices.
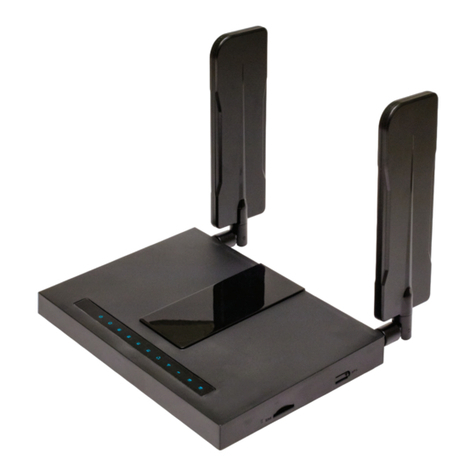
Fig. 1: Teldat G1N: External aspect
1 Description Teldat S.A.
2Teldat Router G1N

Chapter 2 Installation
2.1 Connections
Caution
Before connecting the router please read the following instructions carefully!
Workplace Conditions. Main Characteristics
• Excessive cold and heat should be avoided, as should humidity and dust.
• Direct exposure to sunlight should be avoided as well as other heat sources. The device should not be placed
amongst papers, magazines or other elements that could hinder natural air circulation.
• The device should not be placed very close to strong electromagnetic fields such as speakers, engines, etc.
• Knocks and/or strong vibrations should be avoided during transport, operation and storage.
Warning
The electric current in power cables, telephone lines and communication cables is dangerous. To pre-
vent electric shocks, before installing, handling or opening the equipment covers, connect and discon-
nect the cables as follows:
To Connect To Disconnect
Make sure that the device’s power supply switch is in the
OFF position
Turn the power switch to the OFF position
Make sure that the power supply is not connected either
to the main electricity source or to the device
Disconnect the power supply from the main electricity
source
Connect all data cables Disconnect the power supply to the device
Connect the power supply to the device Disconnect the data cables
Connect the power supply to the main electricity source
Turn the power supply switch to the ON position
2.1.1 Power Source Connection
The Teldat G1N router is powered with an external AC/DC source.
To avoid electric shocks, residual current circulation and other unwanted effects, also affecting communications, the
following is recommended:
Warning
All interconnected communication devices should be plugged to THE SAME GROUNDED POWER
OUTLET, which should at the same time be of good quality (lower than 10 ohms).
Whether the workplace is provided with an uninterrupted power supply system (UPS), regulated supply
or it is independent from the rest (such as lighting, etc.); it is highly recommended that all data devices
should be connected to the same power source. This will avoid operating and premature aging prob-
lems of drivers and other components.
Teldat S.A. 2 Installation
Teldat Router G1N 3

Fig. 2: Power supply connection with external source
To connect the power source to the device, follow the steps listed in the earlier table: ensure that the switch is OFF
(0) and the power supply is NOT connected to the main electricity supply; find the 12 V DC connector, located on the
rear panel of the device, and plug it into the power source.
2.1.2 Data Connection
The Teldat G1N router family has the following available connectors. Some of these connectors may not be avail-
able depending on the model:
SWITCH:
The Teldat G1N routers can incorporate a 4 port Switch, 10/100BaseT with automatic MDI/MDIX to connect to a loc-
al area network (LAN); this device has a 100 LED indicating connection at 100 Mbps and a 10 LED indicating con-
nection at 10 Mbps.
Please pay careful attention to the labeling to avoid confusing this switch with other types of ports.
This is available depending on the model.
Fig. 3: LAN Switch ports (4)
2.1.3 Connecting the WWAN antenna
The Teldat G1N routers have one connector in order to connect the WWAN antenna. To assemble and dismantle
the antenna, simply screw them to the connectors labeled WWAN main, which is located on the rear of the device.
Antenna installation is essential in the Teldat G1N routers in order to improve the quality of the signal received and
transmitted by the Wireless WAN module (GSM).
Note
To obtain optimum performance, the router should always have the WWAN antenna installed.
The device must have the corresponding software license installed to ensure the Wireless WAN inter-
2 Installation Teldat S.A.
4Teldat Router G1N

face is operative.
The following image shows you where to locate the antenna connector.
Fig. 4: Antenna connector for Wireless WAN
In order to achieve optimum features, the installed radio frequency accessories (antenna and cables) should be
those recommended by Teldat.
Teldat has a series of accessories (90º mount antennas, exterior antennas, ceiling antennas, extension cables, etc.)
enabling the Teldat G1N routers to be installed in different locations.
2.1.3.1 Positioning the antenna
The antenna orientation, its location with respect to other wireless devices and radiation devices, such as communic-
ation devices, personal computers, etc., can significantly influence device performance.
The antennas transmit and receive radio signals. Performance is also affected by environmental factors such as the
distance between the device and the base station, physical obstacles and other interferences due to radio frequen-
cies (RF).
In order to achieve the best coverage, carry out the following instructions:
• Whenever possible, place the antenna where there are no physical obstacles. Obstacles between the antenna and
the base station degrade the wireless signal. Situate the antenna above ground level and ensure that it is suitably
orientated towards the nearest base station.
• Density of materials also affects the antennas. Place them away from any type of wall, metal screens, mirrors, etc.
• Do not place the antenna near columns that can produce shadow areas and reduce the coverage zone.
• Keep the antenna away from metal pipes such as canals, air-conditioning, etc.
• Please bear in mind that other wireless devices such as telephones, microwaves, etc., can temporarily interfere
with the quality of the wireless signal.
• We do not recommend that you install the antennas near or between racks containing communication devices,
computers, etc. Use an extension cable and position the antenna outside.
The following recommendations are applicable to all wireless devices:
• Do not touch or move the antenna while the device is transmitting or receiving.
• Do not touch any equipment that contains devices which radiate where the antenna is very close to or touching any
exposed part of the body, particularly the face and eyes, when it is transmitting.
• Do not install the device in areas where the atmosphere is potentially explosive.
• Wireless devices can cause interference in other devices. Do not use the device in areas where medical equip-
ment is installed.
• In order to ensure that you are complying with the R&TTE 1999/5/EC norm, the device must be at least 15 cm
away from any person when operating.
Teldat S.A. 2 Installation
Teldat Router G1N 5

2.1.4 Connecting to the WLAN antenna
The Teldat G1N router has two connectors for an external antenna. This improves the quality of the signal received
and transmitted through the Wireless LAN module. This module is optional; your device may not have Wireless LAN
and, consequently, no antennas. To assemble and disassemble the antennas, simply screw them into the connect-
ors labeled WLAN located on the rear of the device.
Fig. 5: Antenna connectors for the Wireless LAN
So that the Wireless LAN interface is operative, the device must have a plug-in Wireless LAN card and the corres-
ponding software license. Depending on the model, the antennas could be an original factory setting. If your device
does not have the Wireless LAN module incorporated, you can obtain this later on. The manual accompanying this
module will indicate how to install it in the device, together with the corresponding antenna cables.
2.1.5 Connecting for configuration
The Teldat G1N routers have a RJ45 female connector on the front panel referred to as “ Conf.” which provides ac-
cess to the device local console. In order to configure this, you must connect the “ Conf.” port to an asynchronous ter-
minal (or to a PC with terminal emulation).
Fig. 6: Teldat G1N configuration connector
Note
Configuration for the terminal must be as follows:
- Speed: 9600 bps.
- Eight data bits.
- One stop bit.
- No parity bit.
- No type of flow control.
Connection to the configuration port can be carried out using the RJ45 connectors cable, provided with the device,
together with the RJ45 Female-DB9 Female adapter also provided with the device. In cases where the terminal has
DB25 connectors, you will need to use an additional adapter.
2 Installation Teldat S.A.
6Teldat Router G1N

Fig. 7: Connections for the configuration
2.2 Installing the SIM card
The Teldat G1N routers have a Wireless WAN interface that, in order to operate, may require at least one SIM card
that must be inserted into the device.
The Teldat G1N routers have two SIM trays. One is accessible from the outside and the other is located inside the
device.
You must always insert at least one SIM card. When only one SIM card is going to be used in these devices, it can
be inserted into either of the two SIM trays. However you must remember that you will need to suitably configured
the router so it selects the appropriate tray.
Warning
Never install the SIM card when the device is switched on.
Always disconnect the device from the main power supply before inserting the internal SIM.
Always disconnect the device before removing the casing to get to the internal SIM.
When inserting the SIM card, please protect yourself against electrostatic discharges (ESD).
Do not touch the SIM card connectors.
2.2.1 Installing the internal SIM
To access the internal SIM you need to open the upper casing of the device. To do this you need to undo the four
screws which are on the underside of the device. You’ll find the tray just below the WWAN antenna connector and
situated on the device’s main motherboard.
In order to insert a SIM card in the internal tray, locate the retaining flange (metal fastening with OPEN and LOCK on
it) so you can open the tray and place the SIM card on it. The steps are as follows:
(1) Push the fastening to the right (OPEN) until the tray is released.
(2) Open the upper part of the tray.
Teldat S.A. 2 Installation
Teldat Router G1N 7

(3) Fully insert the SIM card using the guides.
(4) Return the tray to its original position.
(5) While pressing on the tray, push the fastening towards the inside of the tray (LOCK).
(6) The card should be completely held by the tray.
2.2.2 Installing the external SIM
The external SIM tray is located on the rear of the device. The following figure shows where you can find it.
2 Installation Teldat S.A.
8Teldat Router G1N

Fig. 8: External SIM tray
Procedure:
• Place the device as indicated in the above figure.
• Extract the tray. The tray is located in the red colored slot you can see in the above figure (SIM CARD).
• To extract it, press the yellow button located on the right of the slot by using a pointed object such as a ballpoint as
shown in the following figure.
Fig. 9: Extracting the external SIM
• In order to insert the SIM card, first place it in the tray.
• If the tray already has a SIM card, you need to extract it by pushing the circular hole underneath the tray.
• Subsequently, you need to place the SIM on the tray so that its connectors can be seen; these are normally a gold
color. In addition, you must make sure that the tray notch coincides with the SIM notch.
• Then insert the tray in the slot using the guides.
Teldat S.A. 2 Installation
Teldat Router G1N 9

Chapter 3 Meaning of the LEDs
The following figure shows the positions of the LEDs on the front panel of the device:
Fig. 10: Teldat G1N: Front panel
ON Power-on indicator. It lights up when connected to the power.
SRouter operations
OFF: System stopped.
GREEN: System initialized and operating.
YELLOW: System with Telnet session established.
LANx Ethernet LAN switch interface:
OFF: Interface not supported or not available.
RED: Interface active, there isn’t an active connected device.
GREEN: Interface active, there is an active connected device.
Flashing: “heartbeat”.
AWireless WAN interface channel 0 (cellular0/1).
OFF: Interface not available or not installed (not supported).
RED: Interface not established, there is no data connection.
YELLOW: Registered in the SIM carrier Network.
GREEN: Communications established.
BWireless WAN interface channel 1 (cellular1/1).
OFF: Interface not available or not installed (not supported).
RED: Interface not established, there is no data connection.
YELLOW: Registered in the SIM carrier Network.
GREEN: Communications established.
CThe device has a MINI-PCI slot where a Wireless LAN daughter card can be in-
stalled.
OFF: Interface not available or not installed (not supported).
RED: Interface not established, there is no data connection.
YELLOW: Connecting.
GREEN: Communications established.
3 Meaning of the LEDs Teldat S.A.
10 Teldat Router G1N

Chapter 4 Microswitches
The Teldat G1N router has a block of 8 microswitches available that are used for maintenance and test tasks. In this
case, they are only used to load the default configuration.
This block of microswitches can be found on the underside of the Teldat G1N routers.
These switches should not be handled by the user except to establish the default configurations.
Note
In order for the device to operate correctly, all the microswitches must be in the OFF position.
4.1 Procedure to ignore the configuration
This procedure is applied if you have to discard the whole configuration of the device, for example, if you cannot re-
member the password.
The procedure is as follows:
(a) Turn off the device through the ON/OFF switch.
(b) Using a screwdriver move microswitch ‘5’ to the ON position.
(c) Turn the device on with the ON/OFF switch.
When the device is switched on, a message similar to the one shown below will appear on the configuration console:
**************************************************
**************************************************
**************************************************
BOOT CODE VERSION: 03.02 Apr 28 2009 11:25:37
gzip Apr 28 2009 11:19:34
P.C.B.: C8 MASK:0C10 Microcode:00E1
START FROM FLASH
BIOS CODE DUMP....................
BIOS DATA DUMP....
End of BIOS dump
BIOS CODE VERSION: 03.02
CLK=262144 KHz BUSCLK=65536 KHz PCICLK=32768 KHz L1
Date: 05/25/09, Monday Time: 13:37:06
SDRAM size: 64 Megabytes
BANK 0: 64 Megabytes (detected)
I_Cache: ON
D_Cache: ON Write-Back
FLASH: 16 Mb.
NVRAM: 128 Kb.
EEPROM: 2048 Bytes.
DPRAM: 8192 Bytes.
SWITCH 10/100
SECURITY ENGINE
PCI device: Host bridge
(Bus: 0, Device: 0, Function: 0)
(Vendor: 0x1057, Device: 0x18C1)
(Subs. Vendor: 0x0000, Subs. Device: 0x0000)
Teldat S.A. 4 Microswitches
Teldat Router G1N 11

Slot 1 - PCI device: serial bus controller
(Bus: 0, Device: 10, Function: 0)
(Vendor: 0x1131, Device: 0x1561)
(Subs. Vendor: 0x5444, Subs. Device: 0x2800)
Slot 1 - PCI device: serial bus controller
(Bus: 0, Device: 10, Function: 2)
(Vendor: 0x1131, Device: 0x1562)
(Subs. Vendor: 0x5444, Subs. Device: 0x2800)
Slot 2 - PCI device: Ethernet controller
(Bus: 0, Device: 29, Function: 0)
(Vendor: 0x168C, Device: 0x0013)
(Subs. Vendor: 0x185F, Subs. Device: 0x1012)
Current production date: 09 21
Current software license: 20 12
S/N: 682/00100
BIOS MAC Add: 00-a0-26-c8-00-64
>>
........
TRYING APP CODE DUMP
(CONFIGURED) APPCODE1.BIN ver.: 0.10.7.32 0.0.0.0
.............................................................................
.............................................................................
.............................................................................
......................
APP DATA DUMP ........................................
Running application
Default configuration used
Parsing text mode configuration ...
Configuration parsed
Initializing
Press any key to get started
On reaching this point, you can set microswitch ‘5’ in the OFF position (you don’t need to turn off the device). This
way, the next time you restart the device, the saved configuration is adhered to.
4 Microswitches Teldat S.A.
12 Teldat Router G1N

Appendix A Technical Information
A.1 Troubleshooting
Below, you will find a table, which will help you to solve problems during the installation of the device. If you cannot
resolve the problem, please consult your distributor for additional information.
Symptom Solution
None of the LEDs lights up on
the device.
Check the power supply to the device (power source, ON/OFF switch, main power
outlet).
The SLED does not light up. Check that all the microswitches are in the OFF position.
The LAN LED does not light up
in green.
Check that the LED after the LINK is lit up; if it isn’t, check the Ethernet cable and
the network connection (it may be that you need a crossover cable).
LED A remains lit up in red. Check that the SIM card has been inserted correctly,
or
Check that the SIM PIN is correct
or
Check that the antenna is properly installed (been screwed in correctly)
or
Get your technical service to check that the device is in the optimum position for
the service.
A.2 Upgrading the software
The Teldat G1N router family can be updated to new releases. Please consult your distributor for further details on
new releases.
There are various ways to upgrade a Teldat router.
The software required to upgrade Teldat routers is supplied in a format known as distribution. This consists of a
single file which contains all the files needed to update your device as well as in-depth information on the contents of
the files.
The Teldat G1N router incorporates independent modules for the Wireless WAN interface. You can use modules
from various manufacturers, or even various modules from the same manufacturer, depending on the technology
used. Generally the modules’ firmware is independent of the device’s software. There is an UPGRADE file for each
Wireless LAN module. Please ask you distributor for the correct upgrade file for the module in your device. The
GPRS interface manual (Dm 747-I) explains how to upgrade the module.
A.3 Connectors
Teldat S.A. Technical Information
Teldat Router G1N 13

A.3.1 LAN Connector
RJ45 LAN RJ45 PIN LAN
1
2
3
4
5
6
7
8
(input)
(input)
Rx+(output)
--
--
Rx-(output)
--
--
A.3.2 WWAN Connectors
PIN ANT
Internal
External
RF in/out
GND
A.3.3 WLAN Connectors
PIN ANT
Internal
External
RF in/out
GND
Technical Information Teldat S.A.
14 Teldat Router G1N

A.3.4 Configuration Connector
RJ45 CONFIGURATION RJ45 PIN CONF
1
2
3
4
5
6
7
8
--
RxD
GND
--
--
GND
TxD
--
A.4 Technical Specifications
A.4.1 Hardware Architecture
PROCESSORS Motorola PowerPC MPC8xx
MEMORY 32/128 Mbytes in SDRAM
STORAGE UNIT FLASH Memory (8/32Mbytes)
EEPROM 2 Kbytes, NVRAM 128 Kbytes
A.4.2 LAN Interface
PROTOCOLS Ethernet (802.3)
SPEED SWITCH 10/100 Mbps (BaseT)
CONNECTOR RJ45 female
A.4.3 Wireless WAN Interface
STANDARDS GSM, GPRS, EDGE
CONNECTOR RF SMA Female
ANTENNA Please see the manual on the antennas for Cellular and GPRS interfaces.
A.4.4 Wireless LAN Interface
STANDARDS Please see the manual on Wireless LAN
SPEED Please see the manual on Wireless LAN
CONNECTOR 2 RF SMA Female
Teldat S.A. Technical Information
Teldat Router G1N 15

A.4.5 Configuration Interface
LOCAL TERMINAL V.24 9.600-8-N-1- without flow control.
CONNECTOR RJ45 female, on the rear panel of the device.
A.4.6 Power Supply
INPUT VOLTAGE +12 V DC
INPUT CURRENT 1,5 A
MAXIMUM POWER 18 W
A.4.7 External Power Source
INPUT VOLTAGE 100-240 V AC
INPUT CURRENT 0,4 A
INPUT FREQUENCY 50-60 Hz
MAXIMUM POWER 16 W
A.4.8 Dimensions and Weight
TYPE Desktop.
LENGTH x WIDTH x HEIGHT 220 x 220 x 30 mm
WEIGHT 0,9 kg
A.4.9 Environmental Specifications
AMBIENT TEMPERATURE ON: 5º to 45 ºC. OFF: -20º to 60 ºC
RELATIVE HUMIDITY ON: 8 % to 85%. OFF: 5 % to 90 %
Technical Information Teldat S.A.
16 Teldat Router G1N
Table of contents
Other Teldat Network Router manuals

Teldat
Teldat iM8 User manual

Teldat
Teldat 5Ge-Rail User manual

Teldat
Teldat 4Ge User manual

Teldat
Teldat iM8-Cx User manual

Teldat
Teldat H2 RAIL User manual

Teldat
Teldat ATLAS 160 User manual

Teldat
Teldat Regesta Smart PLC User manual

Teldat
Teldat Connect-FW5G User manual

Teldat
Teldat Connect-104 User manual

Teldat
Teldat SDE User manual

Teldat
Teldat RXL14000 User manual

Teldat
Teldat RS300 Series User manual

Teldat
Teldat H1 HSDPA User manual

Teldat
Teldat M1 User manual

Teldat
Teldat M1 User manual

Teldat
Teldat M2 User manual

Teldat
Teldat ATLAS X60 User manual

Teldat
Teldat RS1800 Series User manual

Teldat
Teldat Teldat-3Ge User manual

Teldat
Teldat H2 RAIL User manual