WaveMaster 8 Zi-B Getting Started Guide 5
Powering On/Off
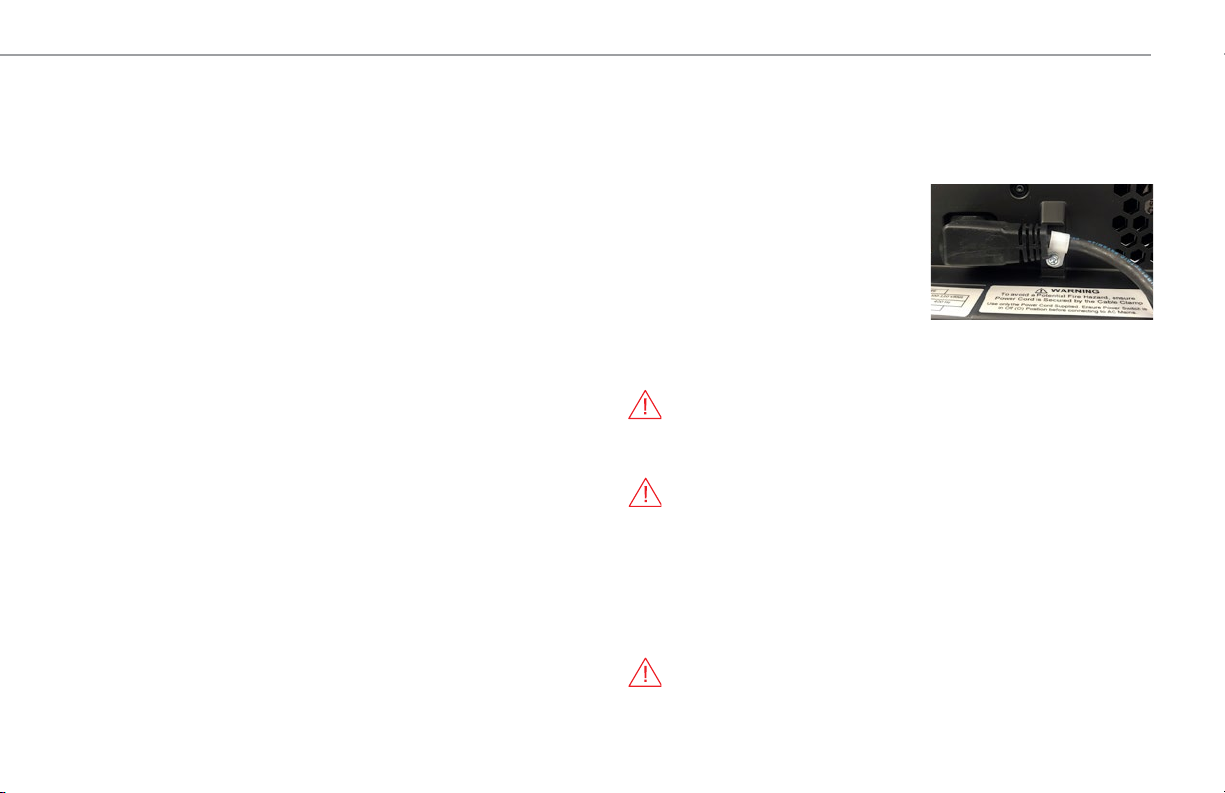
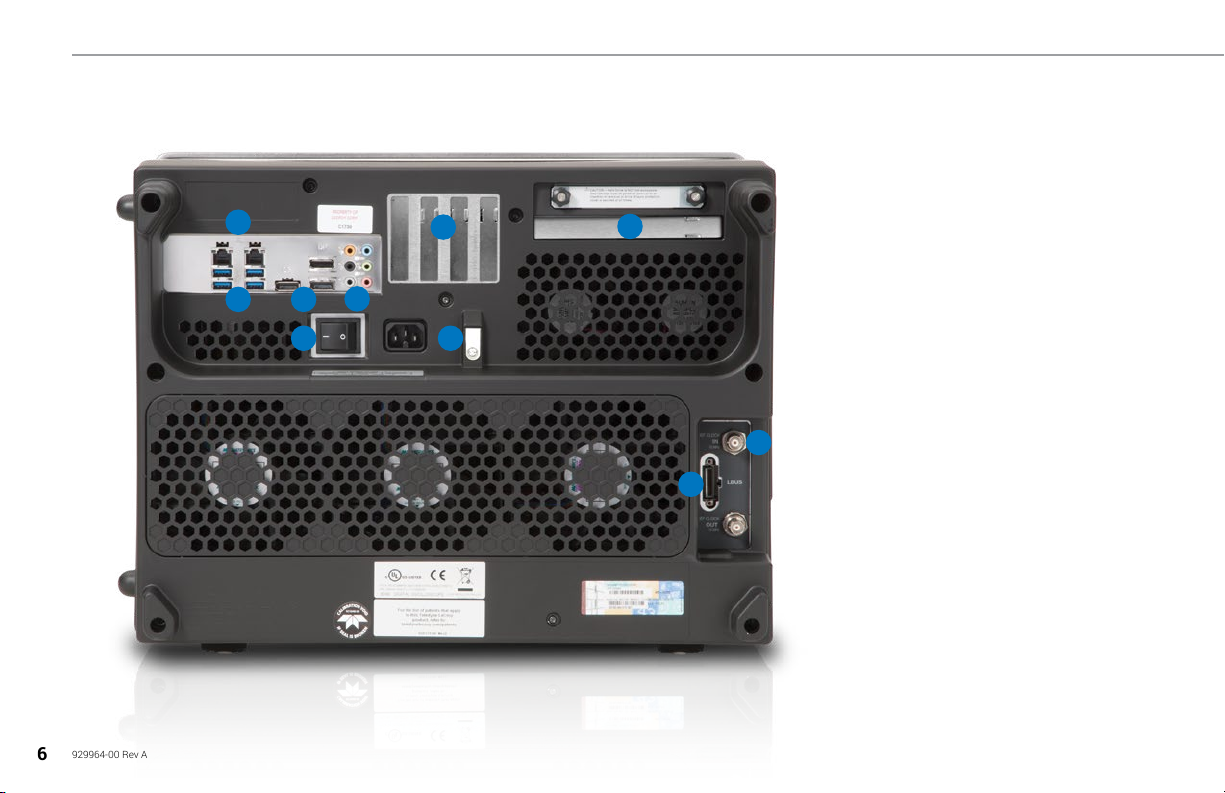
Before connecting the power cord, flip the AC Power Switch on the
back of the oscilloscope (p.6) to the Off position. Always support the
power cord by running it through the Power Cable Clamp. Use a Philips
screwdriver to remove the clamp,
attach the power cord to the AC inlet,
then secure the clamp over the cord as
shown here.
After securing the cord to the
oscilloscope, connect it to a grounded
AC power outlet. Flip the AC power
Switch On, then, press the Standby
Power Button on the front of the instrument to turn on the instrument. The
button will light to show the oscilloscope is operational.
CAUTION. Do not power on or calibrate with a signal attached.
Press the Power button again or use or the File > Shutdown menu option
to execute a proper shut down process and preserve settings.
CAUTION. Do not press and hold the Power button. This will execute
a hard shutdown, but may not preserve setups and data.
The Power button does not disconnect the oscilloscope from the AC power
supply, but puts it into "Standby" mode. Some “housekeeping” circuitry
continues to draw power. The only way to fully power down the instrument
is to turn off the AC Power Switch on the back, or unplug the power cord
from the outlet. We recommend unplugging the instrument if it will remain
unused for a long period of time
CAUTION. Do not change the Windows® Power setting to System
Standby or System Hibernate. Doing so may cause failure.
OVERVIEW
The removable front panel houses buttons and knobs that control
acquisition settings. The front panel release button lets you detach
the front panel and use it like a remote. Operate the instrument using
front panel hard controls, display soft controls, or a mix of both that is
convenient for you. See "Front Panel" on p.9.
The touch screen display is the principal viewing and control center of
the oscilloscope. See p.10 for an overview of its components.
The Cal Out hook emits a signal that can be used to compensate passive
probes. WaveMaster 8 Zi-B oscilloscopes are compatible with the included
passive probes and all ProBus active probes that are rated for the
oscilloscope’s bandwidth. Probe specifications and documentation are at
teledynelecroy.com/probes.
The Standby Power button controls the operational state of the
oscilloscope. See “Powering On/Off”.
C1-C4 are signal inputs. You may use either the “A” row of ProLink inputs
or the “B” row of ProBus and 2.92 mm inputs for analog signal. A variety
of adapters are available to accommodate different cable connectors.
Your input selection is made visible by the Input Row indicators.
Aux Out can be configured to send a pulse to another device upon a
trigger event or Pass/Fail outcome, or to generate a continuous signal.
Aux In can be used to input an external trigger.
The Ground Terminal can be used to ground active probes or connected
to a grounding wrist strap.
The Fast Edge output emits a square wave signal with ~30 ps rising
edges that can be used to deskew channels.
Tilting feet allow you to adjust the angle of the display for easier bench
top viewing.