Information included herein is controlled by the Export Administration Regulations (EAR) and requires an export license, license exception or
other approval from the appropriate U.S. Government agency before being exported from the United States or provided to any foreign person.
Diversion contrary to U.S. law is prohibited.
LTE Cell Service Activation for
the 2100Ci Series Flow Modules
Overview
This instruction sheet will cover setting up Verizon
LTE service for your modem. In the past, Teledyne ISCO
installed CDMA service on cellular products due to the
hardware needed to input the service into the device.
With LTE service, a Subscriber Identity Module (SIM)
card is used to input the service into your cellular
device.
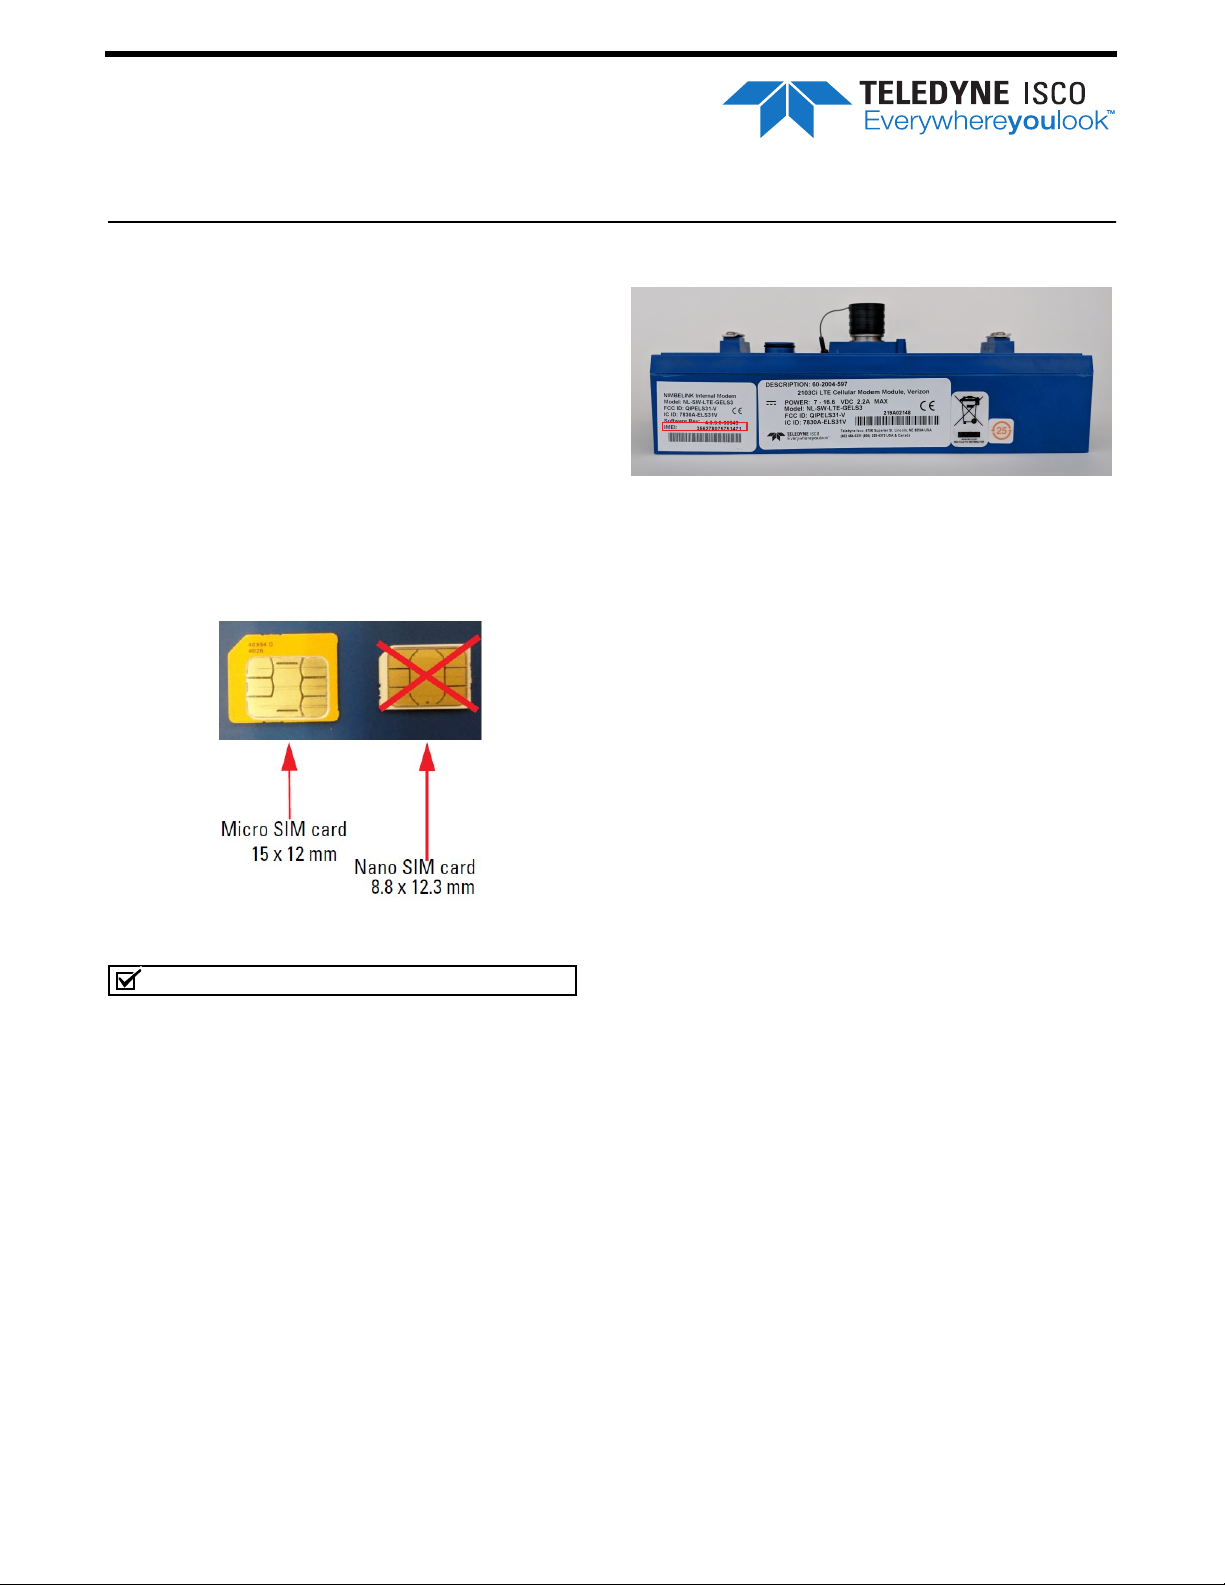
SIM Cards
In order to use this device, you will have to establish
service with your carrier and obtain a SIM card. Tele-
dyne ISCO LTE modems work with Micro SIM cards
(Figure 1).
Figure 1: Types of SIM cards
Note
Read the entire instruction sheet before contacting
your service provider.
Contact Service Provider
Contact Verizon to get a SIM card (Micro SIM card is
required) (Verizon SKU: DFILLSIM3FF-D).
1. Inform Verizon that you need an M2M plan with
text messaging enabled.
2. If you want to contact the modem via IP address,
request an Unrestricted Static IP Address.
3. Verizon will ask you to provide them with the
IMEI number of the unit. This number is specific
to each unit and the location can be found on the
unit (Figure 2).
Figure 2: Location of IMEI number
The M2M plan, with text messaging enabled, will use
bytes, not minutes, and will allow for alarm text mes-
sages to be sent from the sites if you wish to set up
alarm conditions. If Verizon asks, the hardware for these
units will be: Nimbelink Skywire NL-SW-LTE-GELS3
modem. Typical usage would be less than 5MB per
month.
●For 2103Ci or 2105Ci cell phone packages also
consider how you will use it and the service
options:
❍If you desire to contact the unit remotely from
your desk, you will also need to inform Veri-
zon you need an UNRESTRICTED STATIC IP
ADDRESS assigned to the line of service. This
will keep the IP address the same at all times.
You will connect to the unit by entering the IP
address in the menu in Flowlink. There is an
additional Verizon charge for this feature.
Text message alarming can also be sent.
❍If you only plan to push the data to a server
with Flowlink Pro installed on that server, the
dynamic IP address, included with the telem-
etry/data plan, is all you will need. The IP
address will change each time the cell phone
powers up inside the unit. You cannot contact
units with this type of service remotely. Text
message alarming can still be sent with this
type of service.
❍Key point is that if you plan on contacting
the site remotely, you will NEED an unre-
stricted static IP address.
Instruction Sheet 69-2003-725
January 2019


