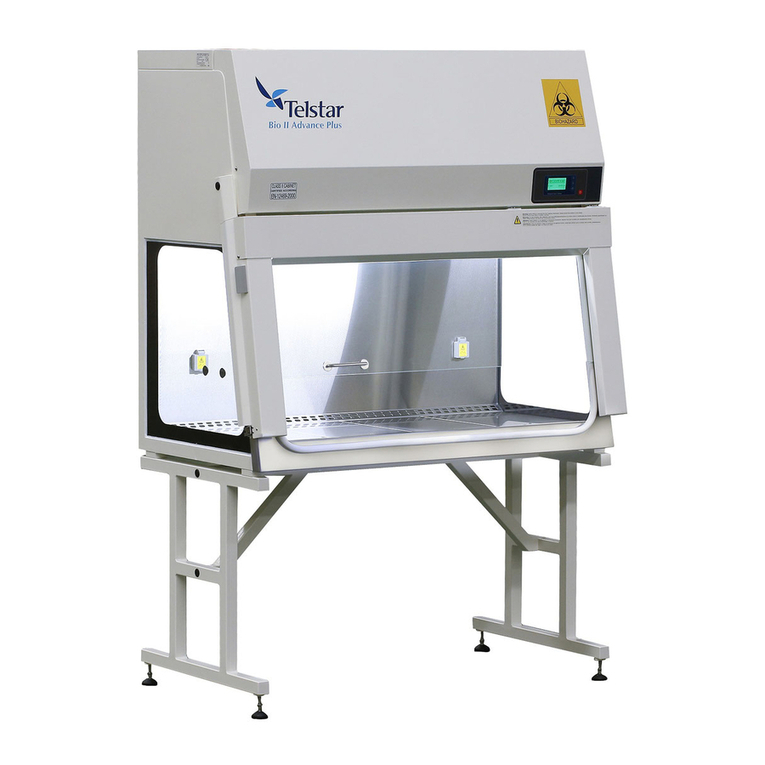
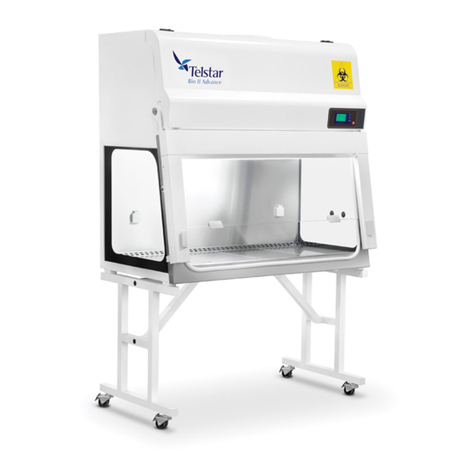
Telstar Bio II Advance Plus User manual

USER MANUAL
MANUAL DE USUARIO
MANUEL D'UTILISATION
BEDIENUNGSANLEITUNG
Microbiological Safety Cabinets
Cabinas e Seguri a Microbiológica
Cabines e sécurité microbiologique
Mikrobiologische Sicherheitswerkbänke
Bio II Advance Plus


USER’S MANUAL
Microbiological Safety Cabinet
Bio II Advance Plus
Failure to read, understand and follow the instructions in this manual may result in damage
to the unit, injury to operating personnel and poor equipment performance.

UM-BioIIAdvancePlus-EN-1812 2 / 35

UM-BioIIAdvancePlus-EN-1812 3 / 35
SUMMARY
.
SYMBOLS AND ABBREVIATIONS ______________________________________ 4
1.
GENERAL DATA ___________________________________________________ 5
2.
DESCRIPTION OF THE SAFETY CABINETS ______________________________ 6
2.1.
Working principle _____________________________________________ 6
2.2.
Applications and principle diagram ________________________________ 6
2.3.
Components description ________________________________________ 6
2.4.
Standard equipment ___________________________________________ 6
2.5.
Certification _________________________________________________ 6
2.6.
Technical features _____________________________________________ 7
3.
INSTALLING INSTRUCTIONS ________________________________________ 8
3.1.
Transport ___________________________________________________ 8
3.2.
Placing on site ________________________________________________ 8
3.3.
Precautions for first connection __________________________________ 1
3.4.
Electrical connection and services_________________________________ 11
3.5.
Cabinet Exhaust Ducting ________________________________________ 12
3.5.1.
Outside ducting via a canopy ________________________________ 12
3.6.
Installation tests ______________________________________________ 12
4.
OPERATING INSTRUCTIONS _________________________________________ 13
4.1.
Start-up ____________________________________________________ 13
4.2.
Front panel positions __________________________________________ 13
4.3.
General working recommendations _______________________________ 15
4.3.1.
Ergonomics ______________________________________________ 16
4.4.
Definition of the working area ___________________________________ 18
4.5.
Control keyboard-display _______________________________________ 19
4.6.
Disconnection ________________________________________________ 25
4.7.
Prolonged stoppage ___________________________________________ 25
4.8.
Optional accessories ___________________________________________ 26
5.
MAINTENANCE ___________________________________________________ 27
5.1.
Maintenance table _____________________________________________ 27
5.2.
Absolute filters _______________________________________________ 28
5.3.
Spare parts __________________________________________________ 29
6.
CLEANING AND DISINFECTION ______________________________________ 3
6.1.
Surface cleaning and disinfection _________________________________ 3
6.2.
Front glass cleaning and disinfection ______________________________ 3
6.3.
Disinfection with formaldehyde ___________________________________ 3
6.4.
Disinfection with vaporized hydrogen peroxide ______________________ 3
7.
MAINTENANCE TABLE ______________________________________________ 31
8.
ELECTRIC DIAGRAMS ______________________________________________ 31
9.
TESTS __________________________________________________________ 31
9.1.
Downflow filters integrity test ____________________________________ 31
9.2.
Exhaust filters integrity test _____________________________________ 31
9.3.
Downflow air velocity test _______________________________________ 31
9.3.1.
Set point alarm downflow air velocity test ______________________ 31
9.4.
Inflow air velocity test _________________________________________ 31
9.4.1.
Set point alarm inflow air velocity test _________________________ 31
9.5.
Smoke test __________________________________________________ 31
9.6.
Light test ___________________________________________________ 31
9.7.
Noise level test _______________________________________________ 31
1 .
CERTIFICATES ___________________________________________________ 32
1 .1.
CE _________________________________________________________ 32
1 .2.
Guarantee ___________________________________________________ 32
11.
TROUBLESHOOTING _______________________________________________ 33
Translation of the original manual

UM-BioIIAdvancePlus-EN-1812 4 / 35
List of stickers used in the biological cabinets.
Abbreviations used in this manual:
V Volts s, h Seconds, hours
A Amperes Hz Hertz
W, kW, µW
Watts, kilowatts, microwatts dB Decibel
mm, cm, m Millimetres, centimetres, metres ºC Celsius
kg Kilogram GS “Tested safety” according
German standards
“EARTH WIRE PROTECTED” STICKER.
“FUNCTIONAL EARTH WIRE” STICKER.
“BIOHAZARD” STICKER.
“CLASS II CABINET CERTIFIED ACCORDING TO
EN-12469-2 ” STICKER.
“ATTENTION, ELECTRIC SHOCK RISK” STICKER.
“SOCKET VOLTAGE” STICKER.
“SOCKET MAXIMUM CURRENT” STICKER.
”SAFETY WARNING PRIOR TO
SERVICE OR REPAIR
ACTIONS” STICKER
”FRONTAL MECHANISM
OPENING” STICKER

UM-BioIIAdvancePlus-EN-1812 5 / 35
Operating Instructions Manual for Microbiological Safety Cabinets Class II Bio II Advance
Plus, according EN 12469 standard, which ensure (applying correct techniques in laboratory)
high level protection for the operator, the environment and the sample.
WARNING
This Manual must be read and understood before its installation, maintenance and operation of
the biological safety cabinet Class II. All the safety instructions given in the Manual must be
followed.
Any use or application failing to comply with the recommendations expressed in the Manual may
cause danger and loss of rights to manufacturing guarantee as well as freeing the
manufacturer from all responsibility arising.
Any maintenance must be done by qualified staff according to the laboratory working correct
conditions. In case these actions are not carefully carried out, as a result the safety cabinet can
work in abnormal conditions.
All maintenance actions on this equipment must be performed by a qualified technician who is
familiar with the proper maintenance procedure required for this equipment.
The European Union issued the Directive 2 12/19/EU on Waste of Electrical and Electronic
Equipment (WEEE).
This product is required to comply with the European Union’s Waste
Electrical & Electronic Equipment (WEEE) Directive. Mark symbol is shown
at the right.
Azbil Telstar sells products through distributors throughout Europe.
Contact your local distributor for recycling/disposal.
The name plate & CE mark sticker is located at one side of the cabinet.
MANU ACTURER: AZBIL TELSTAR TECHNOLOGIES, S.L.U.
Av. Font i Sagué, 55
Parc Científic i Tecnològic Orbital 4
8227 TERRASSA (SPAIN)
Tel (+34) 93 736 16
Fax (+34) 93 786 13 8
http://www.telstar.com

UM-BioIIAdvancePlus-EN-1812 6 / 35
CLASS II Biohazard Safety Cabinets are designed for microbiology work with the most
advanced microprocessor control, ensuring a high level of protection for the operator,
environment and sample.
Exterior of cabinet made of laminated, lacquered, oven-dried steel. Functional design with
reduced external dimensions and front access for changing filters.
Spacious internal chamber with sliding-swinging front made from laminated safety glass.
Segmented work surface and liquid collection tray made of polished stainless steel. Arm-rest
is detachable to facilitate cleaning of liquids tray.
Two-fan system (four in the Bio II Advance Plus 6) providing laminar and exhaust flow by
means of a shared plenum. In the case of a breakdown of any fan, the other ones continue
to provide airflow.
As can be seen in Annex A2, the air propelled by the fans (1) is moved into the chamber or
plenum (3) and, on the one hand via the Absolute HEPA filter (4), is filtered and flows
according laminar regime in the working area (6). On the other hand, part of the air flows
through an Absolute HEPA filter (5) before being expelled to the outside (8).
System of recycled (7 %), sterile vertical laminar flow in depression and exhaust (3 %)
sterile air, approximately.
The microbiological safety cabinet models are appropriate for handling biologically
pathogenic samples or products (up to micro organism risk BSL3), ensuring sterile air in the
work zone, as well as a high level of protection for the operator and the environment.
Principle diagram in Annex A1.
WARNING
Under no circumstances, is possible handling in corrosive, flammable or explosive gas
ambient.
It is recommended that extracted air should be expelled to the exterior.
Right working conditions are obtained only when the display is green and without any alarm
message on the display.
(See Annex A2)
•Two inlet sockets 2A - 46 W each located on either side of the work zone. Insulation
level IP44.
Quality control and tests results certification carried out in line with standard EN 12469. See
Certificate inside the cabinet.

UM-BioIIAdvancePlus-EN-1812 7 / 35
eatures Units. Bio II
Advance Plus
3
Bio II
Advance Plus
4
Bio II
Advance Plus
6
External dimensions (LxWxH)
mm 1 49 x 764 x
126
1354 x 764 x
126
1964 x 764 x
126
Internal dimensions (LxWxH)
mm 954 x 6 2 x
58
1259 x 6 2 x
58
1869 x 6 2 x
58
Front opening height mm
182
Weight Kg 18 2 28
Downflow velocity m/s .35 .35 .35
Inlet velocity m/s .55 .55 .5
Consumption* W 125 125 338
Voltage V 23
Frequency Hz 5 /6
Lighting Lux ≥ 1
Noise dB (A) ≤ 58 (Attached table)
Vibration mm RMS
< . 5
HEPA/ULPA H 14 Filters Efficiency 99.995%, EN 1822 by MPPS method
filtration system in laminar and exhaust flow
(99.999% D.O.P. test @ .3µm particles)
Fans Two high-efficiency fans (four in cabinet
Advance Plus 6). Flows measured by a
thermoanemometric probe.
* Cabinet with factory settings and new filter.
DISSOCIATED DECLARED VALUES O NOISE EMISSION
Standard(s) to which conformity is declared ISO 4871
V
downflow
= .35m/s
V
inlet
= .55 m/s
(23 V, 5 Hz)
V
downflow
= .35m/s
V
inlet
= .5 m/s
(23 V, 5 Hz)
Bio II Advance Plus 3
Bio II Advance Plus 4 Bio II Advance Plus
6
L
pA
(dB) ≤58 ≤58 ≤58
K
pA
(dB) 2 2 2
Values measured according to acoustic test in standard EN 12469:2 using standard
ISO 112 1

UM-BioIIAdvancePlus-EN-1812 8 / 35
For a correct start-up procedure of the microbiological safety cabinet, observe the following
step-by-step instructions.
The cabinet is supplied in an individual package and in the suitable way to prevent it from
being damaged.
This manual and certificate of individual Quality controls of each cabinet are
included in the scope of supply.
a) Special care should be taken when unpacking the front glass and the control display.
b) Use the same packaging base for the transport to its final location and it is highly
recommended doing it with a pallet jack. The cabinet has two M1 eyebolts to help to
position it on a raised surface. If there are no mechanical means to position it, this can
be done manually.
WARNING
We advise against the use of lift trucks for placing the cabinet directly by its base. In such
case, it should be handled with care and it is also a must that:
- the useful length of the forks of the lift-truck are over 750 mm.
- the cabinet is fully supported all along its width (front (A) and rear (B)
structural profiles). Direct visual inspection during its handling is required.

UM-BioIIAdvancePlus-EN-1812 9 / 35
ig. 1
X
ig. 2
ig. 3
WARNING
For any handling during assembly or dismantling of the cabinet, appropriate safety measures
should be taken, such as wearing safety gloves or shoes.
c) Cabinets should be placed away from entrances, corridors, ventilation supply points, etc.,
which might affect airflow in the work area.
d) Ensure the cabinet is set perfectly on the table or workbench in order to prevent
vibrations.
e) To prevent the work area from overheating, we recommend that the room temperature
is always within the comfort margins for working.
The optimal comfort margins are:
-Temperature: 18-28ºC
-Relative humidity: 5 %±2 %
If any of these conditions is not fulfilled, optimum cabinet performance cannot be
guaranteed.
f) When necessary, air vents in the room should be modified or speed of air entry reduced
so that air is not aimed directly at the cabinet, as this may produce turbulence.
Side air vents are not appropriate for rooms where cabinets are installed.

UM-BioIIAdvancePlus-EN-1812 10 / 35
g) Due to the ceiling temperature affects air distribution, sites should be selected with
enough space. We recommend 25 mm minimum free space between the exhaust and
the ceiling.
h) The location of the cabinet will directly influence the noise level. This level will rise
considerably in small spaces with very reflective surfaces because of the proximity of the
cabinets to the walls, and where fan speed has risen to compensate for air currents in
the room or the resistance of clogged filters.
i) Correct cabinet performance should be tested before putting it into operation if any
modification has been made to the room or to the air intake system which may
considerably change the airflow characteristics in the room.
•Before connecting it to the mains supply, proceed to make a general cleaning to remove
any dust particles that may be accumulated during transportation. Follow the instructions
on cleaning and disinfection.
•Before using it for the first time, run the cabinet for around 6 hours to purge the filters.
New filters give off a characteristic smell which tends to disappear in a short period of
time.
WARNING
The cabinet should work at the voltage shown on the name plate. It should be connected to
a suitable socket base (minimum 16A) with an earthed plug. The cable section recommended
for the base is 1.5 mm
2
.
WARNING
The plug connection must be located in such a place to prevent it from being unplugged
intentionally or accidentally during operation, e.g., next to a wall or closed to another
equipment.
EARTH
WIRE

UM-BioIIAdvancePlus-EN-1812 11 / 35
The electrical characteristics of the cabinet are as follows:
•Electrical class: Class I.
•Insulation level: IP-2 .
The cabinet is supplied with a plug cord according European standard (other plug cords
available as optional accessories). The on/off button is in the frontal control keyboard-
display. (Annex A3 pos. 1).
The power socket in the wall should be located in a perimeter around the cabinet of:
•1.25 m from the middle of the cabinet to the sides
•2.5 m from the base of the cabinet upwards
On the top right-hand side of the cabinet and identified by name are:
•Voltage input (1)
•Checking valve fans pressure (2)
•Checking valve for D.O.P. control (3)
WARNING
Unplug the cabinet from the electric current supply, in case of electrical maintenance.
The cabinet can only be activated from the button in the frontal control keyboard.
The installation which the cabinet is connected to should meet the safety requirements in
force in each country.
Exhaust air should be evacuated outside the lab if working with volatile substances not
neutralised by absolute filters.
During normal work in these safety cabinets and because of a basic principle of recirculation
and depression in the work zone, no perforated surface in the work zone should be covered
with paper or sanitary fabric.

UM-BioIIAdvancePlus-EN-1812 12 / 35
!
Ducting of the exhaust may be preferred to exhaust in the lab in order to, for example:
-Prevent from lab temperature rise.
-When volatiles and toxic vapours are involved during the process.
WARNING
Ducting the exhaust to the outside of the lab creates a depression in the lab.
In case of direct ducting outside it must be installed an additional fan to the duct, a canopy,
and adjust the velocity parameters. GS has not been tested. It must be tested after
installation.
WARNING
When the cabinet exhaust is connected to an assisted/air forced exhaust system, it is
necessary to install a canopy between the cabinet and the exhaust duct. This will prevent
from the loose of operator protection in case of any decrease of the exhaust airflow system
(duct obstruction, blower control failure…).
See description & installation in Annex A4.4.
According to standard DIN EN 12469 and in order to ensure correct cabinet operation, after
the installation and connection of the cabinet, it is compulsory to perform the following tests
(before the equipment is used for the first time)
-9.1. Impulsion filters integrity Test.
-9.2. Exhaust filters integrity Test.
-9.3. Downflow air velocity.
-9.3.1 Downflow set points alarm test.
-9.4. Inflow air velocity Test.
-9.4.1 Inflow set points alarm test.
-9.5. Smoke test.
TELSTAR also recommends making the following tests:
-9.6. Light Test.
-9.7. Noise Level Test
Telstar, its representatives and distributors put a qualified technical team at your disposition
that uses control equipment with maximum health protection for carrying out this installation
test under full safety guarantees.

UM-BioIIAdvancePlus-EN-1812 13 / 35
"
Once the above points have been controlled, start up the microbiological safety cabinet by
pressing the On/Off button (Annex A3, pos. 1). After entering the password correctly (by
default the password is 0000) or immediately if this function has been disabled, the fans will
automatically start working.
Ensure that the aspiration area and air exhaust outlet are free (Annex A2, pos. 7 & 8).
The electronic system of regulation by microprocessor via a thermoanemometer probe,
laminar down flow and exhaust airflow, needs a few seconds to stabilise during connection in
order to begin to work normally.
The cabinet can only be used by qualified staff who meets the correct work techniques in the
laboratory. If these techniques are not fulfilled, faulty working of the equipment may
happen.
WARNING
The EN 12469 certification does not allow the deactivation of the password enquiry.
By means of the handles “A”, the front glass can be moved from working position to closed
position or vice versa. To move the glass just slide down or up the glass.
FROM WORKING POSITION FROM CLOSED POSITION
In case it is needed to clean the glass by the inner part (Annex A5.2) or if it is necessary to
place in the working area any big product or device, the glass-frontal group may be
separated from the cabinet, providing full access to both the inner glass area and the
working area. All needed precautions should be taken as the user protection decreases
during that operation.

UM-BioIIAdvancePlus-EN-1812 14 / 35
WARNING
To open the frontal (after the glass has been moved to the lower position), always
pull the lateral handles “B” fixed to the metal supports never pull the handles of the
glasses, that are specifically designed for the vertical movement of the glass. Failure to do so
might result in glass cracking.
WARNING
The glass is required to remain in the closed position prior to moving the frontal of the
cabinet. In case this is not fulfilled, the glass will not be properly adjusted with the frame and
it might result in glass cracking.
WARNING
Do not put the hands in the laterals of the frontal support, in order to avoid any entrapment
risk.

UM-BioIIAdvancePlus-EN-1812 15 / 35
a) We recommend starting up the cabinet around 1 minutes before you begin to work.
This will ensure particles are swept from the work zone and from material introduced.
b) Wash your arms, hands and nails well, using an anti-bacterial soap, before and after
work. Staff should avoid touching their mouths and eyes.
c) We recommend wearing lab coats with adjusted cuffs and, in special works, protection
gloves (or sleeve cuffs). Both the coat and cuffs should be made from a fabric that
minimises the emission of fibres and particles.
d) The work area inside the cabinet should not be used to store lab equipment. This can
produce an accumulation of dust that is unnecessary and hazardous for working under
sterile conditions. Only the fewest pieces of equipment should be placed in order to work
correctly and with the minimum number of interruptions for the user (inserting and
removing arms from the work zone).
e) Although the work zone is under a clean and sterile laminar down flow, the area around
the cabinet might be contaminated. The sources of contamination should be known in
order to avoid them when inserting arms, material, etc.
f) All the material needed for the work should be free of particles and carefully cleaned
before it is placed on the work area.
g) Materials such as paper, wood, cardboard, pencils, rubbers, etc. should not be placed in
the work area as they shed a lot of particles.
h) In the event of using pipettes, only mechanical aspiration type should be used. Blowing
the pipette with the mouth should never be done because it is easy to inhale aerosols
caused by suction.
i) When platinum handles are used, it is advisable to use electric incinerators, preferably
single-use ones.
j) If the work requires the use of a gas flame from a Bunsen burner or similar, we
recommend using a type where the flame is maintained by holding down a button. Please
note that the use of a constant flame burner creates significant turbulence. Bear in mind
that a flame too large could burn the absolute filters.
k) Shadows and turbulence provoked by objects, equipment and materials placed in the
work area should be studied before beginning to work in order to evaluate their possible
effects. Bear in mind that the laminarity of the airflow is not recovered until a distance of
2.5 times the diameter of the object that causes the obstruction.
l) When using bottles and tubes, they should preferably have a screw top instead of cotton
stoppers which easily shed a lot of particles.
m) When the work is finished, all disposable products (handles, Petri dishes, etc.) as well as
means of cultivation, samples, tubes, bottles, etc. should be removed from the cabinet in
impermeable bags suitable for sterilisation if necessary.
n) When working in the cabinet and during cleaning operations, it is important to protect
the HEPA filters from any damage by avoiding knocking them, projecting liquids or
splashing, etc.
o) When placing or taking out the arm rest, take care not to hit strongly the lateral glasses,
in order to prevent any damage of them.
p) Any equipment connected to the internal sockets inside the cabinet should meet all the
electrical specifications.

UM-BioIIAdvancePlus-EN-1812 16 / 35
q) People traffic generates air movements that may cause unexpected loss of the
containment barrier and, in the case of Class II cabinets, a reduced level of product
protection. Warning signs and other means should be used to avoid traffic during critical
operations.
Cabinet locations can be divided to reduce the effects of air movement produced by other
cabinets and people traffic.
r) Suddenly doors opening and closing may disturb airflows in the cabinet and it should be
avoided when cabinets are being used.
WARNING
The UV light system can only be used when the front glass is closed.
Never connect equipment whose consumption exceeds the maximum one indicated on the
internal sockets of the cabinets.
Microbiological security cabinet Bio II Advance Plus and its accessories have been designed
following recommendations and specifications of the standard EN ISO 14738:2 1 .
Users should consider their position when working with the cabinet, for their own safety.
Below are examples of four positions NOT recommended and one that IS recommended.
ig. 1
X
ig. 2
X

UM-BioIIAdvancePlus-EN-1812 17 / 35
ig. 3
X
ig. 4
X
Adjusting the seat and adopting a correct position enables the user to work safely and to
avoid any possible physical damage (sight, neck, back, etc.)
ig. 5

UM-BioIIAdvancePlus-EN-1812 18 / 35
In addition, in order to protect both the product and the user, it is necessary that the cabinet
is placed in a location without air currents, which may cause turbulence in the laminar down
flow.
ig. 6
X
To prevent from creating any turbulence in the laminar down flow and to protect the user
and the product, it is necessary to establish a working area inside the cabinet.
•Do not work in any area with perforations and do not cover them up.
•Always work 1 cm from the limits of the walls and perforated area.
ig. 7
Other manuals for Bio II Advance Plus
1
Table of contents
Languages:
Other Telstar Laboratory Equipment manuals
Popular Laboratory Equipment manuals by other brands
Analytik Jena
Analytik Jena aj CYBERTRON InnuPure C12 manual
erlab
erlab Captair Bio Smart Series user manual

Forma Scientific
Forma Scientific 1284 instruction manual
Sartorius
Sartorius cubis MPS Quick reference guide
Malvern Instruments
Malvern Instruments Spraytec user manual
Bibby Sterilin
Bibby Sterilin Techne No ICE Operator's manual
Bertin Technologies
Bertin Technologies CORIOLIS COMPACT user manual
Bruker
Bruker 300'154 Ascend DNP user manual
Waters
Waters 2707 Quick install guide
Omni International
Omni International TH Series user manual

BANDELIN
BANDELIN SONOREX TECHNIK W 65 Instructions for use
Struers
Struers Duramin-100 instruction manual


