TM-601N/603/604
EN-4
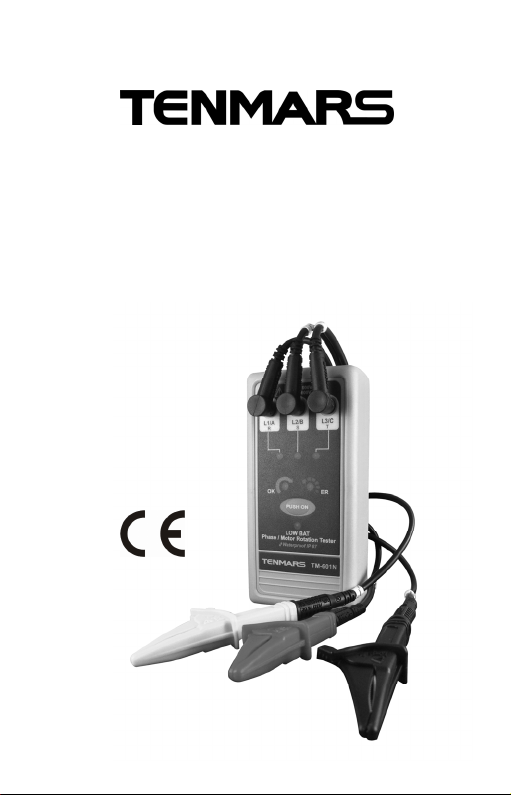
5. How to operate
5.1. How to test the 3 phases of AC
Let your crocodile clip clamp the 3-phase
power terminal. In each test, hold the power
button and check the indicators on the panel.
If L1, L2 and L3 are lit, it means normal.
(In this case, skip to step 2.) If one of
them remains unlit, L1 for example, it
means the wire for L1 is disconnected or
in power failure mode. You may check
visually or with a multimeter if the wire is
connected well.
Next, check if the red or green lamp is lit.
If it is the green lamp, it suggests L1, L2
and L3 are correct for their phases. (In
this case, skip to step 6). If it is the ER
red lamp, it means L1, L2 and L3 are
wired incorrectly. You must correct them
before proceeding to step 3.
Exchange L2 and L3. If the green lamp
goes ON, it means the 3 phases are
correct. (In this case, skip to step 6.) If
the red lamp ER goes ON, it means the 3
phases are wired incorrectly. You must