1. Your Tensegri-
Teach model should include
the following items: 12 sticks, 12 bands, 26
caps (2 are e tras), and this assembly
instruction.
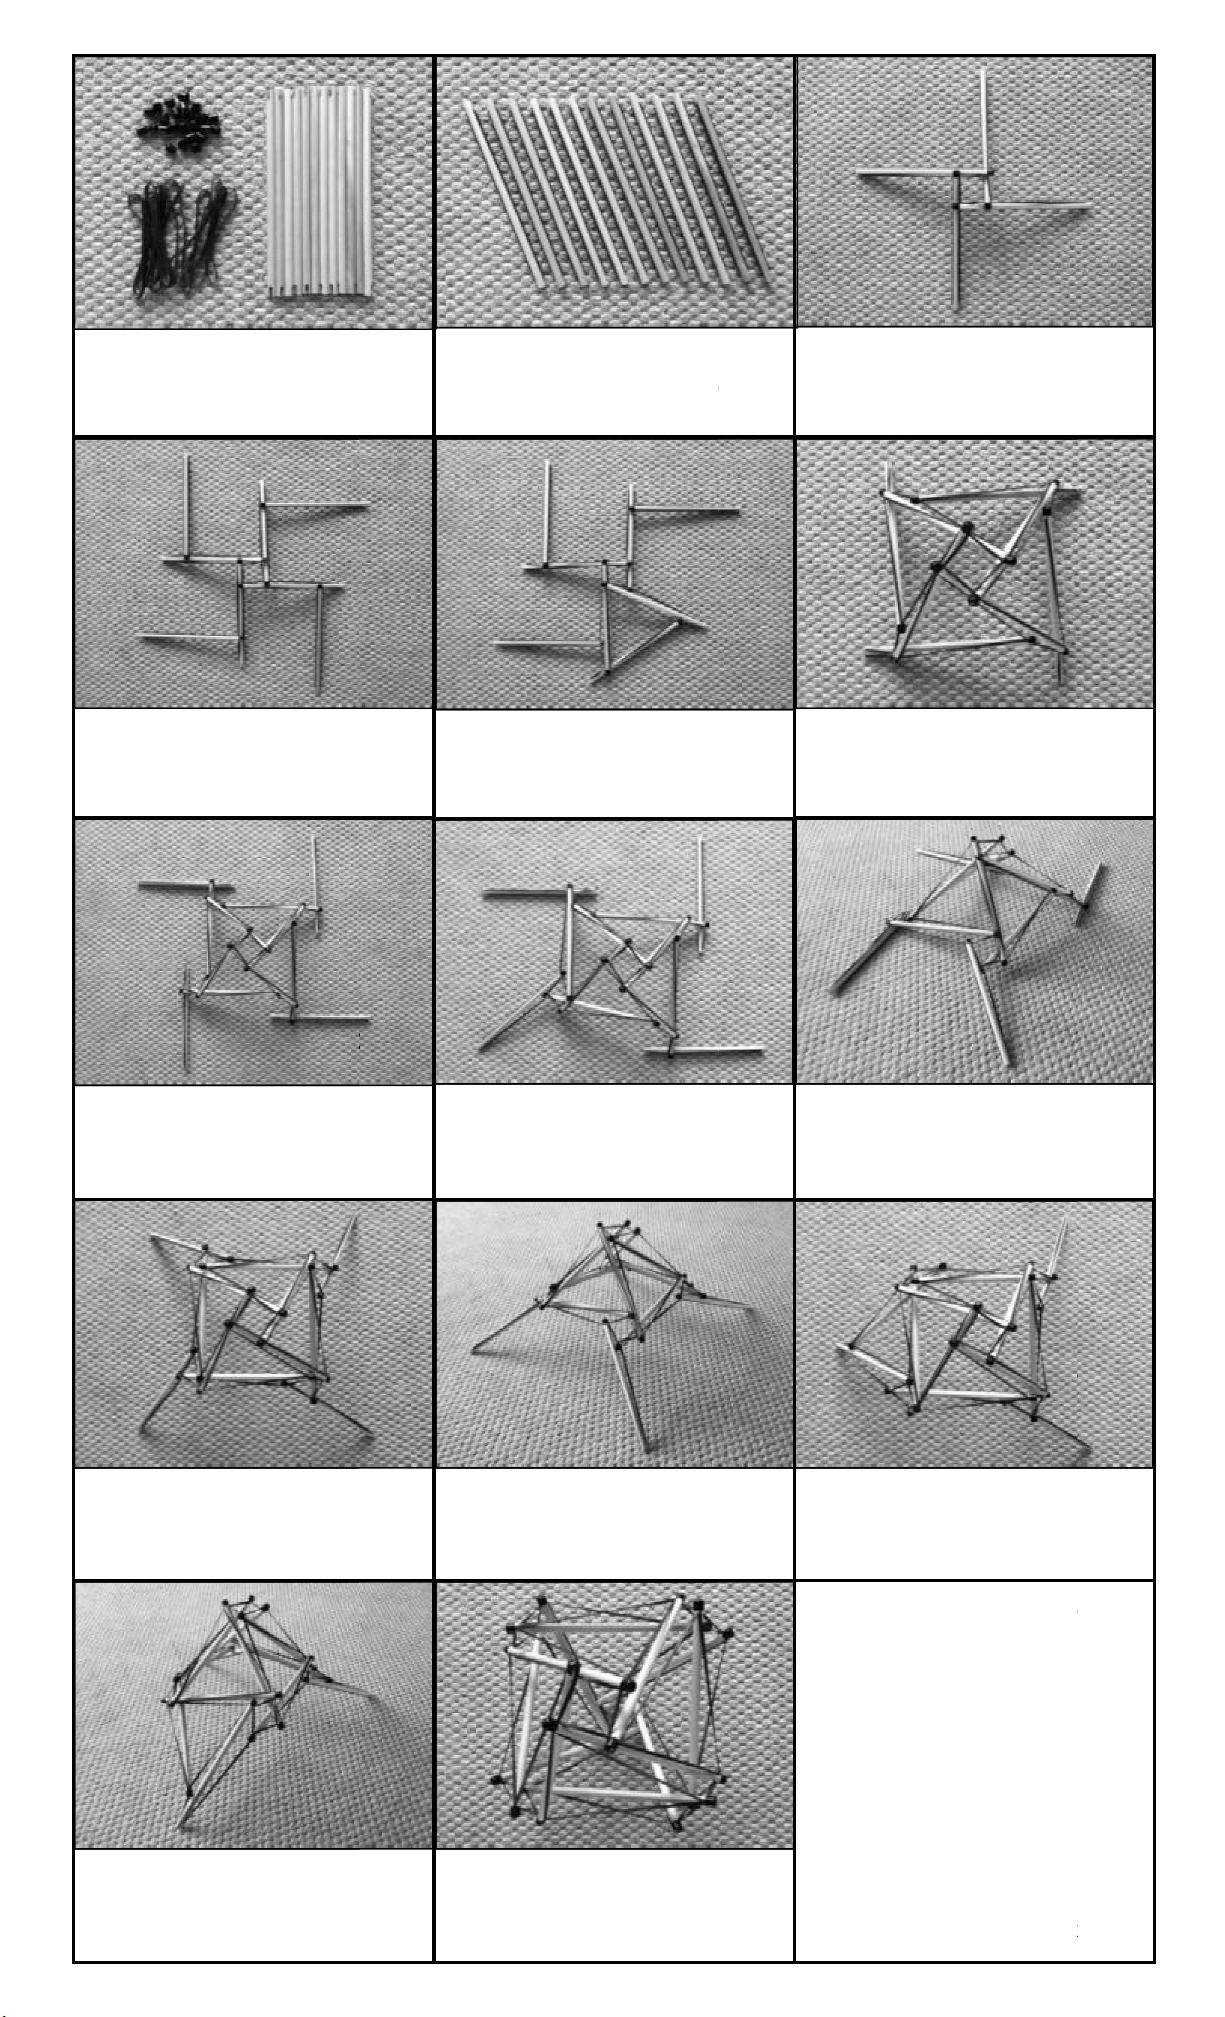
4.
Place four more sticks to create the shape
above. Place the unused band of stick A into
the slot of stick B and firmly twist a cap onto the
end. Repeat this for the bands of the remaining
stick As into stick Bs.
7.
Place four more sticks to create the shape
above. Place the band of stick C1 into the free
slot of stick B1 and firmly twist a cap onto the
end. Repeat this for the bands of
stick B2, stick C3 into B3, and C4 into B4
10.
Repeat step 8 for the slot of stick C
the unused band of stick B2, stick C4 onto the
band of B3, and C1 onto B4
all ends.
13.
Here is another view of the result of step
12. Your structure should be an odd shaped
tripod.
2. Place one band on each stick. The bands
should be flat on the stick and the
not be twisted. Make
equally tight on both sides of the stick by pulling
the bands apart. They should pull equally far.
Teach model should include
the following items: 12 sticks, 12 bands, 26
caps (2 are e tras), and this assembly
Place four more sticks to create the shape
above. Place the unused band of stick A into
the slot of stick B and firmly twist a cap onto the
end. Repeat this for the bands of the remaining
5. Place the band of stick B2 into the
of stick A1
and firmly twist a cap onto the end.
Place four more sticks to create the shape
above. Place the band of stick C1 into the free
slot of stick B1 and firmly twist a cap onto the
stick B2, stick C3 into B3, and C4 into B4
.
8.
Place the slot of stick C2 closest to B1
the free band
of stick B1 and firmly twist a cap
onto the end.
Repeat step 8 for the slot of stick C
3 onto
the unused band of stick B2, stick C4 onto the
11.
Here is another view of the result of step
10. Your structure should be up on four legs
Here is another view of the result of step
12. Your structure should be an odd shaped
14. Repeat step 13
the unused band of stick C3, stick C3
band of C4, and C4 o
nto C1, twisting a cap on
all ends.
2. Place one band on each stick. The bands
equally tight on both sides of the stick by pulling
the bands apart. They should pull equally far.
3.
Place four sticks in the shape above. Place
the band of stick A1 into the slot of stick
firmly twist a cap onto the end to lock
into the slot.
Repeat this for the band of A2 into
stick A3, A3 into A4, and finally A4 into A1.
slot
and firmly twist a cap onto the end.
6. Repeat step 5 for the
free slot of stick A2, B4 into A3, and B1 into A4.
You should end with the above shape which
has become a four sided twisting pyramid.
Place the slot of stick C2 closest to B1
onto
of stick B1 and firmly twist a cap
9.
Here is another view of the result of step 8.
Your structure should start to rise on that
corner.
Here is another view of the result of step
10. Your structure should be up on four legs
.
12.
Place the free slot of stick C1 onto the
unused band of stick C2 and firmly twist a cap
onto the end.
2 onto
nto C1, twisting a cap on
While t
he caps prevent the bands
from falling out, they allow the
sticks to be adjusted along them.
It
is best to pull the bands through
the slots
by grasping the stick end
and pulling the band through
direction
This creates a basic
You can also create a
Icosahedron or
use 6 dowels.
Place four sticks in the shape above. Place
the band of stick A1 into the slot of stick
A2 and
Repeat this for the band of A2 into
stick A3, A3 into A4, and finally A4 into A1.
into
free slot of stick A2, B4 into A3, and B1 into A4.
You should end with the above shape which
has become a four sided twisting pyramid.
Here is another view of the result of step 8.
Your structure should start to rise on that
Place the free slot of stick C1 onto the
unused band of stick C2 and firmly twist a cap
he caps prevent the bands
from falling out, they allow the
sticks to be adjusted along them.
is best to pull the bands through
by grasping the stick end
and pulling the band through
in the
.
.
which


