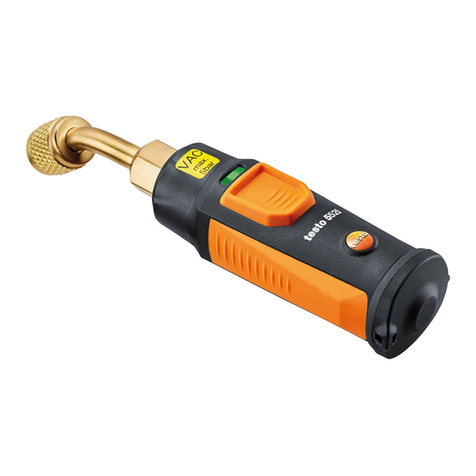
TESTO 521 User manual

Instruction Manual
testo 521 · testo 526
en

Foreword
Foreword
Dear Testo Customer,
We are delighted that you have chosen a product from Testo. We hope that the product
will give you a long period of satisfaction and will aid you in your work.
If problems should occur which you cannot rectify yourself, please consult our service
department or your dealer. We will endeavour to provide fast and competent assistance
to avoid lengthy down times.
Foreword2

General notes
This documentation contains important information about the features and use of the
product. Please read this document through carefully and familiarise yourself with the
operation of the product before putting it to use. Keep this documentation to hand so
that you can refer to it when necessary.
Pictograms
This product could be dangerous if operated incorrectly. Information that requires parti-
cular attention is identified in these Operating Instructions by pictograms:
Warnings are identified by means of a warning triangle. The relevant signal word! indica-
tes the degree of risk:
Warning! means: Serious physical injury could occur if you do not take the
precautionary measures indicated.
Caution! means: Slight physical injury or material damage could occur if
you do not take the precautionary measures indicated.
Pay particular attention to warnings and take the precautionary measures
indicated in order to avoid danger.
Notes on special cases and peculiarities in the handling of your unit are indicated by
an exclamation mark.
Indicates with which instrument variant a menu can be executed.
Content
The content of this documentation relates to the German version of the instrument.
Standards / Tests
As declared in the certificate of conformity, this product fulfils the guidelines of
2014/30/EC.
General notes 3
526
521
Signal word

Content
Foreword .................................................................. 2
General notes ........................................................... 3
Content .................................................................... 4
1. Fundamental safety instructions................................ 6
2. Intended purpose ..................................................... 7
3. Product description .................................................. 8
3.1 Power supply ........................................................... 8
3.2 Controls ................................................................... 8
3.3 Menu overview ....................................................... 10
4. Commissioning....................................................... 12
4.1 Inserting the battery/rechargeable battery............... 12
4.2 Connecting the mains unit...................................... 12
4.3 Connecting probes/sensors .................................. 13
5. Basic operating steps ............................................. 14
5.1 Switching on / off ................................................... 14
5.2 Menu navigation..................................................... 15
6. Menu functions .......................................................... 16
6.1 Measurement site................................................... 16
6.2 Memory.................................................................. 17
6.2.1 Man. / Auto. / Fast ................................................................ 17
6.2.2 Configuration ................................................................... 18
6.2.3 Printing ............................................................................ 18
6.2.3.1 Data transfer ........................................................ 19
6.2.4 Status ............................................................................ 20
6.2.5 Clearing ........................................................................... 20
6.3 Probes ................................................................... 21
6.3.1 Surface increment............................................................. 21
6.3.2 Scaling U/I ........................................................................ 21
6.3.3 F-Reset............................................................................. 23
6.4 Input....................................................................... 24
6.4.1 Temperature .................................................................... 25
6.4.2 Relative humidity .............................................................. 25
6.4.3 Absolute pressure ............................................................ 25
6.4.4 Density ............................................................................. 25
6.4.5 Cross-section .................................................................. 26
6.4.6 Offset factor (O factor) ...................................................... 26
6.4.6 Pitot tube factor (P factor) ................................................. 26
Content4

6.5 Instrument.............................................................. 27
6.5.1 Time ................................................................................ 27
6.5.2 Auto. Off .......................................................................... 28
6.5.3 Unit................................................................................... 28
6.5.4 Damping ........................................................................... 29
6.5.5 Optional ........................................................................... 30
Velocity ....................................................................... 30
Volume flow ................................................................ 30
Delta P ........................................................................ 31
Leakage rate ............................................................... 31
Tightness test.............................................................. 31
Slowdown time ..................................................... 32
Test time ............................................................... 33
Nominal test pressure ........................................... 34
Permitted pressure loss......................................... 34
Measuring rate ...................................................... 34
Start...................................................................... 34
6.6 Service ................................................................... 37
6.6.1 Data ................................................................................. 37
6.6.2 Language ......................................................................... 37
6.6.3 Battery type ..................................................................... 38
6.6.4 W-Reset .......................................................................... 38
7. Measuring............................................................... 39
7.1 Zeroing the display ................................................. 39
7.2 Selecting readings.................................................. 39
7.3 Activating measuring functions ............................... 39
Hold, Max., Min., Mean .................................................................. 39
7.4 Saving readings...................................................... 41
7.5 Printing readings .................................................... 42
8. Care and maintenance............................................ 43
9. Troubleshooting...................................................... 45
10. Technical data ........................................................ 46
10.1 Measuring ranges and accuracies .......................... 46
10.2 Other instrument data ............................................ 47
11. Accessories / spare parts........................................ 48
Contents 5

1. Fundamental safety instructions
Avoid electrical hazards:
Never make measurements with the instrument and its probes on or near live com-
ponents unless the instrument is expressly approved for current/voltage measure-
ments!
Protect the instrument:
Never store the instrument together with solvents (e.g. acetone).
Product safety/preserving warranty claims:
Operate the instrument only within the parameters specified in the technical data.
Handle the instrument properly and according to its intended purpose.
Never apply force!
Temperatures given on probes/sensors relate only to the measuring range of the sen-
sors. Do not expose handles and feeders to any temperatures in excess of 70 °C
unless they are expressly permitted for higher temperatures.
Open the instrument only when this is expressly described in the Instruction Manual
for maintenance purposes.
Carry out only the maintenance and repair work that is described in the Instruction
Manual. Follow the prescribed steps exactly. For safety reasons, use only original
spare parts from Testo.
Any further or additional work must only be carried out by authorised personnel.
Testo will otherwise refuse to accept responsibility for the proper functioning of the
instrument after repair and for the validity of certifications.
Ensure correct disposal:
Dispose of defective rechargeable batteries and spent batteries at the provided col-
lection points.
Send the instrument directly to us at the end of its life cycle. We will ensure that it is
disposed of in an environmentally friendly manner.
1. Fundamental safety instructions6

2. Intended purpose
Employ the instruments for the following applications only:
The testo 521 and testo 526 instruments are handheld pressure-measuring instru-
ments that were developed specifically for use in air conditioning / ventilation equipment,
thermal engineering, automotive engineering and industrial plant engineering. The main
areas of use and measuring applications are:
testo 521
Air conditioning/ventilation, clean rooms and OPs:
Pressure ranges 0 to 100 hPa/0...2,5hPa, Pitot tube measurement, volume flow calcula-
tion, pressure drop on filters, fans, ...
testo 526
Industrial pressure measurement:
Pressure ranges 0 to 2000 hPa, pressure in compressed air systems, leaks in pipes &
lines, pressure drop, vacuum
Both instruments offer the following features:
- Measurement location management
- Data management via testo ComSoft software (from Version 3)
- “on-site” printout of the measured results via the testo printer
- Temperature measurement
- Wide range of probes and sensors can be connected so that one instrument covers
as many measuring tasks as possible
Location conditions
Changes in the location and temperature of the instrument and pressure probes have an
effect on the measurement results. Bring the instrument and probes into a stable positi-
on before any measurement.
Do not change this position during measurement.
Do not subject the housing to mechanical strains during measurement.
Media compatibility
testo 521/526:
Permitted medium: air and non-aggressive gases
External low pressure probes 0638 1347, 0638 1447, 0638 1547, 0638 1647, 0638
1747: Permitted medium: air and non-aggressive gases
External high-pressure probes 0638 1741, 0638 1841, 0638 1941, 0638 2041, 0638
2141: Permitted medium: refrigerant, oil, water, air and non-corrosive gases
2. Intended purpose 7

3. Product description
3.1 Power supply
Power is supplied to the testo 521/526 optionally via:
- 9 V monobloc battery, type: IEC 6LR61 (included)
- 9 V monobloc rechargeable battery, type:
NiMH IEC 6F22 (0515 0025)
- Mains connection and battery charging via mains
unit 0554 0088, see also page 38 6.6.3 Battery
type)
3.2 Controls
Keyboard
Print
Select reading 1 (top line), select menu item
Switch on / off
Save data
Open menu level, confirm selection, execute function
Zero pressure probes
Cancel process, menu level back,
Select
reading
2 (bottom line), select menu item
Hold reading value, display maximum / mini-
mum / mean value
Connections
Socket “1” and socket “2”:
Thermocouple probe (type K), NTC probe, pressu-
re probe, power supply cable
“RS232”: PC connection
12 V DC mains unit (0554 0088)
Pressure nipple p+ with quick-release connection
(M8 x 0.5) (only for testo 526)
Pressure nipple p- with quick-release connection
(M8 x 0.5) (only for testo 526)
3. Product description
3.1 Power supply
8

Display
Header (see detailed explanation of icons below:
Icons in the header)
Designation of internal sensor or input socket 1
with selected channel and parameter unit
Reading
1
Designation of input socket 1 or 2 with selected
channel and parameter unit
Reading
2
Measuring functions
Icons in the header:
Counter for identifying the stored logs in the case of
manual, automatic and fast storage of the measure-
ment series.
Counter for identifying the measurements in a measure-
ment series in the case of automatic and fast storage
.
Appears: manual saving set.
Flashes: current
readings
saved.
Appears: automatic saving set.
Flashes: automatic saving running.
The memory content will be cleared.
Appears: printing possible.
Flashes: print function activated.
Battery / rechargeable batter capacity:
All segments dark: rechargeable battery/battery full.
All segments light, flashing: Battery / rechargeable bat-
tery empty. The instrument switches off automatically
after 1 min.
3. Product description
3.2 Controls 9
M.
N 0000

3. Product description
3.3 Menu overview
10
Memory menu
1 Manual /
Automatic/
Fast
2 Configuration
3 Print
4 Status
5 Delete
Units menu
1 Pressure low
2 Pressure high
3 ISO/US
4 °C/°F
Input menu
1 Temperature
2 Humidity
3 Pressure
4 Density
5 Section
6 Offset factor
7 Pitot tube factor
Surface menu
1 Circle 1
2 Circle 2
3 Rectangle 1
4 Rectangle 2
5 Area 1
Service menu
1 Data
2 Language
3 Battery Type
4 Factory Reset
Probe menu
1 Socket 1
2 Socket 2
Channel menu
1 Surface
increment
2 Scaling U/I
3 Reset
Instrument menu
1 Date/Time
2 Auto. off
3 Unit
4 Damping
5 Optional
Measurement
menu
= 5 Instrument —> 3 Unit
—> 2 P High
3.3 Menu overview
: Open menu, : Select menu, : Back
The menu numbers appear in the topmost line of the display. Example: testo 521
53 2
Main menu
testo 521 testo 526
1 Location 1 Location
2 Memory 2 Memory
3 Probes 3 Probes
4 Input
5 Device 4 Device
6 Service 5 Service
Option menu
testo 521 testo 526
1 Velocity 1 P1-P2
2 Volume Flow 2 Leak Rate
3 P1-P2
3 Tightness
test
Other manuals for 521
1
This manual suits for next models
2
Table of contents
Other TESTO Measuring Instrument manuals
