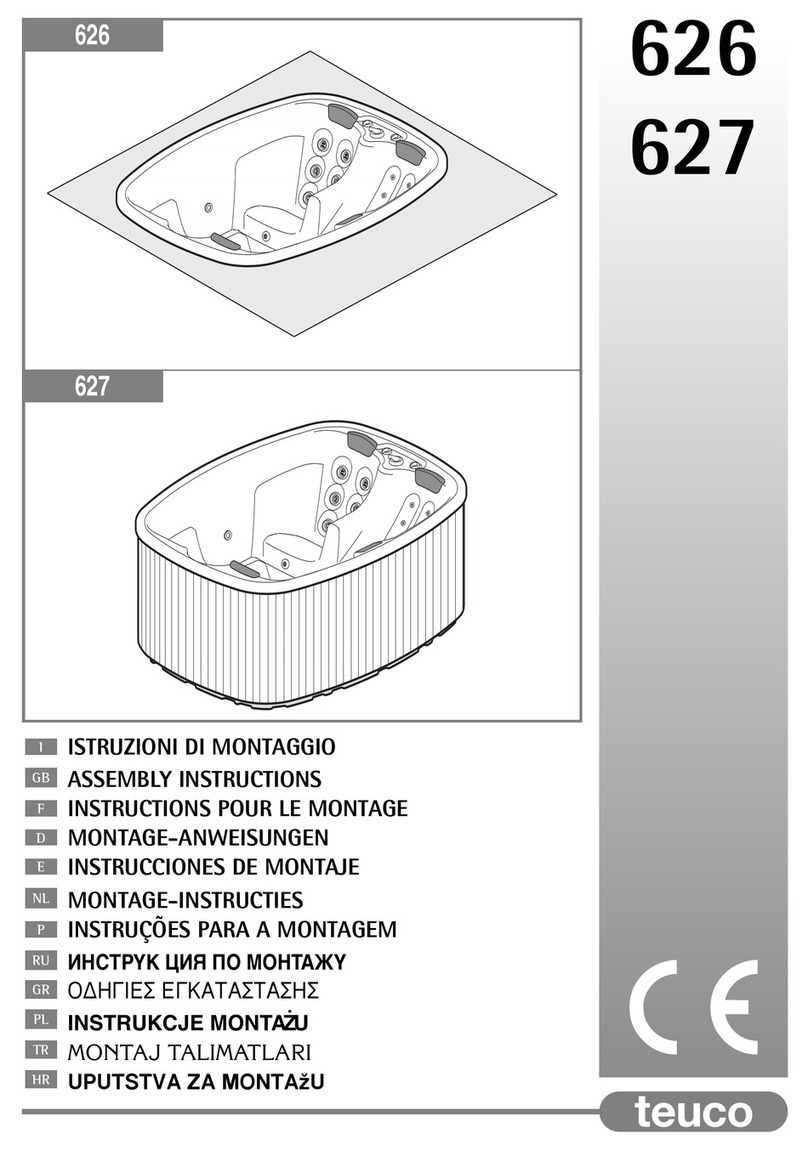
Teuco 629 User manual

Istruzioni di montaggio
629
Instruções para a montagem
Montage-instructies
Instrucciones de montaje
Montage-anweisungen
Instructions pour le montage
Assembly instructions
DE
FR
ES
NL
PT
RU
EL
PL
TR
HR
EN

2
IT Leggere le AVVERTENZE e le istruzioni
descritte in questo manuale.
EN Read the WARNINGS and the instructions
described in this manual.
FR Lire les AVERTISSEMENTS et les
instructions contenus dans ce manuel.
DE Lesen Sie die HINWEISE und die
Anleitungen in diesem Handbuch.
ES Leer las ADVERTENCIAS y las
instrucciones que contiene este manual.
NL Lees de RICHTLIJNEN en de instructies
uit deze handleiding door.
PT Leia as ADVERTÊNCIAS e as instruções
descritas neste manual.
RU
EL
PL
instrukcjami podanymi w niniejszym
TR
okuyunuz.
HR
u ovim uputstvima.
ART.
Peso netto
Net weight
Poids net
Nettogewicht
Peso neto
Netto gewicht
Peso líquido
Contenuto acqua
Water capacity
Contenance eau
Wasserinhalt
Volumen de agua
Waterinhoud
Conteúdo água
Su Kapasitesi
Nosivost vode
Carico sul pavimento
Floor load
Charge au sol
Bodenbelast
Carga al pavimiento
Belasting op de vloer
Carga sobre pavimento
Zemin yükü
Peso di spedizione
Shipping weight
Poids emballage compris
Versandgewicht
Peso de expedición
Verzendgewicht
Peso expedição
Volume di spedizione
Shipping volume
Cubage
Versandvolumen
Volumen de expedición
Volume expedição
transportu
Nakliye Hacmi
629 203 kg 707 lt. (1) 410 kg/m2238 kg 3,12 m3
CARATTERISTICHE ELETTRICHE (2) (2)
(2) (2) (2)
ELEKTRISCHE KEN MER KEN (2) (2)
(2) (2)
ELEKTRYCZNE (2) (2) (2)
Modello
Model
Modèle
Modell
Modelo
Model
Modelo
Model
Model
Model
V Hz
Assorbimento solo ricircolo
Power consumption (recirculation only)
Consommation recyclage uniquement
Stromaufnahme nur Umwälzung
Absorción sólo recirculación
Stroomopname hercirculatie
Absorção apenas recirculação
Pobór mocy tylko przy recyrkulacji
Assorbimento Max versione con riscaldatore
Maximum power consumption: version with heater
Consommation maxi version avec réchauffeur
Max. Stromaufnahme in Ausführung mit Zusatzheizung
Absorción máxima versión con calefactor
Max. stroomopname bij uitvoering met verwarmingselement
Absorção máx. versão com aquecedor
Maksymalny pobór mocy w wersji z ogrzewaczem
3WSR48 230 50 0,4 kW 2,7 kW
placa de datos del producto.

3
650 65
750
35
689
592
600
424
572
612
A-A
1960
1470
A
B
R 40
A
B
1707
1707
1245
1245
1895
1350
B-B
55 55
55
55
1895
1350
55
55
55
55
O =
700
700
350 350
Ø 40
1
2

4
3
4

5
2
1
5
6a

6
6b
7

7
IT Istruzioni di Montaggio 629 8
EN Assembly Instructions 629 10
FR Instructions pour le Montage 629 12
DE Montage-Anweisungen 629 14
ES Instrucciones de Montaje 629 16
NL Montage-Instructies 629 18
PT Instruções para a Montagem 629 20
RU
EL
PL
TR
HR

8
IT PREISTALLAZIONE ART. 629
1ART. 629 - CON PANNELLI IN LEGNO
Fare attenzione che la base di appoggio sia
perfettamente livellata.
su di un prato) realizzare la base di appoggio
con un fondo stabilizzato che ne garantisca
2PREDISPOSIZIONE ALLACCI
ALLACCI IDRAULICI
O
~
Per lo scarico si può utilizzare un tubo
flessibile da collegare alla valvola, oppure si
può effettuare un collegamento fisso con la
per agevolare lo scarico si consiglia la
predisposizione di un pozzetto con valvola, da
utilizzare come valvola di fondo.
ATTENZIONE: Prima di predisporre il
pozzetto di scarico, consultare le autorità
locali per le normative che regolano lo
scarico di acqua trattata chimicamente.
Per il riempimento della minipiscina Teuco è
avendo cura di non immergerlo per evitare un
ATTENZIONE: Nel caso di collegamento
fisso della minipiscina alla rete idrica
è necessaria l’adozione di opportuni
dispositivi in grado di salvaguardare la rete
idrica da fenomeni di riflusso. Consultare le
autorità locali prima di effettuare tale tipo di
istallazione.
ALLACCI ELETTRICI
Il prodotto deve essere collegato alla rete attraverso
un interruttore onnipolare (I), con apertura dei contatti
che garantisca la disconnessione completa nelle
condizioni della categoria di sovratensione III (3mm
minimo), posizionato al di fuori delle zone 0,1,2,3 (CEI
Verificare che il prodotto sia alimentato attraverso un
interruttore differenziale con soglia di intervento 30mA.
Il collegamento alla rete deve comprendere la
(IPX5).
VENTILAZIONE DELL’AMBIENTE
Nel caso di istallazione in ambiente chiuso
è necessario provvedere ad una adeguata
2,5 m
2 m1,5 m 2 m1,5 m
ZONA 2 ZONA 2
ZONA 1
ZONA 0
ZONA 0
2,5 m
h
= h

9
IT
ISTRUZIONI DI MONTAGGIO ART. 629
Il prodotto, per il riconoscimento della garanzia, deve essere installato così come fornito da Teuco.
Devono essere rispettate le istruzioni di montaggio, nonché gli utensili, i materiali consigliati e gli accessori forniti con il
prodotto.
Questo manuale é parte integrante del prodotto pertanto deve essere conservato per eventuali consultazioni future.
I dati e le caratteristiche indicate non impegnano la Teuco SpA, che si riserva il diritto di apportare tutte le modifiche
ritenute opportune senza obbligo di preavviso o sostituzione.
Questo prodotto è destinato ad uso residenziale. In caso di utilizzo pubblico si deve garantire, oltre alle prescrizioni
tecniche e di sicurezza previste da Teuco, il pieno rispetto delle norme legislative specifiche per l’ impiantistica, la
sicurezza ed il trattamento dell’acqua vigenti nel paese dove la minipiscina Teuco viene istallata.
AVVERTENZE
3APERTURA DELL’IMBALLO E
MOVIMENTAZIONE DELLA MINIPISCINA
sul pallet.
Per tutte le operazioni di trasporto servirsi
esclusivamente del pallet su cui appoggia la
minipiscina.
4MONTAGGIO DELLA COPERTURA
Fissare le cinghie della copertura sui pannelli
della minipiscina con le viti in dotazione (vedi
disegno).
La copertura deve essere agganciata con le
cinghie di tenuta e eventualmente chiusa a
chiave per una maggiore sicurezza.
La copertura non é concepita per sostenere
pesi.
Non sedersi, camminare o sdraiarsi sulla
copertura.
Non depositarvi oggetti.
La copertura non fissata o non chiusa può
essere pericolosa.
Non seguire le istruzioni di fissaggio della
copertura può risultare pericoloso per
Rimuovere completamente la copertura prima
di entrare nella minipiscina; si può rimanere
incastrati.
5ALLACCI IDRAULICI
ALLACCIO DI SCARICO
La minipiscina Teuco é dotata di valvola di
scarico.
Effettuare il collegamento della valvola con un
2).
ALLACCIO DI CARICO
Per il riempimento della minipiscina deve essere
usato un tubo esterno (avendo cura di non
immergerlo per evitare un eventuale riflusso
6ALLACCI ELETTRICI
aSmontare il pannello di ispezione svitando le viti
indicate.
bEffettuare il collegamento alla rete elettrica nella
scatola (D) predisposta sulla minipiscina.
Il collegamento elettrico deve essere effettuato
nel rispetto delle normative come descritto nella
preistallazione (punto 2).
Le dimensioni del cavo di alimentazione e del
relativo passacavo vanno scelte in base alla
corrente assorbita, alla distanza dalla centralina
di derivazione e al tipo di posa.
La foratura della scatola, la scelta del
pressacavo IPX5 e il montaggio sono a carico
Effettuati tutti i collegamenti verificare il
buon funzionamento dell’impianto (vedi
manuale d’uso - PRIMO AVVIAMENTO).
ATTENZIONE: Dare tensione all’impianto
solo dopo aver riempito d’acqua la
minipiscina.
Rimontare il pannello della Minipiscina facendo
corrispondere i fori tra pannello di ispezione e
telaio.

10
EN PRE-INSTALLATION ART. 629
1629 (WITH WOOD PANE LS)
PRE PARING THE PLINTH
Make certain the supporting surface is perfectly
level.
If the minipool is installed in the open (e.g. on a
lawn), prepare the plinth or slab with a suitably
solid foundation that will ensure the requisite
stability.
2PERMANENT CONNECTION OPTIONS
O
~
EMPTYING
The tub can be emptied simply by connecting a
hose to the valve, or alternatively, by making a
In this instance it will be advisable to install
a trap with valve, which will serve as the foot
valve.
IMPORTANT: before making any permanent
connection to the main drain, contact the
local authorities to check on regulations
governing the disposal of chemically treated
water.
FILLING
The recommended method of filling the Teuco
minipool is to use a hose, taking care not to
immerse the end as this could allow reflux of
water back into the main.
IMPORTANT: if the intention is to connect
the minipool permanently to the water
supply, sui table non- return devices must
be incorporated to prevent reflux back to the
water main.
Contact the local authorities before
proceeding with this type of installation.
The electrical power supply must be in compliance
with statutory regulations for the country of installation.
The product must be connected to the mains power
via an omnipolar switch (I) with an opening between
contacts that guarantees complete disconnection in
excess voltage category III conditions (minimum 3
701).
Make certain the appliance is connected to the power
source by way of a residual current device with
minimum threshold 30mA.
The connection must include a connection to the earth
system and must be:
ROOM VENTILATION
If the minipool is installed indoors, the room or
enclosure must be properly ventilated.
2,5 m
2 m1,5 m 2 m1,5 m
ZONA 2 ZONA 2
ZONA 1
ZONA 0
ZONA 0
2,5 m
h
= h

11
EN
INSTRUCTIONS FOR INSTALLATION ART. 629
The product must be installed exactly as supplied by Teuco, otherwise warranty will be invalidated.
The directions for installation must be observed to the letter, as must those concerning recommended materials and the
accessories supplied with the product.
Electrical connections must be carried out in compliance with national safety regulations, as indicated in the preinstallation
data sheet.
This manual constitutes an integral part of the product and must be kept for future reference.
Data and specifications indicated are not binding on the company: Teuco SpA reserves the right to make such changes
as are deemed appropriate without prior notice and without any obligation to update.
This product is intended for home use. In the event of a Teuco minipool being commissioned for public use, procurement
managers must ensure compliance with all statutory regulations governing safety, water treatment and utility systems
normally in force in the country of installation.
WARNINGS
3OPEN ING THE PACKING AND HANDLING
THE MINIPOOL
Remove the crate and packing, leaving the
minipool on the pallet.
Whatever transport and handling operations
are involved, use only the pallet on which
the minipool is packed for shipment.
THE MINIPOOL MUST NEVER BE LIFTED
FULL OF WATER.
4FITTING THE CANVAS
Secure the straps of the canvas to the panels
of the minipool with the screws provided (see
illustration).
The canvas must be held down with the straps
and, if necessary, locked for added security.
The cover is not intended to carry weights.
Do not sit, step or lie on the cover.
Do not place objects on the cover.
The canvas can be dangerous if not secured
or properly closed.
Failure to follow the instructions for
securing the canvas can result in danger to
the user.
Remove the canvas completely before
stepping into the pool, otherwise there is a
risk of being trapped.
5PLUMBING CONNECTIONS
DRAIN CONNECTION
The Teuco minipool has a drain valve.
Connect the valve to the main drain by way of a
FILL CONNECTION
The recommended method of filling the Teuco
minipool is to use a hose (taking care not to
immerse the end as this could cause a reflux of
water back into the main).
6ELECTRICAL CONNECTIONS
aRemove the inspection panel, undoing the
screws as indicated.
bMake the connection to the a.c. power supply at
the terminal box (D) provided on the minipool.
Electrical connections must be made in
compliance with safety regulations, as indicated
in the preinstallation data sheet (step 2).
The size of the power cable and the relative
clamp must be selected according to the current
load, the distance from the junction box and the
way the cable is laid and routed.
The jobs of holing the terminal box and
selecting and fitting the IPX5 clamp are the
responsibility of the installer.
Having made all the connections, check
that the system operates correctly (see user
manual - STARTING UP FIRST TIME).
CAUTION: POWER UP THE ELECTRICAL
EQUIPMENT ONLY AFTER THE MINIPOOL
HAS BEEN FILLED WITH WATER .
Refit the inspection panel to the minipool, lining
up the holes in the panel with the holes in the
frame.

12
FR PREINSTALLATION ART. 629
1ART. 629 (AVEC PANNEAUX EN BOIS)
correctement.
exemple sur une pelouse), réaliser la base
stabilité.
2PRÉPARATION DES RACCORDEMENTS
HYDRAULIQUES
O
~
électrique
VIDANGE
valve ou réaliser un raccordement fixe avec
vidange.
ATTENTION : Avant d’installer le puisard
de vidange, demander aux autorités
locales quelles sont les normes qui
règlent l’évacuation de l’eau ayant subi un
traitement chimique.
REMPLISSAGE
Pour remplir une minipiscine Teuco, il est
ayant soin de ne pas le plonger pour éviter un
ATTENTION : Si la minipiscine est reliée au
réseau hydrique à travers un raccordement
fixe, prévoir des dispositifs en mesure de
sauvegarder le réseau hydrique contre les
phénomènes de reflux.
S’adresser aux autorités locales avant
d’effectuer ce type d’installation.
conforme aux dispositions des lois nationales.
interrupteur omnipolaire (I), avec une ouverture des
contacts qui garantit la déconnexion complète dans
les conditions de la catégorie de surtension III (3mm
minimum), et positionné en dehors des zones 0,1,2,3
Le raccordement au réseau doit comprendre la
- de type fixe
- approprié à la consommation (voir données sur
la plaquette)
- avec degré de résistance à la pénétration des
liquides (IPX5).
VENTILATION DE LA PIÈCE
Si la minipiscine est installée dans une pièce
fermée, prévoir une bonne ventilation de cette
dernière.
2,5 m
2 m1,5 m 2 m1,5 m
ZONA 2 ZONA 2
ZONA 1
ZONA 0
ZONA 0
2,5 m
h
= h

13
FR
INSTRUCTIONS POUR LE MONTAGE ART. 629
Pour jouir de la garantie, l’appareil doit être installé tel qu’il est fourni par Teuco. Respecter les instructions de montage,
les outils conseillés et les accessoires fournis avec l’appareil.
Procéder à l’installation électrique conformément aux consignes de sécurité nationales en vigueur qui sont décrites pour
la pré-installation.
Ce manuel doit toujours accompagner l’appareil et doit être conservé pour toute consultation future.
Les données et les caractéristiques indiquées n’engagent nullement Teuco SpA qui se réserve le droit d’apporter toutes
les modifications qu’elle jugera nécessaires sans préavis ni remplacement.
Cet appareil est destiné à un usage domestique. En cas d’usage public, garantir, outres les prescriptions techniques et
de sécurité prévues par Teuco, le respect total des normes de loi spécifiques pour le circuit, la sécurité et le traitement
de l’eau en vigueur dans le pays où la minipiscine Teuco sera installée.
AVERTISSEMENTS
3OUVERTURE DE L’EMBALLAGE ET
TRANSPORT DE LA MINIPISCINE
laissant sur la palette.
Pour toutes les opérations de transport,
utiliser exclusivement la palette sur laquelle
est posée la minipiscine.
NE JAMAIS SOULEVER LA MINIPISCINE
LORS QU’ELLE ES T PLEINE D’EAU.
4MONTAGE DE LA BÂCHE
fournies (voir dessin).
sécurité.
La couverture n’est pas conçue pour
supporter des poids.
Ne pas s’asseoir, marcher ou s’allonger sur
la couverture.
N ‘y déposer aucun objet.
La bâche non fixée ou laissée ouverte peut
représenter un danger.
Nous conseillons à l’utilisateur de suivre
scrupuleusement les instructions pour fixer
la bâche afin de ne courir aucun risque.
Retirer la bâche avant d’entrer dans la
minipiscine sous peine d’y rester encastré.
5RACCORDEMEN TS HYDRAULIQUES
RACCORD D’ÉVACUATION
RACCORD DE REMPLISSAGE
Pour remplir la minipiscine, il est conseillé
dans le réseau hydrique).
6CONNE XIONS ÉLECTRIQUES
a
desserrant les vis indiquées.
b
travers le boîtier (D) qui se trouve sur la
minipiscine.
installation (phase 2).
courant absorbé, la distance par rapport au
boîtier de dérivation et le type de pose.
Après avoir effectué tous les raccordements,
vérifier que le circuit fonctionne
correctement (voir manuel d’utilisation -
PREMIÈRE MISE EN MARCHE).
ATTENTION: METTRE LE CIRCUIT SOUS
TENS ION UN IQUE MEN T APRÈS AVOIR
REMPLI LA MINIPISCINE.
Remonter le panneau de la Minipiscine en
faisant correspondre les orifices du panneau

14
DE VORINSTALLATIONS MOD. 629
1MOD. 629 (MIT HOLZS CHÜRZEN)
Es ist auf die perfekte Nivellierung der
Auflagefläche zu achten.
Wird das Minischwimmbecken im Freien
installiert (z. B. auf einem Rasen), muss die
Auflagefläche mit einem verfestigten Boden
ausgeführt werden, der die erforderliche
Stabilität gewährleistet.
2VORBEREITUNG DER BODEN ANS CHLÜSSE
O
~
WASSERABLAUF
Für den Wasserablauf kann man einen
Schlauch verwenden, der an das Ventil
angeschlossen wird, oder einen festen
In diesem Fall sollte ein Schacht mit Ventil,
das als Bodenventil verwendet wird, für einen
problemlosen Wasserablauf vorgesehen
werden.
ACHTUN G: Vor der Durchführung des
Ablaufschachts müssen die örtlichen
Behörden bezüglich der Vorschriften zum
Ablauf von chemisch behandeltem Wasser
konsultiert werden.
WASSEREINLAUF
Für das Befüllen des Teuco
Minischwimmbeckens wird der Gebrauch
eines externen Schlauchs empfohlen, der nicht
eingetaucht werden darf, um einen eventuellen
Rückfluss des Wassers ins Leitungsnetz zu
verhindern.
ACHTUN G: Bei einem ortsfesten
Anschluss des Minischwimmbeckens
an das Wasserleitungsnetz müssen
geeignete Vorrichtungen vorgesehen w e
r d e n , u m d e n R ü c k f l u s s i n d a s
Wasserleitungsnetz zu verhindern.
Vor der Durchführung dieser Installationsart
müssen die örtlichen Behörden konsultiert
werden.
Die Stromversorgungsanlage am Aufstellungsort
muss den einschlägigen nationalen Vorschriften
entsprechen.
Das Produkt muss an das Netz über einen
allpoligen Schalter (I) mit einer Öffnungsweite
der Kontakte angeschlossen werden, die eine
vollständige Trennung unter den Bedingungen der
Es muss überprüft werden, ob das Produkt über einen
30mA versorgt wird.
auszuführen und muss:
- ortsfest sein
- für die Stromaufnahme geeignet sein (siehe
Daten des Geräteschildes)
- gegen das Eindringen von Flüssigkeiten
geschützt sein (IPX5).
LÜFTUN G DES RAUMS
Erfolgt die Installation in einem
geschlossenen Raum, muss für ein geeignetes
Lüftungssystem des Raums gesorgt werden.
2,5 m
2 m1,5 m 2 m1,5 m
ZONA 2 ZONA 2
ZONA 1
ZONA 0
ZONA 0
2,5 m
h
= h

15
DE
MONTAGEANLEITUNGEN MOD. 629
Zur Gültigkeit der Garantie muss das Produkt wie von Teuco geliefert installiert werden.
Achten Sie auf die Montageanleitungen sowie die Materialempfehlungen und die mit dem Produkt gelieferten Zubehörteile.
Bei der elektrischen Installation beachten Sie die gültigen nationalen Sicherheitsvorschriften gemäß Vorinstallation.
Bewahren Sie diese Bedienungs- und Wartungsanleitung sorgfältig auf, da sie wichtiger Bestandteil der Anlage ist und
als Nachschlagewerk dient.
Die angegebenen Daten und Produkteigenschaften sind nicht verbindlich. Teuco SpA behält sich das Recht vor, ohne
Vorankündigung alle für nötig erachteten Änderungen vorzunehmen, ohne dass sich hieraus Ersatzansprüche ableiten
lassen.
Dieses Produkt ist für den Hausgebrauch gedacht. Bei öffentlichem Gebrauch muss neben den von Teuco vorgesehenen
technischen und Sicherheitsvorschriften die uneingeschränkte Beachtung der speziellen gesetzlichen Normen für die
Anlage, die Sicherheit und die Behandlung des Wassers in den jeweiligen Installationsländern des Minischwimmbeckens
von Teuco garantiert werden.
HINWEISE
3ÖFFNEN DER VERPACKUNG UND
BEFÖRDERUNG DES MINISCHWIMMBECKENS
Entfernen Sie die Verpackung vom
Minischwimmbecken und lassen Sie es auf der
Palette.
Für Transporte ausschließlich die Palette
benutzen, auf der das Minischwimmbecken
aufliegt.
DAS MINISCHWIMMBECKEN NIEMALS MIT
WASSER GEFÜLLT ANHEBEN.
4INSTALLATION DER ABDECKUNG
Befestigen Sie die Gurte der Abdeckung mit den
mitgelieferten Schrauben an den Paneelen des
Minischwimmbeckens (siehe Zeichnung).
Die Abdeckung muss mit den Haltegurten
befestigt und eventuell mit einem Schlüssel
Sicherheit zu gewährleisten.
Die Abdeckung ist nicht zum Tragen
von Gewicht geeignet. Nicht auf der
Abdeckung sitzen, laufen oder liegen. Keine
Gegenstände ablegen. Eine nicht befestigte
oder geschlossene Abdeckung stellt eine
potentielle Gefahr dar.
Es liegt eine Gefahr für den Benutzer vor,
sollten die Anleitungen zur Befestigung der
Abdeckung nicht befolgt werden.
Entfernen Sie die Abdeckung, bevor Sie
in das Minischwimmbecken steigen;
Sie könnten sich möglicherweise darin
verfangen.
5WASSER ANS CHLÜSSE
ABLAUFANSCHLUSS
Ablassventil ausgestattet.
Den Anschluss des Ventils mit einem
Ablaufschacht durchführen (siehe Vorinstallation
EINLAUFANSCHLUSS
Für das Befüllen des Minischwimmbeckens
muss ein externer Schlauch benutzt werden,
der nicht eingetaucht werden darf, um
einen etwaigen Rückfluss des Wassers ins
Leitungsnetz zu verhindern.
6ELEKTRISCHEANS CHLÜSSE
a
nehmen Sie das Inspektionspaneel ab.
bDen Stromanschluss in dem am
Minischwimmbecken vorhandenen Schaltkasten
D) ausführen.
Der Stromanschluss muss unter Beachtung der
2) ausgeführt werden.
Die Abmessungen des Stromkabels und der
passenden Kabelführung werden auf Basis der
aufgenommenen Spannung , des Abstands
vom Verteilerkasten und der Verlegungsart
ausgewählt.
Das Bohren des Schaltkastens, die Wahl der
Kabelverschraubung IPX5 und der Einbau
gehen zu Lasten des Installateurs.
Nach Ausführung aller Anschlüsse ist
der einwandfreie Betrieb der Anlage zu
überprüfen ( s i e h e H a n d b u c h - ERS T
M A L I G E INBETRIEBNAHME).
ACHTUN G: DEN STROM NUR NACH
FÜLLEN DES MINISCHWIMMBECKENS MIT
WASSER EINS CHALTEN .
Richten Sie beim Einbau des Paneels die
Bohrungen von Inspektionspaneel und Rahmen
des Minischwimmbeckens miteinander aus.

16
ES PREINSTALACIÓN ART. 629
1ART. 629 (CON PANELES DE MADERA)
Además debe estar perfectamente nivelada.
Si la piscina se instala fuera de la vivienda (por
ejemplo, en el jardín) es importante construir
una base de apoyo con un fondo perfectamente
estabilizado.
2EMPALMES DEL FONDO
O
~
eléctrica
Para el desagüe se puede conectar a ella un
tubo flexible o construir una conexión fija con
se recomienda preparar una arqueta con una
válvula que hará las veces de válvula de fondo.
ATENCIÓN: Antes de instalar la arqueta
consulte las normas municipales que
reglamentan el manejo de agua tratada
químicamente.
Para llenar la minipiscina se aconseja utilizar
un tubo flexible externo. Es preferible no
sumergirlo para evitar el reflujo del agua.
ATENCIÓN: Si se prefiere hacer una
conexión fija a la red de aguas también es
necesario adoptar medidas adecuadas para
evitar el reflujo.
Consultar los reglamentos municipales
antes de efectuar este tipo de instalación.
La instalación eléctrica debe ser conforme a las
disposiciones legales nacionales.
La minipiscina debe conectarse a la red mediante
un interruptor diferencial omnipolar con una apertura
mínima de los contactos de 3mm.
El producto debe conectarse a la red a través de
un interruptor omnipolar (I), con una apertura de los
contactos que garantice la desconexión completa en
las condiciones de la categoría de sobretensión III
(3mm mínimo),
701).
La red debe estar conectada a tierra. La conexión de
la piscina a la red debe ser:
- fija
- adecuada a la corriente que absorbe la
minipiscina
(ver placa de datos)
- hermética a la penetración de líquidos (IPX5).
VENTILACIÓN
Si la minipiscina se instala bajo techo es
preciso asegurar a la estancia una buena
ventilación.
2,5 m
2 m1,5 m 2 m1,5 m
ZONA 2 ZONA 2
ZONA 1
ZONA 0
ZONA 0
2,5 m
h
= h

17
ES
INSTRUCCIONES DE MONTAJE ART. 629
Para que la garantía tenga validez el producto debe instalarse como lo suministró Teuco . Deben respetarse las
instrucciones de montaje y utilizarse los materiales aconsejados y los accesorios que acompañan al producto.
La instalación eléctrica debe efectuarse de conformidad con las normas de seguridad nacionales que se citan en las
instrucciones de preinstalación.
Este manual es parte integrante del producto: guárdelo hasta el final de la vida útil del mismo.
Los datos y las características que aparecen en el catálogo no son vinculantes para Teuco SPA, que se reserva el derecho
de introducir todas las modificaciones que considere oportunas sin obligación de preaviso o sustitución.
Este producto es para uso residencial. En caso de uso público deben garantizarse, además de las prescripciones técnicas
y de seguridad previstas por Teuco, las leyes sobre instalación, seguridad y tratamiento del agua del país donde se instale.
ADVERTENCIAS
3APERTURA DEL EMBALAJE Y
MANUTENCIÓN DE LA MINIPISCINA
Quitar el embalaje y dejar la minipiscina sobre
el pallet.
Utilizar el pallet como superficie de apoyo
para transportar la minipiscina.
NO ELEVAR NUNCA LA MINIPISCINA SI
ESTÁ LLENA DE AGUA.
4MONTAJE DE LA CUBIERTA
Atornillar las correas de la cubierta en los
paneles de la minipiscina como indica el diseño.
La cubierta se sujeta con correas pero también
puede cerrarse con llave.
La cubierta no ha sido diseñada para
soportar pesos.
No sentarse, caminar o acostarse sobre la
cubierta.
No apoyar objetos sobre la cubierta.
No cerrarla o no sujetarla puede ser
peligroso.
Incumplir las instrucciones de montaje de la
cubierta también puede ser peligroso para el
usuario.
Para evitar accidentes, antes de entrar en la
minipiscina hay que quitar completamente la
cubierta.
5CONEXIONES HIDRÁULICAS
DESAGÜE
La minipiscina Teuco cuenta con una válvula de
desagüe.
Conectar la válvula con una arqueta (ver
LLENADO
Para llenar la minipiscina se debe usar un tubo
externo. No sumergirlo para evitar el reflujo del
agua en la red.
6CONEXIONES ELÉCTRICAS
aDestornillar los tornillos que indica la figura para
desmontar el panel de inspección.
bConectar la red eléctrica a la caja (D) de la
minipiscina.
La conexión eléctrica debe ser conforme con
las normas que se citan en la preinstalación
(fase 2).
Las dimensiones del cable de alimentación
y del pasacable deben elegirse según la
absorción de
corriente absorbida, la distancia de la centralita
de derivación y el tipo de instalación.
La perforación de la caja, la elección del
prensacable IPX5 y el montaje corren a cargo
del instalador.
Richten Sie beim Einbau des Paneels die
Bohrungen von Inspektionspaneel und Rahmen
des Minischwimmbeckens miteinander aus.
Una vez realizadas todas las conexiones
es indispensable verificar si la instalación
funciona correctamente (ver manual de uso -
PRIMERA PUES TA EN MARCHA).
ATENCIÓN: NO DAR TENSIÓN A LA INS
TALACIÓN ANTES DE HABER LLEN ADO DE
AGUA LA MINIPISCINA.
Volver a montar los paneles de la minipiscina
haciendo coincidir los agujeros del panel de
inspección con los del bastidor.

18
NL KAART VOOR-INS TALLATIE ART. 629
1ART. 629 (MET HOUTEN PANE LEN)
Zorg ervoor dat de ondergrond perfect waterpas
is. Als de minipool in de openlucht wordt
geïnstalleerd (b.v.: op een grasveld) dient een
gestabiliseerde ondergrond gemaakt te worden
die de juiste stabiliteit garandeert.
2UITVOERING VAN DE AANSLUITINGEN IN DE
VLOER
AANSLUITINGEN
O
~
Voor de afvoer kan een flexibele leiding gebruikt
worden die op de klep wordt aangesloten, of
vaste verbinding gecreëerd worden. In dit geval
wordt voor een goede waterafvoer aanbevolen
een put met een klep te maken, zodat deze als
bodemklep kan worden gebruikt.
LET OP: alvorens de afvoerput te maken,
dienen eerst de plaatselijke instanties
geraadpleegd te worden omtrent de
voorschriften voor de afvoer van chemisch
behandeld water.
VULLEN
Voor het vullen van de Teuco minipool wordt
aanbevolen een externe flexibele leiding te
gebruiken; zorg er daarbij voor dat de slang
niet in het water ondergedompeld wordt om
eventuele terugstroming van water in het
waterleidingnet te voorkomen.
LET OP: in het geval dat de minipool van
een vaste aansluiting op het waterleidingnet
wordt voorzien, is het noodzakelijk
dat er adequate apparatuur wordt
aangebracht die het waterleidingnet tegen
terugstromingsverschijnselen beschermt.
Raadpleeg de plaatselijke instanties
alvorens een dergelijke installatie aan te
brengen.
AANSLUITINGEN
Het elektrische voedingsnet moet voldoen aan de
nationale wettelijke voorschriften.
Het product moet aangesloten worden aan een
schakelaar met alle aansluitingen (I), met open
contacten die garandeert dat het product helemaal
losgehaald kan worden als zich een overspanning
voordoet III (3mm minimaal), Buiten de zone 0,1,2,3
Controleer of het product gevoed wordt door
middel van een differentieelschakelaar met een
interventiedrempel 30mA.
De aansluiting op het voedingsnet moet geaard zijn
en:
(zie de gegevens op het typeplaatje)
binnendringen van vloeistoffen (IPX5).
VENTILATIE VAN DE RUIMTE
Als de minipool in een gesloten ruimte wordt
geïnstalleerd moet de ruimte van adequate
ventilatie worden voorzien.
2,5 m
2 m1,5 m 2 m1,5 m
ZONA 2 ZONA 2
ZONA 1
ZONA 0
ZONA 0
2,5 m
h
= h

19
NL
MONTAGE-INSTRUCTIES ART. 629
Opdat de garantie geldig is, moet het product zo geïnstalleerd worden als het door Teuco werd geleverd.
De montage-instructies moeten in acht worden genomen, en de aanbevolen materialen en de bij het product geleverde
accessoires moeten gebruikt worden.
De elektrische installatie moet worden uitgevoerd met inachtneming van de geldende landelijke veiligheidsnormen, zoals
beschreven bij de voorinstallatie.
Deze handleiding hoort bij het product en dient dan ook bewaard te worden voor eventuele latere raadpleging.
De gegevens en de kenmerken die vermeld zijn, hebben geen bindend karakter en Teuco SpA behoudt zich het recht voor
opportuun geachte wijzigingen door te voeren zonder verplichting tot kennisgeving vooraf of tot vervanging.
Dit product is bestemd voor gebruik in huiselijke omgeving. In geval van gebruik door een publiek, dient men te
garanderen dat niet alleen de technische voorschriften en veiligheidsregels die worden opgelegd door Teuco, maar ook de
specifieke wettelijke normen voor installaties, veiligheid en waterbehandeling die van kracht zijn in het land waar de Teuco
minipool wordt geïnstalleerd, strikt in acht worden genomen.
RICHTLIJNEN
3OPENEN VAN DE VER PAKKING EN
VERPLAATSEN VAN DE MINIPOOL
Bevrijd de minipool van de verpakking maar laat
hem nog op de pallet staan.
Maak voor alle transporthandelingen
uitsluitend gebruik van het pallet waarop de
minipool geplaatst is.
DE MINIPOOL MAG NOOIT WORDEN
GEHEVEN TER WIJL HIJ VOL WATER ZIT.
4MONTAGE VAN DE AFDEKKING
Bevestig met behulp van de bijgeleverde
schroeven de riemen van de afdekking aan de
panelen van de minipool (zie afbeelding).
De afdekking moet worden vastgezet met
de bevestigingsriemen en eventueel, voor
nog meer veiligheid, met een sleutel worden
afgesloten.
De afdekking kan geen gewichten dragen.
U mag niet op de afdekking gaan zitten, liggen of
lopen.
Leg er geen voorwerpen op.
Een niet bevestigde of niet gesloten
afdekking kan gevaarlijk zijn.
Het niet opvolgen van de instructies voor
de bevestiging van de afdekking kan gevaar
opleveren voor de gebruiker.
Alvorens in de minipool plaats te nemen,
altijd volledig de afdekking verwijderen
omdat u anders daarin verstrikt kunt raken.
5WATERAANSLUITINGEN
AANSLUITING VAN DE AFVOER
De Teuco minipool is uitgerust met een
afvoerklep.
De klep moet worden verbonden met een
VULAANSLUITING
Voor het vullen van de minipool moet een
externe leiding gebruikt worden (zorg er
daarbij voor dat de slang niet in het water
ondergedompeld wordt, om eventuele
terugstroming van het water in het
waterleidingnet te voorkomen).
6ELEKTRISCHE AANS LUITINGEN
aDemonteer het inspectiepaneel door de
aangegeven schroeven los te draaien.
bBreng de aansluiting op het elektriciteitsnet tot
stand via de doos (D) van de minipool.
De aansluiting moet worden uitgevoerd met
inachtneming van de voorschriften, zoals
beschreven bij de voorinstallatie (fase 2).
De afmetingen van de voedingskabel en de
bijbehorende lipklamp moeten gekozen worden
op basis van de opgenomen stroom, de afstand
van de aftakcentrale en het soort installatie.
Het maken van gaten in de doos, de keuze
van de lipklamp IPX5 en de montage zijn voor
verantwoording van de installateur.
Nadat alle aansluitingen tot stand zijn
gebracht, dient u te controleren of
de installatie goed functioneert (zie
gebruikshandleiding - EERSTE START).
LET OP: ZET DE INSTALLATIE PAS ONDER
SPANNING NADAT U DE MINIPOOL MET
WATER HEE FT GEVU LD.
Monteer opnieuw het paneel van de minipool
door de openingen van het inspectiepaneel en
het frame op elkaar uit te lijnen.

20
PT PRÉ-INSTALAÇÃO ART. 629
1ART. 629 (MET HOUTEN PANE LEN)
perfeitamente nivelada.
Se a minipiscina for instalada no exterior (por
ex.: sobre a relva), realize a base de apoio
com um fundo estabilizado que garanta uma
estabilidade adequada.
2PREPARAÇÃO DAS LIGAÇÕES
LIGAÇÕES HIDRÁULICAS
O
~
eléctrica
DESCARGA
ligação fixa com a tubagem de escoamento
aconselhável providenciar uma abertura com
válvula, a utilizar como válvula de fundo.
ATENÇÃO: Antes de efectuar a abertura de
descarga, consulte as autoridades locais
quanto às normas que regulam a descarga
de água tratada quimicamente.
Para o enchimento da minipiscina Teuco,
fim de evitar um eventual refluxo da água para
a rede hídrica.
ATENÇÃO: No caso de ligação fixa da
minipiscina à rede hídrica, é necessária
a adopção de dispositivos adequados,
capazes de proteger a rede hídrica contra
fenómenos de refluxo.
Consulte as autoridades locais antes de
efectuar este tipo de instalação.
interruptor onipolar (I) com abertura dos contactos
que garanta a desconexão completa nas condições
da categoria de sobretensão III (mínimo 3mm),
701).
de um interruptor diferencial com limiar de intervenção
de terra e deve ser:
- de tipo fixo
- adequada à corrente absorvida (vide dados na
chapa)
- com grau de resistência à penetração de líquidos
(IPX5).
VENTILAÇÃO DO AMBIENTE
No caso de instalação em ambiente fechado,
é necessário proceder a uma ventilação
adequada do próprio ambiente.
2,5 m
2 m1,5 m 2 m1,5 m
ZONA 2 ZONA 2
ZONA 1
ZONA 0
ZONA 0
2,5 m
h
= h
Other manuals for 629
1
Table of contents
Languages:
Other Teuco Hot Tub manuals
Popular Hot Tub manuals by other brands

CalderaSpas
CalderaSpas CalderaSpas Utopia Series owner's manual

anko
anko SS-601A user manual

CalderaSpas
CalderaSpas CANTABRIA owner's manual

Dimension One Spas
Dimension One Spas HYDRO SPORT Installation and owner's guide

Bestway
Bestway Lay-Z-Spa Maldives HydroJet Pro manual

Dimension One Spas
Dimension One Spas Nautilus Specifications
