1110
Digitaler Timer und Stoppuhr
6. Inbetriebnahme
• Ziehen Sie die Schutzfolie vom Display.
• Schieben Sie den Batteriefachdeckel nach unten und legen Sie zwei neue
Batterien (2 x 1,5 V AAA) ein. Achten Sie auf die richtige Polarität.
• Legen Sie den Deckel wieder ein und schieben Sie ihn nach oben.
• Es werden alle LCD Segmente kurz angezeigt.
• Das Gerät ist jetzt betriebsbereit.
• Um das Gerät auszuschalten, entfernen Sie bitte die Batterien.
7. Bedienung
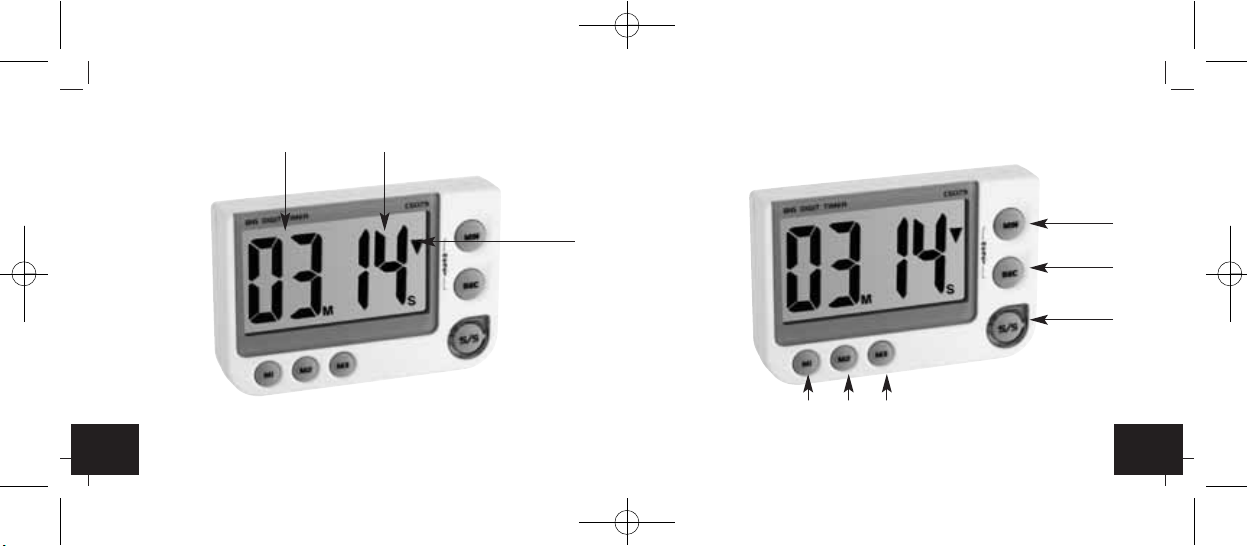
7.1 Timer
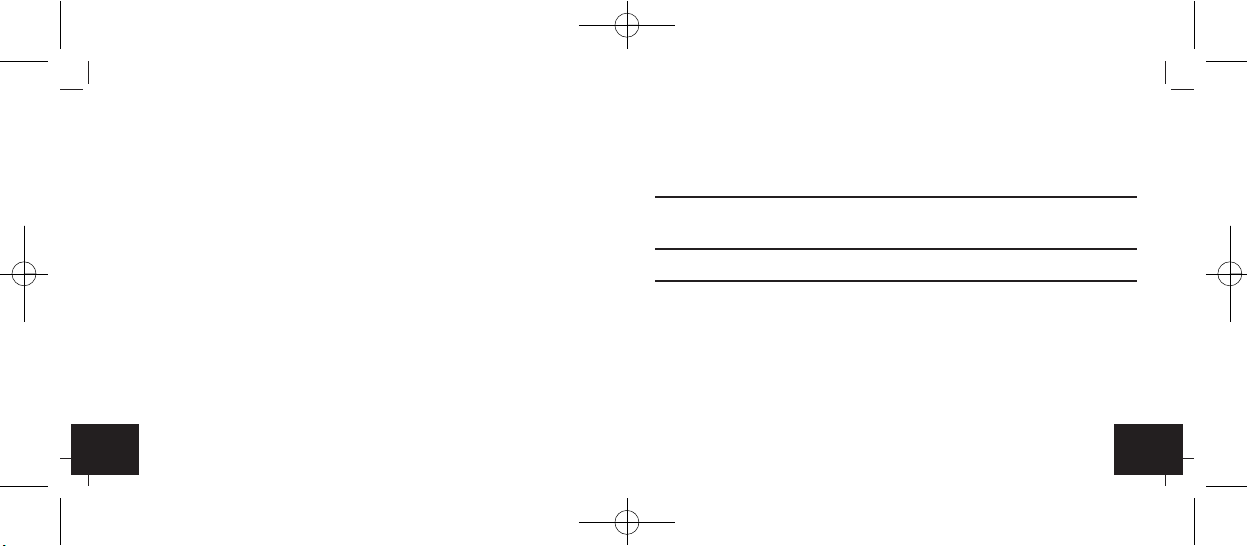
• Stellen Sie mit der MIN Taste die Minuten oder mit der SEC Taste die
Sekunden der gewünschten Zeit ein. Halten Sie die Tasten im Einstellmo-
dus gedrückt, gelangen Sie in den Schnelllauf.
Digitaler Timer und Stoppuhr
•▼ erscheint im Display.
• Drücken Sie die S/S Taste und die Zählung beginnt.
• Während der Zählung blinkt das Symbol und die S/S Taste blinkt grün.
• Mit der S/S Taste können Sie die Zählung anhalten und neu starten.
• Nach Ablauf der Zeit erscheint das Symbol ▲ im Display, das Alarm-
signal ertönt (ca. 60 Sekunden) und die S/S Taste blinkt rot. Der Timer
zählt nun die verstrichene Zeit.
• Drücken Sie die S/S Taste, um die Zählung zu stoppen und das Alarmsi-
gnal auszuschalten.
• Es erscheint automatisch die zuletzt vorgewählte Zeit.
• Durch gleichzeitiges Drücken der MIN und SEC Taste wird die Anzeige
gelöscht.
7.2 Memory-Funktion
• Drücken und halten Sie die M1 Taste für 2 Sekunden.
TFA_No. 38.2024_Anleit_04_21 25.04.2021 17:47 Uhr Seite 6