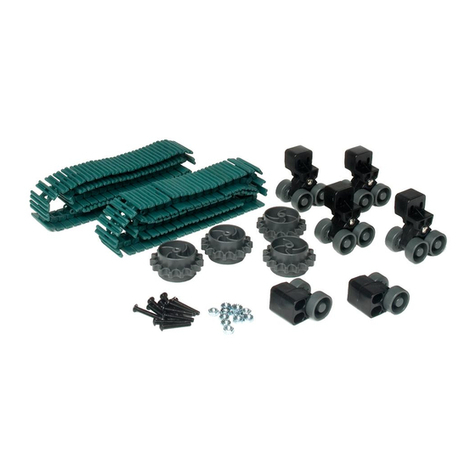
Thames & Kosmos SolarBots User manual

Franckh-Kosmos Verlags-GmbH & Co. KG, Pfizerstr. 5-7, 70184 Stuttgart, Germany | +49 (0) 711 2191-0 | www.kosmos.de
Thames & Kosmos, 89 Ship St., Providence, RI, 02903, USA | 1-800-587-2872 | www.thamesandkosmos.com
EXPERIMENT MANUAL

› › › SAFETY INFORMATION
Dear Parents and Adults,
With this kit, you and your young engineers can build
eight fun solar-powered models. Each model uses
the same solar panel and motor, which are part of a
module called the solar gearbox. Thus, the models
can be built one at a time, and each model must be
disassembled before the next is assembled.
By building the models, kids can learn about how the
different mechanisms enable each model to move in
a different way.
After a model is assembled, you can power it with
direct sunlight or a lamp with a high-wattage
incandescent or halogen light bulb held a few inches
above the solar panel. Sunlight is far more powerful
than any artificial light source. By experimenting with
the solar panel, kids can learn a lot about this
important source of renewable energy.
There is no battery, so energy is not stored in the
device. It operates as long as it is exposed to a
powerful enough light source.
Before building and experimenting, read the
instructions together with your child and discuss the
safety instructions. Please provide your child with the
help and advice that he or she needs for tricky
assembly steps and experiments, and accompany him
or her every step of the way.
If your child is working on a table, provide a table mat
to prevent damage to the furniture.
When cutting the plastic parts with a cutter, special
care must be taken to avoid sharp edges, rough
edges, and burrs. These can be removed using a
cutter and a file. Provide your child with a cutter and
supervise him or her until you are sure that he or she
can use it without supervision.
We hope you and your child have fun building and
experimenting with your SolarBots!
Warning. Not suitable for
children under 3 years.
Choking hazard — small parts
may be swallowed or inhaled.
Warning. Only for use by
children aged 6 years and
older, due to accessible
electronic components.
Instructions for parents or
other supervising adults are
included and have to be
observed. Keep packaging
and instructions as they
contain important
information.
NOTES ON ENVIRONMENTAL
PROTECTION/NOTES ON DISPOSAL
OF ELECTRICAL AND ELECTRONIC
COMPONENTS:
The electronic components of this product
are recyclable. For the sake of the
environment, do not throw them into the
household trash at the end of their lifespan.
They must be delivered to a collection
location for electronic waste, as indicated
by the following symbol:
Please contact your local authorities for the
appropriate disposal location.

1
› › › TABLE OF CONTENTS
SolarBots
1
665082-02-150420
TIP!
Additional information can be
found in the Check It Out sections
on pages 43 and 44.
Safety Information ................................... Inside front cover
Table of Contents ............................................................... 1
Kit Contents ....................................................................... 2
Tips for Assembly and Usage ............................................ 3
Meet the SolarBots! .......................................................... 4
Solar Panel and Motor Module Assembly Instructions ..... 6
Solar Gearbox Module Assembly Instructions .................. 7
Module A & B Assembly Instructions ............................... 8
Tips for Disassembly ......................................................... 9
Assembly Instructions for the Models
Zoomer: The Race-Car SolarBot ..................................... 10
Armie: The Armadillo SolarBot ....................................... 13
Bronto: The Dinosaur SolarBot ....................................... 17
Axel: The Big-Wheel SolarBot ......................................... 21
Tank: The Tank SolarBot ................................................. 25
Dizzy: The Spinning SolarBot .......................................... 29
Cricket: The Bug SolarBot ............................................... 33
Major: The Drumming SolarBot ...................................... 38
About Solar Energy ......................................................... 43
About Solar Cells ............................................................ 44

2
› › › KIT CONTENTS
No. Description Quantity
A Plastic parts group A with parts A1 – A29 1
B Plastic parts group B with parts B1 – B31 1
C Plastic parts group C with parts C1 – C27 1
D Plastic parts group D with parts D1 – D15 1
P1 Solar panel and motor 1
P2 Gear, yellow 1
P3 Gear, red 1
P4 Gear, orange 1
P5 Gear with metal shaft 1
P6 Round shaft 1
P7 Screw 1
P8 Double-sided adhesive mounting tape piece 2
Checklist: Find — Inspect — Check Off
What’s inside your experiment kit:
GOOD TO KNOW!
If you are missing any parts, please contact
Thames & Kosmos customer service:
1:1
8
5
2
34
7
9
10
11
12 12
14 15
16
17
18
19
18
21
20
22 23
25
26 27 29
28
24
13
6
MADE IN TAIWAN A
1
MADE IN TAIWAN
D
1
2
34
57
8
9
10
11
12
13
14
15
15
6 6 6 6
MADE IN TAIWAN
C
1
2
4 5
3
4
5
7
8
9
10
11
12
13
14
16
15 16
17
18 19
19 18
20
21 22 23 24 25
26
26
26
26
27
6
MADE IN TAIWAN
B
1
2
3
4
5
7
8
9 9 9 9
10
11 12
13
14
15 16
17
18
19 20
21
22
23
2424
25
26 27
28
29 30
31
6
BA C
D
P5
P1
P6
P2
P7
P3
P8
P4
You will also need:
Small Phillips-head
screwdriver (PH1 size),
diagonal cutters (or
scissors), nail file
(optional)

› › › TIPS FOR ASSEMBLY AND USAGE
Please read through the tips below before
starting and follow them during assembly
and usage.
• The same solar panel and motor are used
in each model. These are part of a module
called the solar gearbox. First, assemble
the solar gearbox following the steps on
pages 6–8, and then use it to assemble
each model, one at a time.
• You will need the tools shown to the right.
• Cut the plastic parts from their frames only
when they are required. Do not cut them in
advance.
• Use diagonal cutters or scissors to cut the
plastic parts from the frames.
• Remove excess material and burrs using a
cutter and a nail file before assembly. Look
closely at the illustrations of the parts in
this manual and be careful not to remove
any portion of the actual parts themselves.
• Use a screwdriver of the correct size.
Follow the steps to the right to fasten the
screw perfectly.
• Tighten the screw all the way in. If it is not
fastened tightly enough, the models may
not function properly, may wear more
quickly, and may fall apart.
• To power your model, put it in direct
sunlight. You can also power it indoors
using a lamp with a high-wattage (at least
50 watts) incandescent or halogen light
bulb, held a few inches above the solar
panel. Since there is no battery, energy is
not stored in the device. It operates as long
as it is exposed to a powerful enough light
source.
SolarBots
3
A B
Diagonal cutters Nail file
Precision screwdriver
(recommended size: PH1)
50 mm
4~5 mm
PH1
Unnecessary
burrs
Incorrect
Correct
Insert the tip of the screwdriver
into the top of the screw, aligning
it with the shaft of the screw.
(1) Turn the screwdriver to screw
in the screw.
(2) Feel the tension increasing.
(3) Keep screwing until the screw
is screwed all the way in.
Repeat until all the screws are
tightly fastened.
Solar
gearbox
50+
Watts

4
NAME:
HOME:
SKILLS:
NOTES:
NAME:
HOME:
SKILLS:
NOTES:
NAME:
HOME:
SKILLS:
NOTES:
NAME:
HOME:
SKILLS:
NOTES:

5
NAME:
HOME:
SKILLS:
NOTES:
NAME:
HOME:
SKILLS:
NOTES:
NAME:
HOME:
SKILLS:
NOTES:
NAME:
HOME:
SKILLS:
NOTES:

SOLAR PANEL AND MOTOR MODULE ASSEMBLY
First, follow the steps starting here to assemble
the solar gearbox. Then use the solar gearbox
to assemble each model, one at a time.
PULL
P8x2
A13
6
3
P2
P1
Correct
Incorrect
Solar Panel
1
4
2
Note: You may need to adjust how much the motor
axle sticks out of P2 when you get to step 1 on the
next page, to get P2 and P3 to mesh properly.
Remove
paper from
both sides.
Remove protective
film, if present.

SOLAR GEARBOX MODULE ASSEMBLY
7
Assembly Instructions
P6
A10
A7
A10
P4
(Orange)
P4
(Orange)
P5
(Green)
P5
(Green)
P3
(Red)
P3
(Red)
Correct
Incorrect
1
2
A12 Correct Incorrect
1
2
Motor from
solar panel and
motor module
Loop the wires around
the post and through
the notch as shown.

SOLAR GEARBOX MODULE ASSEMBLY
MODULES A & B ASSEMBLY These modules are used in more than one model.
Assemble them before building the models.
8
A12
A B
Module A
A20
A17
Module B
A21
A22 D7
A23
A11
P7
3 4 5
SOLAR GEARBOX TESTING
Place the solar gearbox in direct
sunlight. As soon as enough light energy
strikes the solar panel, the motor shaft
should start spinning. If it doesn’t work,
carefully take it apart and reassemble it
starting from the beginning.
The solar panel is a small photovoltaic
system. These systems convert light
energy — whether from the sun or from
a powerful artificial light source — into
electric current.
Direct
sunlight
Incandescent or
halogen bulb (50
watts or higher)
Follow the tips
for tightening the
screw on page 3.

TIPS FOR DISASSEMBLY
9
Assembly Instructions
A28
PULL
D1
D15
D15 D6
D2
PUSH
PULL
A5 A26 A27
USING THE PART SEPARATOR
TOOL (PART A28)
Part A28 is a specially designed tool
that can be used to help you
disassemble various parts. These
diagrams show you how each section
of the tool can be used and for which
parts.

ZOOMER
10
Solar
Gearbox
B6
C19
C19
B6
A2 A26x2 A27x2 A29
B3 B6x2 B28B10 C7 C9 C14
C15 C16x2 C17 C19x2
Solar Gearbox
1 : 1
D15x10
1

11
Assembly Instructions
x2
A26
D15
Correct Incorrect
C15 C17
B10
Correct
Incorrect
A27
C16
x2
B28 B3
A29
Correct Incorrect
C14
2 3
4
5 7
6

ZOOMER
12
1
2
3
A2
1
2
Don’t pull here
Pull here
C7
C9
8
9 10
11
Note: You do not
need to take this
assembly apart.
Use the tool
(A28) to remove
the D15 parts.
Disassembly tips
Done!

ARMIE
13
Assembly Instructions
A14 A15 A24
A25 B1 B2 B30B29 C6
C11 C18x2 C25x2 D3 D4
Solar Gearbox
Solar
Gearbox D15
D15
D6
C25
C25
D6
1
1
2
2
2
2
1 : 1
D15x2D6x2
1

ARMIE
14
B29
B30
180
D4
C11
C6
D3
B1
2
3

15
Assembly Instructions
C18
C18
A24 A25
B2
A15 A14
4
5
Align the two legs so that
they are pointing in exactly
the same direction.
Right sideLeft side
Line up each leg so it is covering the X symbol.

ARMIE
16
6
7
Done!
This diagram shows how the rotating leg causes
the model to roll over.
Disassembly tip: Use the tool
(A28) to remove the D6 and
D15 parts.

BRONTO
17
Assembly Instructions
A3 A4 B18 B21
B19 B20 C19x2B24x2 C21x2 C24x2 D5 D9
Solar Gearbox
Module B
Solar
Gearbox
D9
D5
Module B
1 : 1
1 : 1
D15x2
1 2

BRONTO
18
C21
C21
x2
C19 D15
Correct Incorrect
x2
D15
D15
C24
1 : 1
1 : 1
1 : 1
3 4
5
76
Table of contents
Other Thames & Kosmos Robotics manuals
Thames & Kosmos
Thames & Kosmos Ultra Bionic Blaster User manual

Thames & Kosmos
Thames & Kosmos SpringBots User manual

Thames & Kosmos
Thames & Kosmos SUPERSPHERE User manual

Thames & Kosmos
Thames & Kosmos Robotics Smart Machines User manual

Thames & Kosmos
Thames & Kosmos TUMBLING HEDGEHOG User manual

Thames & Kosmos
Thames & Kosmos SIDEKICK User manual

Thames & Kosmos
Thames & Kosmos WindBots 6-IN-1 WIND-POWERED MACHINE KIT User manual

