2 3 4
©2017 TiCad GmbH & Co. KG – All rights reserved.
READ ME FIRST
TiCadCANTO
SETTING UP YOUR TROLLEY
Fitting the shaft:
1Insert the shaft
2Insert the shaft through the long hole as far as it will go
3Press shaft against the inside spring and turn it to the left
4Continue turning until the shaft engages
(brake faces upwards)
5Dissemble in reversed order
*Glass-fibre reinforced plastic (PA 6 GF 30)
Expansion bolt turned in too far
Bag holder Expansion bolt in the correct position
USING YOUR TROLLEY
Always move your TiCad trolley slowly and carefully when
moving over rough ground that contains stones or pot-
holes. Avoid kerb stone edges.
Umbrella adapter:
The umbrella adapter is located at the top end of the drawbar.
Screw the umbrella holder into the tapered adapter.
Umbrella adapter with umbrella holder
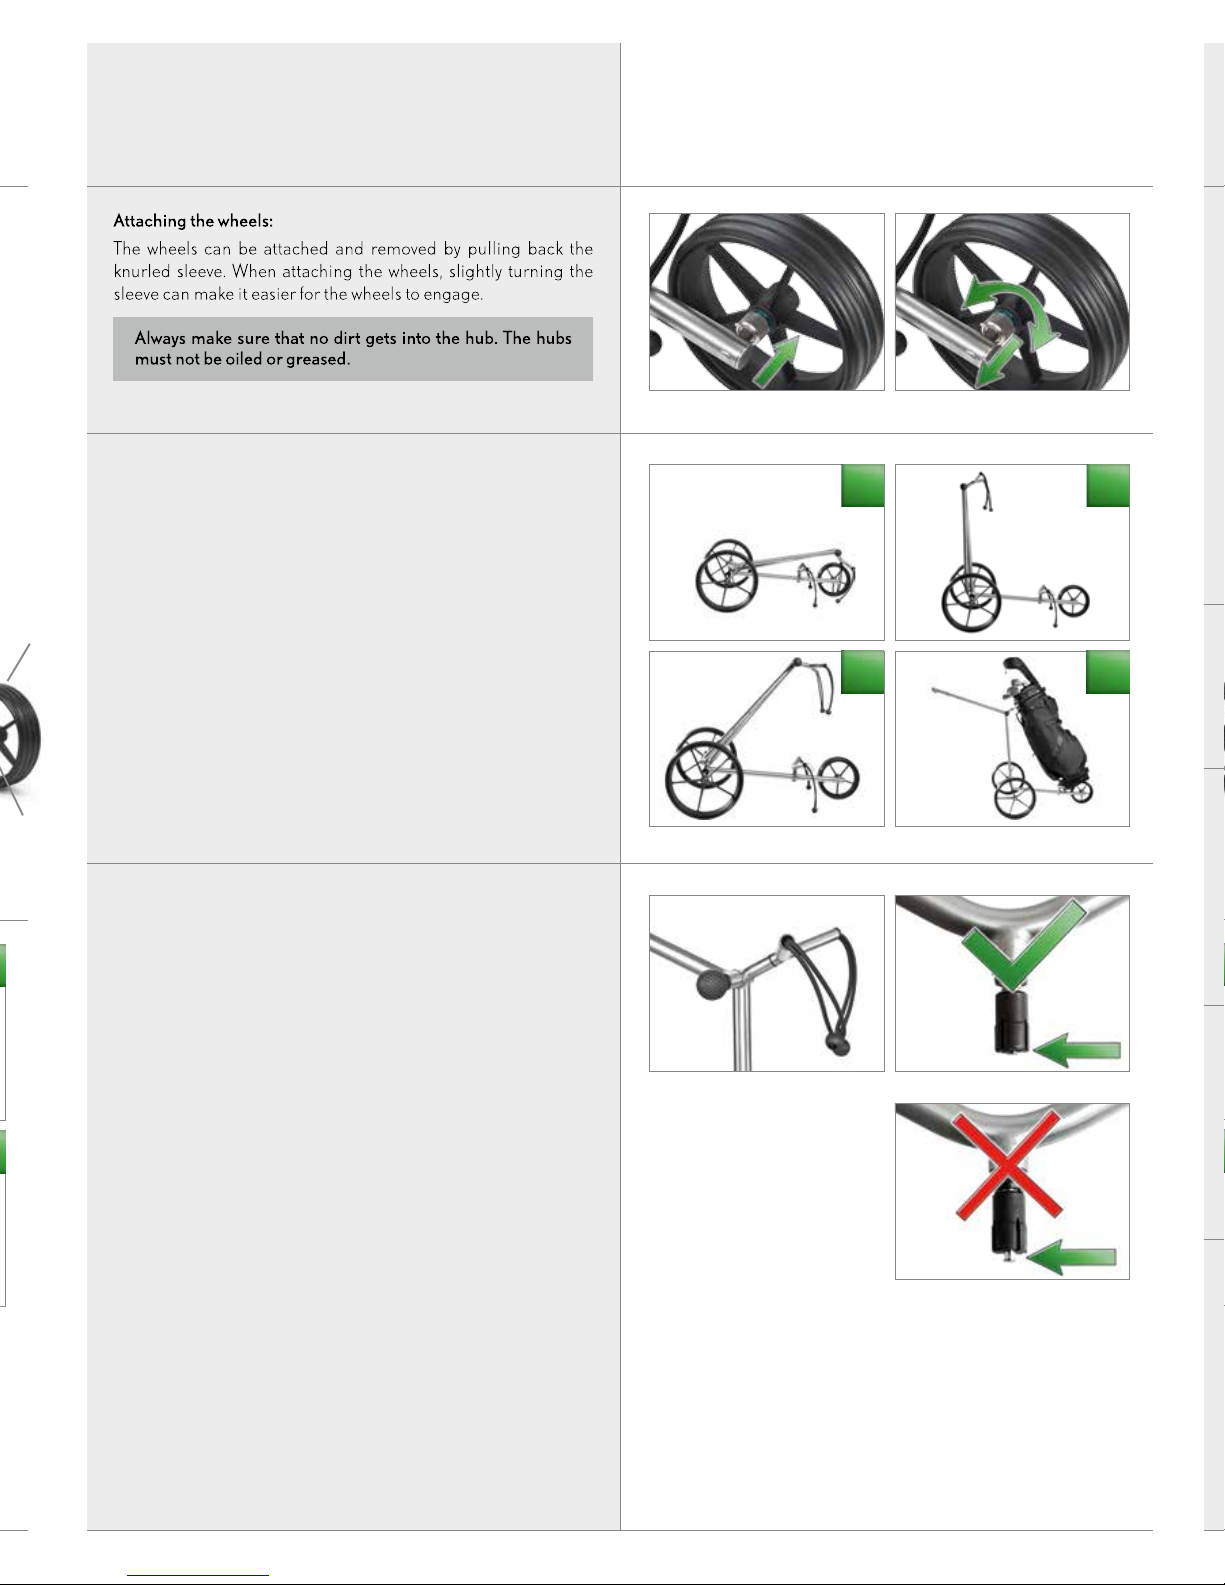
Removing and attaching the wheels
1
2
3
4
Locking brake:
The locking brake has to be fitted on the left wheel. To open and
apply the brake, simply move the locking lever back or forward.
Locking brake when open Locking brake when applied
Adjusting the drawbar:
As soon as the golf bag has been attached to the TiCad trolley, you
can adjust the drawbar to a comfortable height for you. You can
loosen the drawbar by turning the black handle counter-clock-
wise 3 to 4 times. Only start moving the drawbar into the right
position once it has been completely freed and moves without re-
sistance. To fasten the drawbar, turn the black handle in the oppo-
site direction. When doing so, move the drawbar slightly up and
down to allow the fastening mechanism‘s teeth to fully engage
with one another and to prevent them from becoming damaged.
Adjusting the drawbar
1 3
42
Attaching the golf bag:
To fasten the golf bag, insert one of the round fasteners into the
strap of the opposite fastening strap. When doing so, make sure
not to flick the fasteners, as this may cause injury. To undo the fas-
tening straps, hold on to the bottom strap and then remove the
top fastening strap with your other hand.
We recommend fitting the drawbar only once the golf bag
has been attached to prevent the trolley from tipping over.
1
2
3
4
Congratulations!
You have chosen an excellent product manufactured by TiCad! All
of our high-quality products are carefully handmade at our pro-
duction facility in Altenstadt (Hessen, Germany).
To ensure that you will be able to enjoy your trolley for a very long
time, please take some time to carefully read through these oper-
ating instructions, which contain important information that will
make using your trolley a lot easier.
If you have any further questions regarding the use or care of your
trolley, please contact your TiCad dealer.
We would like to wish you many enjoyable games
of golf and a lot of success! Your TiCad team.
YOUR TICADCANTO IN DETAIL
1 Delta leather handle
2 Umbrella adapter
3 Score nuts
4 Drawbar
5 Drawbar adjuster
6 Top bag holder
7 Fastening straps
8 Centre bar
9 Shaft
10 Locking brake
11 GRP* wheel
12 Bottom bag holder
13 Front GRP* wheel
14 Invisible shaft fastener
15 Bottom bar
16 Front shaft
17 Knurled sleeve
1
2
33
4
5
6
7
9
12
14
15
16 17
11
13
10
8
Image:
TiCad Canto with GRP* wheels,
also available as
TiCad Canto with TiTec titanium wheels
Setting up your trolley:
The frame of your TiCad trolley is easy to set up and fold together.
To do so, push the bottom bar right down until it reaches the bot-
tom limit stop and the centre bar right up until it reaches the top
limit stop.
Bag holder:
Both bag holders are attached to the trolley with expansion
bolts. The expansion bolts must not be turned in too far (see
images), because there has to be a gap between the expansion
bolts and the start of the threads. To fit the bag holder, insert it
into the frame and then align and fix it into place by twisting the
bag holder.