7
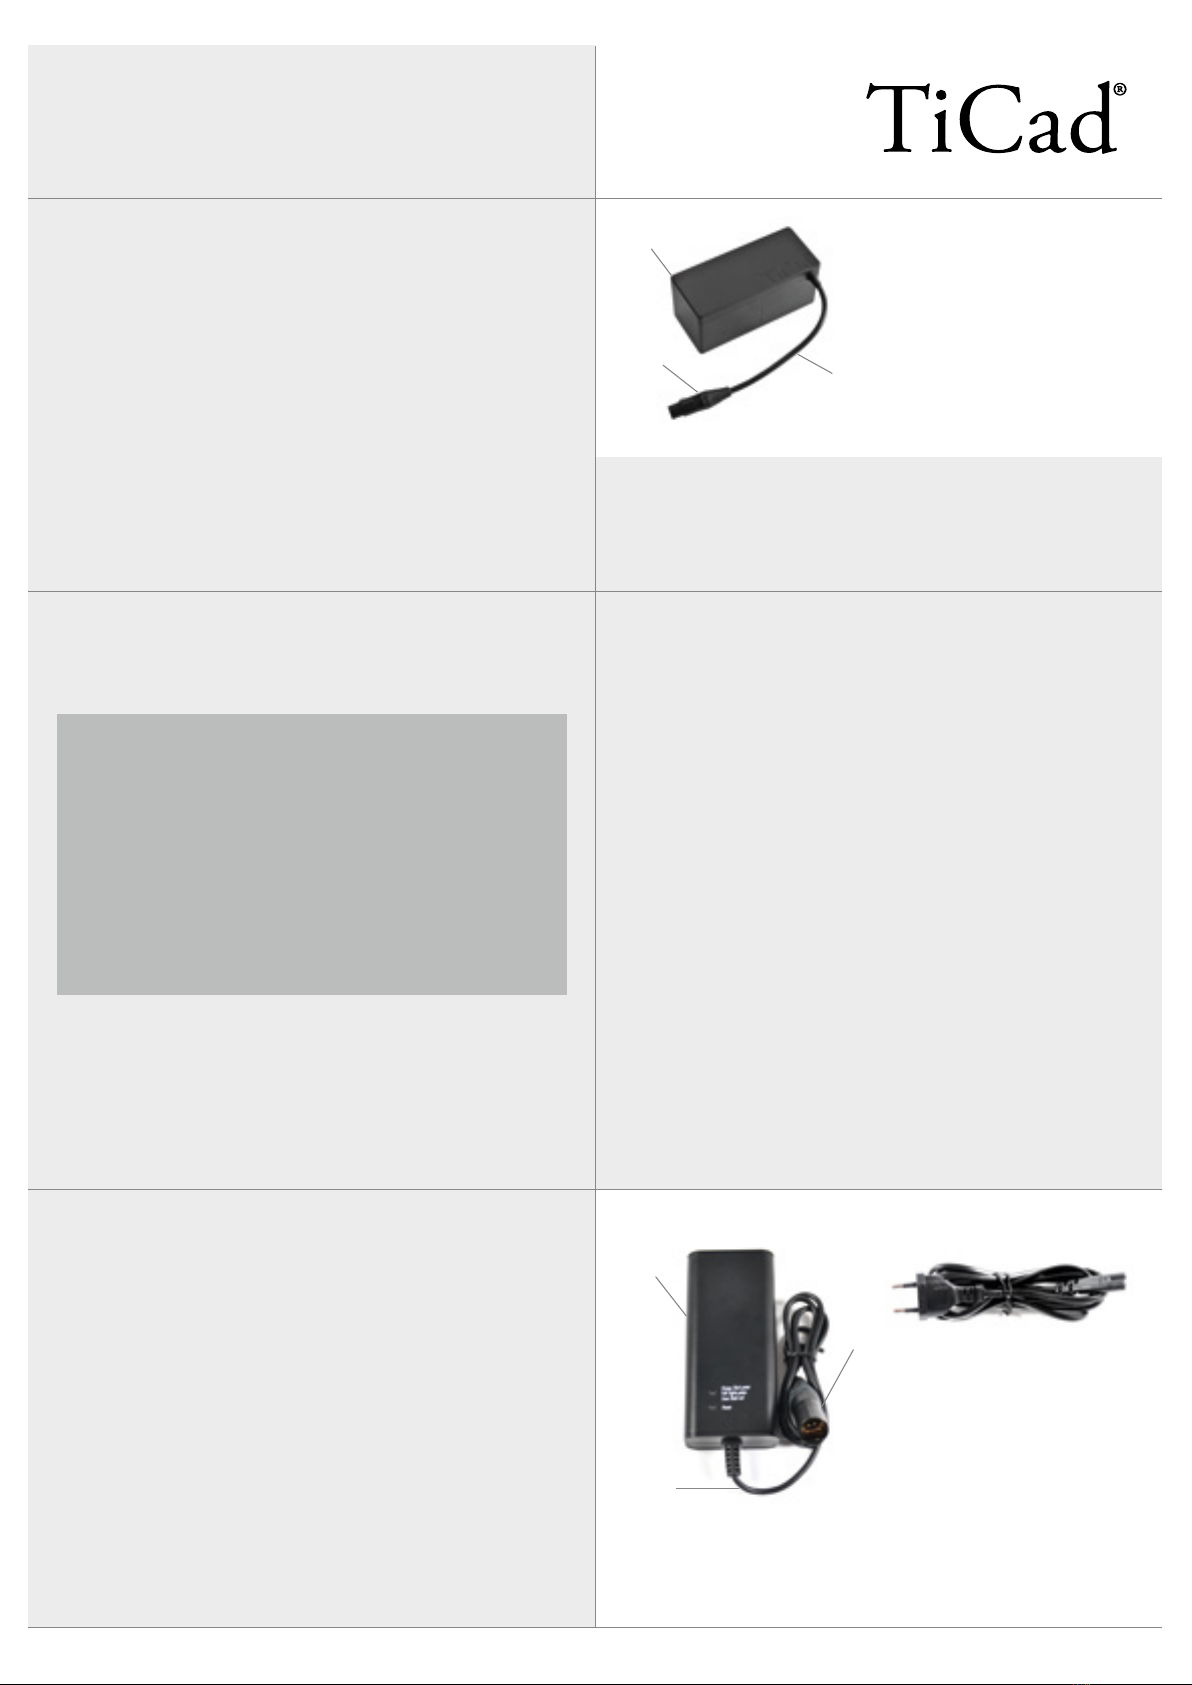
1 Battery inside plastic housing
2 Cable
3 4-pin connector
1 Charger
2 Charger cable
3 Connector, 4-pin
4 Power cord
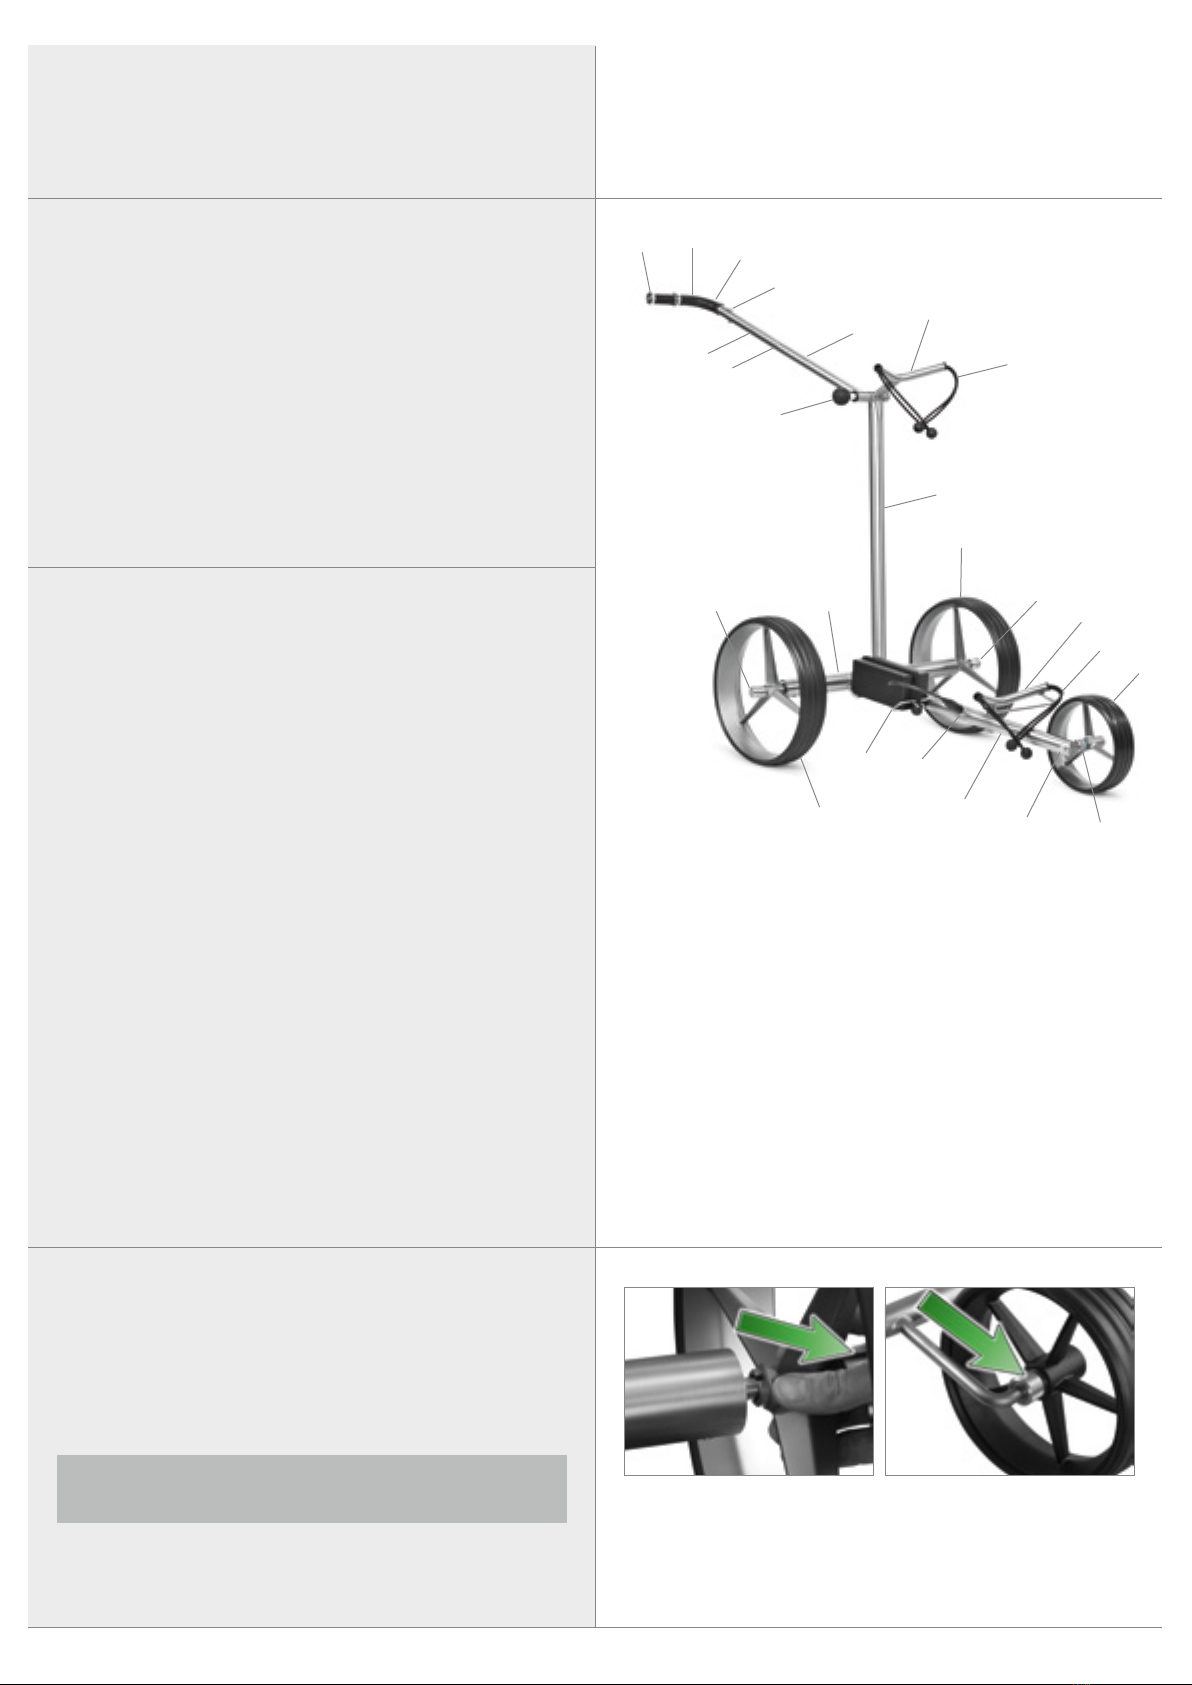
ELECTRONICS
General:
As soon as the battery has been connected to the trolley, some of
the electronic components will be supplied with a small amount
of electricity. This means that the battery will also discharge elec-
tricity while the trolley is standing still. The control unit contains a
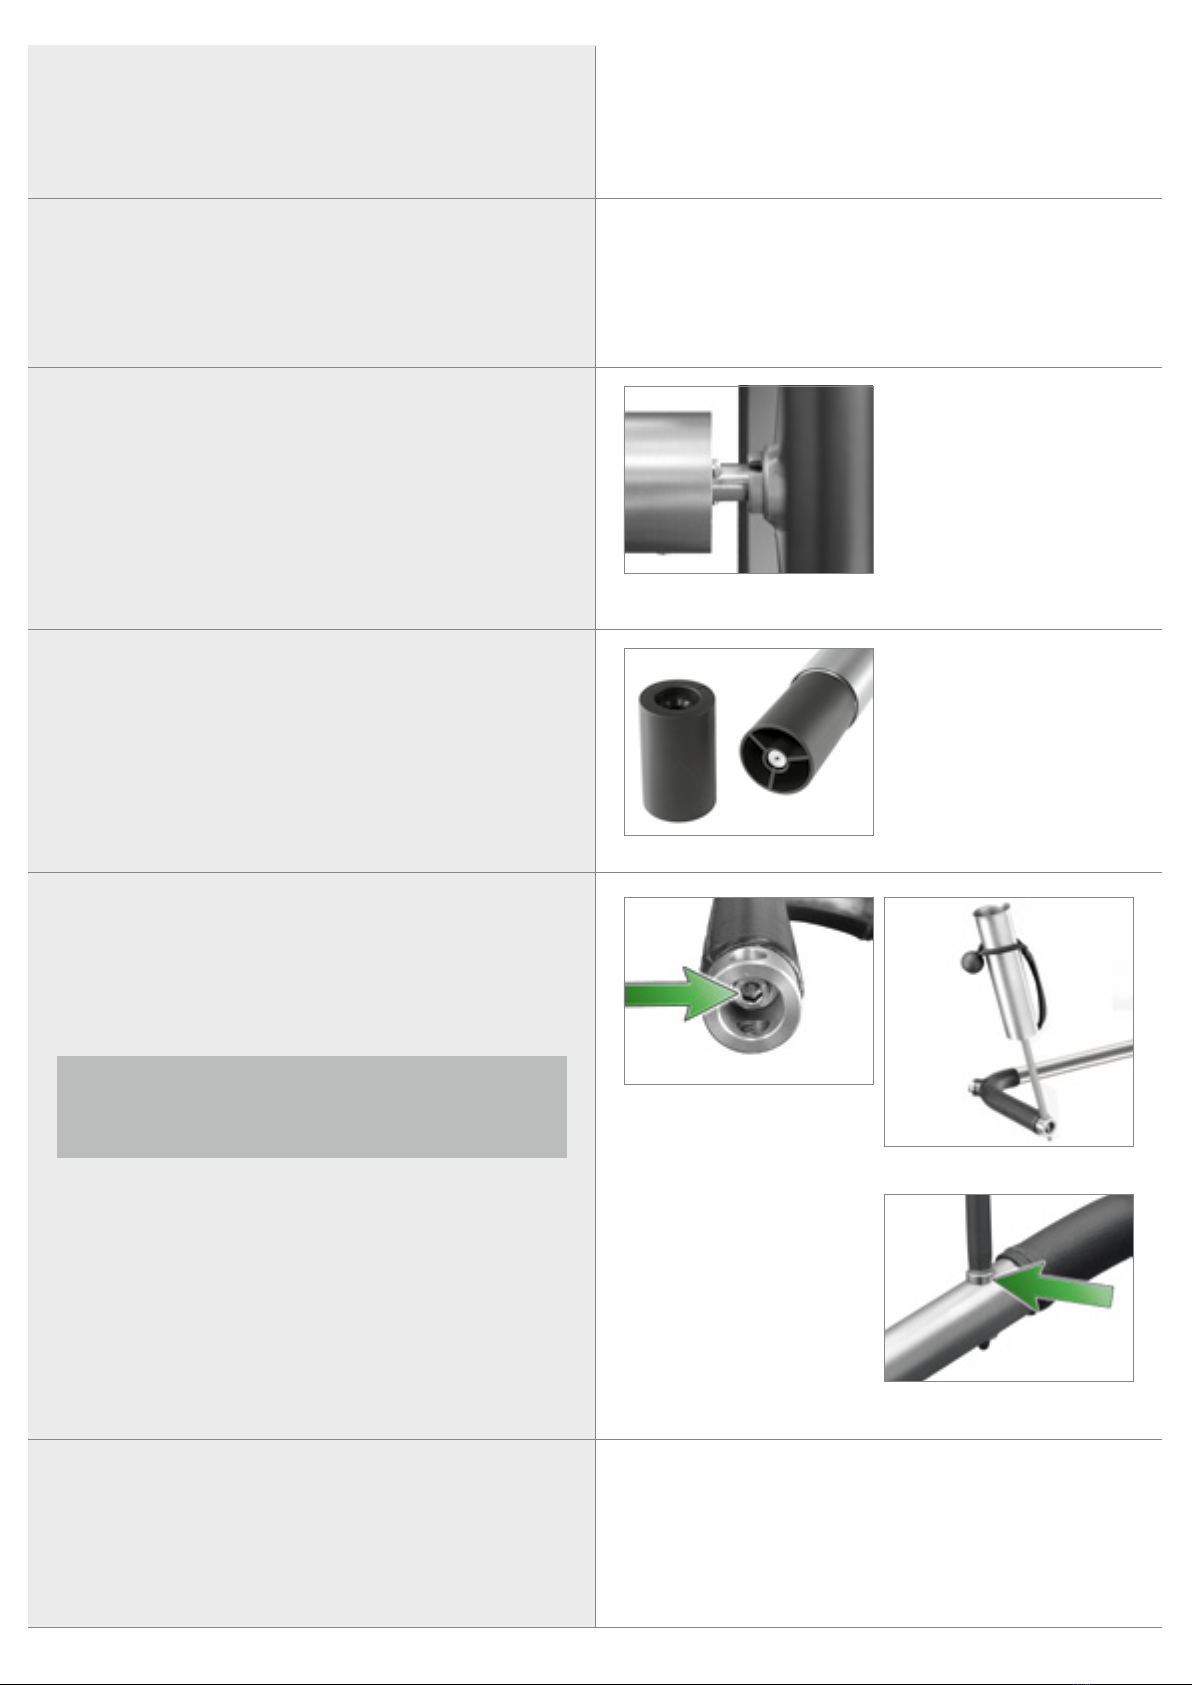
number of fuses to protect the drives from being overloaded and
to protect the battery. These fuses are tripped: if the wheels are
blocked, if the trolley moves up excessively steep inclines, at slow
speed coupled with excessive resistance or if the battery is empty.
In this case, the golf trolley will come to a stop and the LED will
flash fast. To start the trolley again, press the start button(s). If the
trolley comes to a stop after a sudden impact with an obstacle (e.g.
pot-hole or kerb stone), disconnect the battery connector and re-
connect it after 5 seconds. If the battery has sufficient charge, you
can then start the trolley again.
A standard battery generally holds sufficient charge for an aver-
age of 27 holes and an additional trolley weight of approx. 16 kg.
od of time, the battery should be re-charged at the latest after
3 –6 months of storage. The ideal storage temperature is 20°C.
Avoid using the battery in high temperatures (> 40°C), as this
could cause irreversible damage. Do not expose the battery e.g.
to the full force of the sun or leave it in your car or closed rooms
at risk of extreme build-ups of heat. Protect the battery housing
and cable from mechanical damage (e.g. impacts, falls, carrying
the battery by the cable). The battery housing is impermeable
to spray water and must not be opened. The battery and trolley
must not be cleaned with a high-pressure cleaner or similar. If
the battery has been submerged in water or been damaged in
a drop, please send it to TiCad GmbH & Co. KG in compliance
with our guidelines for safe battery transport.
Do not attempt to open or repair the battery yourself. The battery
must only be opened and repaired by trained, specialist person-
nel. Doing so yourself will void the warranty and may make the
battery unsafe.
If your TiCad battery has reached the end of its useful life, please
dispose of it through a certified disposal company. Never dis-
pose of lithium-ion batteries as domestic waste. We are happy to
help our customers with battery disposal as part of our customer
service.
Battery:
Your TiCad trolley is fitted with a rechargeable lithium-ion bat-
tery.Please fully charge the battery before using the trolley for the
first time.
ATTENTION! Lithium-ion batteries are considered haz-
ardous goods. The lithium-ion battery supplied with the
trolley contains a protective circuit that protects the bat-
tery from incorrect use (e.g. short circuiting, overloading,
overcharging, totally discharging). However, the instruc-
tions on the battery‘s use and care still have to be strictly
followed, and the battery treated with care, as non-obser-
vance and improper use can increase the risk of fire and
explosion. Never expose the battery to mechanical stress
or manually manipulate it. Always make sure to careful-
ly wrap and store the battery! The battery must only be
charged with the supplied TiCad charger.
It takes approx. 8 hours to fully charge and be ready for oper-
ation again. Please make sure to connect the battery to the
charger first before connecting the charger to an external power
supply to charge the battery. Please keep monitoring the battery
and charger while charging. During winter, the battery should
be stored with a charge of approx. 50% without the charger
connection, in a cool and dry room. If not used for a long peri-
Charger:
Only ever charge the battery with the supplied TiCad charger. The
charger has been configured to carefully charge the battery. It is
perfectly normal for the charger to heat up during the charging
process. However, because of this, the charger and battery must
not be covered with anything during the charging process. The
charger must only be used in a dry environment and is not suit-
able for outdoor use.Regularly check both of the devices during
the charging process.
Avoid using the charger in temperatures above 35°C and below
5°C!
The charger‘s status is shown by the LED:
LED GREEN lit up = Battery is fully charged
LED GREEN flashing = Battery is charging
LED RED = Error
The charger can also be used to check the battery‘s charge: If
the LED stays green when connecting the battery, it is fully
charged.
2
3
1
1
2
34