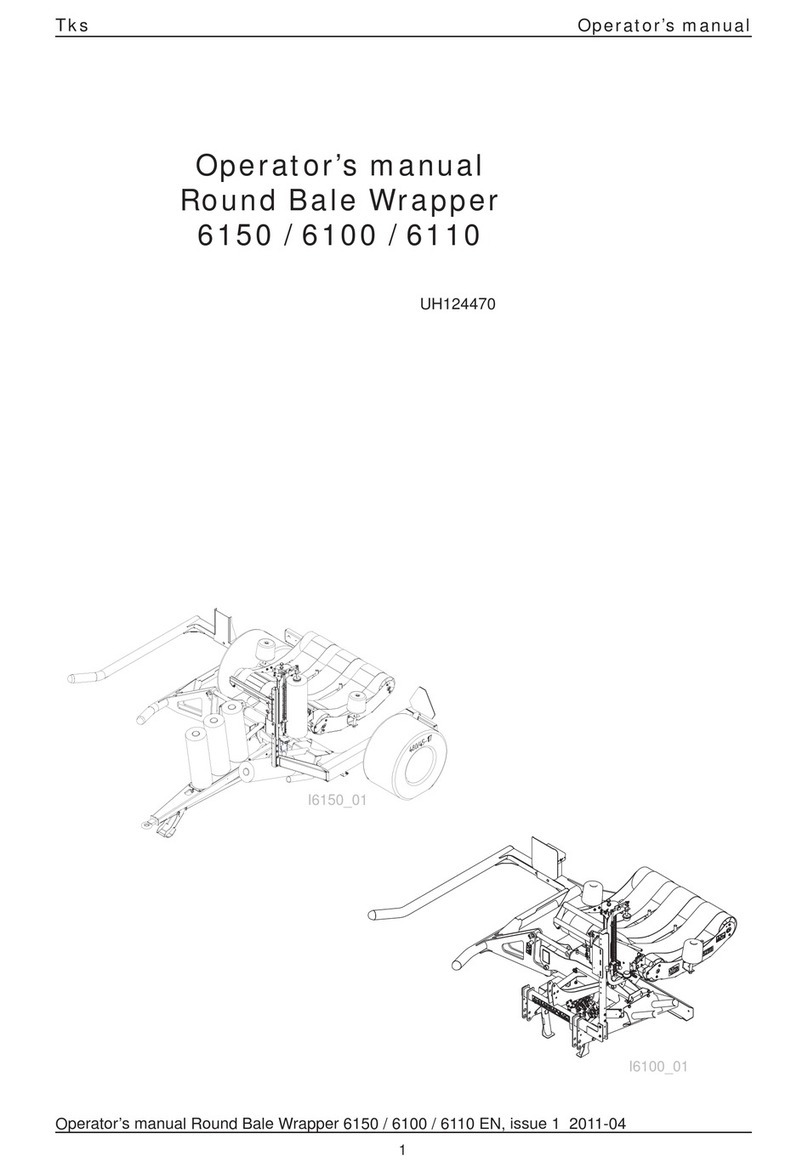
TKS FeedBelt User manual

1
TKS Operator's manual
988862FeedBelt AUTO EN, issue 3 2019-12
Operator's manual
FeedBelt - AUTO

2
TKS Operator's manual
Content
1 GENERAL SAFETY INSTRUCTIONS. . . . . . . . . . . . . . . . . . . . . . . . . . . . . . . . . 4
2 USING THE SCREEN AND PLC . . . . . . . . . . . . . . . . . . . . . . . . . . . . . . . . . . . . 16
3 OPERATION . . . . . . . . . . . . . . . . . . . . . . . . . . . . . . . . . . . . . . . . . . . . . . . . . . . 20
4 EXAMPLE OF GROUP ADJUSTMENT. . . . . . . . . . . . . . . . . . . . . . . . . . . . . . . 46
5 MAINTENANCE / CARE . . . . . . . . . . . . . . . . . . . . . . . . . . . . . . . . . . . . . . . . . . 48
6 ALARMS AND TROUBLESHOOTING . . . . . . . . . . . . . . . . . . . . . . . . . . . . . . . 56
1 General safety instructions . . . . . . . . . . . . . . . . . . . . . . . . . . . . . . . . . . . . . . . . 4
1.1 CE - Declaration of conformity . . . . . . . . . . . . . . . . . . . . . . . . . . . . . . . . . . . . . . . . . . 4
1.2 Guarantee . . . . . . . . . . . . . . . . . . . . . . . . . . . . . . . . . . . . . . . . . . . . . . . . . . . . . . . . . . 5
1.3 Introduction . . . . . . . . . . . . . . . . . . . . . . . . . . . . . . . . . . . . . . . . . . . . . . . . . . . . . . . . . 6
1.4 Technical data - FeedBelt . . . . . . . . . . . . . . . . . . . . . . . . . . . . . . . . . . . . . . . . . . . . . . 7
1.4.1 Model description and use . . . . . . . . . . . . . . . . . . . . . . . . . . . . . . . . . . . . . . . . . 7
1.4.2 Machine identifi cation. . . . . . . . . . . . . . . . . . . . . . . . . . . . . . . . . . . . . . . . . . . . . 8
1.4.3 Main dimension - FeedBelt with 1 center-section. . . . . . . . . . . . . . . . . . . . . . . . 9
1.5 Safety . . . . . . . . . . . . . . . . . . . . . . . . . . . . . . . . . . . . . . . . . . . . . . . . . . . . . . . . . . . . 10
1.5.1 General safety instructions. . . . . . . . . . . . . . . . . . . . . . . . . . . . . . . . . . . . . . . . 10
1.5.2 Additional safety instructions . . . . . . . . . . . . . . . . . . . . . . . . . . . . . . . . . . . . . . 12
1.5.3 Overview of safety risks . . . . . . . . . . . . . . . . . . . . . . . . . . . . . . . . . . . . . . . . . . 13
1.5.4 Lifting FeedBelt during installation . . . . . . . . . . . . . . . . . . . . . . . . . . . . . . . . . . 14
1.5.5 New machine - caution. . . . . . . . . . . . . . . . . . . . . . . . . . . . . . . . . . . . . . . . . . . 14
1.5.6 Installation and commissioning. . . . . . . . . . . . . . . . . . . . . . . . . . . . . . . . . . . . . 14
1.6 Recycling - waste to resource - . . . . . . . . . . . . . . . . . . . . . . . . . . . . . . . . . . . . . . . . 15
2 Using the screen and PLC . . . . . . . . . . . . . . . . . . . . . . . . . . . . . . . . . . . . . . . . 16
2.1 Screen. . . . . . . . . . . . . . . . . . . . . . . . . . . . . . . . . . . . . . . . . . . . . . . . . . . . . . . . . . . . 16
2.2 Numeric keypad . . . . . . . . . . . . . . . . . . . . . . . . . . . . . . . . . . . . . . . . . . . . . . . . . . . . 17

3
TKS Operator's manual
2.3 Alphabetic keypad . . . . . . . . . . . . . . . . . . . . . . . . . . . . . . . . . . . . . . . . . . . . . . . . . . 18
2.4 Selecting values . . . . . . . . . . . . . . . . . . . . . . . . . . . . . . . . . . . . . . . . . . . . . . . . . . . .19
2.5 On/off button. . . . . . . . . . . . . . . . . . . . . . . . . . . . . . . . . . . . . . . . . . . . . . . . . . . . . . . 19
3 Operation . . . . . . . . . . . . . . . . . . . . . . . . . . . . . . . . . . . . . . . . . . . . . . . . . . . . . . 20
3.1 Menu Home . . . . . . . . . . . . . . . . . . . . . . . . . . . . . . . . . . . . . . . . . . . . . . . . . . . . . . . 20
3.2 Menu Overview . . . . . . . . . . . . . . . . . . . . . . . . . . . . . . . . . . . . . . . . . . . . . . . . . . . . . 22
3.3 Menu Groups . . . . . . . . . . . . . . . . . . . . . . . . . . . . . . . . . . . . . . . . . . . . . . . . . . . . . . 25
3.4 Menu Manual . . . . . . . . . . . . . . . . . . . . . . . . . . . . . . . . . . . . . . . . . . . . . . . . . . . . . . 28
3.5 Menu Settings . . . . . . . . . . . . . . . . . . . . . . . . . . . . . . . . . . . . . . . . . . . . . . . . . . . . . . 29
3.6 Menu Info . . . . . . . . . . . . . . . . . . . . . . . . . . . . . . . . . . . . . . . . . . . . . . . . . . . . . . . . . 41
4 Example of group adjustment . . . . . . . . . . . . . . . . . . . . . . . . . . . . . . . . . . . . . 46
5 Maintenance / care . . . . . . . . . . . . . . . . . . . . . . . . . . . . . . . . . . . . . . . . . . . . . . 48
5.1 Important before maintenance. . . . . . . . . . . . . . . . . . . . . . . . . . . . . . . . . . . . . . . . . . 48
5.2 Commissioning and inspections . . . . . . . . . . . . . . . . . . . . . . . . . . . . . . . . . . . . . . . . 48
5.3 Weekly inspections . . . . . . . . . . . . . . . . . . . . . . . . . . . . . . . . . . . . . . . . . . . . . . . . . . 49
5.4 Lubrication. . . . . . . . . . . . . . . . . . . . . . . . . . . . . . . . . . . . . . . . . . . . . . . . . . . . . . . . . 50
5.5 Oil change gearbox . . . . . . . . . . . . . . . . . . . . . . . . . . . . . . . . . . . . . . . . . . . . . . . . 51
5.6 Wire maintenance. . . . . . . . . . . . . . . . . . . . . . . . . . . . . . . . . . . . . . . . . . . . . . . . . . 51
5.7 Belt tensioning . . . . . . . . . . . . . . . . . . . . . . . . . . . . . . . . . . . . . . . . . . . . . . . . . . . . 52
5.8 Wire tensioning . . . . . . . . . . . . . . . . . . . . . . . . . . . . . . . . . . . . . . . . . . . . . . . . . . . . 53
5.9 Scrape reverser adjustment . . . . . . . . . . . . . . . . . . . . . . . . . . . . . . . . . . . . . . . . . 53
5.10 Tightening torque for screws and bolts: . . . . . . . . . . . . . . . . . . . . . . . . . . . . . . . 54
5.11 Cleaning the FeedBelt. . . . . . . . . . . . . . . . . . . . . . . . . . . . . . . . . . . . . . . . . . . . . . 54
5.12 Fault symptoms on the wire . . . . . . . . . . . . . . . . . . . . . . . . . . . . . . . . . . . . . . . . . 55
6 Alarms and troubleshooting. . . . . . . . . . . . . . . . . . . . . . . . . . . . . . . . . . . . . . . 56
Notes . . . . . . . . . . . . . . . . . . . . . . . . . . . . . . . . . . . . . . . . . . . . . . . . . . . . . . . . . . . . . . . . . 59

4
TKS Operator's manual
1 General safety instruction
1.1 CE – Declaration of conformity
We,
T. Kverneland & Sønner AS,
Kvernelandsvegen 100
N-4355 Kverneland
Norge
declare that the product:
TKS - FeedBelt
has been built in conformity with the Machine Directive and meets the relevant
fundamental health and safety requirements
Kverneland, 16 October 2019
Atle Sjølyst - Kverneland
General Manager
Enter the serial number
on the machine:
T. Kverneland & Sønner AS, manufacturer of agricultural products, reserves the right
to change the design and/ or specifi cations of its products without prior warning.
This does not imply any obligation to modify previously supplied machines.

5
TKS Operator's manual
1.2 Guarantee
This TKS product is guaranteed against manufacturing and material defects for one year.
If the owner wishes a defect to be covered by the product guarantee, he or his representative must
inform the dealer of this when ordering parts and/or repairs. Claims must be reported within the
guarantee period.
The dealer must complete a claims form for each case covered by a guarantee and send it to
TKS or TKS’s distributor/importer within the 10th of the month following the one in which the defect
was reported. The defective parts shall be marked with the claim number and be kept for up to 6
months so that TKS or TKS’s distributor/importer can inspect them.
Since TKS products are used outside the manufacturer’s control, we can only guarantee the
product quality, and not that it will perform its function, nor are we liable for any resulting damage.
The guarantee is not valid if:
a) third party spare parts are used, or the product is repaired or altered without the
approval of TKS.
b) the operating and servicing instructions have not been followed.
c) the machine has been used for other purposes than those for which it is designed
d) control box opens.
The guarantee does not cover damage due to normal wear and tear
Offi cial safety regulations specify requirements that apply to the manufacturers of this machine
relating to the careful review of safety hazards that may arise when this type of machine is used
correctly. Therefore, TKS and our importer/distributor are not responsible for the functioning of
components that are not shown in the spare-parts catalogue for this product.
TKS reserves the right to change the design of the product without this implying any obligations in
relation to previously supplied machines.
NB! It must be possible to identify all enquiries relating to this product by the product’s serial
number; see page 12 on Machine identifi cation See chapter. 1.4.2

6
TKS Operator's manual
1.3 Introduction
Congratulations on buying your new TKS product. You have chosen a functional, high quality
product. All TKS products are designed and built in close cooperation with farmers to ensure
optimal effi ciency and reliability.
Please read this instruction manual carefully, and familiarise yourself with the machine’s manner of
operation before starting to use it. The machine is a highly advanced feed machine that operates
unattended. It must be used in accordance with the relevant manufacturer instructions and other
regulations.
Many diff erent factors and variables can aff ect the performance and method of operation of the
machine.
It is therefore very important to assess all known factors and adapt the way in which the machine is
used accordingly.
A good understanding of the machine’s method of operation and performance, together with a
sound knowledge of feeding and feed types/consistency will ensure the best results.
Best Regards
TKS AS
T. Kverneland & Sønner AS,
Kvernelandsvegen 100
N-4355 Kverneland
Norway
www.tks-as.no
e-post : [email protected]
Phone : + 47 51 77 05 00

7
TKS Operator's manual
1.4 Technical data - FeedBelt
1.4.1 Model description and use
TKS FeedBelt is designed to transport diff erent types of forage and concentrated feed via the feed
trough. The feed is released down into the feed trough by means of a scrape carriage.
The scrape carriage is operated via a wire. The scraper can switch from right to left, allowing the
feed to be placed on both sides of the feed trough.
The cabinet with operating screen is positioned as required in the area where fi lling takes place.
• The belt is powered by a gear motor in the drive roller
• The scraper is powered by a gear motor via the wire and is positioned with the aid of a sensor.
• The belt is fed forwards on top of a channel and returns on rollers placed inside the channel.
• The drive roller has a friction coating to improve the reliability of the belt operation.
• The counter-roller ensures a better connection with the drive roller.
• The belt and wire have sensors that indicate their movement.
• A brush is positioned against the belt next to the drive roller. The brush ensures that the belt is
kept clean.
• The machine is installed at various heights above the feed trough.
• The channel is installed on portals or brackets with a maximum length of 6 m between them.
• The feed is conveyed onto the belt at the opposite end of the drive roller.
• Suitable side panels position the feed in the centre of the belt.
• Forage can be added to the belt from various fi lling sources.
• Feed must be fed onto the belt at an even pace, preferably from a conveyor.
• FeedBelt can operate multiple fi lling sources and conveyors, depending on the control cabinet.
• Forage can be dispensed on a time or weight basis.
• Minimum operating temperature -20°C.
NB! The instructions given in this operator’s manual apply to standard operating conditions.
Individual circumstances may arise at the premises of the user that deviate from the instructions
provided here. Changes to the machines and equipment as a result of such circumstances shall
not constitute grounds for making a claim against the manufacturer or supplier.
NB!
Think safety when using the FeedBelt.
Individual users must observe the provisions, rules and standards that apply in the country
concerned.
FeedBelt
Belt width 500mm
Motor output - belt 2,2kW 230V - 14,1A
Scrape motor output 1,1kW 230V - 8,6A
Weight : Kg
Belt section w/drive and return 217
3m belt section 55
Scraper carriage 29
Scrape reverser 20

8
TKS Operator's manual
1.4.2 Machine identification
The machine’s serial number and the manufacturer’s address are written on a plate on the
machine. See the illustration on this page. The machine‘s serial number and the delivery year
should be written below.
Please use this information when making any enquiries about spare parts or servicing.
This product is CE marked. This mark, along with the associated written EU confi rmation, means
that the product fulfi lled. ls current health and safety requirements, and complies with the following
directives: Machine Directive
IFB_02

Min. høyde vender
Min. høyde skrape
Første fôring
Siste fôring
BFB_01
9
TKS Operator's manual
1.4.3 Main dimension - FeedBelt with 1 center-section
All dimensions in mm
IFB_02
Last feeding
Min. reverser height
First feeding
Min. scraper height

10
TKS Operator's manual
1.5
Safety Please pay particular attention to this symbol.
It designates a safety risk, and describes
precautions that must be taken to avoid
accidents.
Before operating, adjusting or repairing the
machine, the user, technician or owner should
familiarise himself with the safety instructions
contained in this installation manual.
Be alert and take precautions when working
with agricultural machinery. Read and observe
the safety instructions in this instruction manual.
Safety at work is your responsibility!
1.5.1
General safety -
instructions
Please read and understand these
general safety instructions.
Use of the machine
The machine must only be used for the
purpose for which it is designed.
The machine’s method of operation
The operator must familiarise themselves with
the machine’s method of operation and function
so that the machine can be used in a safe and
appropriate manner.
Keep a safe distance
Keep your distance from working, rotating and
moving parts
Be safety conscious
Never enter the machine when it is in operation.
When performing maintenance, disconnect the
power supply.
Protective guards
Check that all guards are in good order and
installed correctly. Do not start the machine until
this has been done. Damaged guards must be
repaired or replaced immediately.
Spare parts
For safety reasons we recommend that you
only use original spare parts. The use of
third-party spares invalidates the product
guarantee.

11
TKS Operator's manual
Maintenance
Ensure that the machine is properly maintained
and is kept in good condition. Never attempt to
change the mechanical workings of the
machine.
Control panel
Product warranty is invalid if the control box
opens.

12
TKS Operator's manual
Fig. 3
1.5.2
Additional safety
instructions
The machine is marked with warning
signs . If these signs are damaged, they
must be replaced.
The order number is shown on the illustrations
in this section.
See Fig. 4 for their location on the machine.
Warning sign UH220532 (Fig. 1)
Be careful! Ensure that you read and under-
stand the instruction manual before using the
machine, and before making any adjustments
or performing any maintenance
Warning sign UH220539 (Fig. 2)
Finger fracture warning sign. Risk of fi nger
fracture if fi ngers are trapped between the
carrier and lower frame.
Warning sign 988010 (Fig. 3)
The belt must be kept tight, it is
therefore important and necessary to retighten
the screws regularly.
Fig. 1
Fig. 2

UH220532
UH220539
988010
13
TKS Operator's manual
1.5.3 Overview of safety risks
Fig. 4
MASTER CABINET SLAVE CABINET
IFB_05

500
14
TKS Operator's manual
1.5.4
Lifting FeedBelt during
installation
Caution!
Only use approved lifting equipment
Ensure that no-one is underneath or near
FeedBelt when the various sections are fi tted
into place.
1.5.5
New machine -
caution
Read the operator’s manual
Be particularly careful when starting a new
machine for the fi rst time. Installation faults,
incorrect operation, etc. may lead to expensive
repairs and loss of earnings. The TKS product
guarantee does not cover damage resulting
from failure to follow the recommendations
contained in the instruction manual. Please pay
particular attention to this symbol.
This is used to emphasise important information
so that incorrect installation or use is avoided.
Be particularly attentive to the following
when starting a new FeedBelt:
Check that FeedBelt has been correctly
assembled and that the various sections are
undamaged.
1.5.6
Installation and
commissioning
IFB_36
1. FeedBelt is best installed indoors or under
cover due to the potential eff ect of adverse
weather on its operation.
2. FeedBelt is delivered to the customer packed
in part-assembled sections.
3. Check for damage in transit before
assembling and installing.
4. The following FeedBelt has assembly
instructions.
5. FeedBelt must be calibrated prior to use.
6. The length of the guide plates must be
adjusted to ensure the best possible
positioning of the feed on the bunk feeder.
See Fig. 5
7. Failure to ensure assembly and
installation are in accordance with the
instructions will invalidate the product
warranty.
Fig. 5

15
TKS Operator's manual
1.6 Recycling - waste to resource -
TKS’s products rely on electrical and electronic components in order to work.
These fall under the generic term of EE products. TKS’s products use typical components such as
cables, switches, motors, control units, etc.
When TKS products are thrown away those components containing contaminants should be
treated and sorted in such a way that they do not pollute the environment. Contaminants should be
taken care of safely.
Distributors are obliged to accept EE waste from products in the range of goods they sell.
This waste should be kept safe and sent on to an approved waste recipient or treatment plant.
EE waste must be sorted and transported in such a way that it is not damaged or destroyed.
If you need further information on the treatment of EE waste, please contact your distributor.
TKS is a member of Renas.
(National program for the collection/treatment of electrical/electronic waste)
Best Regards
TKS AS

16
TKS Operator's manual
2 Using the screen and PLC
2.1 Screen
The control system has a touchscreen, meaning that you can control it by touching the screen
directly. You can touch the screen with your fi ngers or use a special stylus located in the control
cabinet.
Do not press too hard, as this may damage the screen.
If the screen has not been active for a few minutes, it will enter screen saver mode.
The screen will be off in this mode. Press any part of the screen to reactivate it. The menu buttons
are displayed on the left-hand side of the screen. Press the desired button. It is recommended you
return to the Home screen after completing the setting.
See Fig. 6
Fig. 6

17
TKS Operator's manual
2.2 Numeric keypad
Values in fi elds with blue borders can be
changed. Press on the number and a numeric
keypad will appear on the screen.
The Max/Min value that can be entered in this
fi eld is shown at the top of the window.
Enter a new value using the numeric keypad.
If an incorrect value is entered, press the
<─ key and delete the most recently entered
number. Press CLR to delete everything.
To enter a negative value, press – before the
value. Once you have selected a value, press
the ENTER button.
This will save the value and close the keypad
window.
To cancel, press X in the upper right-hand
corner. The old value will continue to be active.
To enter times in the feed dispensing schedule
window, begin by entering hours – then press
period. Now enter minutes.
Make sure that the time is correct.
For example, if you enter 12.65, this will be
ignored – enter 13.05 instead.
See Fig. 7
Fig. 7

18
TKS Operator's manual
2.3 Alphabetic keypad
When you enter values with text (e.g. name of animal) the screen will display an alphabetic
keypad:
When editing a text fi eld, the old text is displayed on the screen.
New text can be entered, and the old text will disappear.
Use the Caps button to switch between uppercase and lowercase letters
Press the BACK button to remove the last symbol registered, or press Clear to delete all
text, then enter the new text.
Note that there is a limit on the number of letters in the fi eld. The fi rst letters will be
deleted if a long string of text is entered.
When the text has been entered, press the ENT button. This will save the text and the
keypad window closes. If you want to cancel, press the X or Esc button
and the old value will remain active.
Fig. 8

19
TKS Operator's manual
2.4 Selecting values
Selecting pre-programmed values from a
list.
Select a value, and select value from a list.
See Fig. 9
2.5 On/off button
• Enable or disable a function using the on/off
key.
• Blank – disabled, ticked – enabled
See Fig. 10
Fig. 9
Fig. 10

20
TKS Operator's manual
The Home screen displays the FeedBelt menu on left side. Clock and date are displayed at the
top. The top of the screen shows a blue line with the current status of FeedBelt. A picture of
FeedBelt is displayed on the screen. During feeding, the scraper and movement of the feed are
shown in animation.
FeedBelt operation: Keys
• Automatic feeding on/off – the key automatically activates feeding from the feeding schedule.
When automatic feeding is enabled, the key is green.
FeedBelt status will become ready instead of off .
• Manual feeding – the key will open the manual feed window.
• Stop ongoing feeding – the key will stop the current feeding. Feeding will not stop
immediately – fi rst it will stop feeding supply, then clean the belt, and then stop.
NB! Upon immediate stop of FeedBelt, press the emergency stop button on the cabinet door.
• Pause ongoing feeding – the key will temporarily pause the current feeding. Press pause key
to continue feeding.
• Multi-group feeding – The key opens a window to program several group feeding sessions at
the same time.
FeedBelt status:
Status of current FeedBelt process.
It can be:
• Off - FeedBelt is off .
• Ready - FeedBelt is waiting for a new feeding session from the schedule.
• Reversing – The scraper swaps feeding side.
• Positioning – The scraper goes to the start position for the feeding group.
• Start – FeedBelt waits for the feed to make contact with the scraper.
• Feeding – FeedBelt is feeding.
• Stop – FeedBelt stops – clean the belt
• Pause – Feeding is temporarily on hold.
See Fig. 11
3 Operation
3.1 Menu Home
Fig. 11
Other manuals for FeedBelt
1
Table of contents
Other TKS Farm Equipment manuals
Popular Farm Equipment manuals by other brands

Kellfri
Kellfri 27-DC manual

CARLOTTI
CARLOTTI KMC Series Use and maintenance handbook

Seymour Midwest
Seymour Midwest Mini Landscape Rake Assembly instructions

Warn
Warn ProVantage 79958 installation instructions

GREAT PLAINS
GREAT PLAINS 2 Series Operator's manual

Gaspardo
Gaspardo FBR Plus Use and maintenance / spare parts

HE-VA
HE-VA Tip-Roller operating instructions

Kellfri
Kellfri 35-XKE280 manual

KELLO-BILT
KELLO-BILT 800 Series owner's manual

ATI Corporation
ATI Corporation Level Best Grader Blade Operator's & parts manual

John Shearer
John Shearer CONNOR SHEA 8000 Series Operator's Manual / Parts Catalogue

GSI Group
GSI Group PNEG-1020 Installation & operation manual