Topcom SOLOGIC A811 User manual

UK The CE symbol indicates that the unit complies with the essential requirements of the R&TTE
directive.
NL Het toestel voldoet aan de basiseisen van de R&TTE-richtlijn. Dit wordt bevestigd door de CE-
markering.
FR La conformité de l’appareil avec les exigences fondamentales de la directive européenne R&TTE
relative aux terminaux, est confirmée par le label CE.
DE Die Übereinstimmung des Gerätes mit den grundlegenden Anforderungen der R&TTE-Directive
ist durch das CE-Kennzeichen bestätigt.
ES El sello CE corrobora la conformidad del equipo con los requerimientos básicos de la directiva
R&TTE.
SE CE-märket bekräftar att apparaten uppfyller de grundläggande kraven i R&TTE direktivet.
DK CE-mærkningen bekræfter, at produktet er i overensstemmelse med kravene i Rådets
teleterminaldirektiv.
NO CE-merkingen dokumenterer at apparatet er i samsvar med de grunnleggende kravene til EU-
direktivet for aktivt telekommunikasjonsutstyr.
FI Laite noudattaa R&TTE-direktiivien vaatimuksia, mikä on vahvistettu CE-merkillä.
IT Il simbolo CE indica che l’unità è conforme ai requisiti fondamentali della direttiva R&TTE.
PT O símbolo CE indica que esta unidade cumpre com os requisitos essenciais da directiva R&TTE.
CZ Symbol CE znamená, že jednotka spluje základní požadavky smrnice R&TTE.
GR CE
R&TTE.
PL Symbol CE oznacza, e urzdzenie spenia istotne wymogi dyrektywy R&TTE.
SK Symbol CE oznauje, že jednotka súhlasí s hlavnými požiadavkami R&TTE smernice.
UK The features described in this manual are published with reservation to modifications.
NL De in deze handleiding beschreven mogelijkheden worden gepubliceerd onder voorbehoud van
wijzigingen.
FR Les possibilités décrites dans ce manuel sont publiées sous réserve de modifications.
DE Die in dieser Bedienungsanleitung umschriebenen Möglichkeiten, werden vorbehaltlich
Änderungen publiziert.
ES Conexión a la red telefónica analógica.
SE For anslutning til det analoga nätverket.
DK Tilsluttes til det analoge telefonfastnet.
NO Tilkoples analog telefon nettverk.
FI Liitetään yleiseen analogiseen puhelinverkkoon.
IT Le caratteristiche descritte nel presente manuale vengono pubblicate con riserva di modifica.
PT Para efectuar a ligação com a rede pública analógica.
CZ Pipojit k veejné analogové telefonní síti.
GR .
PL Do podczenia do publicznej analogowej sieci telefonicznej.
SK Pripojitený k verejnej analógovej telefónnej sieti.
SOLOGIC A811
USER GUIDE / HANDLEIDING / MANUEL D’UTILISATEUR
BEDIENUNGSANLEITUNG / MANUAL DE USUARIO / BRUKSANVISNING
BRUGERVEJLEDNING / ANVÄNDARHANDBOK / KÄYTTÖOHJE
MANUALE D’USO / MANUAL DO UTILIZADOR / UŽIVATELSKÁ PÍRUKA
/ INSTRUKCJA OBSUGI / UŽÍVATEL’SKÝ MANUÁL
V1.0 - 06/11
®

1
2
3
4
5
6
7
8
9
101125
24
121314
15
16
17
18
19
20
21
22 23
UK To be connected to the public analogue telephone network.
NL Geschikt voor aansluiting op het openbare analoog geschakelde telefoonnetwerk.
FR Il est destiné à être raccordé au réseau de télécommunication public.
DE Kompatibel für den analogen telefonanschluss.
ES Conexión a la red telefónica analógica.
SE For anslutning til det analoga nätverket.
DK Tilsluttes til det analoge telefonfastnet.
NO Tilkoples analog telefon nettverk.
FI Liitetään yleiseen analogiseen puhelinverkkoon.
IT Le caratteristiche descritte nel presente manuale vengono pubblicate con riserva di modifica.
PT Para efectuar a ligação com a rede pública analógica.
CZ Pipojit k veejné analogové telefonní síti.
GR .
PL Do podczenia do publicznej analogowej sieci telefonicznej.
SK Pripojitený k verejnej analógovej telefónnej sieti.

Sologic A811 3
Sologic A811
ENGLISH
1 Before Initial use
Thank you for purchasing this new desktop caller
ID telephone.
1.1 Intended Purpose
This product is intend to be connected indoor to
an analogue PSTN telephone line.
1.2 Caller ID
1.3 Connection
This device has been designed and manufactured
to comply with the 98/482/EC rule, referent to the
Pan European connection of a terminal to the
Public Switching Telephone Network (PSTN) and
following the established guidelines by the 1999/
5/EC Directive about radio electric equipments
and the reciprocal acknowledge of their conformi-
ty. However, due to the fact that there are some
differences in the PSTNs from one country to an-
other, the verifying measurements by themselves
do not set up an unconditional guarantee for an
optimal working in every connection point to the
PSTN of any country. If any problem comes up,
get in touch firstly with the distributor.
In any case, use conditions for which the product
has been created should be respected as well as
avoid its use in public or private networks with
technical requirements clearly different to those
established in the EU.
2 Safety instructions
• Do not place the basic unit in a damp room or
at a distance of less than 1.5 m away from a
water source. Keep water away from the
telephone.
• Do not use the telephone in environments
where there is a risk of explosions.
• Dispose of the batteries and maintain the
telephone in an environment-friendly manner.
3 Cleaning
Clean the telephone with a slightly damp cloth or
with an anti-static cloth. Never use cleaning
agents or abrasive solvents.
4 Disposal of the device
(environment)
At the end of the product lifecycle,
you should not throw this product
into the normal household garbage
but bring the product to a collection
point for the recycling of electrical
and electronic equipments. The
symbol on the product, user guide and/or box in-
dicate this.
Some of the product materials can be re-used if
you bring them to a recycling point. By re-using
some parts or raw materials from used products
you make an important contribution to the protec-
tion of the environment.
Please contact your local authorities in case you
need more information on the collection points in
your area.
To use ‘Caller ID’ (display caller), this
service has to be activated on your
phone line. Normally you need a separate
subscription from your telephone
company to activate this function. If you
don’t have the Caller ID function on your
phone line, the incoming telephone
numbers will NOT be shown on the
display of your telephone.
The CE symbol indicates that the unit
complies with the essential
requirements of the R&TTE directive.
Please read carefully through the
following information concerning safety
and proper use. Make yourself familiar
with all the functions of the equipment.
Be careful to keep these advice notes
and if necessary pass them on to a third
party.

4Sologic A811
Sologic A811
5 Buttons / connections
(See picture on folded cover page)
1. LCD display
2. Delete key
3. Program / Dial key
4. Phone book key
5. Number store key
6. Memory key
7. VIP key
8. Hold key
9. Volume adjust button
10. Hands-free key
11. Redial / Pauze key
12. Ringer LED
13. Flash key
14. Mute key
15. Curl cord connection
16. Numerical keypad
17. Up key
18. Down key
19. Hook key
20. New call LED
21. In-use LED
22. Line connection
23. Ringer volume button
24. Handset volume button
25. Curl cord connection
6 Installation
Put batteries in the battery compartment to acti-
vate the display:
• Open the battery compartment at the bottom
of the unit. Use a screw driver to remove the
screw.
• Insert 4 Alkaline AA standard batteries.
• Close the battery compartment.
• Connect one end of the line cord to the
telephone line wall socket and the other end
to the backside of the telephone.
7 Telephone settings
7.1 Set the display language
The phone supports 8 display languages: English,
French, Spanish, Italian, German, Turkish, Polish,
Slovenian.
•Press .
• Use / to select “SELECT LANGUAGE“.
• Press to enter the settings.
• Use / to select your language.
• Press to confirm.
• Press to exit the menu.
7.2 Date and time
When you have a subscription to the caller ID
service and your telephone provider sends the
date and time together with the telephone
number, the phone’s clock will be set automatical-
ly. The year must always be set manually!
•Press .
• Use / to select “DATE/TIME”.
• Press to enter the year settings.
• Use / to change.
• Press to move to the hour setting.
• Use / to change.
• Press to move to the minute settings.
• Use / to change.
• Press to move to the month settings.
• Use / to change.
• Press to move to the date settings.
• Use / to change.
•Press .
• Press to exit the menu.
7.3 Display contrast
There are 5 display contrast levels you can
choose from.
•Press .
• Use / to select “CONTRAST ADJUST”.
•Press .
• Use / to change the contrast level.
•Press .
• Press to exit the menu.
7.4 Set the area code
When you have a subscription to the caller ID
service it can be necessary in some countries to
enter your area code. When the telephone re-
ceives a caller ID it will remove the entered area
code from the incoming number.
You can set up to 5 digits for the area code.
• Press to enter the menu.
The telephone line needs to be
disconnected prior to opening the
battery door!

Sologic A811 5
Sologic A811
ENGLISH
• Use / to select “SET AREA CODE”.
• Press to enter the settings.
• Use / to change.
• Press to move to the next digit.
• Repeat this sequence until all digits are set.
• Leave unused digits as “-”.
• Press to exit the menu.
7.5 Long distance code (prefix)
When you have subscribed at an alternative oper-
ator it sometimes is required to dial a prefix in front
of the telephone number. Numbers in the caller ID
list of your telephone can be used together with
the prefix.
Section “8.6 Incoming Caller ID list” will explain
how to add the prefix in front of a number from the
caller ID list.
•Press .
• Use / to select “LONG DIST ACCESS”.
• Press to enter the settings.
• Use / to change the digit.
• Press to move to the next digit.
• Repeat this sequence until all digits are set.
• Leave unused digits as “-”.
• Press to exit the menu.
7.6 Phone book.
The phone has a phonebook that can store up to
125 contacts of 8 characters (name) and 12 digits
(number) or up to 63 contacts with 16 characters
and 22 digits.
You can add and/or edit contacts stored in the tel-
ephone.
7.6.1 Add a contact
•Press .
• Use / to select “PHONEBOOK ADD”.
• Press to enter the number.
• Enter the number using the numeric keypad.
• Press to delete a wrongly entered digit.
• Press to enter the name.
• Enter the number using the numeric keypad.
Press to delete a wrongly entered digit.
• Press to confirm the entry.
• Enter a new contact or press to exit the
menu.
7.6.2 Edit a contact
•Press .
• Use / to select “PHONEBOOK EDIT”.
•Press .
• Now enter one or more characters of the
name you want to edit and press .
If necessary, use / to scroll through the
contacts until you find the one you want to
edit.
• Now change the number (use to delete).
•Press .
• Now change the name (use to delete).
• Press to confirm.
• Select another contact to edit or press to
exit the menu.
7.7 Babycall function
The baby call function allows the telephone to dial
out directly a pre-programmed number just by lift-
ing off the handset or by pressing a key.
•Press .
• Use / to select “BABYCALL”.
•Press .
• Use / to select “ON” or “OFF”.
•Press .
• If you selected “ON” you can now enter the
babycall number using the numeric keypad.
• Press to confirm.
• Press to exit the menu.
7.8 Set the flash time
The R-key (flash) is used for services like “Call
waiting” (if this service is provided by your
telephone company) or to transfer calls when the
telephone is connected to a PBX-system.
Depending on the country, this flash-time can be
different. The telephone supports 3 possibilities :
100, 300, 600 msec.
•Press .
• Use / to select “FLASH TIME”.
•Press .
• Use / to select the desired flash-time.
•Press .
• Press to exit the menu.
7.9 Ringer volume
At the back panel of the telephone you find a
switch that can set three different ring
volumes.
Choose the most comfortable volume.
23

6Sologic A811
Sologic A811
8 Operation
8.1 Making a call
• Enter the telephone number.
• Press to delete a wrongly entered digit.
• Pick up the handset or press or to
make a hands-free call.
The call duration timer will start in the display 6
seconds after the number was dialled.
8.2 Receiving a call
• When a call comes in, the phone will ring and
the ringer LED will blink.
• Pick up the handset or press to take the
call hands-free.
8.3 Deactivating the microphone
During a call you can deactivate the microphone
and talk freely without the caller hearing you.
• Press and hold to mute the microphone.
8.4 Putting a call on hold
During a call you can put the caller on hold. During
this time the caller will hear an electronic melody.
• Press during the conversation and hang-
up the handset.
The other party will be on hold
• To continue the conversation, pickup the
handset or press for hands-free mode.
8.5 Last number redial
The phone will store the 16 latest dialed numbers
together with the call duration.
• Press to go through your latest dialed
numbers (“OUT” will appear in the display).
• Pick up the handset or press or to
make a hands-free call.
• Press twice to delete a number.
8.6 Incoming Caller ID list
The phone can store up to 158 incoming numbers
(depending on the length of the number) together
with the time and date of the call.
• Press / to go through the incoming
numbers (“IN” will appear in the display).
• Press twice to delete a number.
• Pick up the handset or press or to
make a hands-free call.
8.7 VIP numbers
In the incoming number list you can set special
numbers as VIP (Very important person).
VIP numbers cannot be deleted from the incoming
caller ID.
• When browsing the incoming number press
to set the number as VIP. “VIP” will
appear in the display together with the
number.
• Press again to unselect VIP.
The volume of the handset can be set to
HI or LO by using switch .
24
During a call made with the handset you
can switch to hands-free by pressing
and hanging up the handset.
The hands-free volume can be adjusted
using the volume button .
9
In case the telephone is connected to a
PBX system it might be necessary to add
a pause after the PBX access code. The
phone can generate a 4 second pause
time.
Example: 0 P 012345678
– Press to enter a pause.
Secret numbers will be displayed as
“-------------------- UNAVAILABLE”.
The LED will blink when you have new
missed calls. Missed calls will be
displayed together with “NEW”.
If a long distance code (see “7.5 Long
distance code (prefix)”) is programmed,
you can add this code automatically by
pressing twice to dial the number.
For example:
Long distance code: 1234
Number in the caller ID list: 012345678
• Press twice.
The number dialled by the phone is
1234012345678
VIP
VIP

Sologic A811 7
Sologic A811
ENGLISH
8.8 Indirect Memory numbers
The Sologic A811 has 12 indirect memory num-
bers: 1, 2, 3, 4, 5, 6, 7, 8, 9, 0, * and #.
8.8.1 Storing a number
When a number is on the display, either via direct
entry, from the caller ID list or from the redial list
you have the possibility to store the number.
•Press.“
STORE” will appear on the
display.
• Choose a memory number 1, 2, 3, 4, 5, 6, 7,
8, 9, 0, * or # on the numeric keypad.
8.8.2 Using a memory number
• Press + 1, 2, 3, 4, 5, 6, 7, 8, 9, 0, * or #.
• Pick up the handset or press or to
make a hands-free call.
8.9 Using the phone book
•Press .
• Now enter one or more characters of the
contact name you want to call.
• If necessary, use / to scroll through the
contacts until you find the name you want to
call.
• Pick up the handset or press or to
make a hands-free call.
9 Topcom Warranty
9.1 Warranty period
The Topcom units have a 24-month warranty pe-
riod. The warranty period starts on the day the
new unit is purchased. There is no warranty on
standard or rechargeable batteries (AA/AAA
type).
Consumables or defects causing a negligible ef-
fect on operation or value of the equipment are not
covered.
The warranty has to be proven by presentation of
the original or copy of the purchase receipt, on
which the date of purchase and the unit-model are
indicated.
9.2 Warranty exclusions
Damage or defects caused by incorrect treatment
or operation and damage resulting from use of
non-original parts or accessories are not covered
by the warranty.
The warranty does not cover damage caused by
outside factors, such as lightning, water and fire,
nor any damage caused during transportation.
No warranty can be claimed if the serial number
on the units has been changed, removed or ren-
dered illegible.
Any warranty claims will be invalid if the unit has
been repaired, altered or modified by the buyer.

8Sologic A811
Sologic A811
1 Voor het eerste gebruik
Hartelijk dank voor de aankoop van onze nieuwe
comfort-telefoon met nummerweergave oproeper.
1.1 Gebruiksdoeleinde
Het is de bedoeling dat dit product aangesloten
wordt op een analoge PSTN-telefoonlijn binnen.
1.2 Nummerweergave oproeper
1.3 Aansluiting
Dit toestel werd ontworpen en vervaardigd
conform de 98/482/EG-richtlijn voor pan-
Europese aansluiting van een terminal op het
PSTN-netwerk (PSTN = Public Switching
Telephone Network) en conform de gevestigde
richtlijnen uit de EU-richtlijn 1999/5/EG inzake
elektrische radioapparatuur en de wederzijdse
erkenning van hun conformiteit. Maar omdat de
PSTN's van land tot land kunnen verschillen,
bieden de verificatiemaatregelen op zich geen
onvoorwaardelijke garantie voor een optimale
werking in elk aansluitpunt van het PSTN in elk
land. Mochten er problemen optreden, neem dan
eerst contact op met de distributeur.
In ieder geval dienen de gebruiksdoeleinden
waarvoor het product gemaakt is, gerespecteerd
te worden en dient het gebruik in openbare of
privé-netwerken met technische eisen die
duidelijk afwijken van die van Europese
netwerken, vermeden te worden.
2 Veiligheidsinstructies
• Plaats het toestel niet in een vochtige ruimte
en houd het minimaal 1,5 meter van een
waterbron vandaan. Houd water uit de buurt
van de telefoon.
• Gebruik de telefoon niet in een omgeving
waar er een risico op ontploffing is.
• Onderhoud de telefoon op een
milieuvriendelijke manier.
3 Reiniging
Reinig de telefoon met een licht vochtige of
antistatische doek. Gebruik nooit
reinigingsmiddelen of agressieve oplosmiddelen.
4 Het toestel vernietigen (milieu)
Op het einde van de levenscyclus
van het product mag u dit product
niet bij het normale huishoudelijke
afval gooien, maar moet u het naar
een inzamelpunt brengen voor de
recyclage van elektrische en
elektronische apparatuur. Dit wordt aangeduid
door het symbool op het product, in de
handleiding en/of op de verpakking.
Sommige materialen van het product kunnen
worden hergebruikt als u ze naar een inzamelpunt
brengt. Door onderdelen of grondstoffen van
gebruikte producten te hergebruiken, levert u een
belangrijke bijdrage tot de bescherming van het
milieu.
Wend u tot uw locale overheid voor meer
informatie over de inzamelpunten in uw buurt.
Om de functie 'Nummerweergave
oproeper' (Caller ID) te kunnen
gebruiken, dient deze dienst geactiveerd
te zijn op uw telefoonlijn. Als u van deze
functie gebruik wilt maken, moet u zich
normaal gezien op deze functie
abonneren bij uw telefoonmaatschappij.
Als u niet geabonneerd bent op de
oproeperidentificatie, zullen de
inkomende telefoonnummers NIET op de
display van uw telefoon verschijnen.
Het CE-symbool bevestigt dat het toestel
voldoet aan de basiseisen van de
R&TTE-richtlijn.
Lees de volgende informatie over
veiligheid en juist gebruik zorgvuldig
door. Leer alle functies van het toestel
kennen. Bewaar deze instructies
zorgvuldig en geef ze indien nodig door
aan derden.
Sologic A811 9
Sologic A811
NEDERLANDS
5 Toetsen / aansluitingen
(Zie afbeelding op de flap van het voorblad)
1. LCD-display
2. Toets Wissen
3. Toets Programmeren / Kiezen
4. Toets Telefoonboek
5. Toets Nummer opslaan
6. Toets Geheugen
7. Toets VIP
8. Toets Vasthouden
9. Toets Volume aanpassen
10. Toets Handenvrij
11. Toets Nummerherhaling/Pauze
12. LED Belgeluid
13. Toets Flash
14. Toets Microfoon uit
15. Aansluiting gekruld snoer
16. Numeriek toetsenbord
17. Toets Omhoog
18. Toets Omlaag
19. Toets Opnemen
20. LED nieuwe oproep
21. LED In gebruik
22. Snoeraansluiting
23. Toets Belvolume
24. Toets Volume handset
25. Aansluiting gekruld snoer
6 Installatie
Plaats batterijen in het batterijvak om de display te
activeren:
• Open het batterijvak aan de onderkant van
het toestel. Verwijder de schroef met een
schroevendraaier.
• Plaats 4 standaard alkaline AA-batterijen.
• Sluit het batterijvak.
• Verbind het ene uiteinde van de
telefoonkabel met de wandcontactdoos van
het telefoonnet en het andere uiteinde met de
achterkant van de telefoon.
7 Telefooninstellingen
7.1 De displaytaal instellen
De telefoon ondersteunt 8 displaytalen: Engels,
Frans, Spaans, Italiaans, Duits, Turks, Pools,
Sloveens.
• Druk op .
• Gebruik / om “SELECT LANGUAGE“ te
selecteren.
• Druk op om de instellingen te openen.
• Gebruik / om uw taal te kiezen.
• Druk op om te bevestigen.
• Druk op om het menu af te sluiten.
7.2 Datum en tijd
Als u geabonneerd bent op de dienst
nummerweergave (Caller ID) en uw
telefoonmaatschappij de datum en de tijd samen
met het telefoonnummer doorstuurt, dan worden
de datum en tijd’ automatisch ingesteld. Het jaar
moet altijd handmatig ingesteld worden!
• Druk op .
• Gebruik / om “DATE/TIME” te
selecteren.
• Druk op om de instellingen voor het
jaar te selecteren.
• Gebruik / om te wijzigen.
• Druk op om naar de instelling voor de
uren te gaan.
• Gebruik / om te wijzigen.
• Druk op om naar de instelling voor de
minuten te gaan.
• Gebruik / om te wijzigen.
• Druk op om naar de instelling voor de
maanden te gaan.
• Gebruik / om te wijzigen.
• Druk op om naar de instelling voor de
datum te gaan.
• Gebruik / om te wijzigen.
• Druk op .
• Druk op om het menu te verlaten.
7.3 Contrast van de display
Er zijn 5 niveaus voor het displaycontrast waaruit
u kunt kiezen.
• Druk op .
• Gebruik / om “CONTRAST ADJUST” te
selecteren.
• Druk op .
• Gebruik / om het contrastniveau te
wijzigen.
• Druk op .
Haal de telefoonkabel uit de telefoon
voor u het batterijdeksel opent!!

10 Sologic A811
Sologic A811
• Druk op om het menu te verlaten.
7.4 Het netnummer instellen
Als u geabonneerd bent op de dienst
nummerweergave kan het in sommige landen
nodig zijn om het netnummer in te voeren. Als de
telefoon het nummer van een oproeper ontvangt,
zal de telefoon het ingevoerde netnummer van
het inkomende nummer verwijderen.
U kunt maximaal 5 cijfers voor het netnummer
instellen.
• Druk op om het menu te selecteren.
• Gebruik / om “SET AREA CODE” te
selecteren.
• Druk op om de instellingen te
selecteren.
• Gebruik / om te wijzigen.
• Druk op om naar het volgende cijfer te
gaan.
• Herhaal dit totdat alle cijfers zijn ingesteld.
• Laat ongebruikte cijfers staan als “-”.
• Druk op om het menu te verlaten.
7.5 Landnummers (prefix)
Als u een abonnement hebt bij een alternatieve
telefoonmaatschappij is het soms nodig om een
prefix voor het telefoonnummer te draaien.
Nummers in de lijst voor nummerweergave van
uw telefoon kunnen samen met het prefix worden
gebruikt.
In hoofdstuk “8.6 Lijst met inkomende oproepen
met nummerweergave” wordt uitgelegd hoe u een
prefix vóór een nummer uit de lijst met
nummerweergave kunt plaatsen.
• Druk op .
• Gebruik / om “LONG DIST ACCESS” te
selecteren.
• Druk op om de instellingen te
selecteren.
• Gebruik / om het cijfer te wijzigen.
• Druk op om naar het volgende cijfer te
gaan.
• Herhaal dit totdat alle cijfers zijn ingesteld.
• Laat ongebruikte cijfers staan als “-”.
• Druk op om het menu te verlaten.
7.6 Telefoonboek.
De telefoon heeft een telefoonboek waarin
maximaal 125 contactpersonen van 8 tekens
(naam) en 12 cijfers (nummer) of maximaal 63
contactpersonen van 16 tekens en 22 cijfers
kunnen worden opgeslagen
U kunt contactpersonen bewerken of aan het
telefoonboek toevoegen.
7.6.1 Een contactpersoon toevoegen
• Druk op .
• Gebruik / om “PHONEBOOK ADD” te
selecteren.
• Druk op om het nummer in te voeren.
• Voer het nummer in met het
cijfertoetsenbord.
• Druk op om een verkeerd ingevoerd cijfer
te wissen.
• Druk op om de naam in te voeren.
• Voer het nummer in met het
cijfertoetsenbord.
Druk op om een verkeerd ingevoerd cijfer
te wissen.
• Druk op om de invoer te bevestigen.
• Voer een nieuwe contactpersoon in of druk
op om het menu af te sluiten.
7.6.2 Een contactpersoon bewerken
• Druk op .
• Gebruik / om “PHONEBOOK EDIT” te
selecteren.
• Druk op .
• Voer nu een of meer tekens in van de naam
die u wilt bewerken en druk op .
Gebruik waar nodig / om door de
contactpersonen te bladeren totdat u de
contactpersoon die u wilt bewerken hebt
gevonden.
• Wijzig het nummer (gebruik om te
verwijderen).
• Druk op .
• Wijzig de naam (gebruik om te
verwijderen).
• Druk op om te bevestigen.
• Selecteer een andere contactpersoon die u
wilt bewerken of druk op om het menu af
te sluiten.
7.7 Babyfoonfunctie
De babyfoonfunctie zorgt dat de telefoon direct
een geprogrammeerd nummer kiest door de
handset op te pakken of door op een toets te
drukken.
• Druk op .
• Gebruik , om “BABYCALL” te
selecteren.

Sologic A811 11
Sologic A811
NEDERLANDS
• Druk op .
• Gebruik / om “ON” of “OFF” te
selecteren.
• Druk op .
•Alsu“
ON” hebt geselecteerd, kunt u het
nummer voor de babyfoonfunctie met het
cijfertoetsenbord invoeren.
• Druk op om te bevestigen.
• Druk op om het menu te verlaten.
7.8 De flashtijd instellen
De toets R(flash) wordt gebruikt voor diensten
zoals “Call waiting” (als deze dienst door uw
telefoonmaatschappij wordt verleend) of om
gesprekken door te verbinden wanneer de
telefoon is verbonden met een PBX-centrale.
De flashtijd kan per land verschillen. De telefoon
ondersteunt 3 mogelijkheden: 100, 300,
600 msec.
• Druk op .
• Gebruik / om “FLASH TIME” te
selecteren.
• Druk op .
• Gebruik / om de gewenste flashtijd te
selecteren.
• Druk op .
• Druk op om het menu te verlaten.
7.9 Belvolume
Aan de achterkant van de telefoon vindt u een
schakelaar die drie verschillende belvolumes
kan instellen.
Kies het meest comfortabele volume.
8Werking
8.1 Een telefoongesprek voeren
• Voer het telefoonnummer in.
• Druk op om een verkeerd ingevoerd cijfer
te wissen.
• Pak de handset op of druk op of om
handenvrij te bellen.
De duur van het gesprek verschijnt 6 seconden
nadat het nummer gebeld is op de display.
8.2 Een oproep ontvangen
• Als er een oproep binnenkomt, gaat de
telefoon over en knippert de bel-LED.
• Pak de handset op of druk op om de
oproep handenvrij te ontvangen.
8.3 De microfoon deactiveren
Tijdens een gesprek kunt u de microfoon
deactiveren en vrij praten zonder dat de beller u
kan horen.
• Houd ingedrukt om het geluid van de
microfoon stil te zetten.
8.4 Een oproep in de wacht zetten
Tijdens een oproep kunt u de beller in de wacht
zetten. De beller hoort tijdens het wachten een
elektronische melodie.
• Druk tijdens het gesprek op en plaats de
handset terug.
De andere partij staat nu in de wacht
• Als u het gesprek verder wilt zetten, pakt u de
handset weer op of drukt u op voor de
handenvrije modus.
8.5 Herhalen van het laatst gekozen
nummer
De telefoon slaat de 16 laatst gebelde nummers
op samen met de gespreksduur.
• Druk op om uw laatst gebelde
nummers te doorlopen (“OUT” verschijnt op
de display).
23
Het volume van de handset kan worden
ingesteld op HI of LO met de
schakelaar .
24
Tijdens een gesprek met de hoorn kunt u
overschakelen op handenvrij door op
te drukken en de hoorn op de haak te
leggen.
Het volume voor handenvrij kan met de
volumetoets worden aangepast.
9
Als de telefoon verbonden is met een
PBX-centrale kan het nodig zijn om een
pauze toe te voegen na de PBX-
toegangscode. De telefoon kan een
pauze inlassen van 4 seconden.
Bijvoorbeeld: 0 P 012345678
– Druk op om een pauze in te
lassen.

12 Sologic A811
Sologic A811
• Neem de hoorn van de haak of druk op
of om handenvrij te bellen.
• Druk op twee keer op om een nummer te
wissen.
8.6 Lijst met inkomende oproepen
met nummerweergave
De telefoon kan maximaal 158 binnenkomende
nummers opslaan (afhankelijk van de lengte van
het nummer) samen met de tijd en datum van de
oproep.
• Druk op / om de inkomende nummers
te doorlopen (“IN” verschijnt op de display).
• Druk op twee keer op om een nummer te
wissen.
• Neem de hoorn van de haak of druk op
of om handenvrij te bellen.
8.7 VIP-nummers
In de lijst met inkomende nummers kunt u
speciale nummers als VIP instellen (very
important person).
VIP-nummers kunnen niet worden verwijderd uit
de lijst met inkomende oproepen met
nummerweergave.
• Wanneer u het inkomende nummer
tegenkomt tijdens het bladeren, drukt u op
om het nummer in te stellen als VIP.
“VIP” wordt samen met het nummer op de
display weergegeven.
• Druk nog een keer op om de selectie
van VIP ongedaan te maken.
8.8 Indirecte geheugennummers
De Sologic A811 heeft 12 indirecte
geheugennummers: 1, 2, 3, 4, 5, 6, 7, 8, 9, 0, *
en #.
8.8.1 Een nummer opslaan
Wanneer een nummer op de display staat, door
directe invoer, door de nummerweergavelijst of de
nummerherhalingslijst, hebt u de mogelijkheid om
het nummer op te slaan.
• Druk op . “STORE” wordt op de display
weergegeven.
• Kies een geheugennummer 1, 2, 3, 4, 5, 6, 7,
8, 9, 0, * of # op het cijfertoetsenbord.
8.8.2 Een geheugennummer gebruiken
• Druk op + 1, 2, 3, 4, 5, 6, 7, 8, 9, 0, *
of #.
• Neem de hoorn van de haak of druk op
of om handenvrij te bellen.
8.9 Het telefoonboek gebruiken
• Druk op .
• Voer een of meer tekens in van de naam van
de contactpersoon die u wilt bellen.
• Gebruik waar nodig / om door de
contactpersonen te bladeren totdat u de
naam hebt gevonden van de persoon die u
wilt bellen.
• Neem de hoorn van de haak of druk op
of om handenvrij te bellen.
9 Topcom-garantie
9.1 Garantieperiode
Op de Topcom-toestellen wordt een garantie van
24 maanden verleend. De garantieperiode gaat in
op de dag waarop het nieuwe toestel wordt
gekocht. Er is geen garantie op standaard of
oplaadbare batterijen (type AA/AAA).
Kleine onderdelen of defecten die een
verwaarloosbaar effect hebben op de werking of
waarde van het toestel worden niet gedekt door
de garantie.
De garantie moet worden aangetoond door
overlegging van het originele aankoopbewijs of
Geheime nummers worden weergegeven
als “-------------------- UNAVAILABLE”.
De LED knippert als u nieuwe gemiste
oproepen hebt. Gemiste oproepen
worden weergegeven samen met “NEW”.
Als er een landnummer (zie “7.5
Landnummers (prefix)”) is
geprogrammeerd, kunt u dit nummer
automatisch toevoegen door twee keer
op te drukken om het nummer te
kiezen.
Bijvoorbeeld:
Landnummer: 1234
Nummer in de nummerweergavelijst:
012345678
• Druk twee keer op .
Het gekozen nummer is
1234012345678
VIP
VIP

Sologic A811 13
Sologic A811
NEDERLANDS
een kopie waarop de aankoopdatum en het
toesteltype staat vermeld.
9.2 Garantiebeperkingen
Schade of defecten die te wijten zijn aan onjuist
gebruik of bediening en schade die te wijten is aan
het gebruik van niet-originele onderdelen of
accessoires worden niet gedekt door de garantie.
De garantie dekt geen schade die te wijten is aan
externe factoren, zoals bliksem, water en brand,
noch enige transportschade.
Er kan geen aanspraak worden gemaakt op de
garantie als het serienummer op het toestel
gewijzigd, verwijderd of onleesbaar gemaakt is.
Garantieclaims zijn ongeldig indien het toestel
hersteld, gewijzigd of aangepast werd door de
koper.

14 Sologic A811
Sologic A811
1 Avant la première utilisation
Nous vous remercions d'avoir acheté ce nouveau
téléphone de bureau avec identification de
l'appelant.
1.1 Usage
Ce produit est destiné à être connecté à l'intérieur
à une ligne téléphonique analogique RTPC.
1.2 Identification de l'appelant
1.3 Connexion
Ce téléphone a été conçu et fabriqué en vue de sa
conformité à la directive 98/482/CE concernant,
au niveau paneuropéen, le raccordement d'un
équipement terminal au réseau téléphonique
public commuté (RTPC) et à la directive 1999/5/
CE concernant les équipements hertziens et la
reconnaissance mutuelle de leur conformité.
Toutefois, en raison de différences entre les
RTPC d'un pays à un autre, les mesures de
vérification en tant que telles ne constituent pas
une garantie inconditionnelle du fonctionnement
optimal lors de la connexion à tous les points du
RTPC d'un pays. En cas de problème, veuillez
d'abord prendre contact avec le distributeur.
Les conditions d'utilisation pour lesquelles le
produit a été conçu doivent toujours être
respectées. Il convient également d'éviter
d'utiliser le produit sur des réseaux publics ou
privés dont les conditions techniques diffèrent
distinctement de celles établies dans l'UE.
2 Instructions de sécurité
• N'installez pas l'appareil de base dans une
pièce humide ni à moins de 1,5 m d'un point
d'eau. Veillez à ce que le téléphone ne soit
pas mouillé.
• N'utilisez pas le téléphone dans un
environnement qui présente un risque
d'explosion.
• Eliminez les piles et entretenez le téléphone
en respectant l'environnement.
3Nettoyage
Nettoyez le téléphone à l'aide d'un chiffon
légèrement humide ou antistatique. N'utilisez
jamais de détergents ni de solvants abrasifs.
4 Mise au rebut de l'appareil
(environnement)
Au terme du cycle de vie de ce
produit, ne le jetez pas avec les
déchets ménagers ordinaires mais
déposez-le dans un point de
collecte pour le recyclage des
équipements électriques et électroniques. Le
symbole sur ce produit, sur le mode d'emploi et/ou
la boîte vous le signale.
Certains matériaux qui composent le produit
peuvent être réutilisés si vous les déposez dans
un point de recyclage. En réutilisant certaines
pièces ou matières premières de produits usagés,
vous apportez une contribution importante à la
protection de l'environnement. Pour toute
information supplémentaire sur les points de
collecte dans votre région, veuillez contacter vos
autorités locales.
Pour utiliser la fonction 'identification de
l'appelant' (Caller ID), ce service doit être
activé sur votre ligne téléphonique. En
principe, vous devez vous abonner
séparément à ce service auprès de votre
compagnie de téléphone. Si la fonction
identification de l'appelant n'est pas
activée sur votre ligne téléphonique, le
numéro des personnes qui vous
appelent n'apparaîtra PAS à l'écran de
votre téléphone.
Le symbole CE indique que l'appareil est
conforme aux conditions essentielles de
la directive R&TTE.
Veuillez lire attentivement les
instructions suivantes relatives à la
sécurité et l'utilisation correcte du
produit. Familiarisez-vous avec toutes
les fonctions de l'équipement. Veillez à
conserver ces conseils et, si nécessaire,
remettez-les à une autre personne.

Sologic A811 15
Sologic A811
FRANÇAIS
5 Boutons/connexions
(reportez-vous à l'illustration sur le rabat de la
couverture)
1. Écran LCD
2. Touche Effacer
3. Touche Programme/Composition
4. Touche Répertoire
5. Touche de mémorisation du numéro
6. Touche Mémoire
7. Touche VIP
8. Touche de mise en attente
9. Touche de réglage du volume
10. Touche Mains-libres
11. Touche de recomposition/pause
12. Voyant « Sonnerie »'
13. Touche Flash
14. Touche Muet
15. Connexion du cordon à spirale
16. Clavier numérique
17. Touche Haut
18. Touche Bas
19. Touche de prise/fin d'appel
20. Voyant « Nouvel appel »
21. Voyant « Occupé »
22. Connexion ligne
23. Bouton de volume de la sonnerie
24. Bouton de volume du combiné
25. Connexion du cordon à spirale
6 Installation
Insérez les piles dans leur compartiment afin
d'activer l'écran :
• Ouvrez le compartiment des piles situé en-
dessous de l'appareil. Utilisez un tournevis
pour retirer la vis.
• Insérez 4 piles alcalines AA standard.
• Refermez le compartiment des piles.
• Branchez une extrémité du cordon
téléphonique dans la prise téléphonique
murale et l'autre extrémité, à l'arrière du
téléphone.
7 Réglages du téléphone
7.1 Réglage de la langue d'affichage
Le téléphone propose 8 langues d'affichage :
anglais, français, espagnol, italien, allemand, turc,
polonais, slovène.
• Appuyez sur .
• Utilisez / pour sélectionner “CHOIX
LANGUE“.
• Appuyez sur pour accéder aux
réglages.
• Utilisez / pour sélectionner votre
langue.
• Appuyez sur pour confirmer.
• Appuyez sur pour quitter le menu.
7.2 Date et heure
Si vous êtes abonné au service d'identification de
l'appelant et que votre opérateur envoie
également la date et l'heure avec le numéro de
téléphone, l'horloge du téléphone se règle
automatiquement. L'année doit toujours être
réglée manuellement !
• Appuyez sur .
• Utilisez / pour sélectionner “DATE/
HEURE”.
• Appuyez sur pour accéder au réglage
de l'année.
• Utilisez / pour le modifier.
• Appuyez sur pour passer au réglage
des heures.
• Utilisez / pour le modifier.
• Appuyez sur pour passer au réglage
des minutes.
• Utilisez / pour le modifier.
• Appuyez sur pour passer au réglage
du mois.
• Utilisez / pour le modifier.
• Appuyez sur pour passer au réglage
de la date.
• Utilisez / pour le modifier.
• Appuyez sur .
• Appuyez sur pour quitter le menu.
Le cordon téléphonique doit être
déconnecté avant d'ouvrir le
compartiment des piles !

16 Sologic A811
Sologic A811
7.3 Contraste de l'écran
Vous pouvez choisir entre 5 niveaux de contraste
pour votre écran.
• Appuyez sur .
• Utilisez / pour sélectionner “REGLAGE
CONTRAST”.
• Appuyez sur .
• Utilisez / pour modifier le niveau de
contraste.
• Appuyez sur .
• Appuyez sur pour quitter le menu.
7.4 Définition de l'indicatif régional
Si vous êtes abonné au service d'identification de
l'appelant, il vous sera peut-être nécessaire, dans
certains pays, d'encoder votre indicatif régional.
Lorsque le téléphone recevra l'identification de
l'appelant, il ôtera l'indicatif encodé du numéro
entrant.
Vous pouvez saisir jusqu'à 5 chiffres pour
l'indicatif régional.
• Appuyez sur pour ouvrir le menu.
• Utilisez / pour sélectionner “REGL
CODE REGION”.
• Appuyez sur pour accéder aux
réglages.
• Utilisez / pour le modifier.
• Appuyez sur pour passer au chiffre
suivant.
• Répétez cette procédure jusqu'à ce que tous
les chiffres soient encodés.
• Laissez les chiffres non utilisés “-”.
• Appuyez sur pour quitter le menu.
7.5 Code d'interurbain (préfixe)
Si vous avez un abonnement à un opérateur
alternatif, vous serez peut-être amené à
composer un préfixe avant le numéro de
téléphone. Les numéros de la liste d'identification
des appelants de votre téléphone peuvent être
utilisés avec un préfixe.
La section “8.6 Liste d'identification des
appelants” vous expliquera comment ajouter un
préfixe devant un numéro de la liste
d'identification des appelants.
• Appuyez sur .
• Utilisez / pour sélectionner “INTER
URBAIN”.
• Appuyez sur pour accéder aux
réglages.
• Utilisez / pour modifier le chiffre.
• Appuyez sur pour passer au chiffre
suivant.
• Répétez cette procédure jusqu'à ce que tous
les chiffres soient encodés.
• Laissez les chiffres non utilisés “-”.
• Appuyez sur pour quitter le menu.
7.6 Répertoire
Le téléphone dispose d'un répertoire qui vous
permet de mémoriser jusqu'à 125 contacts de 8
caractères (nom) et 12 chiffres (numéro) ou 63
contacts de 16 caractères et 22 chiffres.
Vous pouvez ajouter et/ou modifier les contacts
enregistrés dans le téléphone.
7.6.1 Ajout d'un contact
• Appuyez sur .
• Utilisez / pour sélectionner “AJOUTER
ENTREE”.
• Appuyez sur pour entrer le numéro.
• Saisissez le numéro à l'aide du clavier
numérique.
• Appuyez sur pour effacer un chiffre saisi
erronément.
• Appuyez sur pour entrer le nom.
• Saisissez le numéro à l'aide du clavier
numérique.
Appuyez sur pour effacer un chiffre saisi
erronément.
• Appuyez sur pour confirmer l'entrée.
• Saisissez un nouveau contact ou appuyez
sur pour quitter le menu.
7.6.2 Modification d'un contact
• Appuyez sur .
• Utilisez / pour sélectionner “MODIFIER
ENTREE”.
• Appuyez sur .
• Saisissez un ou plusieurs caractères du nom
que vous souhaitez modifier et appuyez sur
.
Si nécessaire, utilisez / pour faire
défiler les contacts jusqu'à ce que vous
trouviez celui que vous souhaitez modifier.
• Modifiez le numéro (utilisez pour
supprimer).
• Appuyez sur .
• Modifiez le nom (utilisez pour supprimer).
• Appuyez sur pour confirmer.
• Sélectionnez un autre contact à modifier ou
appuyez sur pour quitter le menu.

Sologic A811 17
Sologic A811
FRANÇAIS
7.7 Fonction Appel d'urgence
La fonction d'appel d'urgence permet au
téléphone de composer directement un numéro
pré-programmé simplement en décrochant le
combiné ou en appuyant sur une touche.
• Appuyez sur .
• Utilisez / pour sélectionner “APPEL
URGENCE”.
• Appuyez sur .
• Utilisez / pour sélectionner “ON” ou
“OFF”.
• Appuyez sur .
• Si vous avez sélectionné “ON”, vous pouvez
entrer le numéro d'urgence à l'aide du clavier
numérique.
• Appuyez sur pour confirmer.
• Appuyez sur pour quitter le menu.
7.8 Réglage du flash
La touche R(flash) est utilisée pour certains
services tels que “Appel en attente” (si ce service
est fourni par votre opérateur téléphonique) ou
pour transférer les appels téléphoniques lorsque
vous utilisez un commutateur privé.
Selon votre pays, ce flash peut être différent. Le
téléphone tolère 3 possibilités : 100, 300, 600 ms.
• Appuyez sur .
• Utilisez / pour sélectionner
“TOUCHE R”.
• Appuyez sur .
• Utilisez / pour sélectionner la durée de
flash souhaitée.
• Appuyez sur .
• Appuyez sur pour quitter le menu.
7.9 Volume de la sonnerie
A l'arrière du téléphone, vous trouverez un
bouton permettant de régler le volume de la
sonnerie de trois façons différentes.
Choisissez le volume qui vous convient le mieux.
8 Utilisation
8.1 Composition d'un appel
• Entrez le numéro de téléphone.
• Appuyez sur pour effacer un chiffre saisi
erronément.
• Décrochez le combiné ou appuyez sur
ou pour passer un appel en mode mains-
libres.
La durée de l'appel s'affichera à l'écran 6
secondes après que le numéro a été composé.
8.2 Réception d'un appel
• En cas d'appel entrant, le téléphone sonne et
le voyant de la sonnerie clignote.
• Décrochez le combiné ou appuyez sur
pour prendre l'appel en mode mains-libres
8.3 Désactivation du microphone
Durant un appel, vous pouvez désactiver le
microphone et parler en toute liberté sans que
l'appelant ne vous entende.
• Appuyez sur la touche et maintenez-la
enfoncée pour désactiver le microphone.
8.4 Mise en attente d'un appel
Pendant un appel, vous pouvez mettre l'appelant
en attente. Pendant ce temps, l'appelant entend
une mélodie électronique.
• Appuyez sur pendant la conversation et
raccrochez le combiné.
Votre interlocuteur est mis en attente.
• Pour reprendre la conversation, décrochez le
combiné ou appuyez sur pour passer en
mode mains-libres.
8.5 Recomposition du dernier
numéro
Le téléphone enregistre les 16 derniers numéros
composés, ainsi que la durée de leurs appels.
23
Le volume du combiné peut être réglé
sur haut ou bas grâce au
commutateur .
24
Durant un appel passé à l'aide du
combiné, vous pouvez passer en mode
mains-libres tout simplement en
appuyant sur et en raccrochant le
combiné.
L l d d i lib t
Si le téléphone est connecté à un
système de commutateur privé, il
pourrait s'avérer nécessaire d'ajouter
une pause après le code d'accès au
commutateur privé. Le téléphone peut
générer une pause de 4 secondes.
Exemple : 0 P 012345678
– Appuyez sur pour intercaler
une pause.

18 Sologic A811
Sologic A811
• Appuyez sur pour faire défiler les
derniers numéros composés (“OUT” apparaît
à l'écran).
• Décrochez le combiné ou appuyez sur
ou pour passer un appel en mode mains-
libres.
• Appuyez deux fois sur pour effacer un
numéro.
8.6 Liste d'identification des
appelants
Le téléphone peut mémoriser jusqu'à 158
numéros entrants (en fonction de la longueur des
numéros), ainsi que l'heure et la date de l'appel.
• Appuyez sur / pour faire défiler les
derniers numéros entrants (“IN” apparaît à
l'écran).
• Appuyez deux fois sur pour effacer un
numéro.
• Décrochez le combiné ou appuyez sur
ou pour passer un appel en mode mains-
libres.
8.7 Numéros VIP
Vous pouvez conférer un statut VIP (Very
Important Person) à certains numéros de votre
répertoire.
Les numéros VIP ne peuvent être supprimés de la
liste d'identification des appelants.
• Dans le répertoire, appuyez sur pour
conférer le statut VIP au numéro sélectionné.
“VIP” apparaît à l'écran, avec le numéro.
• Appuyez de nouveau sur pour annuler
le statut VIP.
8.8 Numéros de mémoire indirecte
Le modèle Sologic A811 possède 12 numéros de
mémoire indirecte : 1, 2, 3, 4, 5, 6, 7, 8, 9, 0, * et #.
8.8.1 Mémorisation d'un numéro
Lorsqu'un numéro est à l'écran, soit par encodage
direct, soit de la liste d'identification des appelants
ou de la liste de recomposition des numéros
composés, vous pouvez le mémoriser.
• Appuyez sur . “MEMORISER” s'affiche à
l'écran.
• Sélectionnez le numéro de mémoire 1, 2, 3,
4, 5, 6, 7, 8, 9, 0, * ou # sur le pavé
numérique.
8.8.2 Utilisation d'un numéro en
mémoire
• Appuyez sur + 1, 2, 3, 4, 5, 6, 7, 8, 9, 0, *
ou #.
• Décrochez le combiné ou appuyez sur
ou pour passer un appel en mode mains-
libres.
8.9 Utilisation du répertoire
• Appuyez sur .
• Saisissez un ou plusieurs caractères du
contact que vous souhaitez appeler.
• Si nécessaire, utilisez / pour faire
défiler les contacts jusqu'à ce que vous
trouviez le nom de celui que vous souhaitez
appeler.
• Décrochez le combiné ou appuyez sur
ou pour passer un appel en mode mains-
libres.
9 Garantie Topcom
9.1 Période de garantie
Les appareils Topcom bénéficient d'une période
de garantie de 24 mois. La période de garantie
prend effet le jour de l'achat du nouvel appareil. Il
n'y a aucune garantie sur les piles standard ou
rechargeables (de type AA/AAA).
Les accessoires et les défauts qui ont un effet
nuisible sur le fonctionnement ou la valeur de
l'appareil ne sont pas couverts.
Les numéros cachés apparaîtront sous
la forme “-------------------- INDISPONIBLE”.
Le voyant clignote lorsque vous avez
de nouveaux appels manqués. Les
appels manqués s'affichent avec
“NOUV”.
Si un code d'interurbain (voir “7.5 Code
d'interurbain (préfixe)”) est programmé,
vous pouvez ajouter ce code
automatiquement en appuyant deux fois
sur pour composer le numéro.
Par exemple :
Code d'interurbain : 1234
Numéro dans la liste d'identification des
appelants : 012345678
• Appuyez deux fois sur .
Le numéro composé par le téléphone
est le 1234012345678.
VIP
VIP

Sologic A811 19
Sologic A811
FRANÇAIS
La garantie s'applique uniquement sur
présentation du reçu d'achat original ou une copie
de celui-ci sur lequel figurent la date de l'achat et
le modèle de l'appareil.
9.2 Exclusions de garantie
Les dommages et les pannes causés par un
mauvais traitement ou une utilisation incorrecte et
les dommages qui résultent de l'utilisation de
pièces et d'accessoires non originaux ne sont pas
couverts par la garantie.
La garantie ne couvre pas les dommages causés
par des éléments extérieurs tels que la foudre,
l'eau et le feu, ni les dommages provoqués par le
transport.
Aucune garantie ne pourra être invoquée si le
numéro de série indiqué sur les appareils a été
modifié, supprimé ou rendu illisible.
Aucune garantie ne peut non plus être invoquée si
l'appareil a été réparé ou modifié par l'acheteur.

20 Sologic A811
Sologic A811
1 Bevor Sie beginnen
Vielen Dank, dass Sie sich zum Kauf des neuen
Komforttelefons mit Anruferkennung entschieden
haben.
1.1 Einsatzbereich
Dieses Produkt ist zum Anschluss im Gebäude an
einen analogen PSTN-Telefonanschluss
bestimmt.
1.2 Anruferkennung
1.3 Anschluss
Dieses Gerät wurde in Übereinstimmung mit der
Richtlinie 98/482/EG entwickelt und hergestellt,
es entspricht den europäischen Anschlüssen an
das Public Switching Telephone Network (PSTN)
und den Anforderungen der Richtlinie 1999/5/EG
über Funkanlagen und Telekommunikations-
endeinrichtungen und die gegenseitige
Anerkennung ihrer Konformität. Da jedoch die
PSTN-Anschlüsse von Land zu Land variieren,
stellen die Prüfmaßnahmen alleine keine
Garantie dar für eine optimale Funktion an jedem
Anschlusspunkt an das PSTN-Netz in jedem
Land. Wenden Sie sich bei Problemen zunächst
an Ihren Netzanbieter.
Sie sollten das Produkt immer unter den
Voraussetzungen verwenden, für die es
entwickelt wurde. Sie dürfen es nicht in
öffentlichen oder privaten Netzwerken mit
technischen Voraussetzungen nutzen, die sich
deutlich von denen der EU unterscheiden.
2 Sicherheitshinweise
• Stellen Sie das Basisgerät nicht in einem
feuchten Raum oder in einem Abstand von
weniger als 1,50 m von einem
Wasseranschluss auf. Lassen Sie kein
Wasser an das Telefon kommen.
• Verwenden Sie das Telefon nicht in
Umgebungen, in denen Explosionsgefahr
besteht.
• Entsorgen Sie die Batterien und das Telefon
auf umweltfreundliche Weise.
3 Reinigung
Reinigen Sie das Telefon mit einem leicht
feuchten Lappen oder mit einem anti-statischen
Tuch. Verwenden Sie niemals Reinigungs- oder
Scheuermittel.
4 Entsorgung des Geräts
(Umweltschutz)
Am Ende der Lebensdauer des
Produkts darf das Gerät nicht im
normalen Hausmüll entsorgt
werden. Bringen Sie es zu einer
Sammelstelle zur Aufbereitung
elektrischer und elektronischer Geräte. Das
Symbol am Produkt, in der Bedienungsanleitung
und/oder Verpackung zeigt dies an. Einige der
Materialien des Produkts können
wiederverwendet werden, wenn Sie das Gerät in
einer Aufbereitungsstelle abgeben. Mit der
Wiederverwertung einiger Teile oder
Rohmaterialien aus gebrauchten Produkten
leisten Sie einen wichtigen Beitrag zum
Umweltschutz. Wenden Sie sich bitte an Ihre
örtlichen Behörden, wenn Sie weitere
Informationen über Sammelstellen in Ihrer
Umgebung benötigen.
Um die Funktion 'Anruferkennung'
(Anzeige des Anrufers) zu nutzen, muss
dieser Service für Ihren Telefon-
anschluss aktiviert sein. Normalerweise
benötigen Sie eine separate Registri-
erung Ihres Telefonnetzanbieters zur
Aktivierung dieser Funktion. Ist die
Funktion Anruferkennung nicht für Ihren
Telefonanschluss aktiviert, werden die
eingehenden Telefonnummern NICHT im
Display Ihres Telefons angezeigt.
Das CE-Symbol gibt an, dass das Gerät
allen wesentlichen Anforderungen der
R&TTE Richtlinie entspricht.
Lesen Sie die folgenden Sicherheits-
hinweise und Angaben zum korrekten
Gebrauch des Geräts sorgfältig durch.
Machen Sie sich mit allen Funktionen
des Geräts vertraut. Bewahren Sie diese
Hinweise sorgfältig auf und geben Sie sie
wenn nötig an andere Benutzer weiter.
Other manuals for SOLOGIC A811
1
Table of contents
Languages:
Other Topcom IP Phone manuals

Topcom
Topcom Fidelity 160 User manual

Topcom
Topcom DESKMASTER 142 User manual

Topcom
Topcom ORBIT User manual

Topcom
Topcom Butler E751 TripleButler E751 Quattro User manual

Topcom
Topcom TE-5730 User manual

Topcom
Topcom ALLURE 150 User manual

Topcom
Topcom IP100 User manual

Topcom
Topcom SOLOGIC B921 Product information sheet

Topcom
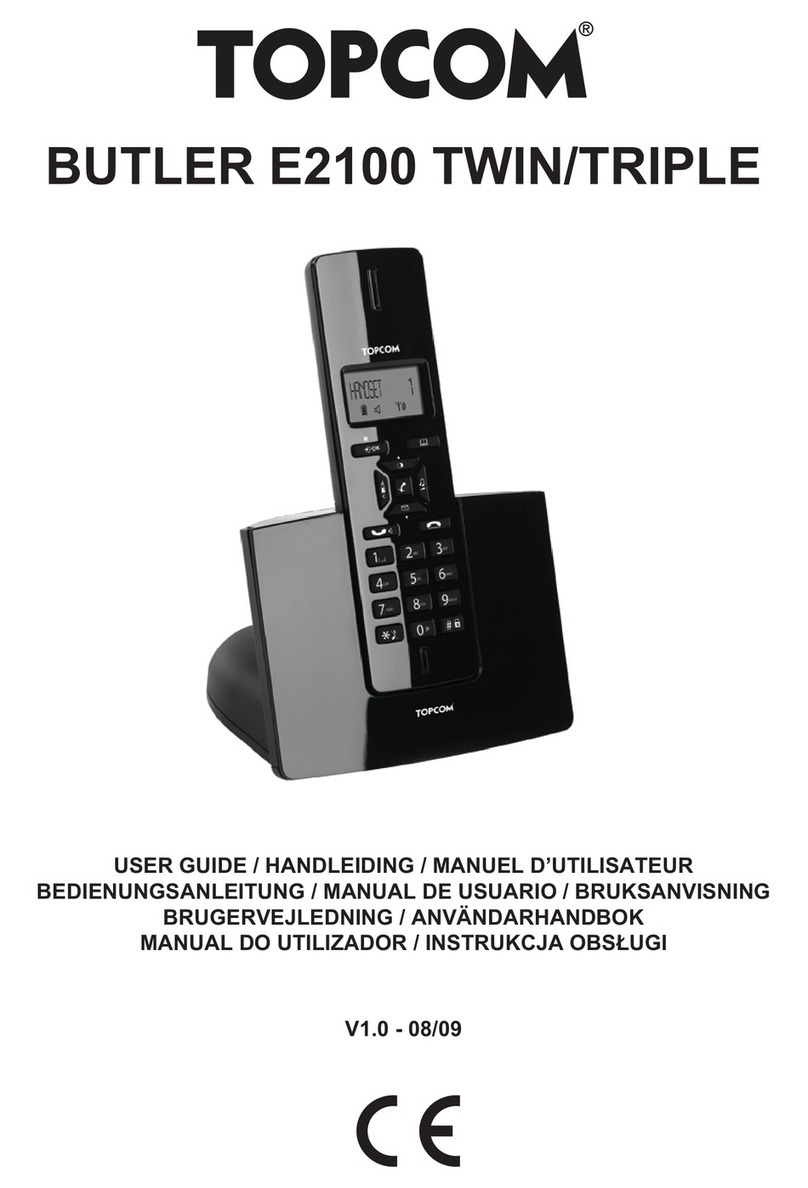
Topcom BUTLER E2100 User manual

Topcom
Topcom BUTLER 2900 Triple User manual