Topcom ORBIT User manual

O
Orbit
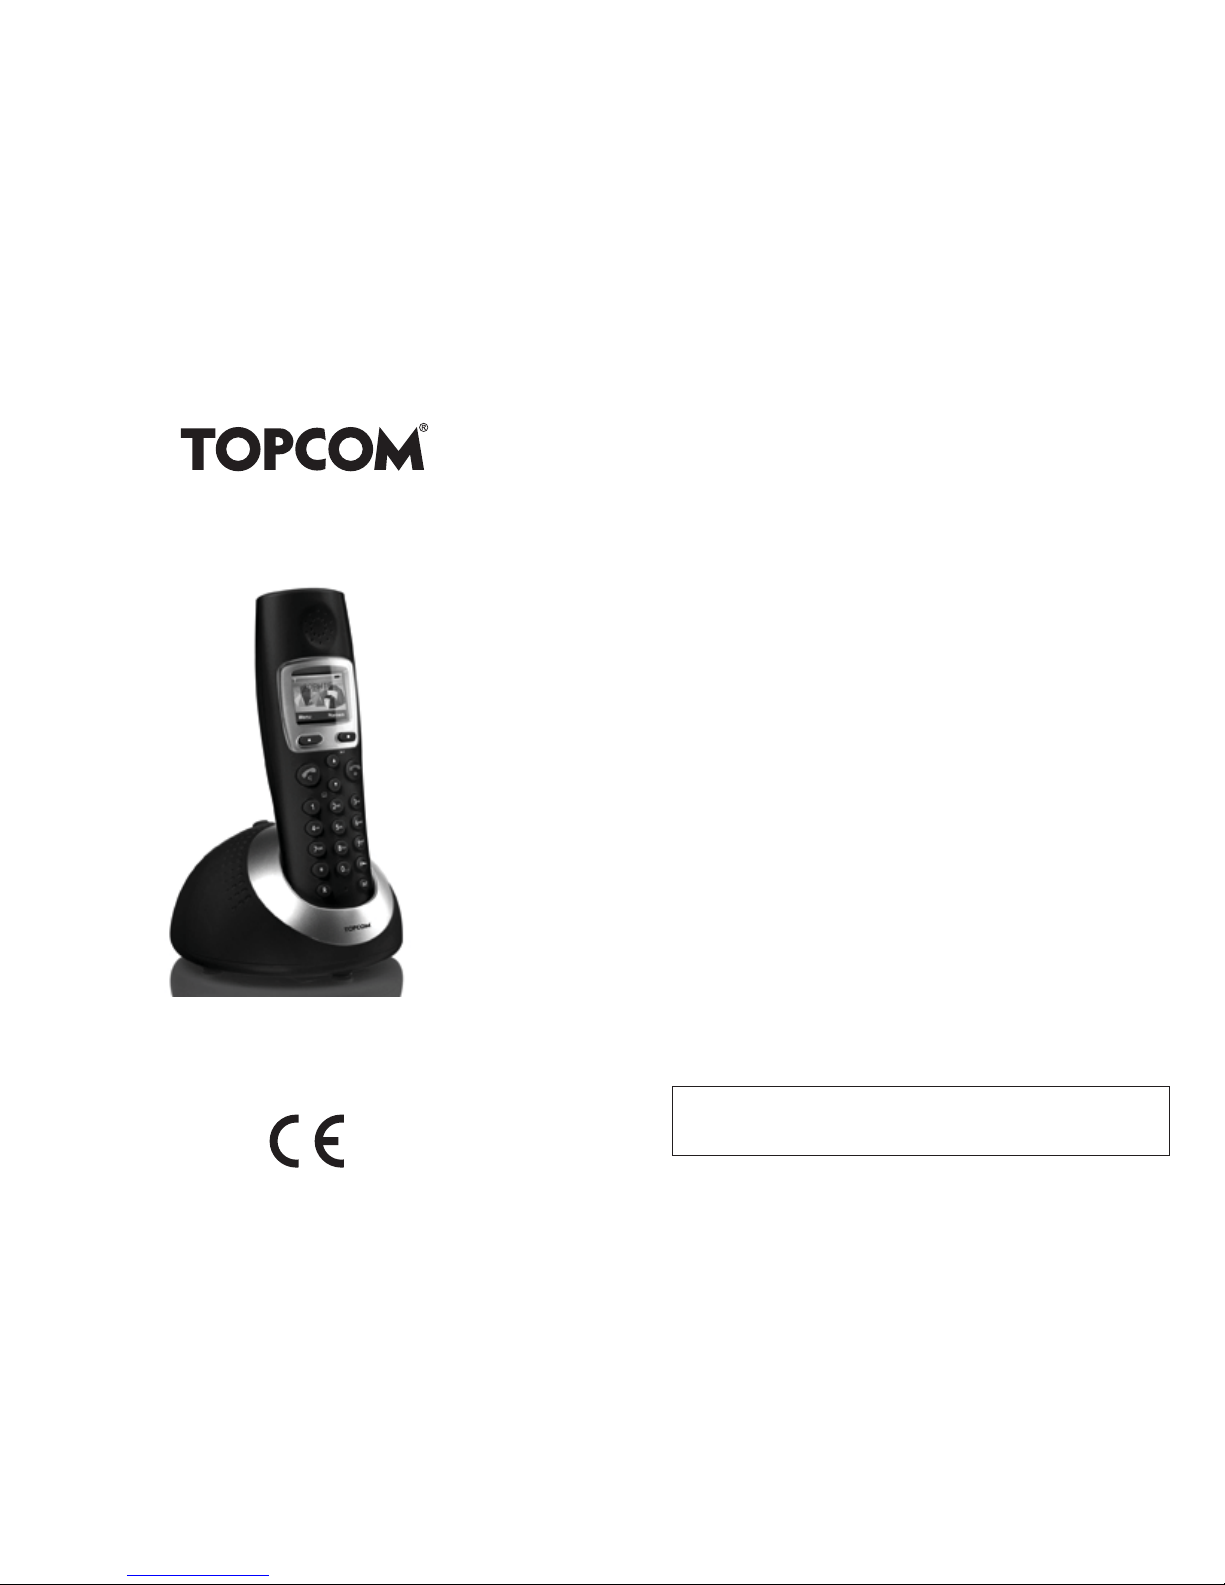
USER GUIDE / HANDLEIDING / MANUEL D’UTILISATEUR
BEDIENUNGSANLEITUNG / MANUAL DE USUARIO
v1.3 - 07/08
Important
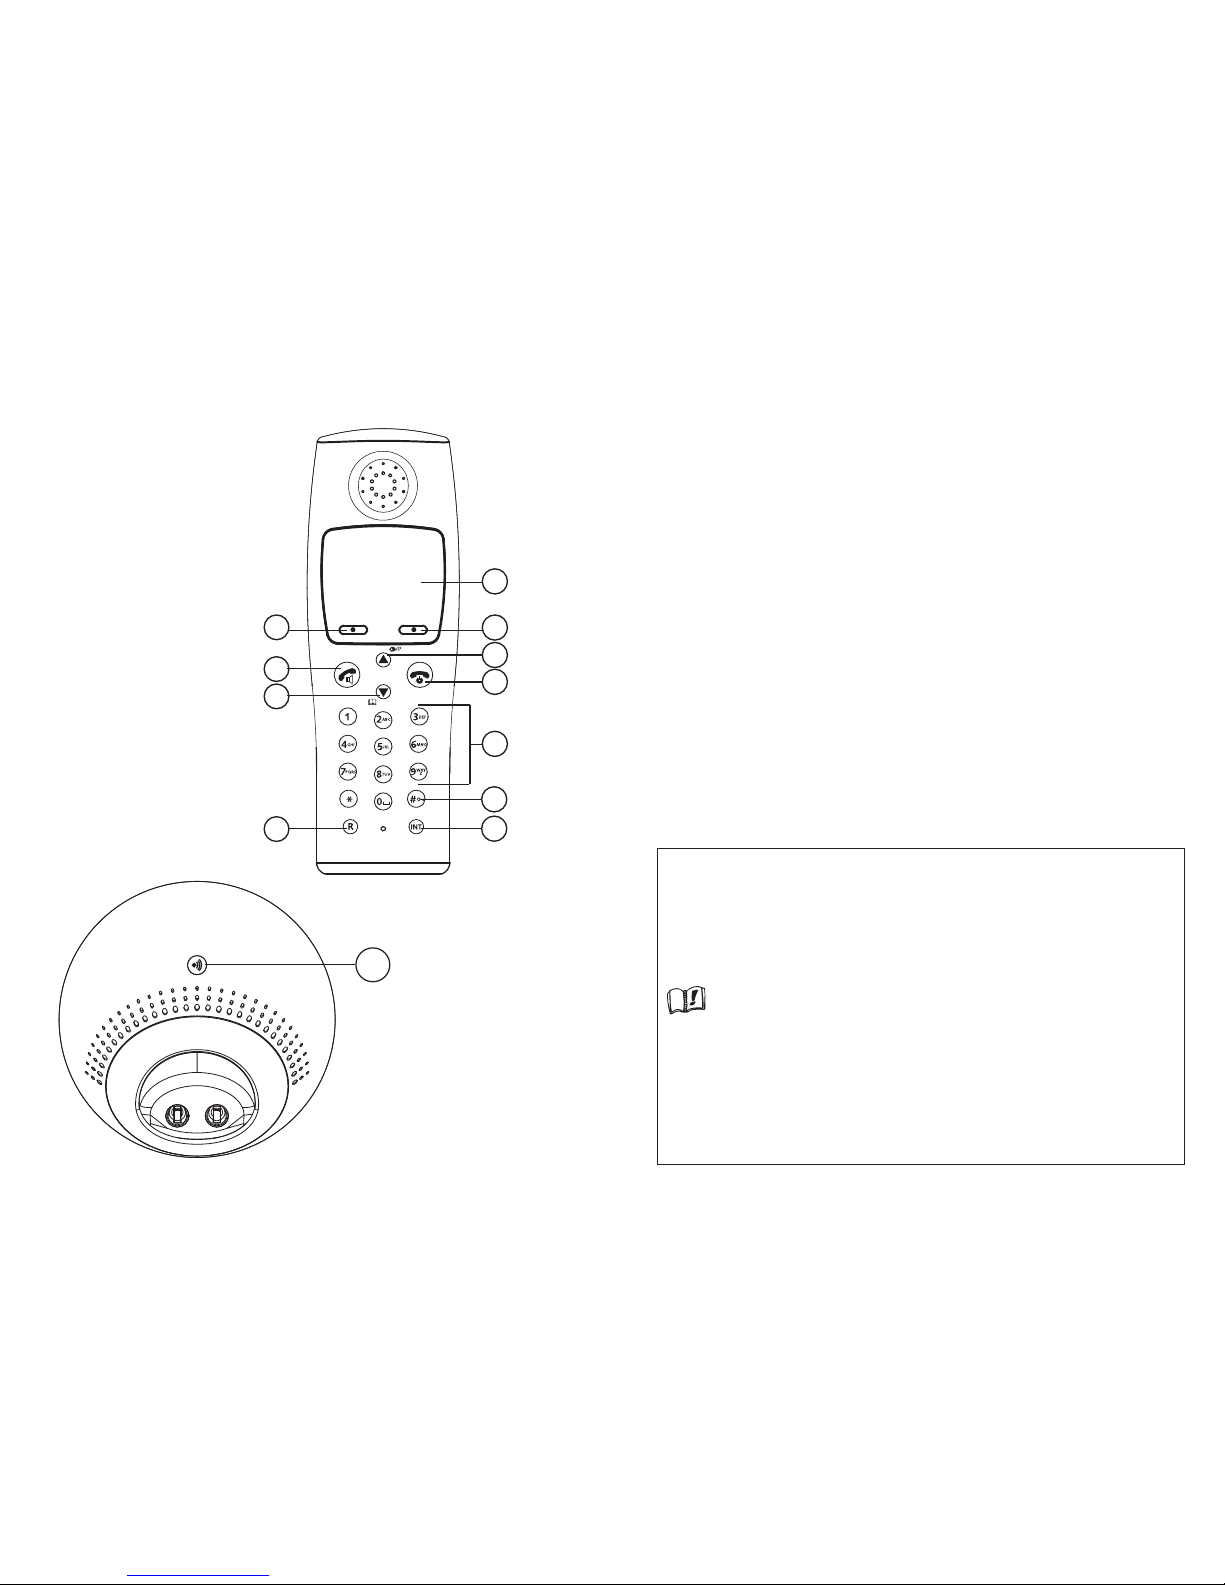
To use ‘Caller ID’ (display caller), this service has to be activated on your phone line.
Normally you need a separate subscription from your telephone company to activate this
function. If you don’t have the Caller ID function on your phone line, the incoming telephone
numbers will NOT be shown on the display of your telephone.
Belangrijk
Om de ‘Nummerweergave’ te kunnen gebruiken, moet deze dienst geactiveerd
zijn op uw telefoonlijn. Om deze dienst te activeren, hebt U hiervoor meestal een apart
abonnement van uw telefoonmaatschappij nodig. Indien U geen nummerweergavefunctie
hebt op uw telefoonlijn, zullen de inkomende telefoonnummers NIET op
de display van uw toestel verschijnen.
Important
Pour utiliser la fonction ‘Caller ID/Clip’ (affichage de l’appelant), ce service doit être activé sur
votre ligne téléphonique. Généralement, vous avez besoin d’un abonnement séparé de votre
compagnie de téléphone pour activer cette fonction. Si vous n’avez pas la fonction
‘Caller ID - Affichage Appelant’ sur votre ligne téléphonique, les numéros de téléphone
entrants n’apparaîtront PAS sur l’écran de votre téléphone.
Wichtig
Zur Verwendung der ‘Rufnummernanzeige’ muss dieser Dienst erst für Ihre Telefonleitung
freigegeben werden. Zur Aktivierung dieser Dienstleistung benötigen Sie meistens ein
separates Abonnement Ihrer Telefongesellschaft.Wenn Sie für Ihre Telefonleitung keine
Rufnummernanzeigefunktion haben, erscheinen die eingehenden
Telefonnummern NICHT im Display Ihres Gerätes.
Importante
Para poder usar la función “Identificación de llamadas,este servicio tiene que estar dado de
alta en su línea telefónica. Normalmente es necesario abonarse a dicho serviciopara que la
compañía telefónica active esta función. Si su línea telefónica no dispone de la
funciónIdentificación de llamadas, la pantalla del aparato no mostrará los números de
teléfono de las llamadas entrantes.
This product is in compliance with the essential requirements and other relevant provisions of the R&TTE directive 1999/5/EC.
The Declaration of conformity can be found on :
http://www.topcom.net/support/cedeclarations.php

8
11
10
9
2
1
3
4
5
6
7
12
UK The features described in this manual are published with reservation to
modifications.
The CE symbol indicates that the unit complies with the essential requirements
of the R&TTE directive
NL De in deze handleiding beschreven mogelijkheden worden gepubliceerd
onder voorbehoud van wijzigingen.
Het toestel voldoet aan de basiseisen van de R&TTE-richtlijn. Dit wordt
bevestigd door de CE-markering.
FLes possibilités décrites dans ce manuel sont publiées sous réserve de
modifications.
La conformité de l’appareil avec les exigences fondamentales de la directive
européenne R&TTE relative aux terminaux, est confirmée par le label CE.
DDie in dieser Bedienungsanleitung umschriebenen Möglichkeiten, werden
vorbehaltlich Änderungen publiziert.
Die Übereinstimmung des Gerätes mit den grundlegenden Anforderungen
der R&TTE-Directive ist durch das CE-Kennzeichen bestätigt.
ES Las características descritas en este manual pueden ser objeto de futuras
modificaciones.
El sello CE corrobora la conformidad del equipo con los requerimientos
básicos de la directiva R&TTE.
UK This product works with rechargeable batteries only. If you put non-
rechargeable batteries in the handset and place it on the base, the handset
will be damaged and this in NOT covered under the warranty conditions.
NL Dit product werkt alleen op herlaadbare batterijen. Als u niet herlaadbare
batterijen in de handset stopt en deze op de basis plaatst, zal de handset
beschadigd raken. Deze beschadiging wordt NIET gedekt door de garantie.
FCe produit fonctionnement uniquement avec des piles rechargeables. Si
vous mettez des piles non rechargeables dans le combiné et si vous le
placez sur la base, le combiné sera endommagé et ceci ne sera PAS
couvert par la garantie.
DDieses Gerät darf nur mit Akkus betrieben werden. Wenn Sie das Mobilteil
mit nicht wiederaufladbaren Batterien bestücken und es auf die
Basisstation stellen, wird das Mobilteil beschädigt und fällt nicht unter die
Garantie.
ES Este producto solo funciona con pilas recargables. Si pone pilas no
recargables en el terminal y lo pone en la base, el terminal se dañará, lo
que NO está incluido en la garantía.

Orbit 3
Orbit
English
1 Safety advice 13
2 Getting started 14
2.1 How to use this user guide 14
2.2 Installing the base 14
2.3 Installing the handset 15
2.4 Wall mounting 16
2.5 Keys/Led 17
2.6 Symbols 18
2.7 Display keys 18
2.8 Navigating the menu 18
2.9 Menu overview 19
3 Using the telephone 19
3.1 Switching the handset ON/OFF 19
3.2 Changing the menu language 19
3.3 Setting the date and time 20
3.4 Setting the time format 20
3.5 Making a normal telephone call 20
3.6 Receiving a telephone call 21
3.7 Handsfree mode 21
3.8 Adjust earpiece/handsfree volume 21
3.9 Secrecy function (Mute function) 22
3.10 Locating a handset (Paging function) 22
3.11 Keypad Lock 22
3.12 Using the alphanumerical keypad 22
4 Phonebook 22
4.1 To access and search in the phonebook 22
4.2 To add an entry 23
4.3 To dial an entry 23
4.4 Show Details 23
4.5 Delete an entry 23
4.6 Delete all entries 23
4.7 Edit Entry 24
4.8 Copy a phonebook entry or all entries to another handset 24
4.9 Memory status 25
4.10 Change the ringtone 25
5 Caller Identification 25
5.1 Call Waiting 25
6 Calls List 26
6.1 New calls Alert 26
6.2 To view new missed calls 26
6.3 View and dial from the Calls list 26
6.4 Copy a Calls list number into the phonebook 26
6.5 Send a text message to a Calls list number 26
6.6 Delete an entry 27
6.7 Delete all entries 27

4Orbit
Orbit
7 Personalise the handset 27
7.1 Ringtone and volume 27
7.2 Handset name 28
7.3 Keypad beeps 28
7.4 Wallpaper 28
7.5 Menu color 29
7.6 Setting the contrast 29
7.7 Setting the light timeout 29
7.8 Setting the screensaver 29
7.9 Autotalk 29
7.10 PABX Access code 30
7.11 Receiving Volume 30
7.12 Using the alarm feature 30
8 Base settings 31
8.1 Ringtone 31
8.2 Ringer Volume 31
8.3 Dial Mode 31
8.4 Recall (Flash) 31
8.5 System PIN 32
8.6 Ring Priority 32
8.7 First ring On/Off 32
9 Factory Reset 33
10 Agenda 33
11 SMS 34
11.1 How to write an SMS 34
11.2 Sending an SMS 34
11.3 Read and view the list of received messages (Inbox) 35
11.4 Reading and sending the saved message (Draft folder) 36
11.5 Using the outbox 36
11.6 Template messages 37
11.7 Delete messages 37
11.8 SMS Settings 37
11.9 User Areas 38
12 Additional handsets and base stations 40
12.1 Adding a new handset 40
12.2 Removing a handset 40
12.3 Select a base 41
12.4 Using the intercom feature 41
13 Troubleshooting 42
14 Technical dataTechnical characteristics 43
15 Topcom Warranty 43
15.1 Warranty period 43
15.2 Warranty handling 44
15.3 Warranty exclusions 44
16 Disposal of the device (environment) 44
17 Cleaning 44

Orbit 5
Orbit
Nederlands
1 Veiligheidsadvies 45
2 Beginnen 46
2.1 Hoe gebruikt u deze gebruiksaanwijzing 46
2.2 Het basisstation installeren 46
2.3 De handset installeren 47
2.4 Bevestiging aan de muur 48
2.5 Toetsen/Led 49
2.6 Symbolen 50
2.7 Displaytoetsen 50
2.8 Navigeren door het menu 50
2.9 Menuoverzicht 51
3 De telefoon gebruiken 51
3.1 De handset AAN- en UIT zetten 51
3.2 De menutaal veranderen 51
3.3 Datum en tijd instellen 52
3.4 De tijdnotatie instellen 52
3.5 Een normaal telefoongesprek voeren 52
3.6 Een gesprek aannemen 53
3.7 Handsfree-modus 53
3.8 Oortelefoon/handsfree-volume aanpassen 54
3.9 Functie mic. uit (Mute-functie) 54
3.10 Een handset traceren (Zoekfunctie) 54
3.11 Toetsenbordvergrendeling 54
3.12 Gebruik van het alfanumerieke toetsenbord 54
4 Telefoonboek 55
4.1 Om toegang te krijgen tot het telefoonboek en in het telefoonboek te zoeken 55
4.2 Om een contact toe te voegen 55
4.3 Om een contact te bellen 55
4.4 Details weergeven 56
4.5 Een contact wissen 56
4.6 Alle contacten wissen 56
4.7 Contact bewerken 56
4.8 Eén contact of alle contacten uit het telefoonboek naar een andere
handset kopiëren 57
4.9 Geheugenstatus 58
4.10 De belmelodie veranderen 58
5 Nummerherkenning 58
5.1 Wisselgesprek 58
6 Bellerslijst 58
6.1 Bericht nieuwe gesprekken 59
6.2 Nieuwe gemiste oproepen bekijken 59
6.3 De bellerslijst bekijken en van hieruit bellen 59
6.4 Een nummer uit de bellerslijst naar het telefoonboek kopiëren 59
6.5 Een SMS versturen naar een nummer in de bellerslijst 60
6.6 Een contact wissen 60

6Orbit
Orbit
6.7 Alle contacten wissen 60
7 De handset personaliseren 60
7.1 Belmelodie en volume 60
7.2 Naam handset 61
7.3 Toetstonen 61
7.4 Achtergrond 62
7.5 Menukleur 62
7.6 Het contrast instellen 62
7.7 De lichttime-out instellen 62
7.8 De screensaver instellen 62
7.9 Automatisch beantwoorden 63
7.10 PABX-code 63
7.11 Ontvangstvolume 63
7.12 De wekkerfunctie gebruiken 64
8 Basisinstellingen 64
8.1 Belmelodie 64
8.2 Belvolume 64
8.3 Kiesmethode 65
8.4 Flash (Recall) 65
8.5 Pincode 65
8.6 Voorrang belsign. 66
8.7 Eerste oproep Aan/Uit 66
9 Fabrieksinstellingen 66
10 Agenda 67
11 SMS 68
11.1 Het schrijven van een SMS 68
11.2 Een SMS verzenden 68
11.3 De lijst ontvangen oproepen (Inbox) bekijken 69
11.4 Lezen en verzenden van het opgeslagen bericht (map Klad (Draft)) 70
11.5 De outbox gebruiken 70
11.6 Sjabloonberichten 71
11.7 Berichten wissen (Delete messages) 71
11.8 SMS-instellingen 71
11.9 Gebruiksgebieden 72
12 Extra handsets en basisstations 74
12.1 Een nieuwe handset toevoegen 74
12.2 Een handset afmelden 75
12.3 Een basisstation kiezen 75
12.4 De intercomfunctie gebruiken 75
13 Probleemoplossing 76
14 Technische gegevens Technische kernmerken 77
15 Topcom-garantie 78
15.1 Garantieperiode 78
15.2 Afwikkeling van garantieclaims 78
15.3 Garantiebeperkingen 78
16 Afvoeren van het toestel (milieu) 79
17 Reinigen 79

Orbit 7
Orbit
Français
1 Conseils de sécurité 80
2 Pour commencer 81
2.1 Comment utiliser ce mode d'emploi ? 81
2.2 Installation de la base 81
2.3 Installation du combiné 82
2.4 Montage mural 83
2.5 Touches/LED 84
2.6 Symboles 85
2.7 Touches d'écran 85
2.8 Navigation dans les menus 85
2.9 Organisation des menus 86
3 Utilisation du téléphone 86
3.1 Mise en/hors service du combiné 86
3.2 Modification de la langue des menus 86
3.3 Réglage de la date et de l'heure 87
3.4 Réglage du format horaire 87
3.5 Passer un appel ordinaire 87
3.6 Recevoir un appel 88
3.7 Mode mains-libres 88
3.8 Réglage du volume de l'écouteur/haut-parleur Mains-libres 89
3.9 Fonction Secret (Secrecy) (Fonction Silence) 89
3.10 Localisation d'un combiné (fonction Recherche (Paging)) 89
3.11 Verrouillage du clavier 89
3.12 Utilisation du clavier alphanumérique 89
4 Répertoire 90
4.1 Accès et recherche dans le répertoire 90
4.2 Ajout d'une entrée 90
4.3 Composition d'un numéro 90
4.4 Voir les détails (Show Details) 91
4.5 Suppression d'une entrée 91
4.6 Suppression de toutes les entrées 91
4.7 Modification d'une entrée 91
4.8 Copie d'une entrée du répertoire ou de toutes les entrées vers
4.9 un autre combiné 91
4.10 Etat de la mémoire 92
4.11 Modification de la mélodie 93
5 Identification de l'appelant 93
5.1 Appel en attente 93
6 Journal 93
6.1 Alerte de nouveaux appels 93
6.2 Affichage des nouveaux appels manqués 94
6.3 Affichage et numérotation depuis le journal 94
6.4 Copie d'un numéro du journal dans le répertoire 94
6.5 Envoi d'un SMS à un numéro du journal 94
6.6 Suppression d'une entrée 95
6.7 Suppression de toutes les entrées 95

8Orbit
Orbit
7 Personnalisation du combiné 95
7.1 Mélodie et volume 95
7.2 Nom du combiné 96
7.3 Bip Touches 96
7.4 Fond d'écran 96
7.5 Menu Couleur 96
7.6 Réglage du contraste 97
7.7 Réglage de la durée de l'éclairage 97
7.8 Réglage de l'économiseur d'écran 97
7.9 Décrochage automatique 97
7.10 Code d'accès PABX 98
7.11 Volume de l'écouteur 98
7.12 Fonction d'alarme de réveil 98
8 Réglages de la base 99
8.1 Mélodie 99
8.2 Volume de la mélodie 99
8.3 Numérotation 99
8.4 Rappel (R) 100
8.5 PIN Système (System PIN) 100
8.6 Priorité de sonnerie 100
8.7 Première sonnerie activée/désactivée 101
9 Réinitialisation des réglages d'usine 101
10 Agenda 101
11 SMS 103
11.1 Comment rédiger un SMS 103
11.2 Envoi d'un SMS 1 03
11.3 Lecture et consultation de la liste de messages reçus (Boîte de réception) 104
11.4 Lecture et envoi des messages sauvegardés (dossier Brouillons) 105
11.5 Utiliser la boîte d'envoi 105
11.6 Modèles de messages 1 06
11.7 Supprimer SMS (Delete messages) 106
11.8 Réglages SMS 106
11.9 Zones utilisateurs 107
12 Combinés et stations de base supplémentaires 109
12.1 Ajout d'un nouveau combiné 109
12.2 Suppression d'un combiné 110
12.3 Sélection d'une base 110
12.4 Fonction Intercom 110
13 Dépannage 112
14 Données et caractéristiques techniques 112
15 Garantie Topcom 113
15.1 Période de garantie 113
15.2 Mise en œuvre de la garantie 113
15.3 Exclusions de garantie 113
16 Mise au rebut de l'appareil (environnement) 114
17 Nettoyage 114

Orbit 9
Orbit
Deutsch
1 Sicherheitshinweise 115
2 Erste Schritte 116
2.1 Zum Gebrauch dieser Bedienungsanleitung 116
2.2 Basisstation installieren 116
2.3 Mobilteil installieren 117
2.4 Wandmontage 118
2.5 Tasten/LED-Display 119
2.6 Symbole 120
2.7 Displaytasten 120
2.8 Durch das Menü navigieren 120
2.9 Menü-Übersicht 121
3 Telefon benutzen 121
3.1 Mobilteil ein-/ausschalten 121
3.2 Menüsprache ändern 121
3.3 Datum und Uhrzeit einstellen 122
3.4 Zeitformat einstellen 122
3.5 Telefonieren 122
3.6 Einen Anruf annehmen 123
3.7 Freisprechmodus 123
3.8 Lautstärke von Hörmuschel/Freisprechmodus anpassen 124
3.9 Stummschaltung 124
3.10 Ein Mobilteil suchen (Paging) 124
3.11 Tastatursperre 124
3.12 Die alphanumerischen Tasten verwenden 124
4 Telefonbuch 125
4.1 Auf das Telefonbuch zugreifen und im Telefonbuch suchen 125
4.2 Einen Eintrag hinzufügen 125
4.3 Eine Nummer aus dem Telefonbuch anrufen 125
4.4 Einen Telefonbucheintrag anzeigen 125
4.5 Einen Eintrag löschen 126
4.6 Alle Einträge löschen 126
4.7 Eintrag bearbeiten 126
4.8 Einen Telefonbucheintrag oder alle Einträge auf ein anderes
Mobilteil kopieren 126
4.9 Speicherstatus 127
4.10 Rufton ändern 128
5 Anruferkennung 128
5.1 Rückfrage 128
6 Anrufliste 128
6.1 Hinweis auf neue Anrufe 128
6.2 Neue entgangene Anrufe anzeigen 129
6.3 Anrufliste anzeigen und aus der Anrufliste anrufen 129
6.4 Alle Nummern der Anrufliste in das Telefonbuch kopieren 129
6.5 SMS an eine Nummer der Anrufliste senden 129
6.6 Einen Eintrag löschen 130
6.7 Alle Einträge löschen 130

10 Orbit
Orbit
7 Mobilteil individuell anpassen 130
7.1 Rufton und Lautstärke 130
7.2 Name des Mobilteils 131
7.3 Tastentöne 131
7.4 Hintergrund 131
7.5 Menüfarbe 132
7.6 Kontrast einstellen 132
7.7 Lichtverzögerung einstellen 132
7.8 Bildschirmschoner einstellen 132
7.9 Automatische Anrufannahme 132
7.10 Nebenstellenvorwahl 133
7.11 Gesprächslautstärke 133
7.12 Weckfunktion verwenden 133
8 Einstellungen der Basisstation 134
8.1 Rufton 134
8.2 Ruftonlautstärke 134
8.3 Wählmodus 134
8.4 R-Taste (Flashtaste) 135
8.5 System-PIN 135
8.6 Klingelzeichenpriorität 135
8.7 Erstes Klingeln ein/aus 136
9 Alles rücksetzen 136
10 Agenda 136
11 SMS 138
11.1 Zum Schreiben von SMS 138
11.2 Eine SMS senden 138
11.3 Liste empfangener Nachrichten (Eingang) lesen und aufrufen 139
11.4 Gespeicherte Nachrichten (Entwurfsordner) lesen und senden 140
11.5 Ausgang verwenden 140
11.6 Nachrichtenvorlagen 141
11.7 Nachrichten löschen 141
11.8 SMS-Einstell. 141
11.9 Benutzerbereiche 142
12 Zusätzliche Mobilteile und Basisstationen 144
12.1 Ein neues Mobilteil hinzufügen 144
12.2 Ein Mobilteil abmelden 145
12.3 Eine Basisstation auswählen 145
12.4 Interne Anrufe vornehmen 145
13 Problemlösung 147
14 Technische Daten 147
15 Topcom-Garantie 148
15.1 Garantiezeit 148
15.2 Abwicklung des Garantiefalls 148
15.3 Garantieausschlüsse 149
16 Hinweise zum Umweltschutz 149
17 Reinigen 149

Orbit 11
Orbit
Español
1 Advertencia de seguridad 150
2 Introducción 151
2.1 Uso del manual del usuario 151
2.2 Instalación de la base 151
2.3 Instalación del terminal 152
2.4 Montaje en la pared 153
2.5 Teclas / LED 154
2.6 Símbolos 155
2.7 Teclas de pantalla 155
2.8 Navegación por el menú 155
2.9 Vista general de los menús 156
3 Uso del teléfono 156
3.1 Activar / desactivar el terminal 156
3.2 Cambio del idioma de los menús 156
3.3 Ajustar la fecha y la hora 157
3.4 Ajustar el formato de hora 157
3.5 Realizar una llamada telefónica normal 157
3.6 Recepción de una llamada telefónica 158
3.7 Modo manos libres 159
3.8 Ajustar el volumen del auricular / manos libres 159
3.9 Función Privado (función de silencio) 159
3.10 Localización de un terminal (función de búsqueda) 159
3.11 Bloqueo del teclado 159
3.12 Uso de las teclas alfanuméricas 159
4 Agenda 160
4.1 Entrar y buscar en la agenda 160
4.2 Para añadir una entrada 160
4.3 Para marcar un número 160
4.4 Ver detalles 161
4.5 Eliminar una entrada 161
4.6 Eliminar todas las entradas 161
4.7 Editar una entrada 161
4.8 Copiar una entrada de la agenda o todas las entradas en otro terminal 162
4.9 Estado de la memoria 162
4.10 Cambiar la melodía 163
5 Identificación de llamadas 163
5.1 Llamada en espera 163
6 Lista de llamadas 163
6.1 Aviso de llamadas nuevas 163
6.2 Ver nuevas llamadas perdidas 164
6.3 Ver y marcar un número de la lista de llamadas 164
6.4 Copiar un número de la lista de llamadas en la agenda 164
6.5 Enviar un mensaje de texto a un número de la lista de llamadas 164
6.6 Eliminar una entrada 165
6.7 Eliminar todas las entradas 165

12 Orbit
Orbit
7 Personalizar el terminal 165
7.1 Timbre y volumen 165
7.2 Nombre del terminal 166
7.3 Tono de pulsación de teclas 166
7.4 Fondo 166
7.5 Color del menú 167
7.6 Ajustar el contraste 167
7.7 Ajustar el tiempo de luz 167
7.8 Ajustar el salvapantallas 167
7.9 Descolgar automáticamente 168
7.10 Código de acceso PABX 168
7.11 Volumen del receptor 168
7.12 Uso de la función de alarma 168
8 Ajustes de la base 169
8.1 Timbre 169
8.2 Volumen del timbre 169
8.3 Modo de marcación 170
8.4 Rellamada (Flash) 170
8.5 PIN del sistema 170
8.6 Prioridad de timbre 171
8.7 Activar / desactivar el primer timbre 171
9 Restablecimiento de la configuración de fábrica 171
10 Agenda 172
11 SMS 173
11.1 Cómo escribir un mensaje SMS 173
11.2 Enviar un SMS 173
11.3 Leer y ver la lista de mensajes recibidos (Buzón de entrada) 174
11.4 Leer y enviar el mensaje guardado (carpeta Borrador) 175
11.5 Usar el Buzón de salida 175
11.6 Plantillas de mensaje 176
11.7 Borrar mensajes 176
11.8 Configuración de SMS 177
11.9 Zonas de usuarios 178
12 Terminales y bases adicionales 180
12.1 Adición de un terminal 180
12.2 Desvinculación de un terminal 180
12.3 Seleccionar una base 181
12.4 Usar la función de intercomunicación 181
13 Solución de problemas 182
14 Datos técnicos / Características técnicas 183
15 Garantía Topcom 183
15.1 Período de garantía 183
15.2 Tratamiento de la garantía 184
15.3 Limitaciones de la garantía 184
16 Eliminación del dispositivo (medio ambiente) 184
17 Limpieza 184

English
13
Safety advice
English
1 Safety advice
The following safety advice must always be followed before using electrical equipment.
Please read carefully through the following information concerning safety and proper use.
Make yourself familiar with all the functions of the equipment. Be careful to keep these
advice notes and if necessary pass them on to a third party.
Electrical safety and protection:
• Do not operate the equipment if the mains plug, cable or the equipment itself is
damaged.
• If the equipment is dropped, then it must be checked by an electrician before further
use.
• Dangerous voltages are present inside the equipment. Never open the housing or
insert objects through the ventilation holes.
• Do not allow liquids to get into the equipment. In case of emergency, pull out the plug
from the socket.
• Similarly, if a fault develops during use or before you start to clean the equipment, pull
the plug out if the socket.
• Do not touch the charger and plug contacts with sharp or metal objects.
• Do not carry out any modifications or repairs to the equipment yourself. Have repairs
done to the equipment or the mains cable only by a specialist service centre.
Unsatisfactory repairs can lead to considerable danger for the user.
• Children frequently underestimate the dangers associated with electrical equipment.
Therefore you must never leave children unsupervised in the vicinity of electrical
equipment.
• The equipment is not to be used in a damp room (e.g. bathrooms) or rooms where
there is a lot of dust.
• Equipment connected to the mains during a thunderstorm can be damaged by
lightning. Therefore you should pull the plug out of the mains socket during a storm.
• To completely disconnect the equipment from the electricity supply, the plug must be
removed from the socket. When doing this always pull on the plug itself and never on
the cable.
• Protect the mains cable from hot surfaces or other sources of damage and do not
allow it to become constrained.
• Check the mains cable regularly for any damage.
• Unwind the mains cable completely before use.
• Make sure that the mains cable does not represent a trip hazard.
• The operation of some medical devices may be affected.
• The handset may cause an unpleasant buzzing sound in hearing aids.
Fire safety:
• The heat accumulated inside the equipment can lead to the defect and/or to the fire of
the equipment. Do not expose this equipment therefore to extreme temperature like:
1. direct sun exposure and heater warmth
2. ventilation holes may not be covered

14
Getting started
Danger of explosion:
• Never throw batteries in fire.
Poisoning danger:
• Keep batteries away from small children.
Note:
• Only use the charger plug supplied. Do not use other chargers, as this may damage
the batteries cells.
• The wall outlet for the power supply must be close and accessible.
• Only use rechargeable batteries of the same type. Place the batteries with correct
polarity inside the battery compartment (polarity is marked inside the handset). Never
use normal unrechargeable batteries!
2 Getting started
2.1 How to use this user guide
In this user guide, following method is used to clarify the instructions:
Key to press. This key can be a soft key. When the soft key is a symbol, it is shown in the
left column. When the soft key is text, the left or right soft key is shown in the left column
and the text is shown in the right column between quotation marks.
2.2 Installing the base
For installation, do the following:
1Plug one end of the adaptor into the outlet and the other end into the adaptor jack on
the bottom of the base.
2Connect one end of the telephone cord with the wall phone jack and the other end to
the bottom of the base.
3Put the telephone- and AC power line cord in the base guides as shown on picture 2A.
As this telephone cannot be used in case of a power cut, you should use a
mains-independent telephone for emergency calls, e.g. a mobile phone.
Text.......”display”.
Text that appears on the display of the phone

English
15
Getting started
- 2A Back view of base -
A. Telephone wall outlet
B. Power cable
C. Telephone cord
2.3 Installing the handset
- 2B Back view of handset -
A. Cover
B. Rechargeable batteries
1Open the battery compartment as shown on picture 2B.
2Insert the batteries respecting the polarity (+ and -).
3Close the battery compartment.
4Leave the handset on the base unit for 20 hours.
Before you use the telephone for the first time, you must first make sure the
battery is charged for 20 hours. If you do not do this, the telephone will not
work optimally.
A
C
B
+
-
+
-
A
B

16
Getting started
2.4 Wall mounting
You can hang the base against the wall by turning the cradle inside the base as shown
below:
Use the template at the back side of the manual to drill the holes in the wall 5 cm apart
horizontally.
- 2C Wall mounting -
3. Release in position Wall mount mode
2. Rotate 180° Clockwise
1. Lift cradle
Desk mode
- 2D Wall mounting -
Wall plug Screw
Wall 5 cm

English
17
Getting started
2.5 Keys/Led
Handset
1. Display
2. Right soft menu key
3. Up / Redial / Pause key
4. On-hook / ON-OFF key
5. Alphanumeric keys
6. Keypad lock
7. INT key
8. Flash key
9. Down / Phonebook key
10. Off-hook / Handsfree key
11. Left soft menu key
Base
12. Paging key
8
11
10
9
2
1
3
4
5
6
7
- 2E Handset -
12
- 2F Base -

18
Getting started
2.6 Symbols
2.7 Display keys
Display-keys (softkeys) are located directly under the display. The function of these 2
keys changes depending on the operation mode. The actual function is displayed as icon
or text directly above the 2 display keys.
2.8 Navigating the menu
The Orbit has a menu system which is easy to use. Each menu leads to a list of options.
The menu map is shown on the following paragraph.
To exit or to go back one level in the menu
Keypad lock Handset within base range
(Flashes if you are out of range)
Alarm set Handsfree
Handset ringer volume is off Battery full
You have SMS messages Battery medium
You have missed calls Battery low
You have new voice mail Battery is almost discharged
1When the handset is switched on and in standby, press the left soft
menu key (Key 11 - Picture 2E) “Menu“ to open the main menu.
2Scroll to the desired menu option.
3Press the soft menu key to view further options or to confirm the
setting displayed.
To go to the previous level in the menu, press the soft menu key
“Back”.
To cancel and return to standby at any time, press the on-hook key.

English
19
Using the telephone
2.9 Menu overview
3 Using the telephone
3.1 Switching the handset ON/OFF
3.2 Changing the menu language
Menu Submenu items
Text Messaging
Write Message
Inbox
Drafts
Outbox
Templates
Delete messages
Text Settings
Calls Lists
Missed Calls
Received Calls
Dialled Calls
Delete Calls
Agenda Add Event (when there are no Events)
Clock & Alarm
Date & Time
Alarm
Time Format
Settings Set Handset
Set Base
Registration
Register Handset
Select Base
De-register
1Press and hold the On-Off key to switch the handset off.
2Press the On-Off key or place the handset in the base to switch the
handset back on.
1Enter the menu.
2Select “Settings” and confirm.
3Select “Set Handset” and confirm.
4Select “Language” and confirm.
5Select a language and confirm.
The screen displays “Saved”.
6Press the on-hook key to return to standby.
The or arrows indicate that further options are available in the menu.

20
Using the telephone
3.3 Setting the date and time
3.4 Setting the time format
3.5 Making a normal telephone call
Direct dialling
Pre-dialling
With the pre-dialling feature, you can enter and modify a number before making the call.
- The date and time is kept inside the base and send to all handsets, so you
only have to set the date/time ones when using more then one handset.
- The date/time can be set by the Caller ID (Clip) information, or manually
as mentioned below.
1Enter the menu.
2Select “Clock & Alarm” and confirm.
3Select “Date & Time” and confirm.
4Enter day, month, year, time and minutes and select “Save” to
confirm.
5Press “Back” to go to the previous menu.
The time format can be set differently for each handset.
1Enter the menu.
2Select “Clock & Alarm” and confirm.
3Select “Time Format” and confirm.
4Select “12 Hour” or “24 Hour” and confirm.
5Press “Back” to go to the previous menu.
1Press the off-hook key to start the call.
2Dial the telephone number.
3Press the on-hook key to hang up or put the handset back on the
base.
1Dial a number of up to 32 digits.
Press and hold the Pause-key to insert a pause. The screen displays a
“P”.
2Press the soft menu key “Clear” to correct.
3Press the off-hook key to start the call or select “Options”.
4If you selected “Options”, scroll and select:
“Save”: to store the number into the phonebook;
“Send Message”: to send a message.
5Press the on-hook key to hang up or put the handset back on the
base.
Other manuals for ORBIT
1
Table of contents
Languages:
Other Topcom IP Phone manuals

Topcom
Topcom TE-5730 User manual

Topcom
Topcom BUTLER E2100 User manual

Topcom
Topcom DESKMASTER 142 User manual

Topcom
Topcom SOLOGIC A811 User manual

Topcom
Topcom BUTLER 2900 Triple User manual

Topcom
Topcom Butler E751 TripleButler E751 Quattro User manual

Topcom
Topcom IP100 User manual

Topcom
Topcom Fidelity 160 User manual

Topcom
Topcom ALLURE 150 User manual

Topcom
Topcom SOLOGIC B921 Product information sheet