Topcom SOLOGIC B921 Product information sheet

SOLOGIC B921
SHORT USER GUIDE / BEKNOPTE HANDLEIDING / NOTICE D'UTILISATION
KURZANLEITUNG / GUÍA DEL USUARIO ABREVIADA
KORT ANVÄNDARHANDBOK / BREVE GUIDA DELL'UTENTE
GUIA RESUMIDO DO UTILIZADOR / KRÁTKÝ NÁVOD PRO UŽIVATELE
/ KRÓTKA INSTRUKCJA OBSUGI
V 1.0 - 09/10
UK The features described in this manual are published with reservation to modifications.
NL De in deze handleiding beschreven mogelijkheden worden gepubliceerd onder voorbehoud van
wijzigingen.
FLes possibilités décrites dans ce manuel sont publiées sous réserve de modifications.
DDie in dieser Bedienungsanleitung umschriebenen Möglichkeiten, werden vorbehaltlich
Änderungen publiziert.
ES Las características descritas en este manual pueden ser objeto de futuras modificaciones.
SFunktionerna i denna bruksanvisning publiceras med reservation för ändringar.
IT Le caratteristiche descritte nel presente manuale vengono pubblicate con riserva di modifica.
PT As características descritas neste manual são publicadas sob reserva de modificação.
CZ Možnost úpravy funkcí popsaných v této píruce vyhrazena.
GR ,
.
PL Waciwoci opisane w niniejszej instrukcji obsugi s publikowane z zatrzeeniem prawa
wprowadzenia zmian.
UK To be connected to the public analogue telephone network.
NL Geschikt voor aansluiting op het openbare analoog geschakelde telefoonnetwerk.
FIl est destiné à être raccordé au réseau de télécommunication public.
DKompatibel für den analogen Telefonanschluss.
ES Conexión a la red telefónica analógica
SFor anslutning til det analoga nätverket.
IT Destinato ad essere collegato alla rete telefonica analogica pubblica.
PT Para efectuar a ligação com a rede pública analógica.
CZ Pipojit k veejné analogové telefonní síti.
GR .
PL Do podczenia do publicznej analogowej sieci telefonicznej.
Hereby, TOPCOM EUROPE N.V., declares that this device is in compliance with the essential
requirements and other relevant provisions of R&TTE directive 1999/5/EC. The Declaration of
conformity can be found on: http://www.topcom.net/cedeclarations.asp
Important
To use ‘Caller ID’ (display caller), this service has to be activated on your phone line. Normally you need
a separate subscription from your telephone company to activate this function. If you don’t have the Caller
ID function on your phone line, the incoming telephone numbers will NOT be shown on the display of your
telephone.
Belangrijk
Om de ‘Nummerweergave’ te kunnen gebruiken, moet deze dienst geactiveerd
zijn op uw telefoonlijn. Om deze dienst te activeren, hebt U hiervoor meestal een apart abonnement van
uw telefoonmaatschappij nodig. Indien U geen nummerweergavefunctie hebt op uw telefoonlijn, zullen de
inkomende telefoonnummers NIET op de display van uw toestel verschijnen.
Important
Pour utiliser la fonction ‘Caller ID/Clip’ (affichage de l’appelant), ce service doit être activé sur votre ligne
téléphonique. Généralement, vous avez besoin d’un abonnement séparé de votre compagnie de
téléphone pour activer cette fonction. Si vous n’avez pas la fonction
‘Caller ID - Affichage Appelant’ sur votre ligne téléphonique, les numéros de téléphone entrants
n’apparaîtront PAS sur l’écran de votre téléphone.
Wichtig
Zur Verwendung der ‘Rufnummernanzeige’ muss dieser Dienst erst für Ihre Telefonleitung freigegeben
werden. Zur Aktivierung dieser Dienstleistung benötigen Sie meistens ein separates Abonnement Ihrer
Telefongesellschaft.Wenn Sie für Ihre Telefonleitung keine Rufnummernanzeigefunktion haben,
erscheinen die eingehenden Telefonnummern NICHT im Display Ihres Gerätes.
Importante
Para poder usar la función “Identificación de llamadas,este servicio tiene que estar dado de alta en su
línea telefónica. Normalmente es necesario abonarse a dicho serviciopara que la compañía telefónica
active esta función. Si su línea telefónica no dispone de la funciónIdentificación de llamadas, la pantalla
del aparato no mostrará los números de teléfono de las llamadas entrantes.
Viktigt
För att använda funktionen "nummervisning" måste tjänsten vara aktiverad för din telefonlinje. Normalt
behöver du ett separat abonnemang från ditt telefonbolag för att kunna aktivera funktionen. Om
nummervisningsfunktionen inte finns för din telefonlinje kommer inkommande telefonnummer INTE visas
på din telefons display.

Importante
Per utilizzare la funzione „Caller ID" (visualizzazione chiamante), è necessario che questo servizio sia
attivato sulla propria linea telefonica. Generalmente, è necessario sottoscrivere un abbonamento
separato con la propria società telefonica, per poter attivare questa funzione. Se la propria linea telefonica
non è dotata della funzione „Caller ID", i numeri telefonici delle chiamate in arrivo NON verranno
visualizzati sul display del proprio telefono.
In caso di chiamata entrante, suona soltanto il ricevitore e non la base.
Importante
Para utilizar a função "ID Chamador" (visualizar Chamador), este serviço terá de ser activado na sua linha
telefónica. Normalmente necessita de subscrever este serviço, à parte, com o seu operador de
telecomunicações, para poder activar esta função. Se não tiver contratado este serviço a função ID do
Chamador não estará disponível e por isso os números de telefone das chamadas entrantes não
aparecerão no seu telefone.
Dležité upozornní
Abyste mohli používat službu “identifikace volajícího” (zobrazení volajícího), musíte si ji na své telefonní
lince aktivovat. K aktivaci této funkce bývá zapotebí samostatné pedplacení této funkce u poskytovatele
telefonních služeb. Pokud na své telefonní lince funkci identifikace volajícího nemáte, NEBUDOU se
telefonní ísla píchozích hovor na displeji vašeho telefonu zobrazovat.
,
.
.
,
.
Uwaga
Aby urzdzenie prezentowao numer przychodzcy, niezbdna jest usuga prezentacji numeru. Usug t
naley aktywowa u lokalnego operatora telekomunikacyjnego.
Jeeli usuga prezentacji numeru nie jest wczona, numery przychodzcych pocze nie bd
prezentowane.
UK This product works with rechargeable batteries only. If you put non-rechargeable
batteries in the handset and place it on the base, the handset will be damaged and this in
NOT covered under the warranty conditions.
NL Dit product werkt alleen op herlaadbare batterijen. Als u niet herlaadbare batterijen in de
handset stopt en deze op de basis plaatst, zal de handset beschadigd raken. Deze beschadiging wordt
NIET gedekt door de garantie.
FR Ce produit fonctionnement uniquement avec des piles rechargeables. Si vous mettez des piles non
rechargeables dans le combiné et si vous le placez sur la base, le combiné sera endommagé et ceci
ne sera PAS couvert par la garantie.
DE Dieses Gerät darf nur mit Akkus betrieben werden. Wenn Sie das Mobilteil mit nicht
wiederaufladbaren Batterien bestücken und es auf die Basisstation stellen, wird das Mobilteil
beschädigt und fällt nicht unter die Garantie.
ES Este producto solo funciona con pilas recargables. Si pone pilas no recargables en el terminal y lo
pone en la base, el terminal se dañará, lo que NO está incluido en la garantía.
SE Den här produkten fungerar endast med uppladdningsbara batterier. Om du sätter i icke-
uppladdningsbara batterier i handenheten och placerar den på basenheten, kommer handenheten att
skadas. Sådana skador täcks INTE av garantin.
IT Questo prodotto funziona solo con batterie ricaricabili. Se si inseriscono batterie non ricaricabili nel
ricevitore portatile e lo si ripone sulla sua base, il portatile subirà dei danni e questi NON saranno
coperti dalla garanzia.
PT Este produto trabalha apenas com baterias recarregáveis. Se colocar baterias não recarregáveis
no portátil e o colocar sobre a base, este ficará danificado. Estes danos não são cobertos pelas
condições da garantia.
CZ Tento výrobek je uren pro použití pouze s dobíjecími bateriemi. Pokud vložíte do telefonu
nedobíjecí baterie a položíte telefon do základny, dojde k poškození telefonu a na tuto škodu se záruka
NEVZTAHUJE.
GR .
,
.
PL Urzdzenie to dziaa tylko z akumulatorkami nadajcymi si do adowania. W przypadku woenia
do suchawki zwykych, nienadajcych si do adowania baterii, a nastpnie pooenia jej na bazie,
suchawka ulegnie uszkodzeniu i NIE bedzie to objte przez gwarancj.
Figure 3
Figure 2
Figure 4
R
ESC/
INT
OK
2
3
4
5
6
7
8
9
12
11
10
1
13
14
17
16
15
B921
+
+
A
B
A
B
C
Figure 1

3
Getting started
English
1 Getting started
Thank you for purchasing this TOPCOM product. This product has
been designed and assembled with utmost care for you and the
environment. Because we at TOPCOM like to think of the future of our
planet and our children, we aim to do our best to help saving the
environment. This is why we decided to reduce the number of pages
of our user guides and product manuals. If you keep in mind that it
takes up to 24 trees to produce 1 ton of paper, publishing product
manuals in 11 languages costs our planet a lot of trees. In this short
manual provided with your TOPCOM device you can find a brief
explanation of how to install and use your TOPCOM device.
If you would still like to discover all the features of your new TOPCOM
device, please visit our website (www.topcom.net) where you can
download the complete user manual in your language. By doing this
TOPCOM hopes to do its share to make our planet a better place, but
we can only succeed with your help!
2 First steps
2.1 How to use this user guide
The following method is used in this user guide to clarify instructions:
Key to be pressed
2.2 Installing the base station
Install the base station as follows (see figure 1 on the folding page):
1Connect the mains adapter to the base station first and then to
a socket.
2Connect one end of the telephone cable to the telephone socket
on the wall and the other to the connector on the back of the
base station.
3The telephone and power cables should be connected as
shown in figure 1.
Text ....... „Display“.
Text that appears on the telephone display

4
First steps
2.3 Handset
2.4 Battery status display
The handset will emit a warning tone when the batteries are nearly flat
during a call. Place the handset on the handset charger to recharge the
batteries.
Keys/display (see figure 3 and 4)
2.5 Navigating through the menu
The Sologic B921 has an easy-to-use menu system. Every menu
consists of a series of options.
1Open the battery compartment as shown in figure 2 on the
folding page.
2
Insert the rechargeable batteries. Make sure the polarity is
correct (+ and -).
3
Close the battery compartment.
4
Place the handset in the charger and charge it for 16 hours.
The charging LED is illuminated
Charged batteries
Flat batteries
Cordless handset
1. Redial / up
2. Phone book
3. Mute / delete
4. Hang up
5. Alphanumeric keys
6. Key lock
7. Pause
8. Ringer on/off
9. Calls list / down
10.Answer call / hands free /
call button
11.INT / escape
12.Menu / OK / flash
13.Display
14.Red LED, flashes during a
call
Base station
15.Paging key
16.Handset charging LED
17.Ringer LED
1Press the menu/OK key to open the main menu.
2
Scroll to the required menu option.
OK

5
Operating the telephone
English
3 Operating the telephone
3.1 Changing the language
3.2 Outgoing calls
Making a call
Redialling the last telephone number called
3.3 Incoming calls
When an incoming call is received, the handset and the base station
ring and the visual call signal LED (see point 14 in figure 3 and point 17
in figure 4) flashes on the handset and base station.
3.4 Activating/deactivating hands free mode
3
Press the menu/OK key to open more options or to
confirm the displayed setting.
4
Press the escape key to go back to the previous
menu level
1Press the menu/OK key.
2
Select
"HANDSET"
and confirm.
3
Select
"LANGUAGE"
and confirm.
4
Select the desired language and confirm.
5
Press the escape key to return to standby mode.
1Press the call button.
2
Enter the telephone number.
3
Press the hang up key to end the call.
1Press the call button.
2
Press the redial button.
The last telephone number is automatically dialled.
3
Press the hang up key to end the call.
1Press the answer call key to answer the call.
2
Press the hang up key to end the call.
1Press the hands free key to activate the function.
2
Press the hands free key again to switch the call
back to the handset.
OK
ESC
OK
OK
OK
OK
ESC
5J
K
L6M
N
O
4G
H
I

6
Operating the telephone
3.5 Mute
3.6 Setting the earpiece/hands free volume
During a call:
3.7 Selecting the ring tone and setting the volume
Handset ring tone for internal/external calls
Handset ring tone volume
1Press the mute key.
The microphone is muted and
"MUTED"
is
displayed.
2
Press the mute key again to reactivate the
microphone.
1Press the down key.
2
Press the up and down keys.
You can set the volume to levels 1 to 5.
1Press the menu/OK key.
2
Select
"HANDSET"
and confirm.
3
Select
"RING TONE"
and confirm.
4
Select
"INTERNAL"
or
"EXTERNAL"
and confirm.
5
Now select a ring tone (1 to 9) and confirm.
1Press the menu/OK key.
2
Select
"HANDSET"
and confirm.
3
Select
"RING TONE"
and confirm.
4
Select
"VOLUME"
and confirm.
5
Select the required volume (Off, 1-5) and confirm.
Important You can switch the ring tone volume of any
individual handset on or off by simply holding the
ring tone on/off key in standby mode.
The symbol appears in the display and the key
lock is activated.
OK
OK
OK
OK
OK
OK
OK
OK
OK
OK

7
Operating the telephone
English
3.8 Key lock
3.9 Phone book
You can store 50 entries in the phone book. Names may be up to
16 characters long and telephone numbers up to 24 digits long.
Adding a phone book entry
Dialling a phone book number
1Press and hold the key lock key.
The symbol appears in the display.
2
Press the key lock key again to deactivate key lock.
When key lock is activated, you can still answer
incoming calls by pressing the answer call key. The
keypad functions as usual during the call. Key lock is
activated again after the call.
1Press the phone book key.
2
Press the OK key twice.
3
Enter the name and confirm.
4
Enter the desired telephone number and confirm.
A confirmation tone is now sounded.
1Press the phone book key.
2
Scroll to the required name or enter the initial letters
of the name.
3
Press the phone book key to display the telephone
number.
4
Now press the call key.
The telephone number is automatically dialled.
5
Press the hang up key to end the call.
OK
OK
5J
K
L6M
N
O
4G
H
I
OK
5J
K
L6M
N
O
4G
H
I
OK
5J
K
L6M
N
O
4G
H
I

8
Van start gaan
1 Van start gaan
Hartelijk dank voor de aankoop van dit TOPCOM-toestel. Dit product
is met de uiterste zorg voor u en het milieu ontworpen en gemonteerd.
Bij TOPCOM zijn we begaan met de toekomst van onze planeet en
onze kinderen, en daarom doen we ons uiterste best om het milieu te
sparen. Daarom hebben we besloten het aantal pagina's van onze
gebruikershandleidingen en producthandleidingen te beperken. Er zijn
namelijk wel 24 bomen nodig om 1 ton papier te produceren. Dat
betekent dat er heel wat bomen moeten worden gekapt om onze
producthandleidingen in 11 talen uit te geven. In deze korte
handleiding die bij uw TOPCOM-toestel wordt geleverd, wordt kort
uitgelegd hoe u uw TOPCOM-toestel moet installeren en gebruiken.
Als u alle eigenschappen van uw nieuwe TOPCOM-toestel wilt
ontdekken, raden wij u aan om naar onze website te gaan
(www.topcom.net); daar kunt u de volledige gebruikershandleiding in
uw taal downloaden. Op die manier hoopt TOPCOM een bijdrage aan
een betere toekomst voor onze planeet te leveren, maar dat kan alleen
met uw hulp!
2 De eerste stappen
2.1 Deze gebruikshandleiding gebruiken
De volgende methode wordt gebruikt in deze handleiding om de
instructies te verduidelijken:
Toets die ingedrukt moet worden
2.2 Het basisstation installeren
Installeer het basisstation als volgt (zie figuur 1 op het vouwblad):
1Sluit de netadapter eerst aan op het basisstation en vervolgens
op een stopcontact.
2Steek één uiteinde van de telefoonkabel in de wandcontactdoos
van de telefoonaansluiting en het andere uiteinde in de
aansluiting aan de achterkant van het basisstation.
3De telefoon- en stroomkabels moeten worden aangesloten
zoals aangegeven in figuur 1.
Tekst ....... "Display".
Tekst die op de display van de telefoon verschijnt

9
De eerste stappen
Nederlands
2.3 Handset
2.4 Indicatie laadniveau batterij
De handset geeft u een waarschuwingssignaal als de batterijen tijdens
een gesprek bijna leeg zijn. Plaats de handset op de lader om de
batterijen op te laden.
Toetsen/display (zie figuur 3 en 4)
2.5 Door het menu bladeren
De Sologic B921 heeft een eenvoudig menusysteem. Elk menu
bestaat uit een aantal opties.
1Open het batterijvak zoals aangegeven in figuur 2 op het
vouwblad.
2
Plaats de oplaadbare batterijen. Zorg ervoor dat de polariteit
juist is (+ en -).
3
Sluit het batterijvak.
4
Plaats de handset in de lader en laat hem 16 uur laden. Het
laadlampje zal branden.
Opgeladen batterijen
Lege batterijen
Draadloze handset
1. Nummerherhaling/omhoog
2. Telefoonboek
3. Geluid uit/wissen
4. Ophangen
5. Alfanumerieke toetsen
6. Toetsvergrendeling
7. Pauze
8. Beltoon aan/uit
9. Oproeplijst/omlaag
10.Antwoorden/handsfree/
oproepen
11.INT/Escape
12.Menu/OK/flash
13.Display
14.Rood lampje, knippert
tijdens een oproep
Basisstation
15.Toets Paging
16.Handset laadlampje
17.LED Belgeluid
1Druk op de menu/OK-toets om het hoofdmenu
te openen.
2
Blader naar de gewenste menuoptie.
OK

10
De telefoon bedienen
3 De telefoon bedienen
3.1 De taal wijzigen
3.2 Uitgaande oproepen
Een oproep maken
Het laatst gekozen telefoonnummer opnieuw kiezen
3.3 Inkomende oproepen
Wanneer een inkomende oproep wordt ontvangen, klinkt er op de
handset en op het basisstation een beltoon en zal het lampje Visueel
oproepsignaal (zie punt 14 in figuur 3 en punt 17 in figuur 4) knipperen
op de handset en op het basisstation.
3
Druk op de menu/OK-toets om meer opties te tonen
of de getoonde instelling te bevestigen.
4
Druk op de escape-toets om terug te gaan naar het
vorige menuniveau.
1Druk op de menu/OK-toets.
2
Selecteer
"HANDSET"
en bevestig.
3
Selecteer
"TAAL"
(LANGUAGE) en bevestig.
4
Selecteer de gewenste taal en bevestig.
5
Druk op de escape-toets om terug te keren naar de
stand-bymodus.
1Druk op de oproeptoets.
2
Voer het telefoonnummer in.
3
Druk op de ophangtoets om de oproep te beëindigen.
1Druk op de oproeptoets.
2
Druk op de nummerherhalingstoets.
Het laatste telefoonnummer wordt automatisch
gekozen.
3
Druk op de ophangtoets om de oproep te
beëindigen.
1Druk op de antwoordtoets om de oproep
te accepteren.
2
Druk op de ophangtoets om de oproep
te beëindigen.
OK
ESC
OK
OK
OK
OK
ESC
5J
K
L6M
N
O
4G
H
I

11
De telefoon bedienen
Nederlands
3.4 De handsfreemodus inschakelen/uitschakelen
3.5 Geluid uit
3.6 Volume oortelefoon/handsfree instellen
Tijdens een oproep:
3.7 De beltoon selecteren en het volume instellen
Beltoon van de handset voor interne/externe oproepen
Beltoonvolume handset
1Druk op de handsfreetoets om de functie
in te schakelen.
2
Druk opnieuw op de handsfreetoets om het
gesprek terug te schakelen naar de handset.
1Druk op de microfoon uit-toets.
De microfoon staat uit en
"MUTE AAN"
(MUTED)
verschijnt.
2
Druk nogmaals op de microfoon uit-toets om de
microfoon weer in te schakelen.
1Druk op de omlaag-toets.
2
Druk op de omhoog- en omlaag- toets.
U kunt het volumeniveau instellen van 1 tot 5.
1Druk op de menu/OK-toets.
2
Selecteer
"HANDSET"
en bevestig.
3
Selecteer
"BELTOON"
(RING TONE) en bevestig.
4
Selecteer
"INTERN"
(INTERNAL) of
"EXTERN"
(EXTERNAL) en bevestig.
5
Selecteer nu een beltoon (1 tot 9) en bevestig.
1Druk op de menu/OK-toets.
2
Selecteer
"HANDSET"
en bevestig.
3
Selecteer
"BELTOON"
(RING TONE) en bevestig.
4
Selecteer
"VOLUME"
en bevestig.
5
Selecteer het gewenste volume (Off, 1-5) en
bevestig.
OK
OK
OK
OK
OK
OK
OK
OK
OK
OK

12
De telefoon bedienen
3.8 Toetsvergrendeling
3.9 Telefoonboek
U kunt 50 invoeren opslaan in het telefoonboek. Namen kunnen
maximaal 16 tekens bevatten en telefoonnummers kunnen maximaal
24 cijfers bevatten.
Een invoer in het telefoonboek toevoegen
Een nummer uit het telefoonboek kiezen
Belangrijk U kunt het belvolume van elke individuele handset
aan- of uitschakelen door de beltoon aan/uit-toets
ingedrukt te houden in de standby-modus.
Het symbool verschijnt op de display en de
toetsvergrendeling staat aan.
1Houd de toetsvergrendelingstoets ingedrukt.
Het symbool verschijnt op de display.
2
Druk de toetsvergrendelingstoets opnieuw in om de
toetsvergrendeling uit te schakelen.
Als de toetsvergrendeling is ingeschakeld, kunt u inko-
mende oproepen nog steeds beantwoorden door op de
antwoordtoets te drukken. Het toetsenbord functioneert
normaal tijdens het gesprek. De toetsvergrendeling
wordt na het gesprek weer ingeschakeld.
1Druk op de telefoonboektoets.
2
Druk twee keer op de OK-toets.
3
Voer de naam in en bevestig.
4
Voer het relevante telefoonnummer in en bevestig.
Er klinkt nu een bevestigingstoon.
1Druk op de telefoonboektoets.
2
Blader naar de gewenste naam of voer de
beginletters van de naam in.
3
Druk op telefoonboektoets om het telefoonnummer
weer te geven.
4
Druk nu op de oproeptoets.
Het telefoonnummer wordt automatisch gekozen.
5
Druk op de ophangtoets om de oproep te beëindigen.
OK
OK
5J
K
L6M
N
O
4G
H
I
OK
5J
K
L6M
N
O
4G
H
I
OK
5J
K
L6M
N
O
4G
H
I

13
Pour commencer
Français
1 Pour commencer
Nous vous remercions d'avoir choisi ce produit TOPCOM. Cet appareil
a été conçu et monté avec le plus grand soin pour répondre à vos
besoins et dans le respect de l'environnement. Soucieux de l'avenir de
notre planète et de nos enfants, nous tentons de faire le maximum
pour préserver l'environnement. C'est la raison pour laquelle nous
avons réduit le nombre de pages de nos manuels d'utilisation et de nos
guides de produits. Si l'on considère qu'il faut jusqu'à 24 arbres pour
produire 1 tonne de papier, la publication de guides de produits en
11 langues coûte à notre planète de nombreux arbres. Dans ce petit
manuel fourni avec votre appareil TOPCOM, vous trouverez un
résumé du mode d'installation et d'utilisation de celui-ci. Toutefois, si
vous souhaitez découvrir toutes les fonctionnalités de votre nouvel
appareil TOPCOM, vous pouvez visiter notre site web
www.topcom.net
et télécharger le manuel d'utilisation complet dans votre langue. De
cette manière, TOPCOM espère contribuer à la préservation de notre
planète, mais nous ne pouvons y arriver sans votre aide !
2 Premières étapes
2.1 Comment utiliser ce mode d'emploi ?
La méthode suivante est utilisée pour clarifier les instructions dans ce
mode d'emploi :
Touche à enfoncer
2.2 Installation de la station de base
Installez la station de base comme suit (voir illustration 1 sur la
page pliée) :
1Connectez l'adaptateur principal à la station de base puis à une
prise.
2Connectez une extrémité du câble téléphonique à la prise
téléphonique murale et l'autre extrémité à l'arrière de la station
de base.
3Le câble téléphonique et le câble d'alimentation doivent être
connectés comme indiqué dans l'illustration 1.
2.3 Combiné
Texte....... « Écran ».
Texte qui apparaît sur l'écran du téléphone
1Ouvrez le compartiment des batteries comme sur l'illustration 2
de la page dépliante.

14
Premières étapes
2.4 Affichage de l'état des batteries
Le combiné produira un son d'avertissement si les batteries sont
presque plates durant un appel. Placez le combiné sur la station de
base pour recharger les batteries.
Touches / écran (voir illustrations 3 et 4)
2.5 Navigation dans le menu
Le Sologic B921 intègre une structure de menu très conviviale.
Chaque menu comporte une série d'options.
2
Insérez les batteries rechargeables. Assurez-vous que la polarité
est correcte (+ et -).
3
Refermez le compartiment à piles.
4
Déposez le combiné sur le chargeur et mettez-le en charge pen-
dant 16 heures. Le voyant indiquant le chargement est allumé.
Batteries chargées
Batteries plates
Combiné sans fil
1. Recomposer / Haut
2. Répertoire
3. Mute / effacer
4. Raccrocher
5. Touches alphanumériques
6. Verrouillage du clavier
7. Pause
8. Activation / Désactivation
de la sonnerie
9. Liste d'appel / Bas
10.Répondre / Mains libres /
Appel
11.INT / Échap.
12.Menu / OK / flash
13.Écran
14.Voyant rouge qui clignote
pendant un appel
Station de base
15.Touche Recherche
16.Voyant de chargement du
combiné
17.Voyant Sonnerie
1Appuyez sur la touche Menu / OK pour ouvrir le
menu principal.
2
Faites défiler l'écran jusqu'à l'option de menu
souhaitée.
3
Appuyez sur la touche Menu / OK pour afficher
d'autres options ou pour valider le réglage affiché.
4
Appuyez sur la touche Échap. pour revenir au
niveau précédent.
OK
OK
ESC

15
Utiliser le téléphone
Français
3 Utiliser le téléphone
3.1 Modification de la langue
3.2 Appels sortants
Passer un appel
Recomposer le dernier numéro appelé
3.3 Appels entrants
Dans le cas d'un appel entrant, le combiné et la station de base son-
nent et le voyant d'appel (voir point 14 dans l'illustration 3 et le point
17 dans l'illustration 4) clignote sur le combiné et la station de base.
3.4 Activation / désactivation du mode Mains-libres
1Appuyez sur la touche Menu / OK.
2
Sélectionnez
« COMBINE »
(HANDSET) et validez.
3
Sélectionnez
« LANGUE »
(LANGUAGE)
et validez.
4
Sélectionnez la langue souhaitée et validez.
5
Appuyez sur la touche Échap. pour revenir en mode
veille.
1Appuyez sur la touche Appel.
2
Composez le numéro de téléphone.
3
Pour terminer l'appel, appuyez sur la
touche Raccrocher.
1Appuyez sur la touche Appel.
2
Appuyez sur la touche Recomposition.
Le dernier numéro de téléphone appelé est
composé automatiquement.
3
Pour terminer l'appel, appuyez sur
la touche Raccrocher.
1Pour prendre l'appel, appuyez sur
la touche Répondre.
2
Pour terminer l'appel, appuyez sur
la touche Raccrocher.
1Appuyez sur la touche Mains-libres pour activer
la fonction.
2
Pour réutiliser le combiné pendant l'appel, appuyez
de nouveau sur la touche Mains-libres.
OK
OK
OK
OK
ESC
5J
K
L6M
N
O
4G
H
I

16
Utiliser le téléphone
3.5 Mute (Muet)
3.6 Réglage du volume de l'écouteur et du haut-parleur
Mains-libres
Pendant un appel :
3.7 Choisir la sonnerie et régler le volume
Type de sonnerie du combiné pour les appels
internes / externes
Volume de la sonnerie du combiné
1Appuyez sur la touche Muet.
Le microphone est désactivé et
« MUET »
(MUTED)
s'affiche.
2
Appuyez à nouveau sur la touche Muet pour
réactiver le microphone.
1Appuyez sur la touche Bas.
2
Appuyez sur les touches Haut et Bas.
Vous pouvez régler le volume de 1 à 5.
1Appuyez sur la touche Menu / OK.
2
Sélectionnez
« COMBINE »
(HANDSET
)
et validez.
3
Sélectionnez
« SONNERIE »
(RING TONE) et validez.
4
Sélectionnez
« INTERNE »
(INTERNAL) ou
« EXTERNE »
(EXTERNAL) et validez.
5
Sélectionnez une mélodie (1à 9) et validez.
1Appuyez sur la touche Menu / OK.
2
Sélectionnez
« COMBINE »
(HANDSET) et validez.
3
Sélectionnez
« SONNERIE »
(RING TONE)
et validez.
4
Sélectionnez
« VOLUME »
et validez.
5
Sélectionnez le volume souhaité (Off, 1-5) et validez.
Important Vous pouvez activer ou désactiver le volume de la
sonnerie de chaque combiné individuellement en
appuyant sur la touche activation / désactivation
de la sonnerie en mode de veille. Le symbole
apparaît à l'écran et le clavier est verrouillé.
OK
OK
OK
OK
OK
OK
OK
OK
OK
OK

17
Utiliser le téléphone
Français
3.8 Touche Verrouillage du clavier
3.9 Répertoire
Vous pouvez enregistrer 50 entrées dans le répertoire. Les noms
peuvent comprendre jusqu'à 16 caractères et les numéros, jusqu'à
24 chiffres.
Ajouter une entrée
Composer un numéro du répertoire
1Appuyez sur la touche de verrouillage
et maintenez-la enfoncée.
Le symbole apparaît à l'écran.
2
Pour déverrouiller le clavier, appuyez sur la touche
Verrouillage du clavier et maintenez-la enfoncée.
Lorsque le clavier est verrouillé, vous pouvez
toujours répondre aux appels entrants en appuyant
sur la touche Appel . Pendant l'appel, le clavier
fonctionne normalement. Le verrouillage du clavier
est réactivé après l'appel.
1Appuyez sur la touche répertoire.
2
Appuyez deux fois sur la touche OK.
3
Saisissez un nom et validez.
4
Introduisez le numéro de téléphone souhaité
et validez.
Un son de confirmation est émis.
1Appuyez sur la touche répertoire.
2
Naviguez jusqu'au numéro souhaité ou introduisez les
premières lettres du nom.
3
Appuyez sur la touche répertoire pour afficher le
numéro de téléphone.
4
Appuyez sur la touche appel.
Le numéro de téléphone est composé automatiquement.
5
Pour terminer l'appel, appuyez de nouveau sur la
touche pour raccrocher.
OK
OK
5J
K
L6M
N
O
4G
H
I
OK
5J
K
L6M
N
O
4G
H
I
OK
5J
K
L6M
N
O
4G
H
I

18
Erste Schritte
1 Erste Schritte
Vielen Dank, dass Sie sich zum Kauf dieses Produkts von TOPCOM
entschieden haben. Dieses Produkt wurde mit der höchsten Sorgfalt für
Sie und die Umwelt entwickelt und hergestellt. Wir bei TOPCOM
machen uns Gedanken über die Zukunft unseres Planeten und unserer
Kinder. Daher geben wir unser Bestes, um die Umwelt zu schützen. Aus
diesem Grund haben wir uns entschieden, die Seitenzahlen unserer
Bedienungsanleitungen und Produkthandbücher zu reduzieren. Wenn
Sie bedenken, dass bis zu 24 Bäume für 1 Tonne Papier gefällt werden
müssen, dann kostet ein Produkthandbuch in 11 Sprachen unseren
Planeten eine Menge Holz. In dem Kurzhandbuch, das Ihrem
TOPCOM-Gerät beiliegt, finden Sie eine kurze Anleitung zur Installation
und Bedienung Ihres TOPCOM-Gerätes.
Wenn Sie gern mehr über die Funktionen Ihres neuen TOPCOM-
Gerätes erfahren möchten, besuchen Sie uns bitte im Internet
(www.topcom.net). Dort können Sie die vollständige
Bedienungsanleitung in Ihrer Sprache herunterladen. Mit diesem
Schritt möchte TOPCOM seinen Beitrag dazu leisten, unseren
Planeten Erde zu verbessern. Doch das gelingt nur mit Ihrer Hilfe!
2 Erste Schritte
2.1 Zum Gebrauch dieser Bedienungsanleitung
In dieser Bedienungsanleitung werden Anweisungen wie
folgt verdeutlicht:
Zu drückende Taste
2.2 Basisstation installieren
Installieren Sie die Basisstation wie folgt (siehe Abbildung 1 auf
der Ausklappseite):
1Schließen Sie den Netzadapter zunächst an die Basisstation
und dann an eine Steckdose an.
2Schließen Sie ein Ende des Telefonkabels an den
Telefonwandanschluss und das andere Ende an den Anschluss
auf der Rückseite der Basisstation an.
3Telefon- und Stromkabel sollten wie in Abbildung 1 dargestellt
angeschlossen werden.
Text ....... „Display“.
Text, der im Telefon-Display erscheint

19
Erste Schritte
Deutsch
2.3 Mobilteil
2.4 Batteriestatusanzeige
Wenn die Akkus während eines Anrufs fast leer sind, erzeugt das
Mobilteil einen Warnton. Setzen Sie das Mobilteil in das Mobilteil-
Ladegerät ein, um die Akkus wieder aufzuladen.
Tasten/Display (siehe Abbildung 3 und 4)
2.5 Navigation durch das Menü
Das Sologic B921 verfügt über eine bedienerfreundliche Menüstruktur.
Jedes Menü besteht aus einer Reihe von Optionen.
1Öffnen Sie das Akkufach, wie in Abbildung 2 der Ausklappseite
dargestellt.
2
Legen Sie die Akkus ein. Achten Sie dabei auf die richtige
Polarität (+ und -).
3
Schließen Sie das Akkufach.
4
Setzen Sie das Mobilteil in das Ladegerät ein und laden Sie es
16 Stunden lang auf. Die Lade-LED leuchtet auf.
Akkus aufgeladen
Akkus leer
Schnurloses Mobilteil
1. Wahlwiederholung/Nach
oben
2. Telefonbuch
3. Stumm / Löschen
4. Auflegen
5. Alphanumerische Tasten
6. Tastatursperre
7. Pause
8. Rufton ein/aus
9. Anrufliste/Nach unten
10.Gesprächannahme-/
Freisprech-/ Anruftaste
11.INT/Escape
12.Menü/OK/Flash
13.Display
14.Rote LED, blinkt während
des Gesprächs
Basisstation
15.Paging-Taste
16.Mobilteil-Ladeanzeige
(LED)
17.LED-Anzeige für Anruf
1Zum Öffnen des Hauptmenüs drücken Sie die
Menü-/OK-Taste.
OK

20
Bedienung des Telefons
3 Bedienung des Telefons
3.1 Sprache ändern
3.2 Abgehende Anrufe
Einen Ruf tätigen
Erneutes Wählen der letzten Telefonnummer
3.3 Eingehende Anrufe
Bei einem eingehenden Anruf klingeln Mobilteil und Basisstation, und
die LED „Visuelles Anrufsignal“ (siehe Punkt 14 in Abbildung 3 und
Punkt 17 in Abbildung 4) blinkt an Mobilteil und Basisstation.
2
Blättern Sie zum gewünschten Menüpunkt.
3
Drücken Sie die Menü-/OK-Taste zum Aufrufen
weiterer Optionen oder zum Bestätigen der
angezeigten Einstellung.
4
Drücken Sie die Escape-Taste, um zur
nächsthöheren Menüebene zurückzukehren.
1Drücken Sie die Menü-/OK-Taste.
2
Wählen Sie
„MOBILTEIL“
(HANDSET) und
bestätigen Sie die Auswahl.
3
Wählen Sie
„SPRACHE“
(LANGUAGE) und
bestätigen Sie die Auswahl.
4
Wählen Sie die gewünschte Sprache aus und
bestätigen Sie die Auswahl.
5
Drücken Sie die Esc-Taste, um in den Standby-
Modus zurückzukehren.
1Drücken Sie die Anruftaste.
2
Geben Sie die Telefonnummer ein.
3
Drücken Sie die Auflegen-Taste, um das Gespräch
zu beenden.
1Drücken Sie die Anruftaste.
2
Drücken Sie die Wahlwiederholungstaste.
Die letzte Telefonnummer wird automatisch gewählt.
3
Drücken Sie die Auflegen-Taste, um das Gespräch
zu beenden.
OK
ESC
OK
OK
OK
OK
ESC
5J
K
L6M
N
O
4G
H
I
Other manuals for SOLOGIC B921
3
Table of contents
Languages:
Other Topcom IP Phone manuals

Topcom
Topcom Butler E400 User manual

Topcom
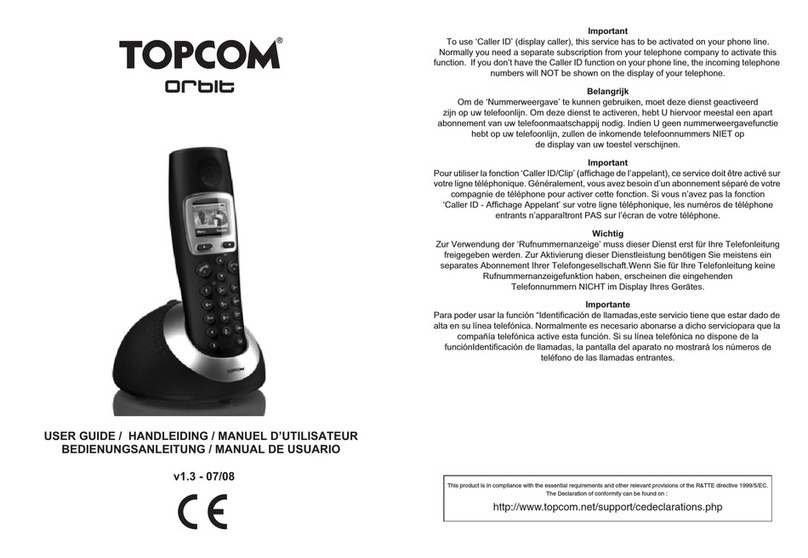
Topcom ORBIT User manual

Topcom
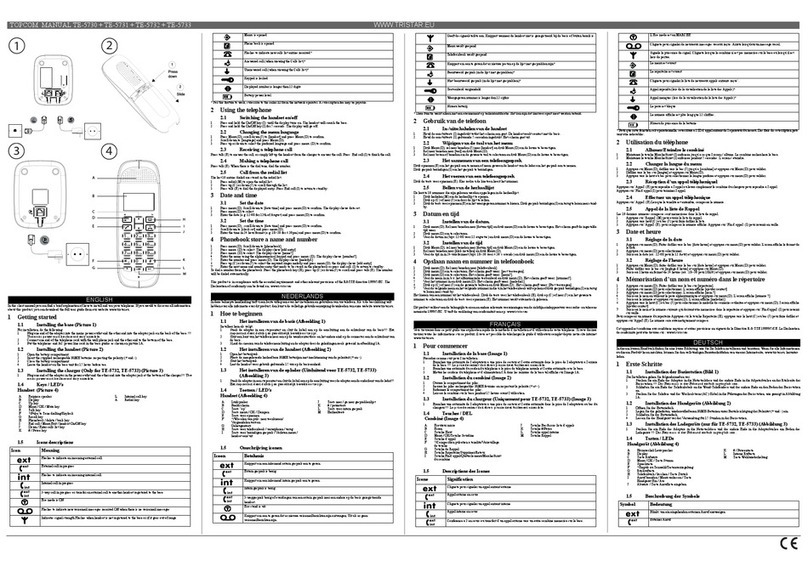
Topcom TE-5730 User manual

Topcom
Topcom BUTLER E2100 User manual

Topcom
Topcom Butler E751 TripleButler E751 Quattro User manual

Topcom
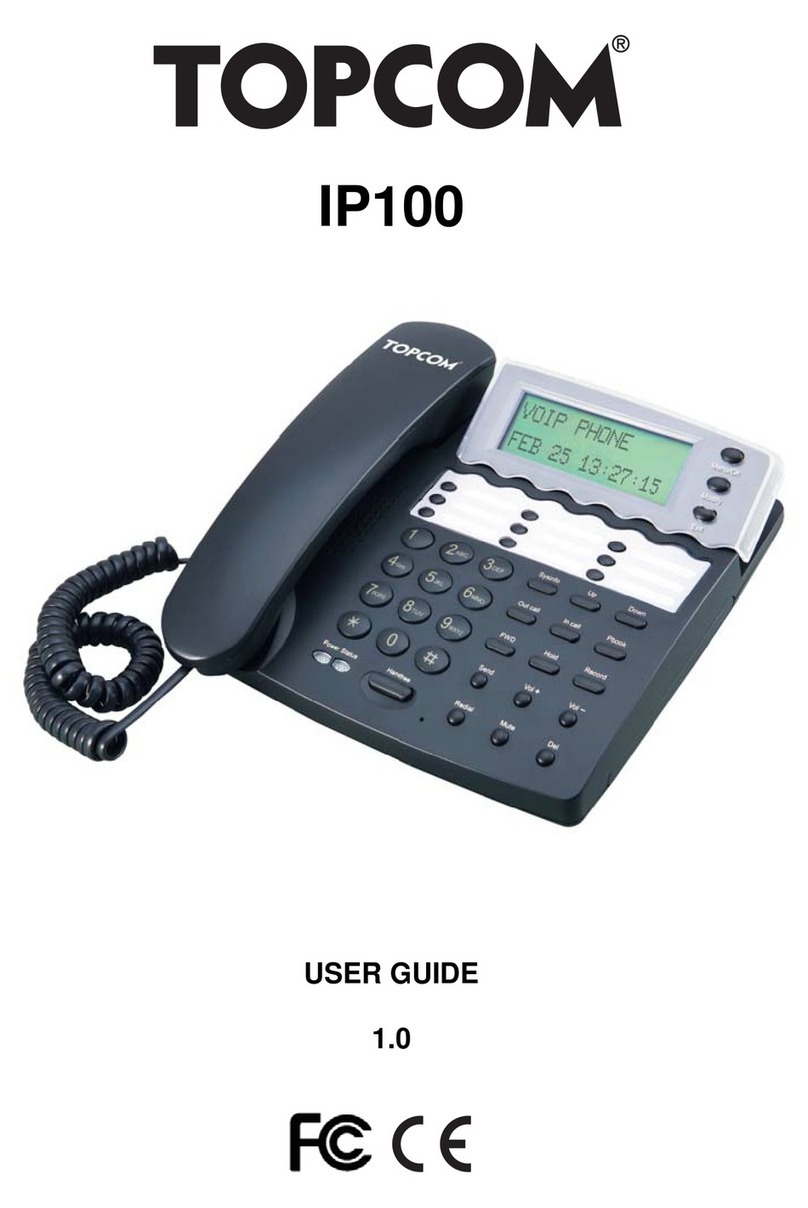
Topcom IP100 User manual

Topcom
Topcom Fidelity 160 User manual

Topcom
Topcom ALLURE 150 User manual

Topcom
Topcom BUTLER 2900 Triple User manual

Topcom
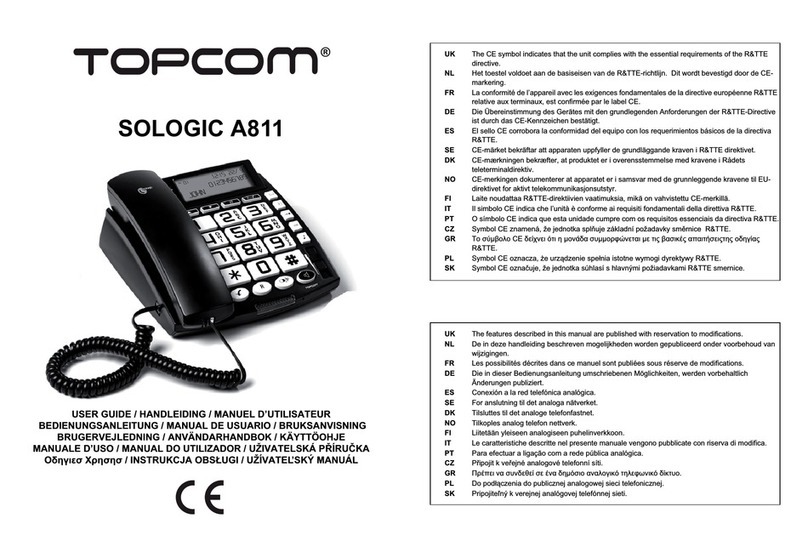
Topcom SOLOGIC A811 User manual