Topcon FC-2500 User manual

&#
(AND(ELD#ONTROLLER
1UICK2EFERENCE'UIDE


Topcon only sells GPS products into Precision Markets.
Please go to www.topcongps.com for detailed market information.
POSITIONING SYSTEMS
FC-2500
Quick Reference Guide
Part Number 7010-0910
Rev A
©Copyright Topcon Positioning Systems, Inc.
October, 2008
All contents in this manual are copyrighted by Topcon. All rights reserved.
The information contained herein may not be used, accessed, copied, stored,
displayed, sold, modified, published, or distributed, or otherwise reproduced
without express written consent from Topcon.

ECO#3422

P/N 7010-0910
TOC
i
Table of Contents
Introduction .......................................................... 1-1
The FC-2500 Digital Camera .......................................... 1-1
Components of the FC-2500 ..................................... 1-1
Positioning the FC-2500 .................................................. 1-2
Settings for the FC-2500 ........................................... 1-3
Getting Started ................................................................. 1-3
Keypad Controls ........................................................ 1-4
Camera Settings for the FC-2500 .................................... 1-5
EyeSetup Menu ................................................................ 1-6
The Viewfinder ................................................................ 1-8
Taking a Photo Using the FC-2500 ................................. 1-10
Taking Good Photos with the FC-2500 .................... 1-11
Composition ........................................................ 1-12
Focus ................................................................... 1-13
Exposure ............................................................. 1-16
Color Temperature .............................................. 1-21

Table of Contents
FC-2500 Quick Reference Guide
Notes:
ii

P/N 7010-0910
Chapter 1
1-1
Introduction
The FC-2500 Digital Camera
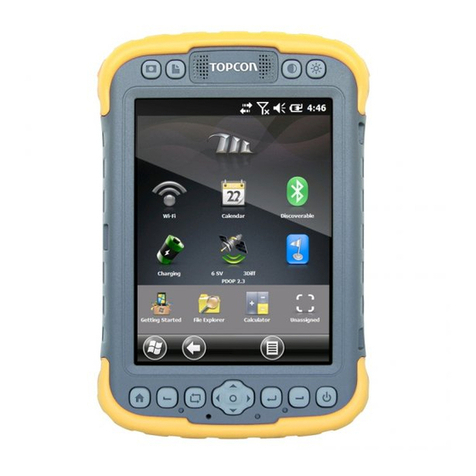
The FC-2500 is not your everyday digital camera. The same CMOS
imaging technology found in many digital cameras is present in this
powerful and rugged computer (Figure 1-1).
Figure 1-1. The FC-2500 Hand-Held Computer
Components of the FC-2500
The following are the components of the FC-2500 (Figure 1-2 on
page 1-2):
• The FC-2500 is a 5 megapixel camera (4 megapixel processed).
• The FC-2500 has four illuminators that allows you to take
pictures in low light conditions.
• The FC-2500 has two 635 nm red visible lasers that you can use
to position objects and to align the FC-2500.

Introduction
FC-2500 Quick Reference Guide
1-2
Figure 1-2. Components of the FC-2500 – Back View
The key to taking great pictures with the FC-2500 digital camera is
learning how to properly use it. Before warming up, take the time to
know the FC-2500 to make consistently great quality pictures.
Positioning the FC-2500
The main difference between an off-the-shelf digital camera and the
FC-2500 is how it is held. Whereas traditional cameras include a
viewfinder and sometimes, an LCD display, the FC-2500’s display is
the viewfinder that operates on a horizontal plane. Instead of holding
the FC-2500 up to your eye, you hold it in front of you, about waist
high (or whatever is comfortable).
NOTE
Please refer to your FC-2500 Operator’s Manual
for a comprehensive glossary of photography and
terms, and detailed instructions on how to change
the settings mentioned in this companion guide.
NOTICE
For a detailed description of all FC-2500
components (including indicators and interface
connections) please refer to your FC-2500
Operator’s Manual.
Illuminators Camera Lasers

Getting Started
P/N 7010-0910 1-3
Settings for the FC-2500
Some settings in the FC-2500 can be changed easily while others are
more complex and should be left to the programmer. Depending on
your application, things such as resolution, key controls, and options
to save may already be set up for you (preprogrammed).
Getting Started
Unlike conventional digital cameras, the FC-2500 does not have a
menu system that allows users to directly change camera options,
such as shutter speed and aperture. Because the FC-2500 is a
computer capable of taking pictures, camera functionality is
integrated into an application via eyeWARE.
eyeWARE is an API that enables an application to communicate with
the FC-2500 to take and store pictures. One component of eyeWARE
enables you to do the following:
• Store different camera settings (shutter speed, aperture, etc.)
• Picture storage information
• Key press functions in configuration files that you can load from
your application to take a picture.
When you start eyeWARE, a configuration file is loaded. This
activates the keys on the FC-2500 or you can use the buttons from
your application to activate camera functions.
You don’t have to write an application to take pictures just yet. Pre-
programmed applications within eyeWARE Setup allow you to take
pictures until you are ready to take your own.
NOTE
For complete instructions on how to change and
save your settings, refer to the FC-2500 Operator’s
Manual.

Introduction
FC-2500 Quick Reference Guide
1-4
Keypad Controls
When using eyeWARE with a standard 55-key joystick keypad, use
the default control buttons on the left when taking pictures.??
Keypads on the FC-2500 can vary. Consequently, not all the functions
listed in Figure 1-3 or in Table 1-1 on page 1-4 may work as
described. In addition, functions listed on certain keypads may
require you to write an application interface.
Figure 1-3. Key Press Character Map
Table 1-1 describes the buttons on the FC-2500 and their functions.
Table 1-1. FC-2500 Button Functions
Icon Name Function
Camera Takes a picture
V Viewfinder Toggle
(Turns the viewfinder on and off)
L Lamp Toggle
(Turns the lamp on and off)
S Shutter Toggle
(Changes the shutter cycle)
A Aperture Toggle
(Changes the aperture setting)

Camera Settings for the FC-2500
P/N 7010-0910 1-5
Camera Settings for the
FC-2500
EyeSEE is the part of eyeWARE that allows you to create
configuration files to change camera settings in your application and
determine how eyeWARE works (Figure 1-4).
Figure 1-4. eyeSEE Configuration Screen
Colon (:)
(FUNC + O)
Manual Focus Forward
(Changes the focus setting forward)
Semicolon (;)
(FUNC + P)
Manual Focus Back
(Changes the focus setting backward)
4 Saves the current picture
1 Deletes the current picture
TIP
Create a custom keypad to work intuitively with
your application.
Table 1-1. FC-2500 Button Functions (Continued)

Introduction
FC-2500 Quick Reference Guide
1-6
EyeSetup Menu
To display the eyeSETUP menu, tap StartProgramseyeWARE
eyesee setup. The eyeSEE Config screen displays. Table 1-2 on
page 1-6 describes the menus on the eyeSEE Config screen
(Figure 1-5, Figure 1-6 on page 1-7, and Figure 1-7 on page 1-7).
Table 1-2. eyeSETUP Menu
Menu Item Menu Option/Description
Figure 1-5. eyeSEE Config Options Screen
Aperture Settings FC-2500 has three aperture settings (Figure 1-5):
• Auto
• Large (F2.8)
• Small (F8.0)
The aperture diameter is expressed in f-stops. The lower the
number, the larger the aperture and the more light that
passes through to the sensor.
Spot Meter The viewfinder consists of nine equal sections when you
press the Camera button (Figure 1-5).
The FC-2500 uses the center section to measure the amount
of available light and to adjust the exposure accordingly
(this process is known as Spot Meter Exposure).
NOTE: Spot Meter can be enabled/disabled as required for
different scenarios.

EyeSetup Menu
P/N 7010-0910 1-7
Figure 1-6. Camera Behavior Options Screen
Light Conditions Enables you to configure the FC-2500 to compensate for
different light conditions and environments (Figure 1-6).
Select either Daylight, Cloudy, Tungsten, or Fluorescent.
Shutter Speed The speed at which the shutter operates (Figure 1-6 on
page 1-7).
All resolutions, except QSXGA mode uses a preset video
capture mode.
If you are taking pictures of fast moving objects, a higher
shutter speed is recommended to prevent a blurred image.
Figure 1-7. Capture Options Screen
Resolution The FC-2500 has four available resolutions (Figure 1-7):
• 320x200 (HF)
• 640x480 (VGA)
• 1280x960 (SXVGA)
• 2048x1944 (QSXGA)
Table 1-2. eyeSETUP Menu (Continued)

Introduction
FC-2500 Quick Reference Guide
1-8
The Viewfinder
Press the Camera button for eyeWARE to:
• Display the viewfinder screen
• Automatically put the camera in focus
• Calculate the exposure setting
By default, a red square or Region of Interest (ROI) displays in the
center of the viewfinder and a status bar displays at the top. A blue
exposure bar displays on the left side of the viewfinder. As the
exposure changes, the blue exposure bar moves up for a brighter
exposure or down for a darker exposure. When the correct exposure
has been reached, the bar remains still and a green box displays. To
readjust the focus, place the center of the subject within the ROI and
press F4. The viewfinder automatically closes if a picture is not taken
within 15 seconds.??
When the focusing process completes, a green square displays on the
right side of the viewfinder. When the exposure has stabilized, a green
square displays on the left side of the viewfinder (Figure 1-8).
Figure 1-8. The Focusing Process

The Viewfinder
P/N 7010-0910 1-9
If the camera is overexposed, a red square displays in the top left
section of the viewfinder. In this case, the mirror finish of the license
plate causes a glare (Figure 1-9 on page 1-9).
Figure 1-9. An Overexposed Picture
If the camera has reached an underexposure limit, a red square
appears in the top left section of the viewfinder. In this case, the
mirror finish of the license plate is causing a glare (Figure 1-10).
Figure 1-10. An Underexposed Picture

Introduction
FC-2500 Quick Reference Guide
1-10
Taking a Photo Using the
FC-2500
If the viewfinder is active and both green squares are visible, press the
Camera button to take a picture.
If the viewfinder is not active, press the Camera button to activate the
viewfinder, wait for two green squares to display, then press the
Camera button again to take a picture. If you are successful in taking
the picture, you can expect the following:
• the FC-2500 makes a beeping noise
• the picture displays in the viewfinder
• an update displays in the status bar
Press 4 to save the picture or 1 to delete the picture.
By default, the eyeWARE engine saves the pictures as JPEG files in
the My Documents folder.
Hold the FC-2500 parallel to the ground to avoid a skewed
perspective. The best way to hold the FC-2500 is in front of you,
about waist high, with your arms comfortably bent (Figure 1-11 on
page 1-10).
Figure 1-11. The Correct Way to Hold the FC-2500
NOTICE
If you are not successful in taking a picture, the
FC-2500 makes a buzzing noise.

Taking a Photo Using the FC-2500
P/N 7010-0910 1-11
Holding the FC-2500 out in front of you with one hand may cause
your image to blur. Using a stationary object for support helps to
reduce the blur (Figure 1-12).
Figure 1-12. Reduce Blur by Using a Stationary Support
Taking Good Photos with the
FC-2500
There are four basic elements to consider to take good photos.
• Composition
• Focus
• Exposure
• Color Temperature
WARNING
Remember! The Beep is your friend! Don’t move
until you hear the Beep!

Introduction
FC-2500 Quick Reference Guide
1-12
Composition
Composition is how the subject is presented in the frame of the
photograph. While basically artistic, composition is important
because it affects the focus and exposure of the picture taken.
Figure 1-13. Top Half and Part of Rear is Cut Off
To avoid the frustration of realizing you have cropped out the
important details of a picture (Figure 1-13), do the following:
• Be certain that your main subject is in the center of the
viewfinder. There should be about 10% of white space around the
subject.
• Use the ROI square as a guide.
• If your ROI square falls on a bright spot or a dark spot, move
slightly to find a neutral zone.
Figure 1-14 shows an improved image of Figure 1-10 above.
Figure 1-14. Full Image of Truck
CAUTION
Some cropping will occur on the sides of your final
image. Make sure that you capture your entire
subject, then take a step back.

Taking a Photo Using the FC-2500
P/N 7010-0910 1-13
Focus
Focus is the sharpness of the photograph. Images that are out of focus
lose detail and can appear blurry. Poor focus can be the result of one
of the following:
• not waiting for the green focus indicator
• incorrect manual adjustment of the focus
• motion blur
The right focus determines whether your picture comes out blurry or
crystal clear.
To avoid blurry pictures do the following:
• Freeze! Do your best to stay completely still until you hear the
BEEP!
• Use a tripod or brace your hands on a sturdy object like a table
when photographing moving objects.
The photograph shown in Figure 1-15 is out of focus. Details are not
visibly clear.
Figure 1-15. Example of an Out of Focus Picture
NOTICE
Things such as muscle fatigue, too much caffeine,
and impatience can cause you to lose focus in your
picture.
Out of Focus

Introduction
FC-2500 Quick Reference Guide
1-14
The photograph shown in Figure 1-16 shows motion blur. Chances
are that the FC-2500 was not held still while taking the photograph.
Figure 1-16. Example of Motion Blur
The photograph in Figure 1-17 is in focus. The edges are sharp. To
achieve an excellent photograph you must have a steady hand and
stand as still as possible.
Figure 1-17. Example of a Photograph That is in Focus
Motion Blur
In Focus
Table of contents
Other Topcon Controllers manuals

Topcon
Topcon KB-50 User manual

Topcon
Topcon ISOCAN User manual

Topcon
Topcon ASC-10 Installation manual

Topcon
Topcon Wachendorff OPUS A8 ECO User manual

Topcon
Topcon ISOBUS Artemis User manual
Topcon
Topcon System 350 User manual

Topcon
Topcon Norac UC5 User manual

Topcon
Topcon ISOBUS Athene - SL2 User manual

Topcon
Topcon Tesla User manual

Topcon
Topcon Liquid Systems CM-40 User manual