Bulb: 2 Watt LED
Battery: Lithium ion rechargeable battery 7.4 V 2200mAh
Recharge/Discharge Number of Times:
at least 300 (until rated capacity drops to 50%)
Operating Temperature: -20˚C ~ 45˚C (-4˚F ~ 113˚F)
Storage Temperature: -20˚C ~ 60˚C (-4˚F ~ 140˚F)
Charger:
Input: Voltage: AC 100-240V, 50/60Hz
Current: 260 mA
Output: Voltage: 12V DC
Current: 1A Max
Charging Time: 5~6 hours
Operating Temperature: 0˚C ~ 40˚C (32˚F ~ 104˚F)
Storage Temperature: -20˚C ~ 60˚C (-4˚F ~ 140˚F)
Topeak products are available only from professional bicycle shops.
Please contact your nearest Topeak authorized bicycle dealer for any questions.
For customers in the USA, call: 1-800-250-3068 Website: www.topeak.com
* The specifications and design are subject to change without notice.
SPECIFICATIONS WARRANTY
1-Year Warranty: All mechanical components (light body,
covers, mounts and fasteners) against
manufacturer defects only.
90-day Warranty: All batteries and chargers against
manufacturer defects only.
Warranty Claim Requirements
To obtain warranty service, you must have your original sales
receipt. Systems returned without a sales receipt will assume
that the warranty begins on the date of manufacture. All
warranties will be void if lighting system is damaged due to
rider crash, abuse, system alteration, modification, or used
in any way not intended as outlined in this operating manual.
Copyright © Topeak, Inc. 2007 M-TMS029/30-GB 01/08
BEAM ANGLE ADJUSTMENT
Switch on light in darkened conditions on a flat surface and adjust the beam angle vertically to desired position. It can
also be pivoted 15˚ laterally. To adjust beam, loosen the adjusting bolt. Position light unit to reach the desired beam angle
and re- tighten the bolt securely.
In addition to its high brightness, the beam
is widely diffused. In case you need to use
this light on public roads, be sure to adjust
the angle downward so as not to blind
oncoming traffic.
POWERPACK OPERATION
* Standard Operating Temperature: 15˚C~25˚C (59˚F~77˚F)
Run-time reference: 5.5 hours at 2W in fully-charged condition.
Before turn on the battery pack, make sure light unit plug and battery socket are connected securely. Press and hold
the power controller for 3seconds to turn on the light. Choose your desired power level by pressing the power controller.
Suggest modes and power levels as listed below:
1 W
2 W
Red
Blue
1
2
Power Level LEDMode In case light does not turn on, switch it off and wait 15 seconds.
Retry turning on the light.
If the ambient temperature is extremely high or low (even within
the operating temperature range), the operating time may be
shorter than the standard time due to characteristics of the battery.
DO NOT leave the lighting system in an area that is not well
ventilated for more than 30 minutes to prevent LED damage.
Note:
POWER AND SAFETY TIME RESERVE TANK INDICATORS
Power Controller
Press and hold for
3seconds
to turn on or off
HANDLEBAR
"Click"
Battery run times are approximate. Run times will vary due to usage
patterns, temperature, and battery condition.
Note:
WhiteLite HP 2W lighting system includes a Safety Time Reserve tank that
provides up to 30 minutes of additional burn time at 1 W. The light will shut
off automatically after RED power-indicator blinks for 1 minute. For continued
use, charge the battery or use a spare battery.
RED
Shut
off
1W
App. 600 min Blinking
3 times
1W
Blinking App. 1 min
RED
1W S.T. Reserve
App. 30 min
RED
Blinking
6 times
1W
Blinking App. 1 min
RED
Total Burn Time at
1W
10.5
hours
BLUE
Shut
off
2W
App. 300 min Blinking
3 times
2W
Blinking App. 1 min
BLUE
1W S.T. Reserve
App. 30 min
RED
Blinking
6 times
1W
Blinking App. 1 min
RED
Total Burn Time at
2W
5.5
hours
Off
Prepare to Ride
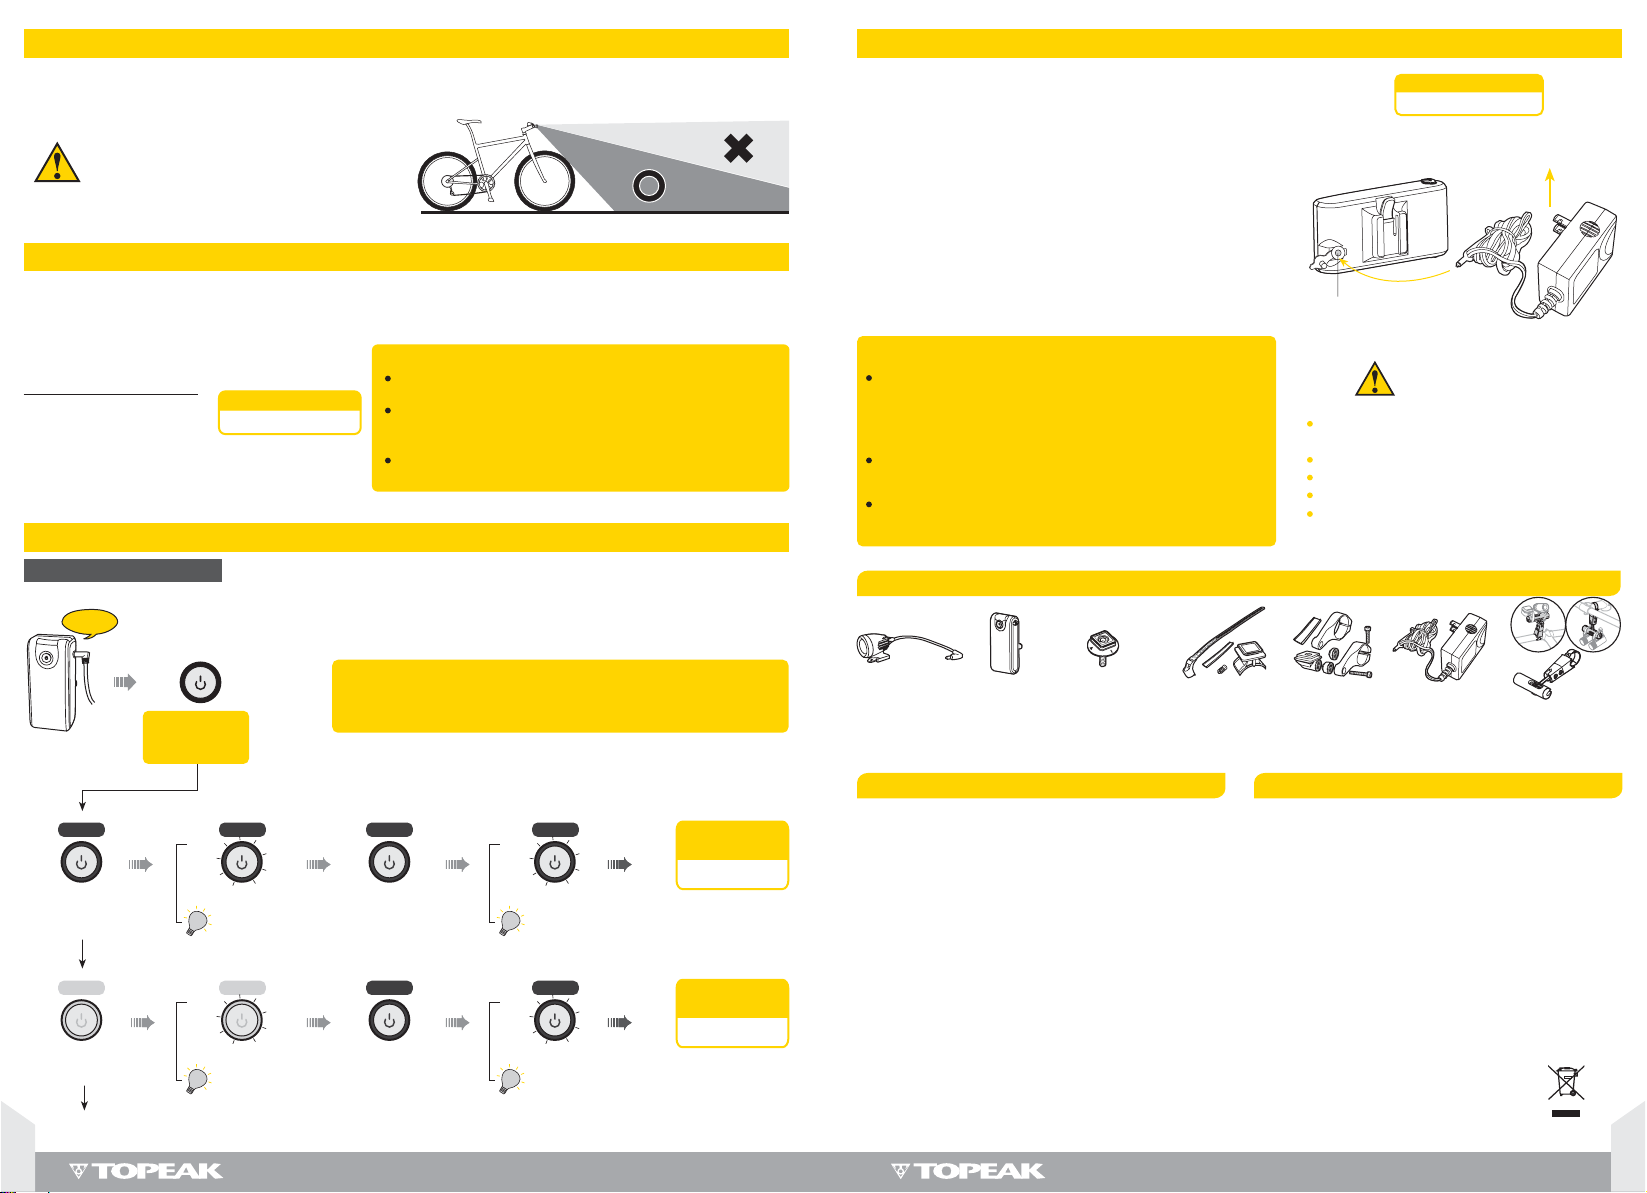
Be sure AC Adaptor input voltage is correct.
Connect AC Adaptor plug to PowerPack input socket before
connecting to home power outlet.
The PowerPack LED will be RED and blink during charging.
The PowerPack LED will turn BLUE and be steady on when
PowerPack is fully charged.
The Power Pack LED will not illuminate if the adaptor is faulty.
Disconnect the AC Adaptor from home power outlet when
the PowerPack is removed.
It is normal for the AC Adaptor and PowerPack to become warm
during charging. Please use caution when charging PowerPack.
After PowerPack is fully charged, unplug the AC Adaptor.
1.
2.
3.
4.
5.
6.
7.
8.
the Home
Power Outlet
Input Socket
BATTERY PACK CHARGING
WARNING
Note:
If the light fails to turn on after several tries, charge the
PowerPack to full capacity. The standard charging time is
5 to 6 hours. (The charging time and operating time may
vary depending on ambient temperature.)
Li-ion battery may take 3 to 5 charging cycles to attain
full capacity.
If the PowerPack does not give the proper run time after
being fully charged, replace with a new PowerPack.
G
B
5
G
B
4
Prepare to Ride
SPARE PARTS
Battery Holder unit (A)
Art no. TMS-SP21
H/bar Light
Bracket unit
Art no. TMS-SP23
Battery Pack
Art no. TMS-SP65
Light Unit
Art no. TMS-SP35 BarXtender
Art no. TBX01
AC Adaptor
Art no. TMS-SP77-
US/JP
TMS-SP77-
AS
TMS-SP77-
EU
TMS-SP77-
UK
WARNING
Battery Holder unit (B)
Art no. TC1008
Total Run Time at 2W
5.5
hours
Standard charging time
5 - 6
hours
Do not place battery charger in a damp or dusty
location or areas affected by oil fumes or steam.
Do not open battery charger case.
Battery charger is for indoor use only.
Avoid electrical shock.
Do not leave battery connected to charger over 48
hours continuously.