TOPP HS2 User manual

EX
ITEN
EX
8P5467
0.0
06.19
COD. / P/N / CODE
VER. / AUFG.
REV.
via Galvani, 59 - 36066 Sandrigo (VI) Italy
Serial No. from 0000001 to 0001000
10/05/2014 Cavalcante Matteo
Declares that the electric device called:
2014/35/EU - 2014/30/EU
complies with the requirements of the following
Directives:
www.topp.it
2011/65/EU
TOPP S.r.l.
Year of construction: 2014
HS2 HAND SENSOR
ISTRUZIONI PER L’UTILIZZO / INSTRUCTIONS FOR USE
INSTRUCCIONES PARA EL EMPLEO / GEBRAUCHSANWEISUNGEN
INSTRUCTION POUR L'EMPLOI
HAND SENSOR
- n.1 Conf. minuteria composta da:
A) Led rosso - verde
B) Vite TSP 2.9x5
- n.1 Manuale istruzioni
E) Targhetta dati tecnici
n. 4 Viti AF TSP d3x25
- n.1 Cavo di connessione L=3mt
n.1 connector
F) Schema elettrico
D) Connettore
LA CONFEZIONE CONTIENE:
C) Regolatore raggio d’azione
- n.1 Pulsante HS2
n. 4 Tasselli 4x20
- 1 Instruction manual
4 anchor bolts 4x20
C) Radius of action regulator
B) TSP 2.9x5 screw
D) Connector
F) Wiring diagram
E) Technical data plate
THE PACKAGE CONTAINS:
- 1 Connection wire L=3mt
A) Red-green LED
- 1 HS2 hand sensor
- 1 Packet of hardware consisting of:
4 screws type AF TSP d3x2
1 connector
- 1 Sensor HS2
- 1 cable de conexión L=3mt
A) Led rojo-verde
4 Tornillos AF TSP d3x2
D) Conector
4 Tacos 4x20
C) Regulador rayo de acción
EL ENVASE CONTIENE:
- 1 Manual de instrucciones
- 1 Paquete de componentes
formado por:
1 conector
B) Tornillo TSP 2.9x5
E) Chapa de características
técnicas
F) Esquema eléctrico
- 1 Stk. Packung Kleinteile,
bestehend aus:
- 1 Stk. Verbindungskabel L=3 m
- 1 Stk. Sensor HS2
4 Stk. Dübel 4x20
4 Stk. Schrauben AF TSP d3x2
- 1 Stk. Anwenderhandbuch
F) Stromlaufplan
DIE PACKUNG ENTHÄLT
FOLGENDES:
A) Led rot-grün
B) Schraube TSP 2.9x5
C) Regler des Aktionsradius
D) Steckverbinder
E) Schild mit den technischen
Daten
A) Diode (led) rouge-vert
C) Connecteur
F) Schéma électrique
B) Vis TSP 2.9x5
D) Régulateur rayon d'action
E) Plaquette données techniques
- 1 manuel d'instructions
L'EMBALLAGE CONTIENT :
4 vis AF TSP d3x2
- 1 capteur HS2
4 tasseaux 4x20
- 1 câble de connexion L = 3 m
- 1 paquet accessoires composé
de:
1 conector
Alimentazione / Power supply / Alimentación / Stromversorgung / Alimentation 12/36V
DATI TECNICI / TECHNICAL DATA / DATOS TECNICOS / TECHNISCHE DATEN / DONNEES TECHNIQUES
Raggio d’azione / Operating range / Rayo de acción / Reichweite / Rayon d'action
Temperatura di funzionamento / Operating temperature / Temperatura de funcionamiento / Betriebstemperatur / Température de fonctionnement
1 ÷ 15 cm
-20°C ÷ 45°C
113 x 63 x 20 mm
Dimensioni / Dimensions / Dimensiones / Abmessungen / Dimensions
ITALIANOENGLISH
HS2
FUNZIONAMENTO
AVVERTENZE GENERALI
DICHIARAZIONE CE DI CONFORMITÀ
Il sensore HS2 è stato progettato e realizzato
esclusivamente per comandare l’apertura delle
automazioni “Originali TOPP Srl” in abbinato
all’elettroblocco EB1. È assolutamente vietato l’uso del
sensore per usi impropri diversi dalla destinazione
d’uso suddetta.
Tenere attivo il pulsante a sfioramento HS2 per almeno
8 secondi. Per ripristinare l'automazione, ripetere
l'operazione.
La porta si chiude e riprende le funzionalità impostate.
" Il led VERDE (Rif.A) segnala l’attivazione del sensore
e l’ apertura automatica della porta.
"Il led ROSSO (Rif.A ) segnala che la porta è chiusa con
l’elettroblocco inserito. Per sbloccarla basta
avvicinare la mano al sensore. ( In caso di utilizzo di
doppio sensore HS2 la porta può essere sbloccata
solo dal sensore di comando dell’elettroblocco (Fig. 4
vedi anche manuale per l’installazione e l’uso V1 e
V1E fig. 26).
"FUNZIONE BLOCCO PORTA APERTA/PULIZIA:
" Il sensore HS2 utilizza comandi ad infrarosso e rileva
l’avvicinamento della mano senza contatto, da una
distanza regolabile da 1 a 15cm (Rif.C).
"Il led ROSSO segnala la funzione ‘blocco porta
aperta/pulizia.
www.topp.it
è conforme alle condizioni delle seguenti direttive:
TOPP S.r.l.
via Galvani, 59 - 36066 Sandrigo (VI) Italy
Dichiara che l’apparecchio elettrico denominato:
HS2 HAND SENSOR
N° di serie dal 0000001 al 0001000
Anno di costruzione: 2014
2014/35/UE - 2014/30/UE
2011/65/UE
10/05/2014 Cavalcante Matteo
DESTINAZIONE D’USO
• Le presenti istruzioni sono parte integrante del sensore e devono essere conservate per futuri riferimenti;
• Topp Srl declina ogni responsabilità per danni causati dall’inosservanza delle norme e avvertenze qui
riportate;
• È assolutamente vietato l’uso del sensore in ambienti con atmosfera potenzialmente esplosiva;
!• Prima di utilizzare il sensore è obbligatorio leggere e comprendere in tutte le parti le presenti istruzioni;
!• Vietato aprire e/o manomettere il sensore.
FISSAGGIO A MURO
2)Far passare il connettore nell’apposita fessura e
fissare la base al muro utilizzando i tasselli e le n.4 viti
fornite;
3)Collegare il cavo di alimentazione al connettore
(Rif.D) seguendo le istruzioni riportate nello schema
elettrico (Fig.3 );
1)Togliere il coperchio anteriore del sensore svitando
con apposito cacciavite a croce la vite posta sotto il
sensore (Rif. B);
4)Applicare la cover anteriore procedendo come
evidenziato in Fig.2.
OPERATION
GENERAL WARNINGS
DECLARATION OF CE CONFORMITY
MAINTENANCE
The sensor was designed and manufactured
exclusively to control the automatic door systems of
“TOPP Srl” when use EB1 electrolock. It is strictly
forbidden to use the remote control for improper uses
other then the above mentioned destination of use.
The door will close and normal operation will resume.
The HS2 sensor uses infrared commands and detects
the approach of the hand without contact, from a
distance which is adjustable between 1 and 15 cm
(Ref. C).
The GREEN led (Ref.A) signals activation of the sensor
and automatic door opening.
When the door is closed with the electric lock engaged,
the led is RED (Ref. A ). To unlock it, simply move your
hand up to the sensor. If the system has the HS2 dual
sensor, the door can be unlocked only by the electric
lock sensor (Fig. 4; see also installation and user
manual V1 and V1E fig. 26).
The led RED to indicate that the 'door locked
open/cleaning' function is active.
DOOR LOCKED OPEN/CLEANING FUNCTION:
Activate the HS2 touch-button for at least 8 seconds. To
restore automatic operation, repeat the procedure.
The HS2 sensor requires no maintenance. In case of
malfunction, contact the technical service department.
DESTINATION OF USE
• These instructions are integral part of the sensor and must be preserved for future reference;
• Topp Srl declines all liabilities for damages caused by the inobservance of the regulations and warnings
herein contained;
• It is strictly forbidden to use the remote control in environments with potentially explosive atmosphere;
• It is forbidden to open and/or to tamper the remote control.
• Before using the sensor, it is compulsory to read and understand these instructions in all their parts;
FASTENING TO THE WALL
3) Connect the power cord to the connector (Ref.D) as
shown in the wiring diagram instructions (Fig.3);
1) Remove the cover from the front of the sensor by
unscrewing it with the Phillips screwdriver supplied
and located under the sensor (Ref. B);
2) Fit the connector in its slot and fasten the base to the
wall using the anchor bolts and the 4 screws supplied;
4) Replace the front cover as shown in Fig. 2.
IT EN FR
ES DE
MANUTENZIONE
Il sensore HS2 non necessita di manutenzione, nel
caso si presentassero anomalie di funzionamento,
contattare il servizio di assistenza tecnica.
DEMOLIZIONE
La demolizione dell’unità di deve avvenire nel rispetto
della legislazione vigente in materia di tutela
ambientale. E’ quindi obbligatorio procedere alla
differenziazione delle parti che costituiscono l’unità
secondo le diverse tipologie di materiale.
MAINTENANCE
DEMOLITION
The demolition of the feeding unit must occur in
compliance with the laws in force on enviroment
protection. Differentiate the parts making up the feeding
unit according to their different material type.
1
2
F
VERDE/GREEN/VERDE/GRÜN/VERT (+24v)
GIALLO/YELLOW/AMARILLO/G GND)ELB/JAUNE (
MARRONE/BROWN/MARRON/BRAUN/MARRON
Fig.2 Fig.3
BIANCO/WHITE/BLANCO/WEISS/BLANC
(CONTACT NO)
E
1
2
Fig.1
A
B
D
C
Fig.2
A
B

Le capteur a été projetée et réalisée exclusivement
pour commander l'automatisation “Originaux TOPP Srl”
avec électroblocage EB1.
Il est absolument interdit l'emploi de le capteur pour
utilisations non autorisées différentes de la susdite
destination pour l'emploi.
DE ES
FR
FRANÇAIS ESPAÑOLDEUTCH
FUNCIONAMIENTO
ADVERTENCIAS GENERALES
DECLARACION CE DE CONFORMIDAD
El sensor ha sido proyectado y realizado exclusivamente
para mandar les automatización “Originales TOPP Srl”
con el bloqueo eléctrico EB1. Se prohíbe absolutamente
el uso del sensor para usos impropios diferentes del
arriba mencionado destino de uso.
Mantenga activo el pulsador táctil HS2 por lo menos 8
segundos. Para restablecer el automatismo, repita la
operación.
El sensor HS2 utiliza mandos infrarrojos y detecta el
acercamiento de la mano sin contacto, desde una
distancia regulable de 1 a 15 cm (Ref.C).
El led ROJO (Ref.A ) señala que la puerta está cerrada
con el bloqueo eléctrico puesto. Para desbloquearla,
acerque la mano al sensor. En caso de uso de doble
sensor HS2, la puerta puede ser desbloqueada sólo
por el sensor de mando del bloqueo eléctrico (Fig. 4
véase también el manual de instalación y uso V1 y
V1E fig. 26).
F U N C I Ó N D E B L O Q U E O D E P U E R T A
ABIERTA/LIMPIEZA:
El led VERDE (Ref.A) señala la activación del sensor y
la apertura automática de la puerta.
El led ROJO señala la función de 'bloqueo de puerta
abierta/limpieza'.
La puerta se cierra y retoma las funciones
configuradas.
El sensor HS2 no necesita mantenimiento, si se
presentaran anomalías de funcionamiento será
necesario ponerse en contacto con el servicio de
asistencia técnica.
www.topp.it
Declara que el aparato eléctrico llamado:
HS2 HAND SENSOR
N° de serie desde el 0000001 al 0001000
Año de construcción: 2014
2014/35/UE - 2014/30/UE
2011/65/UE
es conforme a las condiciones de las siguientes directivas:
TOPP S.r.l.
10/05/2014 Cavalcante Matteo
via Galvani, 59 - 36066 Sandrigo (VI) Italy
DESTINACION DE USO
• Estas instrucciones son parte integrante del sensor y se deben guardar para futuras referencias;
• El Fabricante declina toda responsabilidad para daños causados por la inobservancia de las normas y
advertencias aquí indicadas;
• Antes de utilizar el sensor es obligatorio leer y comprender en todas sus partes estas instrucciones;
• Se prohíbe absolutamente el uso del sensor en ambientes con atmósfera potencialmente explosiva;
• Se prohíbe abrir y/o manipular el sensor.
FIJACIÓN A LA PARED
4)Aplicar la cobertura anterior siguiendo los pasos que
se muestran en la Fig.2.
2)Hacer pasar el conector en la correspondiente ranura
y fijar la base a la pared utilizando los tacos y los 4
tornillos suministrados;
1)Sacar la tapadera anterior del sensor desatornillando
con el correspondiente destornillador de punta de
estrella el tornillo colocado debajo del sensor (Ref.
B);
3)Conectar el cable de alimentación al conector (Ref.D)
siguiendo las instrucciones que aparecen en el
esquema eléctrico (Fig.3);
BETRIEB
ALLGEMEINE HINWEISE
CE-KONFORMITÄTSERKLÄRUNG
Der Sensor wurde ausschließlich dazu entworfen und
hergestellt, um die “Originalstellantriebe TOPP Srl”
Automatisierung mit Elektroschloss EB1 zu steuern. Es
ist streng verboten, die Sensor für unsachgemäße
Zwecke anders als die o.e. Gebrauchsbestimmung zu
verwenden.
Die Led (Ref. A) meldet die Aktivierung des Sensors
und die automatische Öffnung der Tür.
Den Touch-Sensor HS2 mindestens 8 Sekunden
betätigen. Die Tür öffnet sich und die LED beginnt rot
zu blinken.
Die ROTE LED die Funktion „Sperrung der offenen Tür /
Reinigung“ an.
Die Tür schließt sich und nimmt die eingestellten
Funktionalitäten wieder auf.
Der Sensor HS2 gebraucht Infrarot-Befehle und erfasst
die Annäherung der Hand ohne Kontakt aus einer
einstellbaren Entfernung von 1 bis 15 cm (Ref.C).
Die ROTE LED (Ref.A) weist darauf hin, dass die Tür
mit eingeschaltetem Elektroschloss geschlossen ist.
Um sie zu entsperren, muss die Hand in die Nähe des
Sensors geführt werden. Wenn der Doppelsensor
HS2 verwendet wird, kann die Tür nur vom
Steuersensor des Elektroschlosses entriegelt werden
(A b b . 4 s i e h e a u c h In s t a l l a t i o n s - u n d
Gebrauchsanleitung V1 und V1E Abb. 26).
F U N K T I O N S P E R R U N G D E R O F F E N E N
TÜR/REINIGUNG:
Der Sensor HS2 benötigt keine Wartung und wenn
Störungen seiner Funktionsweise auftreten sollten, bitte
mit dem technischen Kundendienst in Verbindung
setzen. erklärt, dass die elektrische Vorrichtung:
10/05/2014 Cavalcante Matteo
mit den Anforderungen der folgenden Richtlinien
Seriennummer von 0000001 bis 0001000
2014/35/EU - 2014/30/EU
Baujahr: 2014
übereinstimmt:
via Galvani, 59 - 36066 Sandrigo (VI) Italy
2011/65/EU
www.topp.it
TOPP S.r.l.
HS2 HAND SENSOR
GEBRAUCHSBESTIMMUNG
• Die gegenständlichen Anweisungen sind Bestandteil des Sensor und sind zum zukünftigen Nachschlagen
aufzubewahren;
• Der Hersteller lehnt jede Haftung für Schäden ab, die von der Missachtung der hierein angegebenen
Vorschriften und Hinweise verursacht sind;
• Es ist verboten, den Sensor zu öffnen oder an ihr missbräuchlich einzugreifen.
• Es ist streng verboten, dem Sensor in Umgebungen mit potentiell explosiver Atmosphäre zu verwenden;
• Vor dem Gebrauch des Sensor muss man zwangsmäßig die gegenständlichen Anweisungen und die
Anweisungen zum Gebrauch der Hauptsteuereinheit vollkommen lesen und verstehen;
WANDBEFESTIGUNG
FONCTIONNEMENT
AVERTISSEMENTS GENERAUX
DECLARATION CE DE CONFORMITE’
EINTRETIEN
La diode (Réf. A) indique l'activation du capteur et
l'ouverture automatique de la porte.
Le témoin ROUGE (Réf. A) signale que la porte est
fermée et l'électroblocage actif. Pour la débloquer,
approcher la main du capteur. En cas d'utilisation d'un
double capteur HS2, la porte peut être débloquée
uniquement à l'aide du capteur de commande de
l'électroblocage (Fig. 4, v. aussi manuel d'installation
et d'utilisation V1 et V1E fig. 26).
Le capteur HS2 utilise des commandes à infrarouges et
détecte l'approche de la main sans contact, à partir
d'une distance réglable de 1 à 15 cm (Réf. C).
Un témoin ROUGE signale la fonction "bloc porte
ouvert/nettoyage".
F O N C T I O N D E B L O C A G E D E P O R T E
OUVERTE/NETTOYAGE :
maintenir le bouton tactile HS2 ou tout autre bouton
pendant au moins 8 secondes. Pour relancer
l'automatisme, répéter l'opération.
La porte se ferme et le programme défini est réactivé.
Le capteur HS2 n'exige aucun entretien, dans le cas où
se présenteraient des anomalies de fonctionnement,
contacter le service technique. www.topp.it
N° de série du 0000001 au 0001000
TOPP S.r.l.
via Galvani, 59 - 36066 Sandrigo (VI) Italy
Déclare que l'appareil électrique qui s'appelle:
HS2 HAND SENSOR
est conforme aux conditions des suivantes directives:
2011/65/UE
2014/35/UE - 2014/30/UE
Année de construction: 2014
10/05/2014 Cavalcante Matteo
DESTINATION D’EMPLOI
• Le Producteur décline toute responsabilité pour dommages causés par la non observance des normes et
avertissements indiqués ici;
• Ces instructions sont une partie intégrante du capteur. Il faut les conserver pour toute référence future; • Avant d'utiliser du capteur il est obligatoire de lire et comprendre dans toutes ses parties ces instructions ;
•Il est absolument interdit d'utiliser du capteur dans des environnements avec une atmosphère potentiellement
explosive;
• Il est interdit d'ouvrir et/ou manipuler capteur.
FIXATION MURALE
3)Brancher le câble d'alimentation au connecteur
(Réf.D) en suivant les instructions figurant dans le
schéma de câblage électrique (Fig. 3) ;
1)Enlever le couvercle antérieur du capteur, en
dévissant, avec un tournevis à tête cruciforme, la vis
qui est placée sous le capteur (Réf. B) ;
4)Fixer le couvercle avant, en procédant comme
indiqué dans la Fig.2.
2)Faire passer le connecteur dans la fente prévue à cet
effet et attacher la base à la paroi à l'aide des
tasseaux et des 4 vis fournies ;
4) Den vorderen Deckel anbringen, dabei vorgehen,
wie in Abb. 2 dargestellt.
3) Das Stromkabel an den Steckverbinder(Ref. D)
anschließen, dazu die im Stromlaufplan (Abb. 3)
enthaltenen Anweisungen beachten;
2) Den Steckverbinder durch den entsprechenden
Spalt schieben und die Basis an der Wand
befestigen, dazu die mitgelieferten Dübel und die 4
Stk. Schrauben verwenden;
1) Den vorderen Deckel des Sensors abnehmen, dazu
mit dem entsprechenden Kreuzschraubenzieher die
unter dem Sensor (Ref. B) angebrachte Schraube
lösen;
EX
EX
MANTENIMIENTO
El desguace de el sensor tiene que llevarse a cabo
respetando la legislación vigente en materia de tutela
del medio ambiente. Por lo tanto, es obligatorio efectuar
la idferenciación de las partes que forman la
automatización según las diversas tipologías de
material.
DESGUACE
WARTUNG
ABBRUCH
Der Abbau dem Sensor muss unter Einhaltung der
geltenden Gesetzgebung in Sachen Umweltschutz
erfolgen. Die Teile, aus denem dem Sensor besteht,
müssen deshalb nach ihren Materialtypologien
unterteilt werden.
EX
DÉMOLITION
La mise au rebut du capteur doit se faire en respectant
la législation en vigueur en matière de protection de
l’environnement. Il est donc obligatoire de procèder à
un tri des èlèments qui constituent le système
d’automatisation selon les diffèrents de matériau.
ISTRUZIONI PER L’UTILIZZO / INSTRUCTIONS FOR USE
INSTRUCCIONES PARA EL EMPLEO / GEBRAUCHSANWEISUNGEN
INSTRUCTION POUR L'EMPLOI
HAND SENSOR HS2

HS2 di blocco e sblocco porta
HS2 for lock and unlock the door
HS2 pour verrouiller et déverrouiller la porte
HS2 para bloquear y desbloquear la puerta
HS2 zum Sperren und Entsperren der Tür
giallo (GND)
bianco (CONTACT NO)
verde (+24V)
Hs2 di sola apertura porta
HS2 for only opening door
HS2 pour seulement ouverture de porte
HS2 para la apertura de la puerta sólo
HS2 nur öffnen Tür
giallo (GND)
bianco (CONTACT NO)
verde (+24V)
verde (+24V)
bianco (CONTACT NO)
giallo (GND)
verde/green/verde/grün/vert
giallo/yellow/amarillo/gelb/jaune
bianco/white/blanco/weiss/blanc
marrone/brown/marrón/braun/brun
verde/green/verde/grün/vert
giallo/yellow/amarillo/gelb/jaune
bianco/white/blanco/weiss/blanc
marrone/brown/marrón/braun/brun
giallo/yellow/amarillo/gelb/jaune
Marrone/brown/marrón/braun/brun
verde/green/verde/grün/vert
bianco/white/blanco/weiss/blanc
verde/green/verde/grün/vert
giallo/yellow/amarillo/gelb/jaune
bianco/white/blanco/weiss/blanc
marrone/brown/marrón/braun/brun
Fig.4
Link zu Karte V1
Connecting to V1/V1E board
Lien vers la carte V1/V1E
Collegamento a scheda V1/V1E
Enlace a la tarjeta V1/V1E
Fig.5
Cut and splice the wires brown sensor HS2
Couper et raccorder les fils capteur brun HS2
Cortar y empalmar los cables del sensor de color marrón HS2
Geschnitten und Splice die Drähte braun Sensor HS2
Tagliare e unire i fili marrone del sensore HS2
Presione la capucha roja hasta la fijación completa
Appuyez sur le capot rouge jusqu'à fixation complète
Drücken Sie die rote Haube bis zur vollständigen Fixierung
Premere il cappuccio rosso fino a completo fissaggio
Press the red hood until complete fixation
Braun cables
Brown cables
Brun kabel
Cavi marrone
Marrón câbles
ISTRUZIONI PER L’UTILIZZO / INSTRUCTIONS FOR USE
INSTRUCCIONES PARA EL EMPLEO / GEBRAUCHSANWEISUNGEN
INSTRUCTION POUR L'EMPLOI
HAND SENSOR HS2
HS2 di blocco e sblocco porta
HS2 for lock and unlock the door
HS2 pour verrouiller et déverrouiller la porte
HS2 para bloquear y desbloquear la puerta
HS2 zum Sperren und Entsperren der Tür
Hs2 di sola apertura porta
HS2 for only opening door
HS2 pour seulement ouverture de porte
HS2 para la apertura de la puerta sólo
HS2 nur öffnen Tür
Hs2 di sola apertura porta
HS2 for only opening door
HS2 pour seulement ouverture de porte
HS2 para la apertura de la puerta sólo
HS2 nur öffnen Tür
HS2 di blocco e sblocco porta
HS2 for lock and unlock the door
HS2 pour verrouiller et déverrouiller la porte
HS2 para bloquear y desbloquear la puerta
HS2 zum Sperren und Entsperren der Tür
marrone
Fig. 5
1 2 3
Fig. 5
1 2 3
1 2 3

Società a Socio Unico soggetta a direzione e coordinamento di 2 Plus 3 Holding S.p.a.
TOPP S.r.l.
Via Galvani, 59 - 36066 Sandrigo (VI) - Italia
Tel. +39 0444 656700 - Fax +39 0444 656701
[email protected] - www.topp.it
Other TOPP Door Opening System manuals
Popular Door Opening System manuals by other brands
Dormakaba
Dormakaba ED50 installation instructions
Design Hardware
Design Hardware F2000V Series installation instructions
GEZE
GEZE Slimdrive EMD Invers Installation and service instructions

Chamberlain
Chamberlain 878MAX manual
CAMDEN
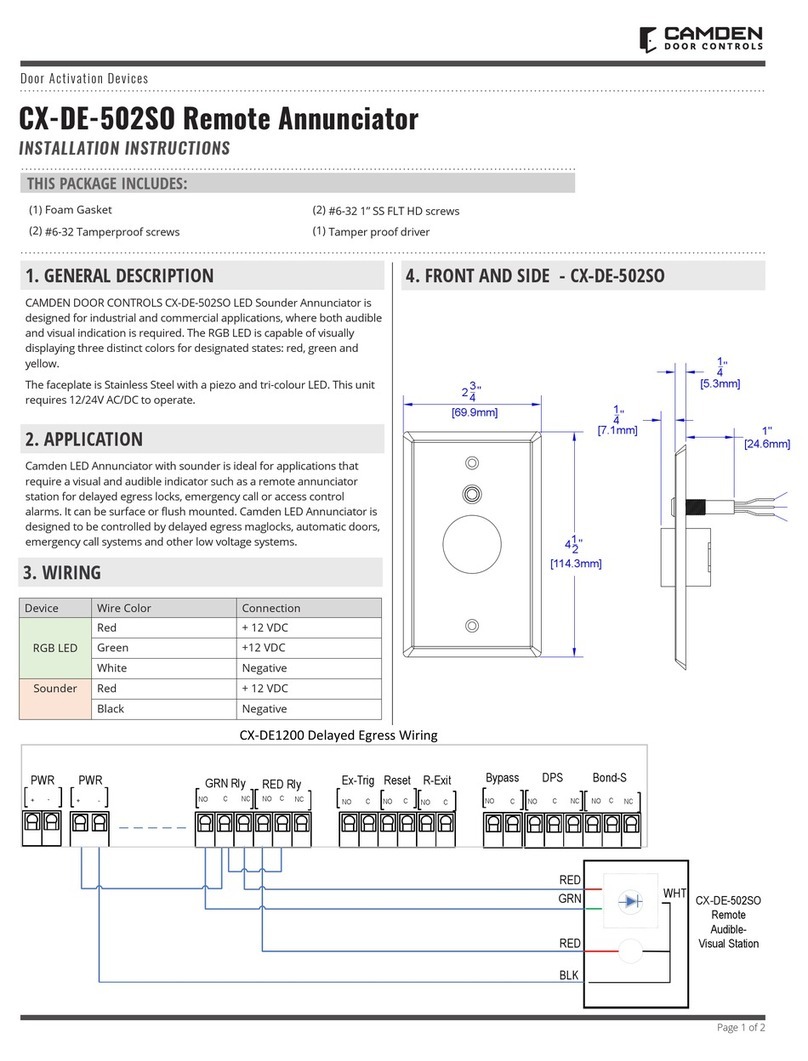
CAMDEN CX-DE-502SO installation instructions
DITEC
DITEC DAS200T Original instructions
