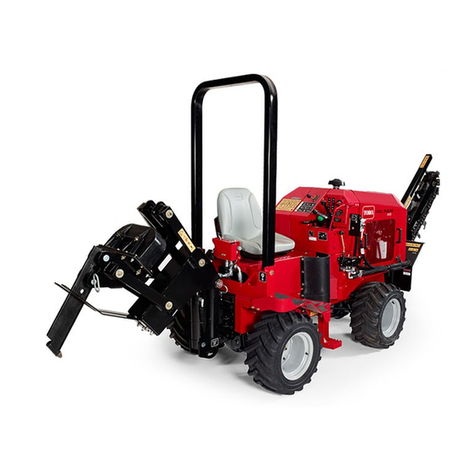
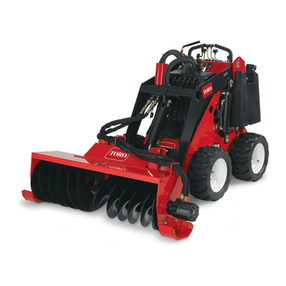
Toro Pro Sneak 365 User manual

FormNo.3389-747RevA
ProSneak365VibratoryPlow
ModelNo.25403—SerialNo.314000001andUp
ModelNo.25403A—SerialNo.314000001andUp
ModelNo.25403C—SerialNo.314000001andUp
Registeratwww.Toro.com.
OriginalInstructions(EN)*3389-747*A

WARNING
CALIFORNIA
Proposition65Warning
Thisproductcontainsachemicalorchemicals
knowntotheStateofCaliforniatocausecancer,
birthdefects,orreproductiveharm.
Dieselengineexhaustandsomeofits
constituentsareknowntotheStateof
Californiatocausecancer,birthdefects,
andotherreproductiveharm.
Important:Thisengineisnotequippedwithaspark
arrestermufer.ItisaviolationofCaliforniaPublic
ResourceCodeSection4442touseoroperatetheengine
onanyforest-covered,brush-covered,orgrass-covered
land.Otherstatesorfederalareasmayhavesimilarlaws.
Theenclosed
Engine Owner's Man ual
issuppliedfor
informationregardingtheUSEnvironmentalProtection
Agency(EPA)andtheCaliforniaEmissionControl
Regulationofemissionsystems,maintenance,and
warranty.Replacementsmaybeorderedthroughthe
enginemanufacturer.
Introduction
Readthisinformationcarefullytolearnhowtooperateand
maintainyourproductproperlyandtoavoidinjuryand
productdamage.Youareresponsibleforoperatingthe
productproperlyandsafely.
YoumaycontactTorodirectlyatwww.Toro.comforproduct
andaccessoryinformation,helpndingadealer,ortoregister
yourproduct.
Wheneveryouneedservice,genuineToroparts,oradditional
information,contactanAuthorizedServiceDealerorToro
CustomerServiceandhavethemodelandserialnumbersof
yourproductready.Figure1identiesthelocationofthe
modelandserialnumbersontheproduct.Writethenumbers
inthespaceprovided.
Figure1
1.Modelandserialnumberlocation
ModelNo.
SerialNo.
Thismanualidentiespotentialhazardsandhassafety
messagesidentiedbythesafetyalertsymbol(Figure2),
whichsignalsahazardthatmaycauseseriousinjuryordeath
ifyoudonotfollowtherecommendedprecautions.
Figure2
1.Safetyalertsymbol
Thismanualuses2wordstohighlightinformation.
Importantcallsattentiontospecialmechanicalinformation
andNoteemphasizesgeneralinformationworthyofspecial
attention.
©2014—TheToro®Company
8111LyndaleAvenueSouth
Bloomington,MN554202
Contactusatwww.Toro.com.
PrintedintheUSA
AllRightsReserved

Contents
Safety...........................................................................3
SafeOperatingPractices...........................................3
SafetyandInstructionalDecals.................................6
ProductOverview.........................................................12
Controls...............................................................12
Specications........................................................14
Attachments/Accessories........................................14
Operation....................................................................15
AddingFuel...........................................................15
FillingtheFuelTank...............................................15
StartingandStoppingtheEngine..............................16
OperatingtheVibratoryPlow..................................16
RotatingtheWheels................................................18
CheckingtheInterlockSystem.................................18
TransportingtheMachine........................................19
Maintenance.................................................................20
RecommendedMaintenanceSchedule(s)......................20
PremaintenanceProcedures........................................21
OpeningtheHood.................................................21
Lubrication...............................................................21
GreasingtheMachine.............................................21
EngineMaintenance..................................................22
ServicingtheAirCleaner.........................................22
ServicingtheEngineOil..........................................23
ServicingtheDieselParticulateFilter(DPF)...............24
FuelSystemMaintenance...........................................25
CheckingtheFuelLinesandConnections..................25
DrainingtheFuelFilter/WaterSeparator...................25
ReplacingtheFuelFilterCanister..............................26
DrainingtheFuelTank...........................................26
ElectricalSystemMaintenance....................................26
ServicingtheBattery...............................................26
DriveSystemMaintenance.........................................27
ServicingtheTires..................................................27
ServicingtheTransmissionandAxles........................28
CoolingSystemMaintenance......................................29
ServicingtheCoolingSystem...................................29
BeltMaintenance......................................................30
CheckingtheAlternatorDriveBeltTension...............30
ReplacingtheDriveBelt..........................................30
ControlsSystemMaintenance.....................................31
CheckingtheParkingBrake.....................................31
AdjustingtheTractionDriveforNeutral....................31
CleaningtheDirectionalControlsLinkage
Assembly...........................................................32
HydraulicSystemMaintenance....................................32
ServicingtheHydraulicSystem.................................32
ROPSMaintenance....................................................36
CheckingandServicingtheROPS.............................36
Cleaning...................................................................37
RemovingDebrisfromtheMachine..........................37
CleaningtheChassis...............................................37
Storage........................................................................37
Troubleshooting...........................................................38
Safety
Improperuseormaintenancebytheoperatororowner
canresultininjury.Toreducethepotentialforinjury,
complywiththesesafetyinstructionsandalways
payattentiontothesafetyalertsymbol,which
means:
Caution
,
W ar ning
,or
Danger
—personalsafety
instruction.Failuretocomplywiththeinstructionmay
resultinpersonalinjuryordeath.
SafeOperatingPractices
Thisproductiscapableofamputatinghandsandfeet.Always
followallsafetyinstructionstoavoidseriousinjuryordeath.
WARNING
Engineexhaustcontainscarbonmonoxide,an
odorless,deadlypoisonthatcankillyou.
Donotruntheengineindoorsorinanenclosed
area.
Training
•ReadtheOperator'sManualandothertrainingmaterial.If
theoperator(s)ormechanic(s)cannotreadEnglish,itis
theowner'sresponsibilitytoexplainthismaterialtothem.
•Becomefamiliarwiththesafeoperationoftheequipment,
operatorcontrols,andsafetysigns.
•Alloperatorsandmechanicsshouldbetrained.The
ownerisresponsiblefortrainingtheusers.
•Neverletchildrenoruntrainedpeopleoperateorservice
theequipment.Localregulationsmayrestricttheageof
theoperator.
•Theowner/usercanpreventandisresponsiblefor
accidentsorinjuriesoccurringtopeople,ordamageto
property.
Preparation
•Evaluatetheterraintodeterminewhataccessoriesand
attachmentsareneededtoproperlyandsafelyperform
thejob.Onlyuseaccessoriesandattachmentsapproved
bythemanufacturer.
•Wearappropriateclothingincludinghardhat,safety
glasses,longpants,safetyshoes,reectorvests,
respirators,andhearingprotection.Longhair,loose
clothingorjewelrymaygettangledinmovingparts.
•Inspecttheareawheretheequipmentistobeusedand
removeallobjectssuchasrocks,toys,andwirewhichcan
bethrownbythemachine.
•Useextracarewhenhandlingfuels.Theyareammable
andvaporsareexplosive.
–Useonlyanapprovedcontainer
–Neverremovethefuelcaporaddfuelwiththeengine
running.Allowtheenginetocoolbeforerefueling.
Donotsmoke.
3
–Neverrefuelordrainthemachineindoors.
–Knowthehandsignalsusedonyourjob.Followthe
instructionsoftheagmen,signals,etc.
•Checkthattheoperator'spresencecontrols,safety
switches,andshieldsareattachedandfunctioning
properly.Donotoperateunlesstheyarefunctioning
properly.
Operation
•Beforedigging,havetheareamarkedfor
undergroundutilities,anddonotdiginmarked
areas.
•Neverrunanengineinanenclosedarea.
•Beforestartingeachday,checkthemachineforoiloruid
leaks.Replacealldamaged,loose,wornormissingparts
andfollowthelubricationandmaintenanceprocedures
showninthismanual.
•Onlyoperateingoodlight,keepingawayfromholesand
hiddenhazards.
•Besurealldrivesareinneutralandparkingbrakeis
engagedbeforestartingtheengine.Onlystarttheengine
fromtheoperator'sposition.
•Slowdownanduseextracareonhillsides.Ground
conditionsmayadverselyaffectthestabilityofthe
machine.Usecautionwhenworkingonnewlydisturbed
earth.
•Allowadequatespacewhenturningthisunit.
•Slowdownandusecautionwhenmakingturnsandwhen
changingdirectionsonslopes.
•Neveroperatewithouttheguardssecurelyinplace.Be
sureallinterlocksareattached,adjustedproperly,and
functioningproperty.
•Stoponlevelground,lowerimplements,disengagethe
auxiliaryhydraulics,engageparkingbrake,andshutoff
theenginebeforeleavingtheoperator'spositionforany
reason.
•Keephandsandfeetawayfrommovingattachments.
•Lookbehindanddownbeforebackinguptobesureof
aclearpath.
•Nevercarrypassengersandkeeppetsandbystanders
away.
•Slowdownandusecautionwhenmakingturnsand
crossingroadsandsidewalks.
•Donotoperatethemachineundertheinuenceof
alcoholordrugs.
•Usecarewhenloadingorunloadingthemachineintoa
trailerortruck.
•Usecarewhenapproachingblindcorners,shrubs,trees,
orotherobjectsthatmayobscurevision.
•Readallattachmentmanuals.
•Ensurethattheareaisclearofotherpeoplebefore
operatingthemachine.Stopthemachineifanyoneenters
thearea.
•Neverleavearunningmachineunattended.Alwaysstop
theengine,settheparkingbrake,andremovethekey
beforeleaving.
•Neverjerkthecontrols;useasteadymotion.
•Watchfortrafcwhenoperatingnearorcrossing
roadways.
•Donottouchpartswhichmaybehotfromoperation.
Allowthemtocoolbeforeattemptingtomaintain,adjust,
orservice.
•Checkforoverheadclearances(i.e.branches,doorways,
electricalwires)beforedrivingunderanyobjectsanddo
notcontactthem.
•Ensurethatyouoperatethemachineinareaswhere
therearenoobstaclesincloseproximitytotheoperator.
Failuretomaintainadequatedistancefromtrees,walls,
andotherbarriersmayresultininjuryasthemachine
backsupduringoperationiftheoperatorisnotattentive
tothesurroundings.Onlyoperatetheunitinareaswhere
thereissufcientclearancefortheoperatortosafely
maneuvertheproduct.
•Neverallowanyoneinthetrenchwhileoperatingthe
machine.
•Locatethepinchpointareasmarkedonthemachineand
attachmentsandkeephandsandfeetawayfromthese
areas.
•Beforeoperatingthemachinewithanattachment,ensure
thattheattachmentisproperlyinstalled.
•Lightningcancausesevereinjuryordeath.Iflightning
isseenorthunderisheardinthearea,donotoperate
themachine;seekshelter.
SlopeOperation
Slopesareamajorfactorrelatedtoloss-of-controland
tip-overaccidents,whichcanresultinsevereinjuryordeath.
Allslopesrequireextracaution.
•Avoidoperatingthismachineonslopes.
•Removeobstaclessuchasrocks,treelimbs,etc.fromthe
workarea.Watchforholes,ruts,orbumps,asuneven
terraincouldoverturnthemachine.Tallgrasscanhide
obstacles.
•UseonlyToro-approvedattachments.Attachmentscan
changethestabilityandtheoperatingcharacteristics
ofthemachine.Warrantymaybevoidedifusedwith
unapprovedattachments.
•Keepallmovementsonslopesslowandgradual.Donot
makesuddenchangesinspeedordirection.
•Avoidstartingorstoppingonaslope.Ifthemachine
losestraction,proceedgradually,straightdowntheslope.
•Avoidturningonslopes.Ifyoumustturn,turnslowly
andkeeptheheavyendofthemachineuphill.
•Donotoperateneardrop-offs,ditches,orembankments.
Themachinecouldsuddenlyturnoverifawheelgoes
overtheedgeofaclifforditch,orifanedgecavesin.
4

•Donotoperateonwetgrass.Reducedtractioncould
causesliding.
•Donotparkthemachineonahillsideorslopewithout
loweringtheattachmenttotheground,settingtheparking
brake,andchockingthewheels.
•Onlyoperatethemachineonlevelgroundwhenthe
machineisinthenarrowwheelconguration.
RolloverProtectionStructure(ROPS)
System
•BeforeoperatingamachinewithaROPS(rollover
protectionstructure),ensurethattheseatbeltisingood
conditionandissecurelyattachedtothemachine.
•Alwayswearaseatbeltwhenoperatingamachinewith
aROPS.
•InspecttheROPSattheintervalrecommendedinthis
manualorwhentheROPShasbeeninanaccident.
•RepairadamagedROPSusingonlygenuineToro
replacementparts;donotrepairormodifytheROPS.
•Checkcarefullyforoverheadclearances(i.e.branches,
doorways,electricalwires)beforedrivingunderany
objectsanddonotcontactthem.
•DonotremovetheROPSexceptwhenservicingor
replacingit.
•Donotaddweighttothemachinethatexceedsthegross
weightdisplayedontheROPSlabel.
MaintenanceandStorage
•Disengagetheauxiliaryhydraulics,lowertheattachment,
settheparkingbrake,stoptheengine,andremovethe
key.Waitforallmovementtostopbeforeadjusting,
cleaning,orrepairing.
•Cleandebrisfromattachments,drives,mufers,and
enginetohelppreventres.Cleanupoilorfuelspillage.
•Lettheenginecoolbeforestoringanddonotstorenear
ame.
•Donotstorefuelnearamesordrainindoors.
•Parkthemachineonlevelground.Neverallowuntrained
personneltoservicethemachine.
•Usejackstandstosupportcomponentswhenrequired.
•Carefullyreleasepressurefromcomponentswithstored
energy.
•Disconnectthebatterybeforemakinganyrepairs.
Disconnectthenegativeterminalrstandthepositive
last.Reconnectpositiverstandnegativelast.
•Keephandsandfeetawayfrommovingparts.Ifpossible,
donotmakeadjustmentswiththeenginerunning.
•Chargebatteriesinanopenwellventilatedarea,away
fromsparkandames.Unplugthechargerbefore
connectingordisconnectingitfromthebattery.Wear
protectiveclothinganduseinsulatedtools.
•Keepallpartsingoodworkingconditionandallhardware
tightened.Replaceallwornordamageddecals.
•Keepnutsandboltstight.Keepequipmentingood
condition.
•Nevertamperwithsafetydevices.
•Keepthemachinefreeofgrass,leaves,orotherdebris
build-up.Cleanupoilorfuelspillage.Allowthemachine
tocoolbeforestoring.
•Useextracarewhenhandlingfuels.Theyareammable
andvaporsareexplosive.
–Useonlyanapprovedcontainer.
–Neverremovethefuelcaporaddfuelwhenthe
engineisrunning.Allowtheenginetocoolbefore
refueling.Donotsmoke.
–Neverrefuelthemachineindoors.
–Neverstorethemachineorfuelcontainerinside
wherethereisanopename,suchasnearawater
heaterorfurnace.
–Neverllacontainerwhileitisinsideavehicle,trunk,
pick-upbed,oranysurfaceotherthantheground.
–Keepcontainernozzleincontactwiththetankduring
lling.
•Stopandinspecttheequipmentifyoustrikeanobject.
Makeanynecessaryrepairsbeforerestarting.
•UseonlygenuineTororeplacementpartstoensurethat
originalstandardsaremaintained.
•Batteryacidispoisonousandcancauseburns.Avoid
contactwithskin,eyes,andclothing.Protectyourface,
eyes,andclothingwhenworkingwithabattery.
•Batterygasescanexplode.Keepcigarettes,sparksand
amesawayfromthebattery.
•Keepyourbodyandhandsawayfrompinholeleaks
ornozzlesthatejecthighpressurehydraulicuid.Use
cardboardorpapertondhydraulicleaks;neveruse
yourhands.Hydraulicuidescapingunderpressurecan
penetrateskinandcauseinjuryrequiringsurgerywithina
fewhoursbyaqualiedsurgeonorgangrenemayresult.
5

SafetyandInstructionalDecals
Safetydecalsandinstructionsareeasilyvisibletotheoperatorandarelocatednearanyareaofpotential
danger.Replaceanydecalthatisdamagedorlost.
Figure3
1.Decal117-27185.Decal130-73609.Decal125-6674
2.Decal130-43436.Decal130-434110.Decal127-1822
3.Decal127-18247.Decal130-736111.Decal125-4967
4.Decal130-43408.Decal125-668012.Decal125-6671
6

g0272 73
12
10 11 1 2 13 14 2
3 4 5 6 7 8 9 1
Figure4
1.Decal125-66846.Decal117-327611.Decal125-6135(undertheseat)
2.Decal125-66947.Decal125-496312.Decal106-9290(insideofmachine)
3.Decal125-8491(behindtherubber
guard)
8.Decal130-429113.Decal125-6694
4.Decal125-66889.Decal125-848314.Decal125-6672
5.Decal120-0627(bothsidesof
machine)
10.Decal125-8487(behindthestep)
106-9290
1.Inputs5.Inseat9.Outputs13.Start
2.Notactive6.PowerT ake-off(PTO)10.PowerT akeOff(PTO)14.Power
3.Hightemperatureshutdown7.ParkingbrakeOff11.Start
4.Hightemperaturewarning8.Neutral12.EnergizetoRun(ETR)
117-2718
7

117-3276
1.Enginecoolantunder
pressure
3.Warning—donottouchthe
hotsurface.
2.Explosionhazard—read
theOperator'sManual.
4.Warning—readthe
Operator'sManual.
120-0627
1.Cutting/dismembermenthazard,fan—stayawayfrom
movingparts,keepallguardsandshieldsinplace.
125–4963
1.Warning—keephandsawayfromhotsurfaces
125–4967
1.Liftpoint
125–6135
125-6671
1.Explosionhazard;electricshockhazard—calllocalutilities
beforedigging.
125–6672
1.Crushinghazard—stayawayfromarticulatedjoints.
8

125–6674
1.Disengagetheparking
brake.
2.Engagetheparkingbrake.
125–6680
1.ReadtheOperator’s
Manual.
4.Fast
2.Turnleft5.Turnright
3.Slow6.Tractioncontrol
125–6684
1.Cutting/dismembermenthazard,plow—keepbystanders
awayfromtheplow;stayawayfrommovingparts;keepall
guardsandsafetiesinplace.
125–6688
1.Explosionhazard—ReadtheOperator’sManual;Donot
usestartinguid.
125–6694
1.Tiedownlocation
125–8483
1.Hydraulicuid;readtheOperator’sManual.
9

125–8487
1.Crushinghazard,tire—readtheOperator’sManual;the
extensionstepmustbeattachedwhenthetiresareinwide
ordoubledconguration.
125–8491
1.Crushinghazard,warning—keepawayfromarticulated
joints;replacemissingsafetyshields.
130-7361
1.Raisetheplow3.Lowerthetrencher
2.Lowertheplower4.Raisethetrencher
127-1822
1.Theenginecannotstart
withtheplowactive.
4.Novibration
2.Highvibration5.Theenginecanstartwith
theplowinactive.
3.Lowvibration
127-1824
1.Formoreinformationon
startingtheengine,read
theOperator'sManual—1)
Engagetheparkingbrake;
2)Settheplow,trencher,
anddrivetoneutral;3)
Turnthekeytotheengine
startposition.
2.Formoreinformationon
stoppingtheengine,read
theOperator'sManual—1)
Parkthemachineona
levelsurface;2)Setthe
plow,trencher,anddrive
toneutral;3)Engagethe
parkingbrake;4)Lower
allattachments;5)Turn
thekeytotheenginestop
position;6)Removethe
keyfromtheignition.
10

130-4291
1.Regenerationinhibit—readtheOperator'sManual.
130-4340
1.Fast3.Slow
2.Enginespeed
130-4341
ACK
130-4341
1.Regenerationacknowledge
130-4343
1.Warning—readthe
Operator'sManual.
5.Warning—keep
bystandersaway.
2.Warning—donotoperate
themachineunlessyou
havereceivedinstruction.
6.Warning—keepaway
frommovingparts;keep
allguardsandshieldsin
place.
3.Warning—wearaseatbelt.7.Warning—donotoperate
thetrencherwhileusing
theplow;donotoperate
theplowwhileusingthe
trencher.
4.Warning—wearear
protection.
8.Explosionhazard;shock
hazard—beforedigging,
callthelocalutilities
service.
130-7360
1.Engine—stop3.Engine—start
2.Engine—run/warming
11

ProductOverview
1
2
3 4 5 6
g025662
Figure5
Right-sideview
1.Vibratoryplow3.Engine-oillter5.Engine-oilcap
2.Vibratory-plow
control
4.Airlter6.Fuellter/water
separator
1 2 3
4 5 6
Figure6
Left-sideview
1.Diesel-particulatelter
(DPF)
4.Battery
2.Regeneration-inhibit
switch
5.Coolant-expansiontank
3.Fuses6.Hydraulictank
Controls
Becomefamiliarwithallofthecontrolsbeforeyoustartthe
engineandoperatethemachine.
Throttle
Thethrottlecontrolstheenginespeed.Pushtheknobto
increasetheenginespeed.Pulltheknobtodecreasethe
enginespeed.
ParkingBrakeLever
Tosettheparkingbrake,pulltheleverupandpushitforward.
Toreleasetheparkingbrake,pulltheleverbackanddown.
AttachmentControlLever
Theattachmentcontrolleverhas2positions:raiseandlower.
Thecongurationofthemachinedetermineswhichdirect
raisesorlowerstheattachment;refertotheOperator’sManual
foryourattachmenttocongureyourmachine.
Figure7
1.Throttle6.Parkingbrake
2.Indicatorlights7.Fuelgauge
3.Hourmeter8.Keyswitch
4.Regeneration-acknowledge
switch
9.Traction-controllever
5.Attachment-controllever10.Creep-controllever
Traction-ControlLever
Thetractioncontrollevercontrolsthedirectionandspeedof
themachineduringtransport.Togoforward,pushthelever
forward.Toreverse,pulltheleverbackward.Thefurtheryou
pushorpullthelever,thefasterthemachinewilltravel.To
turn,pushthelevertotheleftorright.
12

Creep-ControlLever
Thecreepcontrollevercontrolsthedirectionandspeedof
themachinewhiletheattachmentsareinuse.Togoforward,
pushtheleverforward.Toreverse,pulltheleverbackward.
Thefurtheryoupushorpullthelever,thefasterthemachine
willtravel.Thecreep-controlleverwillnotreturntothe
Neutralpositiononitsown.
HourMeter
Thehourmeterdisplaysthenumberofhoursofoperation
thathavebeenloggedonthemachine.
KeySwitch
Thekeyswitch,usedtostartandstoptheengine,has3
positions:Off,On/Preheat,andStart.Tostarttheengine,
rotatethekeytotheOn/Preheatposition.Oncethe
glowplugindicatorlightisoff,rotatethekeytotheStart
position.Releasethekeywhenenginestartsanditwillmove
automaticallytotheOnposition.Tostoptheengine,rotate
thekeytotheOffposition.
FuelGauge
Thefuelgaugemeasurestheamountoffuelinthefueltank.
Vibratory-PlowControlLever
Thislevercontrolsthevibratoryplow .Toincreasethe
agitation,pushtheleverforward.Todecreasetheagitation,
pulltheleverback.Ifthevibratoryplowisinuse,usethe
creep-controllevertodrive.
Diesel-ParticulateFilter(DPF)
CAUTION
Duringregeneration,thedieselparticulatelter
becomesextremelyhotandcancauseserious
burns.
Keepyourbodyandhandsawayfromtheengine
duringregeneration.
Thedieselparticulatelter(DPF)removesparticulatematter
fromtheexhaustandpreventsitfrombeingdischargedinto
theair.Astheparticulatescollectinthelter,theengine
performsaregenerationtopreventclogginganddecreased
engineperformance.Mostregenerationsareperformed
inthebackgroundandwillnotimpactoperation.These
backgroundregenerationshappenautomatically,unlessthe
regenerationinhibitswitchisactivated.
Overtime,ashaccumulatesintheDPFandabackground
regenerationisnotsufcienttounclogthelter.Whenthis
occurs,theregenerationrequestandcheckenginelights
illuminateonthecontrolpanel.Atthistime,thelterrequires
astationaryregenerationorneedstobeserviced;contactyour
AuthorizedServiceDealerformoreinformation.
Figure8
1.Engine-coolant-temperature
light
7.Hydraulic-oil-temperature
light
2.Glow-plugindicator8.Hydraulic-oil-pressure
light
3.Engine-oil-pressurelight9.Neutralindicator
4.Chargeindicator10.Air-lterlight
5.Regeneration-requestlight11.High-temperature-exhaust
indicator
6.Check-enginelight12.Regenerationinhibit
indicator
Engine-Coolant-TemperatureLight
Thislightwillilluminateiftheengineoverheats.Ifthelight
illuminateswhentheengineisrunning,stoptheengine,
removethekey,andcheckforapossiblecause.
Glow-PlugIndicator
Thislightwillilluminatewhiletheglowplugsareactive.
Whenthelightisoff,itissafetostartyourmachine.
Engine-Oil-PressureLight
Thislightilluminatesiftheengineoilpressuredropsbelowa
safelevelwhiletheengineisrunning.Ifthelightickersor
remainson,stopthevehicle,turnofftheengine,andcheck
theoillevel.Iftheoillevelwaslow,butaddingoildoesnot
causethelighttogooutwhentheengineisrestarted,turnthe
engineoffimmediatelyandcontactyourAuthorizedService
Dealerforassistance.
ChargeIndicator
Thislightilluminateswhenthebatteryisbeingdischarged.If
thelightilluminatesduringoperation,stopthemachine,turn
offtheengine,andcheckforpossiblecauses.
13

Regeneration-RequestLight
Thislightilluminatesalongwiththehigh-temperature-exhaust
indicatorwhenaregenerationisinprocess.Ifthislightis
illuminatedonitsown,astationaryregenerationispossible.
Whenaregenerationisrequestedbuttheregenerationinhibit
switchisactive,thislightwillblink.Ifthislightisilluminated
alongwiththecheckenginelight,yourDPFneedsservicing;
contactyourAuthorizedServiceDealerformoreinformation.
Check-EngineLight
Thislightilluminateswhenthereisanengineproblem.Ifthe
lightilluminateswhentheengineisrunning,stoptheengine,
removethekey,andcheckforapossiblecause.Ifthislight
isilluminatedalongwiththeregenerationrequestlight,your
DPFneedsservicing;contactyourAuthorizedServiceDealer
formoreinformation.
Hydraulic-Oil-TemperatureLight
Thislightwillilluminateifthehydraulicsystemoverheats.
Ifthelightilluminateswhentheengineisrunning,stopthe
engine,removethekey,andcheckforapossiblecause.
Hydraulic-Oil-FilterLight
Thislightilluminatesifthehydraulicoillterisinneedof
service.Ifthislightilluminateswhentheengineisrunning,
stoptheengine,removethekey,andservicethelter.
NeutralIndicator
ThislightilluminateswhenallcontrolleversareintheNeutral
position.
Air-FilterLight
Thislightilluminatesiftheairlterisinneedofservice.If
thislightilluminateswhentheengineisrunning,stopthe
engine,removethekey,andservicetheaircleaner.
High-Temperature-ExhaustIndicator
ThislightilluminateswhentheDPFisundergoing
regeneration.
Regeneration-InhibitIndicator
Thislightilluminateswhenautomaticbackground
regenerationhasbeenturnedoff.
Regeneration-AcknowledgeSwitch
Thisswitchmanuallyactivatesastationaryregeneration.
Thislightontheswitchwillilluminatewhenastationary
regenerationisinprogress.Iftheregenerationrequestlight
andthelightontheswitcharebothblinking,theregeneration
inhibitswitchmustbeturnedoffforabackground
regenerationtooccur.Iftheregenerationrequestlightis
illuminatedandthelightontheswitchisblinking,contact
yourAuthorizedServiceDealerformoreinformation.
Regeneration-InhibitSwitch
Thisswitchwilldisabletheautomaticbackground
regeneration.
Specications
Note:Specicationsanddesignaresubjecttochange
withoutnotice.
Width117cm(46inches)
Width(narrowwheels)91cm(36inches)
Length(withvibratoryplow)291cm(114inches)
Height216cm(85inches)
Weight1,329kg(2,930lb)
Operatingcapacity251kg(553lb)
Tippingcapacity717kg(1,580lb)
Wheelbase122cm(48inches)
Attachments/Accessories
AselectionofToroapprovedattachmentsandaccessoriesis
availableforusewiththemachinetoenhanceandexpand
itscapabilities.ContactyourAuthorizedServiceDealeror
Distributororgotowww.Toro.comforalistofallapproved
attachmentsandaccessories.
Important:UseonlyToroapprovedattachments.
Otherattachmentsmaycreateanunsafeoperating
environmentordamagethemachine.
14

Operation
Note:Determinetheleftandrightsidesofthemachine
fromthenormaloperatingposition.RefertoProduct
Overview(page12).
Important:Beforeoperating,checkthefuelandoil
level,andremovedebrisfromthemachine.Also,ensure
thattheareaisclearofpeopleanddebris.Youshould
alsoknowandhavemarkedthelocationsofallutility
lines.
AddingFuel
Useultralowsulfurdieselfuel(ULSD)intheengineofthis
machine.Theuseofotherfuelscancausethelossofengine
powerandhighfuelconsumption.Thedieselfuelusedin
thismachinemustmeetthespecicationsofD975ofASTM
International.Seeyourdieselfueldistributor.TheD975
standarddenes2ULSDstandards,GradeNo.2-DS15
(regularULSD)andGradeNo.1-DS15(ahighervolatility
ULSDfuelwithalowergellingtemperaturethanregular
ULSD).
Fueltankcapacity:26.9L(7.1USgallons)
Usesummergradedieselfuel(No.2-D)attemperatures
above20°F(-7°C)andwintergrade(No.1-DorNo.
1-D/2-Dblend)belowthattemperature.Useofwintergrade
fuelatlowertemperaturesprovideslowerashpointand
coldowcharacteristicswhichwilleasestartingandreduce
fuellterplugging.
Useofsummergradefuelabove20°F(-7°C)willcontribute
towardlongerfuelpumplifeandincreasedpowercompared
towintergradefuel.
Important:Donotusekeroseneorgasolineinsteadof
dieselfuel.Failuretoobservethiscautionwilldamage
theengine.
WARNING
Fuelisharmfulorfatalifswallowed.Long-term
exposuretovaporscancauseseriousinjuryand
illness.
•Avoidprolongedbreathingofvapors.
•Keepfaceawayfromnozzleandfueltankor
conditioneropening.
•Keepfuelawayfromeyesandskin.
FillingtheFuelTank
DANGER
Incertainconditions,fuelisextremelyammable
andhighlyexplosive.Areorexplosionfromfuel
canburnyouandothersandcandamageproperty.
•Fillthefueltankoutdoors,inanopenarea,when
theengineiscold.Wipeupanyfuelthatspills.
•Neverllthefueltankinsideanenclosedtrailer.
•Neversmokewhenhandlingfuel,andstayaway
fromanopenameorwherefuelfumesmaybe
ignitedbyaspark.
•Storefuelinanapprovedcontainerandkeepit
outofthereachofchildren.Neverbuymore
thana30-daysupplyoffuel.
•Donotoperatewithoutentireexhaustsystemin
placeandinproperworkingcondition.
DANGER
Incertainconditionsduringfueling,static
electricitycanbereleasedcausingasparkwhich
canignitethefuelvapors.Areorexplosionfrom
fuelcanburnyouandothersandcandamage
property.
•Alwaysplacefuelcontainersonthegroundaway
fromyourvehiclebeforelling.
•Donotllfuelcontainersinsideavehicleoron
atruckortrailerbedbecauseinteriorcarpets
orplastictruckbedlinersmayinsulatethe
containerandslowthelossofanystaticcharge.
•Whenpractical,removeequipmentfromthe
truckortrailerandrefueltheequipmentwithits
wheelsontheground.
•Ifthisisnotpossible,thenrefuelsuchequipment
onatruckortrailerfromaportablecontainer,
ratherthanfromafueldispensernozzle.
•Ifafueldispensernozzlemustbeused,keepthe
nozzleincontactwiththerimofthefueltank
orcontaineropeningatalltimesuntilfuelingis
complete.
15

1.Parkthemachineonalevelsurface,lowerany
attachments,stoptheengine,andremovethekey.
2.Lifttheoperatorseattoaccessthefueltank.
3.Removethefueltankcap(Figure9).
Figure9
1.Fuel-tankcap
4.Fillthetanktoabout2.5cm(1inch)belowthetopof
thetank,notthellerneck,withdieselfuel.
5.Installthefuel-tankcap.
StartingandStoppingthe
Engine
StartingtheEngine
1.Adjusttheseatandfastentheseatbelt.
2.EnsurethatallofthecontrolleversareintheNeutral
position.
3.MovethethrottlelevertotheSlowpositions.
4.RotatethekeytotheOn/Preheatposition.
5.Oncetheglowplugindicatorlightisoff,rotatethe
keytotheStartposition.Releasethekeywhenengine
startsanditwillmoveautomaticallytotheOnposition.
Important:Donotengagethestarterformore
than10secondsatatime.Iftheenginefailsto
start,allowa30secondcool-downperiodbetween
attempts.Failuretofollowtheseinstructionscan
burnoutthestartermotor.
6.Movethethrottlelevertodesiredsetting.
Important:Iftheengineisrunathighspeeds
whenthehydraulicsystemiscold(i.e.,whenthe
ambientairtemperatureisnearfreezingorlower),
hydraulicsystemdamagecouldoccur.When
startingtheengineincoldconditions,allowthe
enginetorunintheSlowpositionforatleast5
minutesbeforemovingthethrottletoFast(rabbit).
Note:Iftheoutdoortemperatureisbelowfreezing,
storethemachineinagaragetokeepitwarmerand
aidinstarting.
StoppingtheEngine
1.MovethethrottlelevertotheSlowposition.
2.Loweranyattachmentstotheground.
3.SetallcontrolstotheNeutralposition.
4.Settheparkingbrake.
5.TurntheignitionkeytotheOffposition.
Note:Iftheenginehasbeenworkinghardorishot,
letitidlefor5minutesbeforeturningtheignitionkey
off.Thishelpscooltheenginebeforeitisstopped.In
anemergency,youcanstoptheengineimmediately.
OperatingtheVibratoryPlow
Plowing
1.Removetherotationpin,placeitinthestorage
location,andstarttheengine(Figure10).
Figure10
1.Rotationpin2.Storagelocation
2.Whentheengineiswarm,pushthethrottleleverup
tofullthrottle.
3.Ifthemachineisequippedwithatrencher,movethe
attachmentselectorlevertothecableplowposition.
4.Usetheattachmentcontrollevertolowertheplowto
theground.
Note:Theenginewillturnoffin1secondifthe
operatorsseatisemptyandthedirectioncontrol,
trencher-digging-control,vibratory-plowlever,or
creep-controlleversaremovedfromtheNeutral
position.
5.Releasetheparkingbrake.
16

Note:Donotstarttheplowvibrationuntiltheblade
tiphasenteredtheground.
6.Movethevibratory-plowlevertostarttheplow
vibration.
7.Slowlylowertheplowbladeintothegroundasthe
machinemovesforward.
8.Usethecreepcontrollevertocontrolthedirectionand
speedofthemachineduringplowing.Themachinewill
moveinthesamedirectionthatyoumovethelever.
Note:ThemoreyoupushtheleverfromtheNeutral
position,thefasterthemachinewilltravel.Thelever
willstayinthispositionwhenyoureleasethelever.
MovethelevertotheNeutralpositiontostopthe
machinetravel.
9.Usethedirectionorcreepcontrolleverstosteerthe
machinetotheleftorright.
Important:Donotreversethemachinewiththe
plowbladeintheground.
Important:Slowlylifttheplowbladeoutofthe
groundasthemachinemovesforward.
Note:Decreasethemachinespeedifthetiresslip
orthebladeraisesoutofthegroundduringplow
operation.
10.Reducethespeedofthemachineandpullthe
vibratory-plowlevertostoptheplowvibrationbefore
raisingthebladeoutoftheground.
ChangingthePlowBlade
Theplowbladesareheavy;use2peopletocompletethis
procedure.
1.Parkthemachineonalevelsurface,lowerany
attachments,andstoptheengine.
Note:Ensurethatthevibratoryplowisraisedhigh
enoughforthebladetobechanged.
2.Flipthe2circularsnapringsoverandremovethe
snap-ringpin(Figure11).
G025774
Figure11
1.Snap-ringpin2.Pin
3.Pullthe2pinsoutoftheblade.
Note:Theplowbladesareheavy.Makesurethat1
personisholdingthebladewhiletheotherpersonis
removingthepins.
4.Placethenewbladeintotheplowbladeassemblyand
secureitwith2pinsand2snap-ringpins.
RemovingandInstallingtheSkidShoes
1.Raisetheplowabout91cm(36inches)offtheground.
2.Stoptheengineandremovethekey.
3.Removethe4bolts,4nuts,and8washersfromthe
skidshoes(Figure12).
1
2
3
4
g021986 5
Figure12
1.Nut4.Washer
2.Washer5.Bolt
3.Skidshoes
4.Installthenewskidshoesandsecurethemwiththe
previouslyremovedhardware(Figure12).
17

RotatingtheWheels
Thewheelscanbeinstalledtoprovideanarroworawide
overallwidthofmachine.Installthewheelswiththedeep
concavetowardthemachineforoperationintightareasor
theshallowconcavetowardthemachineforwiderstability.
Important:Onlyoperateonlevelgroundwiththe
narrowwheelconguration.
Pressure
TireSizePlyRatingkPapsi
23x10.5x12413820
26x12x12820730
1.Parkthemachineonalevelsurface,lowerany
attachments,andstoptheengine.
2.Removetherearwheels.
3.Removethestepextensionfromthemachine(Figure
13).
g022223
Figure13
4.Installthewheelsontheoppositesideofthemachine
fromwhicheachwasremoved.
5.Removethefrontwheelsandinstallthemonthe
oppositesideofthemachine.
Note:Besuretokeepthetreadgoinginthesame
direction(Figure14).
g023499
Figure14
CheckingtheInterlockSystem
Beforeusingthemachine,makethefollowinginterlock
systemchecks.Ifanyofthesechecksfails,contactyour
AuthorizedServiceDealerformoreinformation.
•Theengineshouldstartwiththetractioncontrolleverin
theNeutralpositionandtheparkingbrakeengaged.
•Theengineshouldstartwiththetractioncontrolleverin
theNeutralpositionandtheoperatorintheseat.
•Theengineshouldnotcrankwiththetractioncontrol
leveroutoftheNeutralpositionandtheoperatorinseat
and/ortheparkingbrakeengaged.
•Theengineshouldkillifthetractioncontrolleveris
movedoutoftheNeutralpositionwiththeengine
runningandtheparkingbrakeset.
•Theenginemustkillifthetractioncontrolleverismoved
outoftheNeutralpositionwiththeenginerunningand
theoperatorisnotintheseat.
•Theenginemustkillifthevibratoryplowisengagedwith
theenginerunningandoperatornotintheseat.
•Theenginemuststopinapproximately1secondifthe
operatorleavestheseatedpositionwiththevibratory
plowengagedand/ordirectionalcontrolleveroutofthe
Neutralposition.
18

TransportingtheMachine
LoadingtheMachine
Important:Ensurethatthetrailerandrampcan
supportbothyourweightplustheweightofthemachine
withanyattachments.
1.Starttheengine.
2.Movetheattachmentstotransportposition.
3.Securethetrailerhitchtoyourvehicleandputablock
atthefrontandrearofthetrailerwheels.
4.Movethemachineslowlyontothetrailer.
5.Lowertheattachmentsontothetrailerandsetthe
parkingbrake.
6.Stoptheengineandremovethekey.
7.Putblocksatthefrontandrearofeachtireofthe
machine.
8.Fastenthefronttie-downloopsofthemachinetothe
trailer(Figure15).
1
g018921
Figure15
1.Fronttie-downloop
9.Fastentherearofthemachinetothetrailerusing
chainsandabinder.
Note:Usethereartie-downloop(Figure16)tosecure
themachine.
1g018922
Figure16
1.Reartie-downloop
10.Measurethedistancefromthegroundtothehighest
pointofthemachinetodeterminetheclearanceheight.
11.Removetheblocksfromthefrontandrearofthe
trailerwheels.
Important:Aftertransportingthemachineafewmiles,
stopthetruck,ensurethatthetie-downsarestilltight
andthatthemachinehasnotmovedonthetrailer.
UnloadingtheMachine
1.Putablockatthefrontandrearofthemachineand
trailerwheels.
2.Removetheties,thenremovetheblocksfromthe
machine.
3.Starttheengineandreleasetheparkingbrake.Referto
StartingandStoppingtheEngine(page16).
4.Ensurethattheattachmentsareinthetransport
position.
5.Slowlymovethemachineoffofthetrailer.
19

Maintenance
Note:Determinetheleftandrightsidesofthemachinefromthenormaloperatingposition.RefertoProductOverview
(page12).
Important:Refertoyourengine
Operator's Man ual
for
additionalmaintenanceprocedures.
Note:DownloadafreecopyoftheElectricalSchematicor
HydraulicSchematicforyourmachinebyvisitingwww.Toro.com
andsearchingforyourmachinefromtheManualslinkon
thehomepage.
CAUTION
Ifyouleavethekeyintheignitionswitch,someonecouldaccidentlystarttheengineandseriouslyinjure
youorotherbystanders.
Removethekeyfromtheignitionbeforeyoudoanymaintenance.
RecommendedMaintenanceSchedule(s)
MaintenanceService
IntervalMaintenanceProcedure
Aftertherst25hours•Replacethehydrauliclter.
Aftertherst50hours•Changetheengineoilandlter.
Aftertherst250hours•Changethehydraulicuid.
Beforeeachuseordaily
•Greasethemachine(Greaseimmediatelyaftereverywashing).
•Checktheairlterserviceindicatorlight(morefrequentlyifconditionsaredusty
orsandy).
•Checktheengineoil
•Checkthefuellter/waterseparator.
•Checkthetirepressure.
•Checkthelugnuts.
•Checkandrelltheenginecoolant.
•Checkthehydraulic-uidlevel.
•Removedebrisfromthemachineandscreens.
•Checkforloosefasteners.
Every50hours•Drainwaterandothercontaminantsfromthefuellter/waterseparator.
Every100hours
•Checkthebatteryelectrolytelevel(replacementbatteryonly).
•Checktheaxleoillevels.
•Checkthecoolingsystemhoses.
•Checkthehydrauliclinesforleaks,loosettings,kinkedlines,loosemounting
supports,wear,weather,andchemicaldeterioration.
•Checkfordirtbuild-upinthechassis.
Every250hours
•Removetheaircleanercover,cleanoutanydebris,andchecktheairlterservice
indicatorlight(morefrequentlyifconditionsaredustyorsandy).
•Changetheengineoilandlter
•Drainandcleanthefueltank.
•Checkthebatterycableconnections.
•Checkthetransmissionoil.
•Cleantheradiator.
Every400hours•Checkthefuellinesandconnectionsfordeterioration,damage,orlooseconnections.
Every500hours
•Replacetheairlter(morefrequentlyifconditionsaredustyorsandy).
•Replacethefuellter/waterseparator.
•CheckandmaintaintheROPS;checkitafteranaccident.
20
Other manuals for Pro Sneak 365
1
This manual suits for next models
3
Table of contents
Other Toro Construction Equipment manuals

Toro
Toro MMX-1158H-S User manual

Toro
Toro MM E-S Series User manual

Toro
Toro TX 427 Installation and operating manual

Toro
Toro PT-36PP User manual

Toro
Toro MMX-658H-P User manual

Toro
Toro 22442 User manual

Toro
Toro TX 700 User manual

Toro
Toro CM-658H-S User manual

Toro
Toro 323 User manual

Toro
Toro 23136 User manual