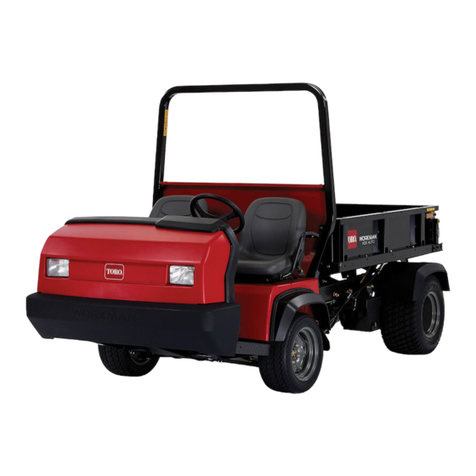
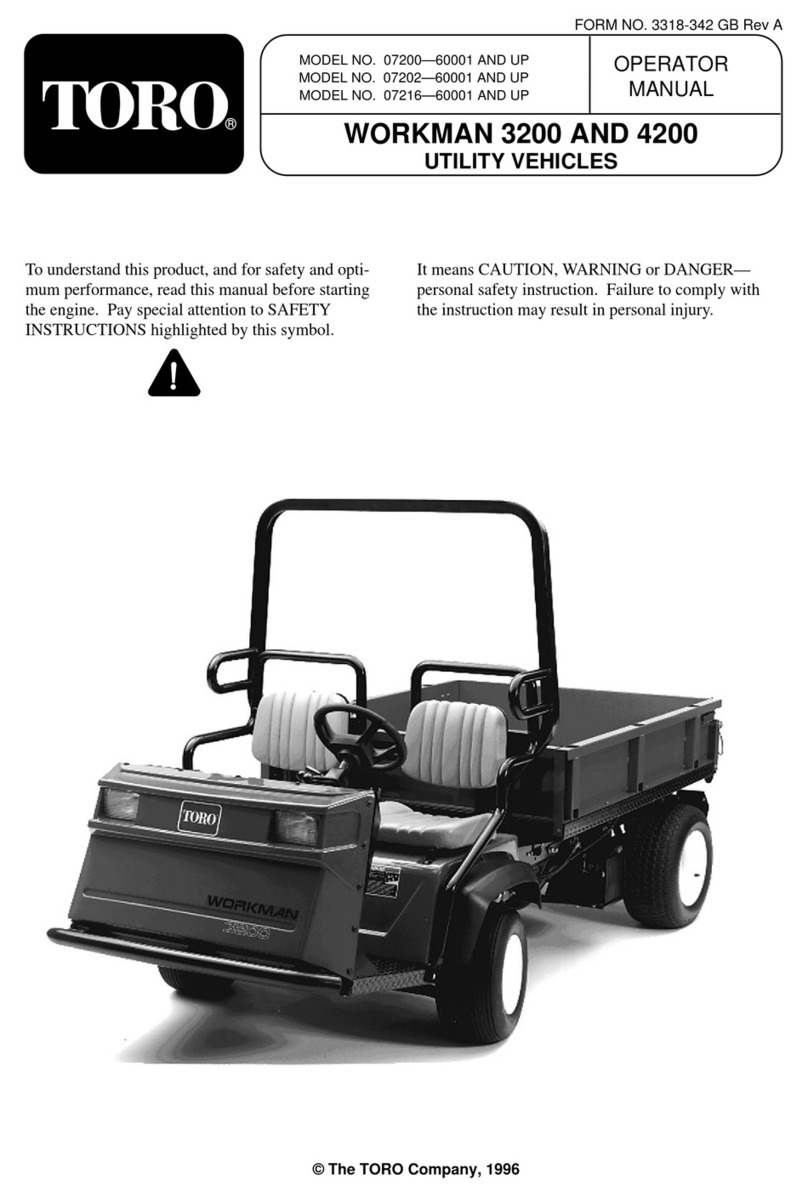
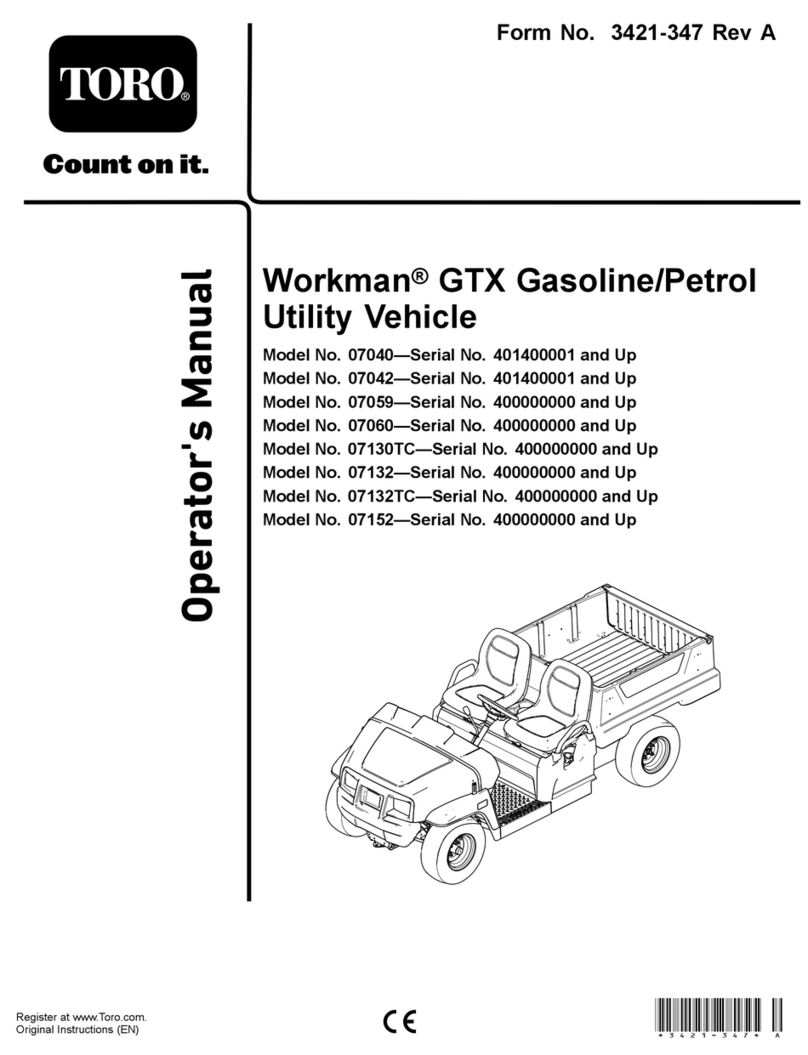
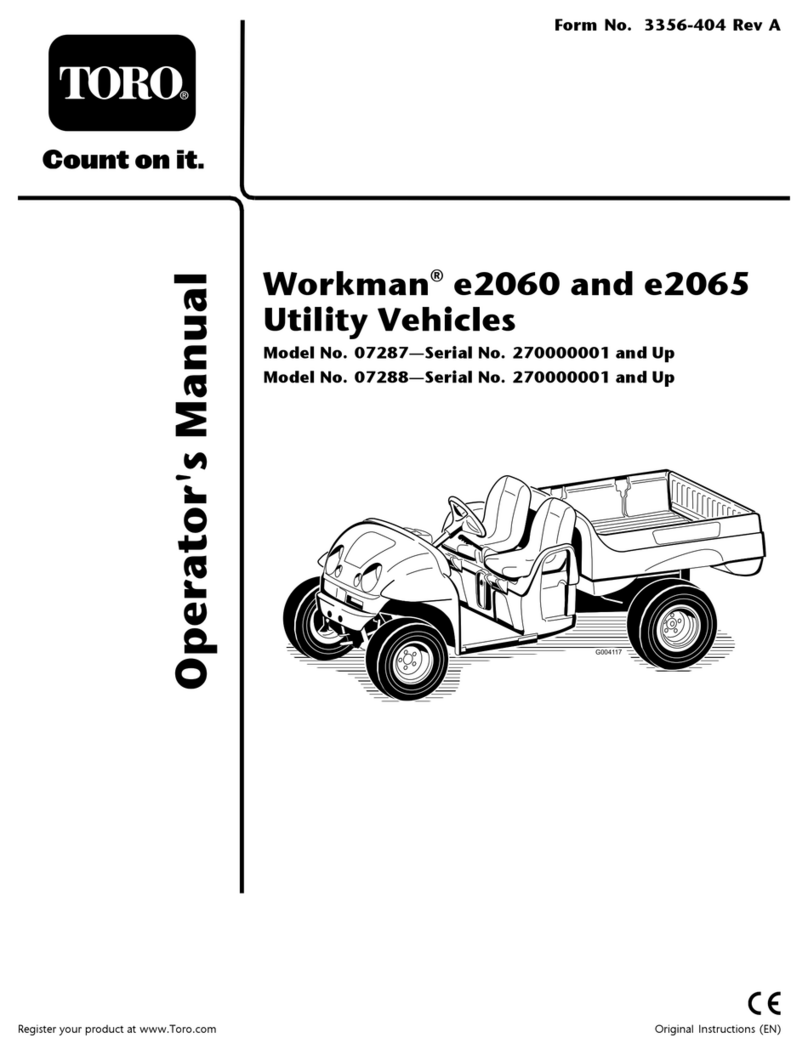
Toro 7360 User manual

FormNo.3359-770RevB
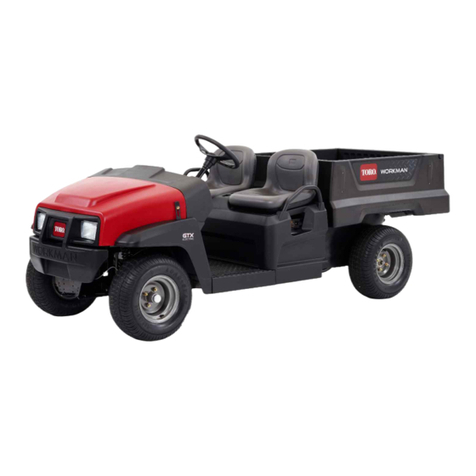
Workman®3200&4200
LiquidCooledGasUtilityVehicle
ModelNo.07360—SerialNo.280000001andUp
ModelNo.07361—SerialNo.280000001andUp
ModelNo.07361TC—SerialNo.280000001andUp
ModelNo.07365—SerialNo.280000001andUp
Registeratwww.Toro.com.OriginalInstructions(EN)

Introduction
Warning
CALIFORNIA
Proposition65Warning
Theengineexhaustfromthisproduct
containschemicalsknowntotheStateof
Californiatocausecancer,birthdefects,
orotherreproductiveharm.
Important:Theengineinthisproductisnot
equippedwithasparkarrestermufer.Itisa
violationofCaliforniaPublicResourceCode
Section4442touseoroperatethisengineonany
forest-covered,brush-covered,orgrass-covered
landasdenedinCPRC4126.Otherstatesor
federalareasmayhavesimilarlaws.
Readthisinformationcarefullytolearnhowtooperate
andmaintainyourproductproperlyandtoavoidinjury
andproductdamage.Youareresponsibleforoperating
theproductproperlyandsafely.
YoumaycontactTorodirectlyatwww .Toro.comfor
productandaccessoryinformation,helpndinga
dealer,ortoregisteryourproduct.
Wheneveryouneedservice,genuineToroparts,or
additionalinformation,contactanAuthorizedService
DealerorToroCustomerServiceandhavethemodel
andserialnumbersofyourproductready.Figure1
identiesthelocationofthemodelandserialnumbers
ontheproduct.Writethenumbersinthespace
provided.
Figure1
1.Modelandserialnumberlocation
ModelNo.
SerialNo.
Thismanualidentiespotentialhazardsandhas
safetymessagesidentiedbythesafetyalertsymbol
(Figure2),whichsignalsahazardthatmaycauseserious
injuryordeathifyoudonotfollowtherecommended
precautions.
Figure2
1.Safetyalertsymbol
Thismanualuses2otherwordstohighlightinformation.
Importantcallsattentiontospecialmechanical
informationandNoteemphasizesgeneralinformation
worthyofspecialattention.
©2007—TheToro®Company
8111LyndaleAvenueSouth
Bloomington,MN554202
Contactusatwww.Toro.com.
PrintedintheUSA.
AllRightsReserved

Contents
Introduction.................................................................2
Safety...........................................................................4
SafeOperatingPractices.......................................4
Supervisor’sResponsibilities.................................4
BeforeOperating.................................................4
WhileOperating...................................................5
Maintenance.........................................................6
SoundPressureLevel...........................................7
VibrationLevel.....................................................7
SafetyandInstructionalDecals.............................7
Setup..........................................................................13
1InstalltheRearFenders....................................13
2InstalltheWheels............................................14
3InstalltheSteeringWheel.................................14
4InstalltheFrontFenders..................................15
5InstalltheROPS..............................................15
6ActivateandChargetheBattery........................16
7FullBedRemoval.............................................17
8Re-InstalltheFullBed......................................18
ProductOverview......................................................19
Controls.............................................................19
Specications.....................................................22
Attachments/Accessories...................................23
Operation...................................................................23
CheckCrankcaseOil..........................................23
FillFuelTank.....................................................24
CheckCoolingSystem........................................25
CheckTransaxle/HydraulicFluid......................25
CheckFrontDifferentialOil...............................26
CheckTorqueOfWheelNuts.............................26
CheckTirePressure............................................26
CheckBrakeFluid..............................................26
CheckFanBeltTension......................................27
Pre–startingChecks............................................27
StartingEngine...................................................27
DrivingVehicle..................................................28
StoppingVehicle................................................28
StoppingEngine.................................................28
NewVehicleBreak–in........................................28
CheckInterlockSystem......................................28
OperatingCharacteristics...................................29
Passengers..........................................................30
Speed.................................................................30
Turning..............................................................30
Braking..............................................................30
Tipovers.............................................................31
Hills...................................................................31
LoadingAndDumping.......................................32
UsingTheDifferentialLock...............................32
FourWheelDrive...............................................33
TransportingVehicle..........................................33
TowingVehicle...................................................33
TrailerTowing....................................................33
HydraulicControl...............................................34
Maintenance...............................................................36
RecommendedMaintenanceSchedule(s)................36
ServiceIntervalChart.........................................37
HeavyDutyOperation.......................................37
PremaintenanceProcedures....................................38
UsingBedSafetySupport...................................38
JackingVehicle...................................................39
Lubrication.............................................................39
GreasingBearingsandBushings.........................39
EngineMaintenance...............................................41
GeneralAirCleanerMaintenance
Practices.........................................................41
ServicingAirCleaner..........................................41
ChangingEngineOilAndFilter..........................41
ReplacingSparkPlugs.........................................42
FuelSystemMaintenance.......................................43
FuelSystem........................................................43
ElectricalSystemMaintenance................................43
Fuses..................................................................43
JumpStartingVehicle.........................................44
BatteryCare.......................................................44
DriveSystemMaintenance.....................................45
ChangeFrontDifferentialOil.............................45
InspectConstantVelocityBoot...........................45
AdjustingShiftCables........................................45
AdjustingHigh–lowCable..................................45
AdjustingDifferentialLockCable.......................45
InspectTires......................................................46
FrontWheelToe................................................46
CoolingSystemMaintenance..................................47
RemovingDebrisFromEngineCooling
System............................................................47
ChangingEngineCoolant...................................47
BrakeMaintenance.................................................49
InspectBrakes....................................................49
BeltMaintenance....................................................49
AdjustingBelts...................................................49
ControlsSystemMaintenance.................................50
AdjustingAcceleratorPedal................................50
AdjustingBrakePedal.........................................51
AdjustingClutchPedal.......................................51
AdjustingParkingBrake.....................................52
HydraulicSystemMaintenance...............................53
ChangingTransaxle/HydraulicFluid.................53
ReplacingHydraulicFilter...................................53
CleaningHydraulicStrainer................................54
EmergencyBoxRaising......................................54
Storage.......................................................................56
BatteryStorage...................................................56
Schematics.................................................................57
3
Safety
TheTOROWORKMANmeetstherequirementsof
SAEJ2258.
Supervisors,operatorsandservicepersonsshouldbe
familiarwiththefollowingstandardsandpublications:
(Thematerialmaybeobtainedfromtheaddressshown).
•FlammableandCombustibleLiquidsCode:
ANSI/NFPA30
•NationalFireProtectionAssociation:
ANSI/NFPA#505;PoweredIndustrialTrucks
ADDRESS:
NationalFirePreventionAssociation
BarrymarchPark
Quincy,Massachusetts02269U.S.A
•ANSI/ASMEB56.8PersonalBurdenCarriers
ADDRESS:
AmericanNationalStandardsInstitute,Inc.
1430Broadway
NewYork,NewYork10018U.S.A.
•ANSI/UL558;InternalCombustionEngine
PoweredIndustrialTrucks
TrucksADDRESS:
AmericanNationalStandardsInstitute,Inc.
1430Broadway
NewYork,NewYork10018U.S.A.
OR
UnderwritersLaboratories
333PngstenRoad
Northbrook,Illinois60062U.S.A.
SafeOperatingPractices
TheWorkmanisanoff–highwayvehicleonly,
andisnotdesigned,equipped,ormanufactured
foruseonpublicstreets,roadsorhighways.
TheWorkmanwasdesignedandtestedtooffersafe
servicewhenoperatedandmaintainedproperly.
Althoughhazardcontrolandaccidentprevention
partiallyaredependentuponthedesignand
congurationofthemachine,thesefactorsarealso
dependentupontheawareness,concern,andproper
trainingofthepersonnelinvolvedintheoperation,
maintenanceandstorageofthemachine.Improperuse
ormaintenanceofthemachinecanresultininjuryor
death.
Thisisaspecializedutilityvehicledesignedforoff–road
useonly.itsrideandhandlingwillhaveadifferent
feelthanwhatdriversexperiencewithpassengercars
ortrucks.Sotaketimetobecomefamiliarwithyour
Workman.
NotalloftheattachmentsthatadapttotheWorkman
arecoveredinthismanual.SeethespecicOperator’s
Manualprovidedwithattachmentforadditionalsafety
instructions.Readthesemanuals.
Toreducethepotentialforinjuryordeath,comply
withthefollowingsafetyinstructions:
Supervisor’sResponsibilities
•Makesureoperatorsarethoroughlytrainedand
familiarwiththeOperator’sManualandalllabels
onthevehicle.
•Besuretoestablishyourownspecialproceduresand
workrulesforunusualoperatingconditions(e.g.
slopestoosteepforvehicleoperation).Usethe3rd
HighLockoutswitchifhighspeedcouldresultina
safetyorvehicleabusesituation.
BeforeOperating
•Operatethemachineonlyafterreadingand
understandingthecontentsofthismanual.A
replacementmanualisavailablebysendingcomplete
modelandserialnumberto:TheToro®Company,
8111LyndaleAvenueSouth,Minneapolis,Minnesota
55420.
•Neverallowchildrentooperatethevehicle.Never
allowadultstooperateitwithoutproperinstructions.
Onlytrainedandauthorizedpersonsshouldoperate
thisvehicle.Makesurealloperatorsarephysically
andmentallycapableofoperatingthevehicle.
•Thisvehicleisdesignedtocarryonlyyou,the
operator,andonepassengerintheseatprovidedby
themanufacturer.Nevercarryanyotherpassengers
onthevehicle.
•Neveroperatethevehiclewhenundertheinuence
ofdrugsoralcohol.
•Becomefamiliarwiththecontrolsandknowhowto
stoptheenginequickly.
•Keepallshields,safetydevicesanddecalsinplace.
Ifashield,safetydeviceordecalismalfunctioning,
4

illegible,ordamaged,repairorreplaceitbefore
operatingthemachine.
•Alwayswearsubstantialshoes.Donotoperate
machinewhilewearingsandals,tennisshoesor
sneakers.Donotwearloosettingclothingor
jewelrywhichcouldgetcaughtinmovingpartsand
causepersonalinjury.
•Wearingsafetyglasses,safetyshoes,longpantsanda
helmetisadvisableandrequiredbysomelocalsafety
andinsuranceregulations.
•Keepeveryone,especiallychildrenandpets,away
fromtheareasofoperation.
•Beforeoperatingthevehicle,alwayscheckallparts
ofthevehicleandanyattachments.Ifsomethingis
wrong,stopusingvehicle.Makesureproblemis
correctedbeforevehicleorattachmentisoperated
again.
•Sincegasolineishighlyammable,handleitcarefully.
–Useanapprovedfuelcontainer.
–Donotremovecapfromfueltankwhenengine
ishotorrunning.
–Donotsmokewhilehandlingfuel.
–Fillfueltankoutdoorsandtoaboutoneinch
belowtopoftank(bottomofllerneck).Do
notoverll.
–Wipeupanyspilledfuel.
•Operatevehicleonlyoutdoorsorinawellventilated
area.
•Useonlyanapprovednon–metal,portablefuel
container.Staticelectricdischargecanignitefuel
vaporsinaungroundedfuelcontainer.Removethe
fuelcontainerfromthebedofthevehicleandplace
onthegroundawayfromthevehiclebeforelling.
Keepnozzleincontactwithcontainerwhilelling.
Removeequipmentfromvehiclebedbeforelling.
•Checkthesafetyinterlocksystemdailyforproper
operation.Ifaswitchshouldmalfunction,replace
theswitchbeforeoperatingmachine.Afterevery
twoyears,replacetheinterlockswitchesinthesafety
system,whethertheyareworkingproperlyornot.
WhileOperating
•Operatorandpassengershoulduseseatbeltsand
remainseatedwheneverthevehicleisinmotion.
Operatorshouldkeepbothhandsonsteeringwheel,
wheneverpossibleandpassengershouldusehand
holdsprovided.Keeparmsandlegswithinthe
vehiclebodyatalltimes.Nevercarrypassengers
intheboxoronattachments.Rememberyour
passengermaynotbeexpectingyoutobrakeorturn
andmaynotbeready.
•Neveroverloadyourvehicle.Nameplate(located
undermiddleofdash)showsloadlimitsforvehicle.
Neveroverllattachmentsorexceedthevehicle
maximumGVW .
•Whenstartingtheengine:
–Sitonoperator’sseatandensureparkingbrake
isengaged.
–DisengagePTO(ifsoequipped)andreturnhand
throttlelevertoOFFposition(ifsoequipped).
–Makesurethehydraulicliftleverisinthecenter
position.
–MoveshiftlevertoNEUTRALanddepress
clutchpedal.
–Keepfootoffacceleratorpedal.
–TurnignitionkeytoSTART.
•Usingthemachinedemandsattention.Failureto
operatevehiclesafelymayresultinanaccident,tip
overofvehicleandseriousinjuryordeath.Drive
carefully.Topreventtippingorlossofcontrol:
–Useextremecaution,reducespeedandmaintain
asafedistancearoundsandtraps,ditches,creeks,
ramps,anyunfamiliarareasorotherhazards.
–Watchforholesorotherhiddenhazards.
–Usecautionwhenoperatingvehicleonasteep
slope.Normallytravelstraightupanddown
slopes.Reducespeedwhenmakingsharpturns
orwhenturningonhillsides.Avoidturningon
hillsideswheneverpossible.
–Useextracautionwhenoperatingvehicleonwet
surfaces,athigherspeedsorwithafullload.
Stoppingtimewillincreasewithafullload.Shift
intoalowergearbeforestartingupordowna
hill.
–Whenloadingbed,distributeloadevenly.Use
extracautioniftheloadexceedsthedimensions
ofthevehicle/bed.Operatevehiclewithextra
cautionwhenhandlingoff–centerloadsthat
cannotbecentered.Keeploadsbalancedand
securetopreventthemfromshifting.
–Avoidsuddenstopsandstarts.Donotgofrom
reversetoforwardorforwardtoreversewithout
rstcomingtoacompletestop.
–Donotattemptsharpturnsorabruptmaneuvers
orotherunsafedrivingactionsthatmaycausea
lossofvehiclecontrol.
–Donotpassanothervehicletravelinginthesame
directionatintersections,blindspots,oratother
dangerouslocations.
5

–Whendumping,donotletanyonestandbehind
vehicleanddonotdumploadonanyone’sfeet.
Releasetailgatelatchesfromsideofbox,not
frombehind.
–Keepallbystandersaway.Beforebackingup,
looktotherearandassurenooneisbehindthe
vehicle.Backupslowly.
–Watchoutfortrafcwhennearorcrossingroads.
Alwaysyieldtherightofwaytopedestriansand
othervehicles.Thisvehicleisnotdesignedfor
useonstreetsorhighways.Alwayssignalyour
turnsorstopearlyenoughsootherpersons
knowwhatyouplantodo.Obeyalltrafcrules
andregulations.
–Neveroperatevehicleinornearanareawhere
thereisdustorfumesintheairwhichare
explosive.Theelectricalandexhaustsystems
ofthevehiclecanproducesparkscapableof
ignitingexplosivematerials.
–Alwayswatchoutforandavoidlowoverhangs
suchastreelimbs,doorjambs,overhead
walkways,etc.Makesurethereisenoughroom
overheadtoeasilyclearthevehicleandyour
head.
–Ifeverunsureaboutsafeoperation,STOP
WORKandaskyoursupervisor.
•Donottouchengine,transaxle,radiator,muferor
mufermanifoldwhileengineisrunningorsoon
afterithasstoppedbecausetheseareasmaybehot
enoughtocauseburns.
•Ifthemachineevervibratesabnormally,stop
immediately,turnengineoff,waitforallmotion
tostopandinspectfordamage.Repairalldamage
beforeresumingoperation.
•Beforegettingofftheseat:
–Stopmovementofthemachine.
–Lowerbed.
–Shutengineoffandwaitforallmovementto
stop.
–Setparkingbrake.
–Removekeyfromignition.
Maintenance
•Beforeservicingormakingadjustmentstothe
machine,stopengine,setparkingbrakeandremove
keyfromignitiontopreventaccidentalstartingof
theengine.
•Neverworkunderaraisedbedwithoutplacingbed
safetysupportonfullyextendedcylinderrod.
•Makesureallhydrauliclineconnectorsaretight,and
allhydraulichosesandlinesareingoodcondition
beforeapplyingpressuretothesystem.
•Keepbodyandhandsawayfrompinholeleaksor
nozzlesthatejecthydraulicuidunderhighpressure.
Usepaperorcardboard,nothands,tosearchfor
leaks.Hydraulicuidescapingunderpressurecan
havesufcientforcetopenetrateskinanddoserious
damage.Ifuidisinjectedintotheskinitmustbe
surgicallyremovedwithinafewhoursbyadoctor
familiarwiththisformofinjuryorgangrenemay
result.
•Beforedisconnectingorperforminganyworkon
thehydraulicsystem,allpressureinsystemmust
berelievedbystoppingengine,cyclingdump
valvefromraisetolowerand/orloweringboxand
attachments.Placetheremotehydraulicsleverin
theoatposition.Ifboxmustbeinraisedposition,
securewithsafetysupport.
•Tomakesureentiremachineisingoodcondition,
keepallnuts,boltsandscrewsproperlytightened.
•Toreducepotentialrehazard,keeptheengine
areafreeofexcessivegrease,grass,leavesand
accumulationofdirt.
•Iftheenginemustberunningtoperforma
maintenanceadjustment,keephands,feet,clothing,
andanypartsofthebodyawayfromtheengineand
anymovingparts.Keepeveryoneaway.
•Donotoverspeedenginebychanginggovernor
settings.Maximumenginespeedis3650rpm.To
assuresafetyandaccuracy,haveanAuthorizedToro
Distributorcheckmaximumenginespeedwitha
tachometer.
•Ifmajorrepairsareeverneededorassistanceis
required,contactanAuthorizedToroDistributor.
•Tobesureofoptimumperformanceandsafety,
alwayspurchasegenuineTororeplacementpartsand
accessories.Replacementpartsandaccessoriesmade
byothermanufacturerscouldbedangerous.Altering
thisvehicleinanymannermayaffectthevehicle’s
operation,performance,durabilityoritsusemay
resultininjuryordeath.Suchusecouldvoidthe
productwarrantyofTheToro®Company.
•Thisvehicleshouldnotbemodiedwithout
TheToro®Company’sauthorization.Directany
inquiriestoTheToro®Company,Commercial
Division,VehicleEngineeringDept.,8111Lyndale
Ave.So.,Bloomington,Minnesota55420–1196.
USA
6

SoundPressureLevel
ThisunithasanequivalentcontinuousA-weighted
soundpressureattheoperatorearof:88dB(A),based
onmeasurementsofidenticalmachinesperDirective
98/37/ECandamendments.
VibrationLevel
Hand-Arm
Thisunitdoesnotexceedavibrationlevelof2.5m/s2at
thehandsbasedonmeasurementsofidenticalmachines
perISO5349procedures.
WholeBody
Thisunitdoesnotexceedavibrationlevelof0.5m/s2
attheposterior,basedonmeasurementsofidentical
machinesperISO2631procedures.
SafetyandInstructionalDecals
Safetydecalsandinstructionsareeasilyvisibletotheoperatorandarelocatednearanyareaof
potentialdanger.Replaceanydecalthatisdamagedorlost.
93-9852
1.Warning—readtheOperator’sManual.2.Crushinghazard—installthecylinderlock.
93-9448
1.Warning—whenaddingfueltothetank,leave25mm
betweenthefuelandthetopofthetank;readtheOperator’s
Manual.
93-9442
1.Maximumtongueweight
is90kg;maximumtrailer
weightis680kg.
2.Forinformationon
transmissionuid,read
theOperator’sManual.
93-9879
1.Storedenergyhazard—readtheOperator’sManual.
93-8071
1.Hotsurface/burnhazard—stayasafedistancefromthe
hotsurface.
93-9447
1.Warning—readtheOperator’sManual;removetheignition
keybeforeservicingorperformingmaintenanceonthe
engineairintakesystem.
7

93-6687
1.Donotstephere.
93-7814
1.Entanglementhazard,belt—stayawayfrommovingparts.
93-9449
1.ReadtheOperator’s
Manual.
3.Addgrease(9grease
points).
2.Greaseevery100hours.
115-2320
1.Warning—donotoperate
thevehicleonpublic
streets,roads,orhighways.
4.Engine—preheat7.Temperaturelevel10.Engine—run
2.Headlights5.Horn8.Hourmeter11.Engine—start
3.Engine—oil6.Battery9.Engine—stop
105-4215
1.Warning—avoidpinchpoints.93-9862
1.Entanglementhazard,shaft—stayawayfrommovingparts,
keepallguardsandshieldsinplace.
8

106-2353
1.Electricalpowerpoint
106-2355
1.Slow3.Transmission—thirdhigh;
nofastspeed
2.Fast
106-2377
1.Locked8.Warning—readtheOperator’sManual.
2.Differentiallock9.Entanglementhazard,shaft—keepbystander’sasafe
distancefromthevehicle.
3.Unlocked10.Retracthydraulics
4.Hydrauliclock11.Extendhydraulics
5.Engage12.Transmission—highspeed
6.Powertake-off(PTO)13.Transmission—lowspeed
7.Disengage14.Parkingbrake
9

110-2599
1.Warning—readtheOperator’sManual.
2.Firehazard—stoptheenginebeforefueling.
3.Tippinghazard—readtheOperator’sManual,donotoperatethismachineunlessyouaretrained,usecautionanddriveslowly
whendrivingonslopes,slowdownandturngradually,donotexceed20mph(32kph),anddriveslowlyoverroughterrainor
whencarryingafullorheavyload.
4.Crushing/dismembermenthazardofbystanders—keepbystandersasafedistancefromthevehicle,donotcarrypassengersin
thecargobed,andkeeparmsandlegsinsideofthevehicleatalltimes.
5.Warning—stoptheengineandremovetheignitionkeybeforeleavingthevehicle.
93-6689
1.Warning—donotcarrypassengers.
98-9335
1.Cutting/dismembermenthazard,fan—stayawayfrom
movingparts.
93–9868
1.Crushinghazardofhand—readtheOperator’sManual.
106-7894
1.Engine—start3.Headlights
2.Ignition4.Powerpoint
106-7767
1.Warning—readtheOperator’sManual;avoidtippingthe
machine;weartheseatbelt;leanawayfromthedirection
themachineistipping.
10

106-7888
1.Warning—readthe
hydraulicoilpressure
is124bar(1800psi)
3.CouplerB
2.CouplerA
93-9899
93-9899
1.Crushinghazard—installthecylinderlock.
BatterySymbols
Someorallofthesesymbolsareonyourbattery
1.Explosionhazard6.Keepbystandersasafe
distancefromthebattery.
2.Nore,opename,or
smoking.
7.Weareyeprotection;
explosivegasescan
causeblindnessandother
injuries
3.Causticliquid/chemical
burnhazard
8.Batteryacidcancause
blindnessorsevereburns.
4.Weareyeprotection9.Flusheyesimmediately
withwaterandgetmedical
helpfast.
5.ReadtheOperator’s
Manual.
10.Containslead;donot
discard.
93-9850
1.Donotrepairorrevise—readtheOperator’sManual.
11

106-2384
12

Setup
LooseParts
Usethechartbelowtoverifythatallpartshavebeenshipped.
ProcedureDescriptionQty.Use
Rearfender2
Bolts,3/8x1–1/4in10
Locknut,3/82
1Supportplate2
Mounttherearfenders.
Wheelnut10
Frontwheel2
Wheelnut10
2Rearwheel2
Mountthewheels.
Steeringwheel1
Cap1
Washer1
3Foamseal1
Installthesteeringwheel.
Frontfender2
Sockethexheadbolt,#10x3/4”in.10
Washer,.210I.D.20
4Locknut,#1010
Installthefrontfenders.
ROPSframe1
bolt,1/2x3”in.4
5Locknut,1/24
MounttheROPS(RolloverProtection
System)
MediaandAdditionalParts
DescriptionQty.Use
Operator’sManual1Readbeforeoperatingthevehicle
PartsManual1Usetoreferencepartnumbers
Note:Determinetheleftandrightsideofthemachine
fromthenormaloperatingposition.1
InstalltheRearFenders
Partsneededforthisprocedure:
2Rearfender
10Bolts,3/8x1–1/4in
2Locknut,3/8
2Supportplate
Procedure
1.Loosenthelocknutsandboltssecuringtaillight
bracketstorightandleftframebrackets(Figure3).
2.Pivottaillightbracketsrearwardandtightenbolts
andlocknuts.
13

Figure3
1.Fender
3.Securerearofeachtaillightbrackettorearof
framebracketswitha5/16x1in.bolt,.344”I.D.
atwasherandlocknut,asshowninFigure3.
Figure4
1.Fender2.Supportplate
4.Looselysecureafendertoeachsideofframewith
asupportplate,(5)3/8x1–1/4in.bolts,anda
locknutasshowninFigure4.
Note:Weldnutsareinplacetosecure(4)ofthe
bolts.
5.Tightenallfasteners.
2
InstalltheWheels
Partsneededforthisprocedure:
10Wheelnut
2Frontwheel
10Wheelnut
2Rearwheel
Procedure
1.Removelugnutssecuringwheelstowheelbrackets.
Retainlugnuts.
2.Mountwheelsandinstalllugnuts.Torquelugnuts
to45–65ft-lb.
Figure5
1.Wheel2.Wheelnut
14

3

InstalltheSteeringWheel
Partsneededforthisprocedure:
1Steeringwheel
1Cap
1Washer
1Foamseal
Procedure
1.Removethejamnutfromthesteeringshaft.Slide
thefoamseal,steeringwheelandwasheronto
steeringshaft(Figure6).
2.Securesteeringwheeltoshaftwithjamnutand
tightenitto10-15ft-lb.
3.Installcaptosteeringwheel.
Figure6
1.Steeringwheel3.Cap
2.Jamnut4.Washer
4
InstalltheFrontFenders
Partsneededforthisprocedure:
2Frontfender
10Sockethexheadbolt,#10x3/4”in.
20Washer,.210I.D.
10Locknut,#10
Procedure
1.Alignthevefendermountingholeswiththeholes
ineachsideofbody(Figure7).
2.Mountafendertoeachsideofbodywith(5)#10x
3/4in.socketheadbolts,(10)atwashersand(5)
#10locknuts.Positionawashernexttobolthead
andlocknut.
Figure7
1.Fender
15

5
InstalltheROPS
Partsneededforthisprocedure:
1ROPSframe
4bolt,1/2x3”in.
4Locknut,1/2
Procedure
1.InserteachsideofROPSintomountingbracket
oneachsideofvehicleframe,positioningROPSas
showninFigure8.
Note:TheROPScoverplatemountingboltsmay
havetobeloosenedtoinserttheROPSintothe
mountingbrackets.
2.SecureeachsideofROPStomountingbracketswith
(2)1/2–13x3”lg.boltsandlocknuts.
Figure8
1.ROPS3.Covermountingplate
2.Mountingbracket
6
ActivateandChargethe
Battery
Partsneededforthisprocedure:
Procedure
Ifbatteryisnotlledwithelectrolyteoractivated,it
mustberemovedfromvehicle,lledwithelectrolyte
andcharged.Bulkelectrolytewith1.260specicgravity
canbepurchasedfromalocalbatterysupplyoutlet.
Warning
CALIFORNIA
Proposition65Warning
Batteryposts,terminals,andrelated
accessoriescontainleadandleadcompounds,
chemicalsknowntotheStateofCalifornia
tocausecancerandreproductiveharm.
Washhandsafterhandling.
Batteryelectrolytecontainssulfuricacidwhich
isadeadlypoisonandcausessevereburns.
•Donotdrinkelectrolyteandavoidcontact
withskin,eyesorclothing.Wearsafety
glassestoshieldyoureyesandrubbergloves
toprotectyourhands.
•Fillthebatterywherecleanwaterisalways
availableforushingtheskin.
1.Loosenknobssecuringbatterycovertobatterybase
andslidecoveroff.
16

Figure9
1.Batterycover3.Batterybase
2.Knob
2.Removebolt,washersandlocknutsecuringbattery
holddowntobatterybase.Removeholddownand
slidebatteryoutofbatterybase.
3.Removellercapsfrombatteryandslowlylleach
celluntilelectrolyteisjustabovetheplates.
4.Replacellercapsandconnecta3to4ampbattery
chargertothebatteryposts.Chargethebatteryata
rateof3to4amperesfor4to8hours.
Chargingthebatteryproducesgassesthatcan
explode.
Neversmokenearthebatteryandkeepsparks
andamesawayfrombattery.
5.Whenbatteryischarged,disconnectchargerfrom
electricaloutletandbatteryposts.
Figure10
1.Positive(+)cable
6.Removellercaps.Slowlyaddelectrolytetoeach
celluntillevelisuptollring.Installllercaps.
Important:Donotoverllbattery.Electrolyte
willoverowontootherpartsofthevehicleand
severecorrosionanddeteriorationwillresult.
7.Slidebatteryintobatterybasesobatteryterminals
aretowardtherearofthevehicle.
8.Installthepositivecable(red)tothepositive(+)
terminalandthenegativecable(black)tothe
negative(—)terminalofthebatteryandsecure
withboltsandnuts.Slidetherubberbootoverthe
positiveterminaltopreventpossibleshort–outfrom
occurring.
Incorrectbatterycableroutingcoulddamage
themachineandcablescausingsparks.Sparks
cancausethebatterygassestoexplode,
resultinginpersonalinjury.
•Alwaysdisconnectthenegative(black)
batterycablebeforedisconnectingthe
positive(red)cable.
•Alwaysconnectthepositive(red)battery
cable
9.Installbatteryholddownandsecuretobasewith
bolt,washersandlocknut.
10.Reinstallbatterycovertobatterybaseandtighten
knobs.
17

7
FullBedRemoval
NoPartsRequired
Procedure
1.Startengine.Engagehydraulicliftleverandlower
beduntilcylindersarelooseinslots.Releaseliftlever
andturnoffengine.
2.Removelynchpinsfromouterendsofcylinderrod
clevispins(Figure11).
Figure11
1.Bedmountingplate4.Lynchpin
2.Cylinderrodend5.Rearslots(Fullbed)
3.Clevispin6.Frontslots(2/3bed)
3.Removeclevispinssecuringcylinderrodendsto
bedmountingplatesbypushingpinstowardsinside
(Figure11).
4.Removelynchpinsandclevispinssecuringpivot
bracketstoframechannels(Figure11).
5.Liftbedoffvehicle.
Thefullbedweighsapproximately325pounds,
sodonottrytoinstallorremoveitbyyourself.
Useanoverheadhoistorgetthehelpoftwoor
threeotherpeople.
6.Storecylindersinstorageclips.Engagehydrauliclift
lockleveronvehicletopreventaccidentalextension
ofliftcylinders.
8
Re-InstalltheFullBed
NoPartsRequired
Procedure
Note:Ifbedsideswillbeinstalledonatbed,itis
easiertoinstallthembeforebedisinstalledonvehicle.
Note:Assurerearpivotplatesareboltedtothebed
frame/channelsothatlowerendanglestotherear
(Figure12).
Figure12
1.Leftrearcornerofbed4.Clevispin
2.Vehicleframechannel5.Lynchpin
3.Pivotplate
Note:Makesurespacerbracketsandwearblocks
(Figure13)areinstalledorradiatorcovermaybe
damaged.Carriageboltsheadstobepositionedinside
themachine.
18

Thefullbedweighsapproximately325pounds,
sodonottrytoinstallorremoveitbyyourself.
Useanoverheadhoistorgetthehelpoftwoor
threeotherpeople.
Figure13
1.Spacerbracket3.Carriagebolt
2.Wearblock
1.Assureliftcylindersarefullyretracted.
2.Carefullysetbedontovehicleframealigningrearbed
pivotplateholeswithholesinrearframechannel
andinstall(2)clevispinsandlynchpins(Figure12).
3.Withbedlowered,secureeachcylinderrodend,to
appropriateslotsinbedmountingplateswithclevis
pinandlynchpin.Insertclevispinfromoutsideof
bedwithlynchpintowardoutside(Figure12).Rear
slotsareforfullbedinstallationandfrontslotsare
for2/3bedinstallation.
Note:Enginemayneedtobestartedtoextend
orretractcylindersforalignmentwithholes.Keep
ngersout!
Note:Unusedslotcanbepluggedwithaboltand
nuttopreventassemblyerrors.
4.Startengineandengagehydraulicliftlevertoraise
bed.Releaseliftleverandturnoffengine.Installthe
bedsafetysupporttopreventaccidentalloweringof
thebed.RefertoUsingBedSafetySupport.
5.Installlynchpinstoinsideendsofclevispins.
Note:Ifautomatictailgatereleasehasbeen
installedonbed,makesurefrontdumplinkrodhas
beenplacedoninsideofleftsideclevispinbefore
lynchpinisinstalled.
ProductOverview
Controls
Note:Determinetheleftandrightsideofthemachine
fromthenormaloperatingposition.
AcceleratorPedal
Theacceleratorpedal(Figure14)givestheoperatorthe
abilitytovaryengineandgroundspeedofthevehicle,
whenthetransmissionisingear.Depressingthepedal
increasesengineRPMandgroundspeed.Releasing
pedalwilldecreaseengineRPMandgroundspeedof
themachine.
Figure14
1.Acceleratorpedal3.Brakepedal
2.Clutchpedal
ClutchPedal
Theclutchpedal(Figure14)mustbefullydepressed
todisengageclutchwhenstartingengineorshifting
transmissiongears.Releasepedalsmoothlywhen
transmissionisingeartopreventunnecessarywearon
transmissionandotherrelatedparts.
Important:Donotrideclutchpedalduring
operation.Clutchpedalmustbefullyoutorclutch
willslipcausingheatandwear.Neverholdthe
vehiclestoppedonahillusingtheclutchpedal.
Damagetotheclutchmayoccur.
BrakePedal
Thebrakepedal(Figure14)isusedtoapplyservice
brakestostoporslowvehicle.
19

Wornormisadjustedbrakesmayresultin
personalinjury.Ifbrakepedaltravelstowithin
1–1/2”ofthevehicleoorboard,thebrakes
mustbeadjustedorrepaired.
GearShiftLever
Fullydepressclutchpedalandmoveshiftlever
(Figure16)intodesiredgearselection.Adiagramofthe
shiftpatternisindicatedinFigure15.
Figure15
Important:Donotshiftthetransaxletothereverse
orforwardgearunlessthevehicleisstandingstill.
Damagetotransaxlemayoccur.
Downshiftingfromtoohighaspeedcan
causetherearwheelstoskidresultinginloss
ofvehiclecontrolaswellasclutchand/or
transmissiondamage.Shiftsmoothlytoavoid
grindinggears.
DifferentialLock
Allowsrearaxletobelockedforincreasedtraction.
Differentiallock(Figure16)maybeengagedwith
vehicleinmotion.Moveleverforwardandtotheright
toengagelock.
Note:Vehiclemotionplusaslightturnisrequiredto
engageordisengagedifferentiallock.
Turningwiththedifferentiallockoncanresult
inlossofvehiclecontrol.Donotoperatewith
differentiallockonwhenmakingsharpturnsor
athighspeeds.Refertousingthedifferential
lock.
Figure16
1.Gearshiftlever4.Hydraulicliftlock
2.Parkingbrake5.Differentiallock
3.Hydraulicbedlift6.High–lowrangeshifter
ParkingBrake
Whenevertheengineisshutoff,theparkingbrake
(Figure16)mustbeengagedtopreventaccidental
movementofthevehicle.Toengagetheparkingbrake,
pullbackonlever.Todisengage,pushleverforward.
Makesureparkingbrakeisreleasedbeforemoving
vehicle.Ifvehicleisparkedonasteepgrade,makesure
parkingbrakeisapplied.Also,shiftthetransmission
into1stgearonauphillgradeorreverseonadownhill
grade.Placechocksatthedownhillsideofwheels.
HydraulicLift
Raisesandlowersbed.Moverearwardtoraise,forward
tolower(Figure16).
Important:Whenloweringbed,holdleverin
forwardpositionfor1or2secondsafterbed
contactsframetosecureitinloweredposition.
Donotholdthehydraulicliftineithertheraiseor
lowerposition,formorethan5seconds,oncethe
cylindershavereachedtheendoftheirtravel.
HydraulicLiftLock
Locksliftleversohydrauliccylindersdonotoperate
whenvehicleisnotequippedwithabed(Figure16).
ItalsolocksliftleverinONpositionwhenusingthe
hydraulicsforattachments.
High–LowRangeShifter
Addsthreeadditionalspeedsforprecisespeedcontrol
(Figure16).
•Vehiclemustbecompletelystoppedbeforeshifting
betweenHighandLowrange.
20
Other manuals for 7360
1
This manual suits for next models
5
Table of contents
Other Toro Utility Vehicle manuals

Toro
Toro MB-1600 User manual

Toro
Toro Workman HDX Auto User manual

Toro
Toro 7253 User manual

Toro
Toro Workman GTX User manual

Toro
Toro Workman GTX EFI User manual

Toro
Toro 07252TC Workman 1100 User manual

Toro
Toro Workman 3100 User manual

Toro
Toro Workman HDX--D User manual

Toro
Toro 07383 User manual

Toro
Toro 127-7377 User manual

Toro
Toro 7287 User manual

Toro
Toro 07352 User manual

Toro
Toro 7362 User manual

Toro
Toro 07413LT User manual

Toro
Toro 07280TC User manual

Toro
Toro 133-7128 User manual

Toro
Toro 07277 Workman 2110 User manual

Toro
Toro 07390 Workman HDX-Auto User manual

Toro
Toro Workman GTX 07413LT User manual

Toro
Toro 7359 User manual