manuals.online logo
Brands
  1. Home
  2. •
  3. Brands
  4. •
  5. Traceable
  6. •
  7. Timer
  8. •
  9. Traceable 5008 User manual

Traceable 5008 User manual

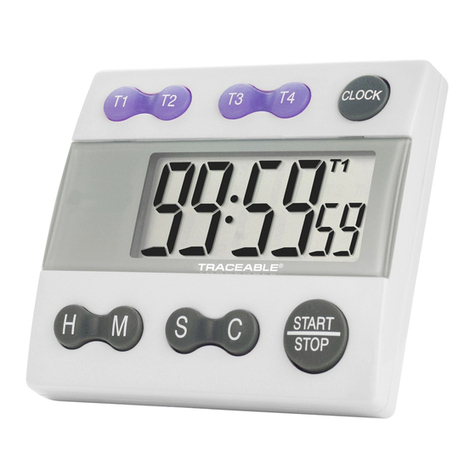
DESCRIPTION
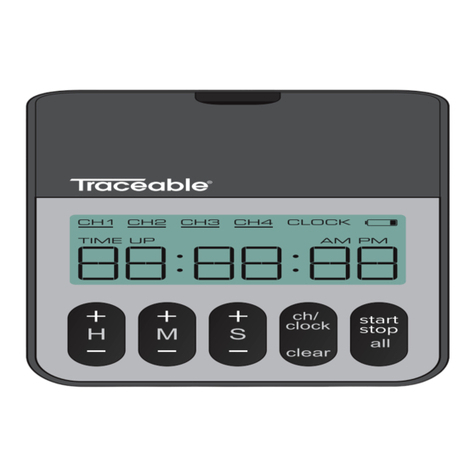
“HR” button: increase Hours value
“MIN” button: increase Minutes value
“SEC” button: increase Seconds value
“CLEAR” button: reset a timer setting
“CLOCK/TIMER” button: switch between clock and timer
“START/STOP” button: Start, Pause or Stop count up or
count down timer. Memory recall last setting of TIMER 1
TIMER 2 TIMER 3.
Timing Channels
“TIMER 1’’ button: start or stop channel 1.
“TIMER 2” button: start or stop channel 2.
“TIMER 3” button: start or stop channel 3.
Press corresponding channel for channel memory recall.
SPECIFICATIONS
Clock: Displays Hr/Min/Sec (AM/PM)
Count Up Timer: 99 hours, 59 minutes and 59 seconds
Count Down Timer: 99 hours, 59 minutes and 59
seconds. Timer will beep for 1 minute once set time is
reached.
Batteries: 2 x 1.5V lithium batteries
Material: ABS plastic
Dimensions: 8.82 x 6.62 x 1.32 cm, Weight: 90g.
OPERATION
To switch between .”Time/Count Up” and “Count Down”
mode, press the “CLOCK/TIMER” button.
1. In Time/Count Up mode, press the “CLOCK/TIMER”
button for 2 seconds until screen ashes. This
indicates time setting menu has been entered.
2. Press the “HR” button to increase HOURS; press
“MIN” button to increase Minutes and press “SEC”
button to increase Seconds. Continue pressing button
to increase value.
3. Press “CLOCK/TIMER” button to conrm new setting.
COUNT UP TIMER
1. In Time/Count Up mode, press START/STOP button.
Timer will begin counting up. Press START/STOP
button again to pause and press again to continue
counting up.
2. To clear count up time, press START/STOP to stop
timer and then press “CLEAR” button.
HR CLOCK/
TIMER
MIN CLEAR
SEC START/
STOP
www. .com information@itm.com1.800.561.8187
COUNTDOWN TIMER
Press “CLOCK/TIMER” button to enter “Count Down”
mode.
COUNTDOWN SETTINGS
Use three independent channels to time three different
events; Channels: TIMER 1, TIMER 2, and TIMER 3.
1. Press “TIMER 1” button until TIMER 1 appears on
display.
2. Press “HR” button to increase Hours value, press
“MIN” button to increase Minutes value and press
“SEC” button to increase Seconds. Continue pressing
button to increase value.
3. Press “CLEAR” to reset the value to zero.
4. Press the TIMER 1 button to conrm new setting.
5. If multi-channel timing is desired, repeat steps above
to set channels TIMER 2 and TIMER 3.
TO START A COUNTDOWN
1. Press the TIMER 1 button to start the channel 1 count
down, the TIMER 2 button to start the channel 2 count
down and the TIMER 3 button to start the channel 3
countdown.
2. Press the TIMER 1, TIMER 2 or TIMER 3 button again
to pause timer. Press again to continue countdown.
NOTE: TIMER1 or TIMER2 or TIMER3 message will
appear in the Time/Count Up mode while it is counting
down.
3. Press the CLEAR button to reset a timer setting or to
reset all 3 timer settings back to zero when the timer
is in the pause status.
4. Press “START/STOP” button to recall or bring back
last setting. When the timer is reset to zero, a
“MEMORY” message. will appear on the screen.
NOTE: Press “TIMER 1”, “TIMER 2” or “TIMER 3” to recall
or set the TIMER1, TIMER 2 or TIMER 3 timer back to
zero respectively. At the same time, a “MEMORY” message
will appear on its corresponding screen.
TO STOP A COUNTDOWN
1. Once it reaches set time, a “TIME’s UP” message will
appear. The screen will ash, continue to count up and
will beep for 1 minute.
2. When it reaches set time, press “TIMER 1” or “TIMER
2” or “TIMER 3” or “START/STOP” to stop the beep
sound and the timer. Press “CLEAR” to reset it to zero.
3. You can set the timer only if the timer’s value is zero.
NOTE: “TIME’s UP” and “TIMER 1” (TIMER 2 or TIMER 3)
message will ash on the screen when you are in the
“CLOCK /TIMER” mode.
www. .com information@itm.com1.800.561.8187

ALL OPERATIONAL DIFFICULTIES
If this timer does not function properly for any reason,
please replace battery with a new, high-quality battery
(see Battery Replacement section). Low battery power
can occasionally cause any number of “apparent”
operational difculties. Replacing battery with a fresh new
battery will solve most difculties.
BATTERY REPLACEMENT
An incorrect display, no display or operational difculties
indicate that the battery should be replaced. Slide
open the battery cover on the back of the timer. Insert
a new AAA alkaline battery. Make certain to note the
proper polarity as indicated by the diagram in the battery
compartment. Replace the battery cover.
www. .com information@itm.com1.800.561.8187
TRACEABLE
THREE-LINE
ALARM TIMER
INSTRUCTIONS
®
WARRANTY, SERVICE, OR
RECALIBRATION
For warranty, service, or recalibration, contact:
TRACEABLE
®
PRODUCTS
Cat. No. 5008
Traceable®is a registered trademark of Cole-Parmer.
©2020 Traceable®Products. 92-5008-00 Rev 4 033120
www. .com information@itm.com1.800.561.8187
This manual suits for next models

1

Other Traceable Timer manuals

Traceable 99M/59S User manual

Traceable

Traceable 99M/59S User manual

Traceable 5026 User manual

Traceable

Traceable 5026 User manual

Traceable 5667 User manual

Traceable

Traceable 5667 User manual

Traceable 5004 User manual

Traceable

Traceable 5004 User manual

Traceable 98768-63 User manual

Traceable

Traceable 98768-63 User manual

Popular Timer manuals by other brands

Levante LEV24/7PFS Fitting & user instructions

Levante

Levante LEV24/7PFS Fitting & user instructions

Woods 50123WD quick start guide

Woods

Woods 50123WD quick start guide

Uniteck UNITIMER 16.12 manual

Uniteck

Uniteck UNITIMER 16.12 manual

Sanela SLZA 02N Mounting instructions

Sanela

Sanela SLZA 02N Mounting instructions

WAREMA 1002 219 Operating and installation instructions

WAREMA

WAREMA 1002 219 Operating and installation instructions

uPunch HN2000 product manual

uPunch

uPunch HN2000 product manual

Alarm SAF UT-10 installation instructions

Alarm SAF

Alarm SAF UT-10 installation instructions

Aqua Control PRZERO manual

Aqua Control

Aqua Control PRZERO manual

Silent Gliss 11092 manual

Silent Gliss

Silent Gliss 11092 manual

Skytech E-Stop Series manual

Skytech

Skytech E-Stop Series manual

HANYOUNG NUX TF4 instruction manual

HANYOUNG NUX

HANYOUNG NUX TF4 instruction manual

red lion CUB5T manual

red lion

red lion CUB5T manual

Air King AKEDT2 operating manual

Air King

Air King AKEDT2 operating manual

La Crosse 919-186-60WH instructions

La Crosse

La Crosse 919-186-60WH instructions

Skytech TM-3 Installation and operation instructions

Skytech

Skytech TM-3 Installation and operation instructions

Delta GT-ZSm-01 Essantials user guide

Delta

Delta GT-ZSm-01 Essantials user guide

CO/Tech EMT799-30M instruction manual

CO/Tech

CO/Tech EMT799-30M instruction manual

Green Brook T108A Installation & operating instructions

Green Brook

Green Brook T108A Installation & operating instructions

manuals.online logo
manuals.online logoBrands
  • About & Mission
  • Contact us
  • Privacy Policy
  • Terms and Conditions

Copyright 2025 Manuals.Online. All Rights Reserved.