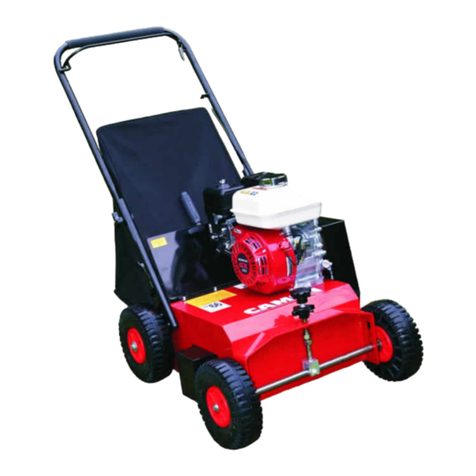
Tracmaster Camon LS52 User guide

Before commissioning the machine, read operang instrucons
and observe warning and safety instrucons.
Manufactured by Tracmaster Ltd
CAMON LS52 Lawn Scarier
ORIGINAL INSTRUCTION MANUAL
Before commissioning the machine, read operang instrucons
and observe warning and safety instrucons.
Manufactured by Tracmaster Ltd

CAMON LS52 Lawn Scarier
LS52 Lawn Scarier
Manufacturer Details
Tracmaster Ltd
Units 6-7 Winterpick Business Park
Hurstpierpoint Road
Wineham
Heneld
BN5 9BJ
UNITED KINGDOM
Tel: +44 (0)1444 247689
www.tracmaster.co.uk
info@tracmaster.co.uk
Machine Details
Model: CAMON LS52 Lawn Scarier
Serial No: B 0 6 - 11111
Engine Serial No: G A A A A -1111111
Purchase Date: D D -M M -Y Y Y Y
Supplier:

CAMON LS52 Lawn Scarier
LS52-03/2022.A Page 1
Table of Contents
1.0 Introducon .............................................................................................................................2
1.1 Welcome ................................................................................................................................2
1.2 About This Manual ................................................................................................................2
2.0 What the Machine is Designed For............................................................................................3
2.1 Applicaons ...........................................................................................................................3
3.0 Specicaons............................................................................................................................4
4.0 Unpacking and Assembly ..........................................................................................................5
4.1 Major Components Diagram .................................................................................................5
4.2 Unpacking Instrucons ..........................................................................................................5
5.0 Safety Instrucons – Pre-Operaon ..........................................................................................6
5.1 Basic Safety Instrucons ........................................................................................................6
5.2 Main Components and Operang Elements .........................................................................6
5.3 Engine and Drive ....................................................................................................................6
5.4 Operang Lever .....................................................................................................................6
5.5 Height Adjustment.................................................................................................................6
5.6 Collecon Bag ........................................................................................................................7
5.7 Rotor Sha .............................................................................................................................7
5.8 Commissioning ......................................................................................................................8
5.9 General Safety Instrucons ...................................................................................................8
5.10 Engine Specic Safety Instrucons ........................................................................................9
5.11 Machine Safety Scker Explanaons .....................................................................................9
6.0 Safety Instrucons Starng and Operang..............................................................................11
6.1 To Start the Engine ..............................................................................................................11
6.2 To Stop the Engine ...............................................................................................................12
6.3 Safety Equipment ................................................................................................................12
6.4 Operaon.............................................................................................................................12
6.5 Procedure for Unexpected Shut Down ................................................................................14
6.6 How to Clear Unwanted Debris from the Underside of the Machine .................................14
6.7 Residual Risks of the LS52 Lawn Scarier ............................................................................15
7.0 Maintenance ..........................................................................................................................16
7.1 Schedule ..............................................................................................................................16
7.2 Basic Maintenance ..............................................................................................................16
7.3 Advanced Maintenance .......................................................................................................16
7.3.1 Belt ............................................................................................................................16
7.3.2 Removing Cartridge/Rotor Assembly ........................................................................17
7.3.3 Fing Cartridge/Rotor Assembly ..............................................................................18
7.3.4 Blades ........................................................................................................................18
7.4 Engine ..................................................................................................................................21
7.4.1 Check Engine Oil Level ..............................................................................................21
7.4.2 Change Engine Oil .....................................................................................................22
7.4.3 Air Filter ....................................................................................................................22
7.4.4 Spark Plug .................................................................................................................22
7.5 Cleaning ...............................................................................................................................23
7.6 Troubleshoong ...................................................................................................................23
7.6.1 Machine ....................................................................................................................23
7.6.2 Engine ......................................................................................................................23
7.6.3 Lubricants ..................................................................................................................23
8.0 Transportaon, Storage and Handling.....................................................................................24
8.1 Transportaon .....................................................................................................................24
8.2 Storage.................................................................................................................................24
8.3 Handling ..............................................................................................................................24
9.0 Spare Parts .............................................................................................................................25
9.1 Parts Diagrams .....................................................................................................................25
10.0 Service Record ........................................................................................................................26
11.0 EC Declaraon of Conformity..................................................................................................27
12.0 Warranty Informaon.............................................................................................................28
CAMON LS52 Lawn Scarier
Page 2 www.tracmaster.co.uk
1.0 Introducon
1.1 Welcome
Welcome to Tracmaster and thank you for choosing CAMON.
We are condent that you will be more than happy with your machine.
Your machine is covered by a comprehensive warranty. However, the lifespan of
your CAMON machine depends on a number of factors. It is important that you read
this manual carefully and follow the instrucons regarding operaon, maintenance,
and care.
1.2 About This Manual
It is crucial that you read this manual carefully and understand it. Reading and
understanding this manual should prevent you from operang the LS52 Lawn
Scarier incorrectly and so extend the life of the machine.
This manual also contains important safety informaon about your machine.
You must observe all safety instrucons at all mes. CAMON machines are oen
updated and improved so models may vary due to dierences in specicaons.
Any illustraons, descripons, specicaons, and technical data in this manual is
correct at the me of prinng.
For any quesons relang to this manual please contact us.
During oce hours (UK) we can be contacted on:
Phone: +44 (0)1444 247689
Email: info@tracmaster.co.uk
Website: www.tracmaster.co.uk
IMPORTANT!
READ THIS MANUAL
CAREFULLY
!

CAMON LS52 Lawn Scarier
LS52-03/2022.A Page 3
2.0 What the Machine is Designed For
2.1 Applicaons
The CAMON LS52 Lawn Scarier has been designed by Tracmaster for removing the
dead thatch and moss from lawns and other grassed areas.
The benet of scarifying a lawn is that it allows air, water and nutrients to reach the
roots of the grass whilst removing unwanted dead and foreign material.
The blades of the CAMON LS52 Lawn Scarier are designed to pass through the
grass ONLY - they are NOT designed to make contact with solid ground at any point
during operaon.
The machine will be damaged should blades connuously come into contact with
solid ground.
DO NOT use the CAMON LS52 Lawn Scarier for cung grass or sling the ground.
Both operaons will result in damage to the machine.
Operang the machine on non-grass surfaces such as concrete or tarmac will cause
damage to the LS52 Lawn Scarier.
DO NOT scarify your lawn if there is a likelihood of high temperatures or drought.
Irrigate the lawn if necessary to ensure that the grass benets from its treatment.

CAMON LS52 Lawn Scarier
Page 4 www.tracmaster.co.uk
3.0 Specicaons
ENGINE
Engine Manufacturer Honda
Engine Model GX200
Engine Type 4-stroke OHV, single cylinder
Net Engine Power 4.1kW (5.5hp) @ 3600rpm
Engine Sha Size ¾” straight
Spark Plug BPR6ES (NGK) / W20EPR-U (DENSO)
Spark Plug Gap 0.70 - 0.80mm
Engine Ignion Type Recoil
Cold Start System Choke
Fuel Tank Capacity 3.1 litres
Fuel Type Unleaded
Fuel Consumpon 1.7 litres per hour @ 3600rpm
Air Filter Paper and foam
Rated Engine Speed 3600rpm
Working RPM 2800rpm
Engine Oil 10w/30 API SJ or equivalent
Engine Oil Capacity 0.6 litres
Dry Weight 16.1kg
The power rang of the engine indicated in this table is the net power output tested on a producon engine for the engine
model and measured in accordance with SAE J1349 at a specied rpm.
MACHINE
Model LS52
Working Width 52cm
Cartridge Types Free Swinging Fixed Spring Rake Renovaon
Number of Blades 36 18 36 18
Direcon of Rotor Rotor rotates in the same direcon as travel
Clutch Type Centrifugal
Height Adjustment From 0mm above ground to 20mm
Discharge Onto ground or into bag if ed
Wheel Types Solid rubber
Steering Handle Foldable
Noise Level 101 dB(A)
Vibraon Acceleraon Value 6.2ms2
Max Gradient for Operaon on Slope 20 degrees
Weight 72kg
Dimensions (l x w x h) 120 x 69 x 98cm

CAMON LS52 Lawn Scarier
LS52-03/2022.A Page 5
4.0 Unpacking and Assembly
4.1 Major Components Diagram
① Operang Lever
② Engine On/O Switch
③ Top Handlebar
④ Engine
⑤ Handlebar Locking Pins
⑥ Height Adjuster Knob
⑦ Belt Guard
⑧ Wheels
⑨ Front Axle
⑩ Back Flap
4.2 Unpacking Instrucons
The CAMON LS52 Lawn Scarier is usually delivered on a pallet, covered with pallet
wrap, and secured with transport brackets which are xed to the wheels.
Carefully remove any outer packaging.
Locate and remove any cable es or straps that secure the LS52 Lawn Scarier to
the pallet.
Using a 13mm spanner remove the bolts on the transport brackets. Once the
brackets are removed, ret the washer and bolt back onto the wheels ensuring
they are correctly ghtened.
Swivel the folded top part of the handlebar unl it locates into posion.
Place the handlebar locking pins (⑤on image above) into the holes to lock the
handlebars in the operang posion.
Push the machine forward safely and carefully o the pallet.
Dispose of the pallet and other packing material. Recycle where possible.
②
⑨
⑧
⑦
⑤
④
⑥
③
①
⑩

CAMON LS52 Lawn Scarier
Page 6 www.tracmaster.co.uk
5.0 Safety Instrucons – Pre-Operaon
5.1 Basic Safety Instrucons
Before starng the machine, read and understand these operang instrucons.
5.2 Main Components and Operang Elements
Below is a descripon of the main components of the LS52 Lawn Scarier and how
they operate.
5.3 Engine and Drive
The Honda GX200 (Fig. 1) is a four stroke engine that runs
on standard unleaded fuel.
The engine is air cooled and therefore it is important that
the grille covering the recoil rope is kept clear from debris.
The engine air lter cleans the air sucked in by the engine.
A clogged air lter will reduce performance.
The engine is ed with a fuel on/o lever and a choke lever. Read the engine
operang instrucons to understand the operaon of these levers.
5.4 Operang Lever
The LS52 Lawn Scarier rotor sha is engaged by
using the lever located underneath the top of the
handlebar.
PLEASE NOTE THAT THIS IS A TWO STAGE LEVER.
THE GREY BUTTON MUST BE DEPRESSED BEFORE
THE MAIN LEVER CAN BE PULLED UP.
This lever increases the engine speed to a level that will engage the centrifugal
clutch ed to the engine drive sha. Once the clutch has been engaged it will
transfer the engine power to the rotor sha that will rotate at high speeds within
the chassis of the Scarier.
5.5 Height Adjustment
The height of the blades of LS52 Lawn Scarier is altered
using the two adjuster knobs (Fig. 3).
The top knob is connected to the centre of the front axle via
a threaded rod. Rotang the top knob in either direcon
will raise or lower the front axle in relaon to the main
chassis and in turn alter the height of the blades with the
chassis.
The second knob located below the top knob on the threaded rod is used to x the
posion of the threaded rod and consequently the height of the blades relave to
the front axle.
Fig. 1
Fig. 2
Grey Buon
Operang
Lever
Locking
Knob
Fig. 3
Height
Adjustment
Knob

CAMON LS52 Lawn Scarier
LS52-03/2022.A Page 7
5.6 Collecon Bag
If ed, the collecon bag will collect the thatch and moss that is removed.
Always stop the engine and wait for the blades to stop rotang before removing or
replacing the collecon bag.
Use the central liing handle on the bag frame (Fig. 4) when connecng or
disconnecng the bag from the machine.
To aach the collecon bag onto the machine, rst li up the back ap on the rear
of the machine chassis with one hand (Fig. 5).
Then whilst holding the bag with your other hand guide the two lugs at either side
of the collecon bag frame (Fig. 4) into the two channels that have been formed to
hold the bag (Fig. 5).
5.7 Rotor Sha
The LS52 Lawn Scarier can be ed with a choice of cartridges.
Free Swinging Blades
Three rods with each rod holding
12 hardened steel blades (36 in
total). The blades are separated
using spacers and springs. Each set
of 13 blades on a rod is oset from
the other two rods.
Fixed Blades
The rotor sha holds 18 hardened
steel blades. The blades are
separated using spacers.
Bag Frame
Channels
Fig. 5
Back Flap
Liing Knob
Bag Liing
Handle
Fig. 4
Lugs

CAMON LS52 Lawn Scarier
Page 8 www.tracmaster.co.uk
Spring Rake
Three rods with each rod holding
12 springs (36 in total). The springs
are separated using spacers. Each
set of springs on a rod is oset
from the other rods.
Renovaon Blades
The rotor sha holds 18 hardened
steel blades. The blades are
separated using spacers.
5.8 Commissioning
Prior to operaon it is necessary to check the engine oil level and, if required, add
engine oil to the levels indicated in the table in secon 6.1.
The engine fuel tank will not contain fuel so will need lling to the recommended
level before use.
5.9 General Safety Instrucons
Be aware of all the safety requirements for the machine.
Visually check the machine for operaonal safety, complete components and xed
guarding prior to each use.
Read and be aware of the warning and instrucon signs located on the machinery.
Cordon o the work area to access from the general public.
Before starng work clear the area of any objects that may cause damage to the
machine.
Do not operate the machine if you are under the inuence of alcohol or drugs. This
equipment must only be operated by persons who are medically t both physically
and mentally.
Only work in good light and visibility.
Wear the correct personal protecon equipment as instructed by this manual.
Operator clothing should not be loose and footwear should oer good grip.
Know how to stop the machine in an emergency.

CAMON LS52 Lawn Scarier
LS52-03/2022.A Page 9
5.10 Engine Specic Safety Instrucons
PETROLIS HIGHLY FLAMMABLE.ALWAYSSTOPTHEENGINE AND ENSURETHE
FUEL TAP IS TURNED OFF BEFORE REFUELING, OR WHEN TRANSPORTING,
CLEANING, OR MAKING ADJUSTMENTS TO THE MACHINERY.
Do not smoke or use a naked ame when refueling.
Use only unleaded petrol from fuel containers designed for this purpose. Refuel
outdoors only and replace the fuel tank cap securely.
Do not mix oil with the fuel.
Leave one inch of space in the fuel tank during relling.
Clear up any petrol spillages immediately.
Always start the engine in the open air. Starng an engine within a conned space
can lead to the inhalaon of toxic substances.
Avoid contact with the engine during operaon as it will become hot. Leave the
engine to cool prior to contact and storage.
Never interfere with the control sengs of the engine.
5.11 Machine Safety Scker Explanaons
Danger – moving blades.
Keep hands and feet away.
Warning: Rotang blade hazard.
Do not operate with guard
removed.
Always remove the spark plug
before servicing.
Ensure safety guards are in place. Machine MUST NOT
be operated without guards.
!

CAMON LS52 Lawn Scarier
Page 10 www.tracmaster.co.uk
Maximum sound power level (LWA).
Ear protecon must be worn when operang the machine.
ALWAYS wear suitable Personal Protecve
Equipment (PPE):
• Ear Defenders
• Eye Protecon
• Foot Protecon
• Safety Gloves
Read operang instrucons before use.
Remove spark plug before servicing or
performing maintenance.
Warning: Keep bystanders away.
Machine idencaon label. Indicates
compliance with European standards (CE
mark). Includes unique serial number,
machine weight, power output, and month
and year of manufacture.
It is important that these sckers are in good condion, are legible, and are in the
correct posions on the LS52 Lawn Scarier. If any of these sckers are missing or
damaged then they must be replaced. They can be obtained from Tracmaster Ltd.
1
2
3
1
2
3
TRACMASTER LTD
Units 6-7
Winterpick Business Park
Hurstpierpoint Road
Wineham, Henfield
BN5 9BJ, UK
T: +44 (0)1444 247689
Machine Type: LS52 Lawn Scarifier
Weight: 72kg Year ID: March 2020
Power: 4.1kW Serial No: B06-75000

CAMON LS52 Lawn Scarier
LS52-03/2022.A Page 11
6.0 Safety Instrucons Starng and Operang
6.1 To Start the Engine
Using the dipsck provided,
check the engine oil level. Top
up with SAE 10W/30 oil, API SJ
or equivalent, if the dipsck is
clear of oil.
Check the fuel level. Rell as
necessary and as determined
by the fuel tank type – see
diagram.
Switch the engine ignion
switch to the ON (I) posion.
(Not ed to all engine
models, but on all
handlebars).
Turn the fuel tap located on
the engine carburetor to the
ON posion. If the engine is
cold or has not been operated
recently set the choke lever
on the carburetor to the ON
posion.
Pull the engine recoil handle slowly unl it engages then pull hard and fast to start
the engine.
Aer the start, guide the cord back into its posion. Do not let it snap back.
Once the engine has started, if the choke lever has been used, return this to its OFF
posion aer the engine has run for a few seconds.
ENGINE SWITCH
ON HANDLEBARS
ENGINE SWITCH
ON ENGINE

CAMON LS52 Lawn Scarier
Page 12 www.tracmaster.co.uk
6.2 To Stop the Engine
Release the operang lever.
Switch the engine ON/OFF switch on the handlebars to the OFF (O) posion (Figs. 6A
or 6C). If there is an ON/OFF switch on the engine then turn this to the OFF posion.
Turn the fuel tap lever to the OFF posion.
Ensure the blades have stopped prior to moving the machine.
WARNING: THE EXHAUST COVER MAY BE HOT – DO NOT TOUCH.
6.3 Safety Equipment
The LS52 Lawn Scarier operator must be wearing suitable PPE including:
• Ear Defenders
• Gloves
• Protecve Footwear
• Safety Glasses
6.4 Operaon
Before scarifying can be carried out the grass must be cut short and be cleared of
any objects such as stones or scks that would damage the LS52 Lawn Scarier, or
be picked up and thrown by the rotang blades.
WARNING: SCARIFYING LONG GRASS WILL QUICKLY CAUSE DAMAGE TO
COMPONENTS OF THE MACHINE. WE RECOMMEND THE GRASS IS CUT
PRIOR TO SCARIFYING.
Do not operate the Lawn Scarier on wet lawns or in wet weather.
Do not operate the engine in a conned space where dangerous carbon monoxide
fumes can collect.
Operate the machine only in daylight or in good arcial light.
Always be sure of foong on slopes.
!
!
Fig. 6B
ENGINE
ON
Fig. 6A
ENGINE
OFF
Fig. 6C
ENGINE
OFF

CAMON LS52 Lawn Scarier
LS52-03/2022.A Page 13
Walk never run.
Exercise extreme cauon when changing direcon on slopes.
Use extreme cauon when reversing or pulling the machine towards you.
Stop the blades if the machine has to be lted for transportaon. Do not operate
the blades when crossing surfaces other than grass and when transporng the
machine to and from the working area.
Never operate the machine with defecve guards, or without safety devices, for
example deectors and or catchers in place.
Do not change the engine governor sengs or over speed the engine.
Disengage all levers, by releasing them, before starng the engine.
Start the engine carefully according to the instrucons.
Do not lt the machine when starng the engine.
Posion the ON/OFF switch in its midway ON (I) posion (Fig. 6B).
Depress the grey buon under the operang lever (Fig. 7B) then li the operang
lever (Fig. 7C) to engage the drive and start the nes rotang in their lied posion.
You can release the grey buon once you have lied the operang lever.
PLEASE NOTE THAT THIS IS A TWO STAGE LEVER. THE GREY BUTTON MUST BE
DEPRESSED BEFORE THE MAIN LEVER CAN BE PULLED UP.
Do not put hands or feet near or under the rotang parts. Keep clear of the discharge
opening at all mes.
Never pick up or carry the machine whilst the engine is running.
Avoid operang the machine in bad weather condions especially if there is the
risk of lightning.
Set the operang height by screwing the top adjuster knob either up or down and
locking the desired height with the locking handle.
WARNING: THE BLADES MUST NOT BE ALLOWED TO TOUCH THE GROUND
AT ANY POINT DURING OPERATION.
If using the collecon bag, ensure that it is mounted correctly and is secure (see
Secon 5.6 for more informaon).
!
Fig. 7B Fig. 7CFig. 7A
Grey Buon
Operang
Lever

CAMON LS52 Lawn Scarier
Page 14 www.tracmaster.co.uk
Li the operang lever to engage the rotor sha and walk at a slow steady pace
pushing the machine ahead of you.
To turn the LS52 Lawn Scarier 180o, release the operang lever, put light downwards
pressure on the handlebars and rotate the machine on its rear wheels.
Do not work the LS52 Lawn Scarier on slopes of more than 20o and always work
across the slope, not up and down it.
Once the collecon bag has become full, release the operang lever, turn o the
engine and ensure the rotor sha has stopped turning. Remove the collecon bag
and empty. Re-aach the bag securely and re-start the engine to connue scarifying.
Stop the engine and disconnect the spark plug wire before:
a) Clearing blockages;
b) Checking, cleaning or working on the machine;
c) Aer striking a foreign object;
d) If the machine starts to vibrate abnormally.
Stop the engine:
a) Whenever you leave the machine;
b) Before refueling.
Reduce the throle seng during engine shut down and turn the fuel o on the
engine at the conclusion of scarifying.
6.5 Procedure for Unexpected Shut Down
Release the operang lever.
Switch the engine ON/OFF switch on the handlebars to the OFF (O) posion (Figs.
6A or 6C).
Ensure the rotor sha and blades have stopped rotang prior to moving the
machine.
6.6 How to Clear Unwanted Debris from the Underside of the Machine
Ensure that the engine has been turned o, remove the spark plug wire and the
rotor sha has stopped turning.
Turn the engine fuel tap to the o posion.
Aach a liing hoist to the top handlebar and li the machine so that it lts forward
onto its front wheels. As the underneath of the chassis becomes exposed it is
possible to see and remove any unwanted debris.
WARNING: ALWAYS TILT THE LS52 LAWN SCARIFIER FORWARDS TO AVOID
OIL IN THE ENGINE FLOODING INTO AREAS WHERE IT WILL CAUSE DAMAGE.
!

CAMON LS52 Lawn Scarier
LS52-03/2022.A Page 15
6.7 Residual Risks of the LS52 Lawn Scarier
The rotor sha will connue to rotate for a couple of seconds once the operang
lever has been released. Ensure that the blades have stopped rotang prior to
moving or lng the machine.
The LS52 Lawn Scarier is designed to be pushed by the operator both during
transportaon and operaon. It has no brake system and therefore the operator
must hold rmly onto the machine on sloped areas.

CAMON LS52 Lawn Scarier
Page 16 www.tracmaster.co.uk
7.0 Maintenance
IMPORTANT! BEFORE UNDERTAKING ANY MAINTENANCE ENSURE
THAT THE ENGINE IS OFF AND THE FUEL TAP IS OFF.
7.1 Schedule
Operaon Daily
Every
Week
Every
Month
Engine Check engine oil level SAE 10W/30 API SJ or equivalent
See separate engine manual X X
Machine
Check condion of blades X
Check condion of blade rods X
Check belt condion X
Check operang lever and cable X
Check collecon bag condion X
Check rotor sha bearings X
Check all nuts and bolts are ght X
7.2 Basic Maintenance
Check that all guards are ed securely.
Ensure the cable connecng the operang lever to the engine is securely fastened
at both ends and shows no sign of wear.
Ensure the ON/OFF switch and cable located on the handlears is not damaged or
defecve.
Ensure the wheels are held securely on the axles.
Check that the wheels rotate smoothly and without hindrance.
7.3 Advanced Maintenance
We strongly recommend that an Authorised Representave is consulted prior to
any major machine maintenance projects.
7.3.1 Belt
Inspecon Check:
Check every 25 hours that the drive belt is not frayed or cracked. If it appears
frayed or cracked then it is me to replace the belt.
Changing the Belt:
Remove the three bolts that aach the belt guard to the chassis and remove
the belt guard.
!

CAMON LS52 Lawn Scarier
LS52-03/2022.A Page 17
Release the tension from the belt by using the engine plate tension screws
at the rear of the engine plate.
The drive belt has now become slack.
Grab the right-hand side of the belt close to the boom pulley and pull as if
you are trying to pull the belt o the boom pulley.
With your other hand slowly and carefully rotate the pulley in an anclockwise
direcon and ease the belt o the pulley.
The belt is now free from the machine.
To t the new belt, start by locang the new belt in the groove of the
centrifugal clutch.
Stretch the new belt ght by pulling it downwards to the boom pulley.
Locate one side of the belt in posion on the boom pulley.
Slowly rotate the boom pulley so that the belt is slowly eased into its place
sing in the groove of the boom pulley.
Using the tensioning bolts at the rear of the engine plate readjust the belt
tension.
Re-aach the belt guard using the original cap screw bolts.
7.3.2 Removing Cartridge/Rotor Assembly
To access the underneath of the chassis you must use a liing hoist to li the
handlebars of the machine so that it lts forward over its front axle.
Remove both the belt guard and rotor sha guard by undoing the fastening
nuts and bolts.
Remove the belt as instructed above in secon 7.3.1.
Remove the taper lock pulley from the rotor sha by completely removing
the two grub screws in the middle of the pulley, then using one of the
removed grub screws insert it into the single hole between the 2 holes that
the grub screws were removed from, as you ghten the grub screw it should
push the pulley o the bush.
WARNING: Do not lose the woodru key at this stage.
Remove the bolt holding the protecon plate, rotate the protecon plate
over on the front axle to gain access to the chassis rotor sha removal slots.
Remove the bolts of the pillow block bearings.
Once the bearing bolts have been removed the blade rotor will be able to be
removed from the chassis by sliding it out of the chassis slots.

CAMON LS52 Lawn Scarier
Page 18 www.tracmaster.co.uk
7.3.3 Fing Cartridge/Rotor Assembly
Insert the cartridge/rotor into the chassis.
Ret the pillow block bearings with the bolts to x the pillow block bearings
to the chassis.
Locate the boom taper lock pulley onto the end of the rotor sha ensuring
the woodru key is ed. Once the pulley is situated beneath the centrifugal
clutch x the taper lock pulley into posion by ghtening the 2 grub screws
evenly in the original holes when the taper lock was removed.
Re-aach the belt and belt guard as described in 7.3.1.
7.3.4 Blades
Inspecon Check:
Blades that have been worn so that they have become rounded must be
changed for the LS52 Lawn Scarier to funcon properly.
Changing the Blades:
Safety glasses and gloves must be worn.
Remove the rotor as described in secon 7.3.2.
WARNING: Take note of the blade layout from the diagrams.
Free Swinging Cartridge
Remove one split pin from both ends of just one rod taking note of the blade
and spring layout on that rod.
Slide the rod through the spiders being careful to remove the springs and
blades as the rod is removed from each secon.
Once the worn blades have been removed the rod should be checked for
wear and if serviceable can be reinserted and the new blades located.
Split
Pin
Spider
Springs
Spacer
Blade
Washer
Rod
Table of contents
Other Tracmaster Lawn And Garden Equipment manuals

Tracmaster
Tracmaster Camon LS42B1 User guide

Tracmaster
Tracmaster CAMON LS42 User manual

Tracmaster
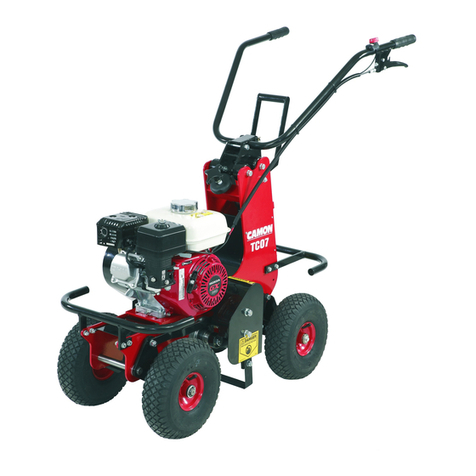
Tracmaster CAMON TC07 Operating manual

Tracmaster
Tracmaster Camon LS14 User manual

Tracmaster
Tracmaster BCS615L Instruction Manual

Tracmaster
Tracmaster BCS630 Instruction Manual

Tracmaster
Tracmaster ARTIO BC65 User guide

Tracmaster
Tracmaster CAMON LS17 Instruction Manual

Tracmaster
Tracmaster Camon C6 Instruction Manual

Tracmaster
Tracmaster Camon LS14 User guide