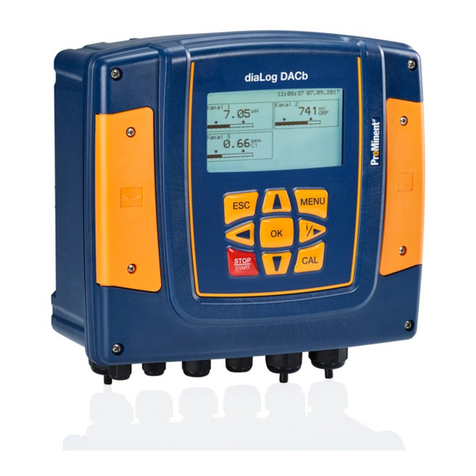
TRIATEK CMS-2000 User manual

1
CMS-2000
User Guide
Central Monitoring Station
LIT-12013738
February 2023

CMS-2000
LIT-12013738
2
Risk of Personal Injury or Property Damage.
For use in a controlled environment only. Refer to installation instructions for environmental conditions.
Risk of Electric Shock.
Disconnect the power supply before making electrical connections. Contact with components carrying hazardous voltage can cause
electric shock and may result in severe personal injury or death.
Disconnect all electric power sources from the CMS-2000 Central Monitoring Station before removing the CMS-2000 Central
Monitoring Station cover. Contact with internal components carrying hazardous voltage can cause electric shock and may result in
severe personal injury or death.
IMPORTANT: Do not install or use this CMS-2000 Central Monitoring Station in or near environments where corrosive substances or
vapors could be present. Exposure of the CMS-2000 monitor to corrosive environments may damage the device’s internal components
and will void the warranty.
IMPORTANT: Do not install this CMS-2000 Central Monitoring Station in condensing, wet, or damp environments. Moisture may cause
damage to the CMS-2000 monitor.
IMPORTANT: Only qualied personnel should install or service Johnson Controls® products. These instructions are a guide for such
personnel. Carefully follow all instructions in this document and all instructions for the CMS-2000 Central Monitoring Station.
IMPORTANT: Use copper conductors only. Make all wiring connections in accordance with local, national, and regional regulations. Do
not exceed the CMS-2000 Central Monitoring Station’s electrical ratings.
Risk of Property Damage.
Do not apply power to the station before checking all wiring connections. Short circuited or improperly connected wires may result in
permanent damage to the equipment.
Risk of Property Damage.
Do not run network communication cables in the same conduit, raceway, or panel with any high-voltage (greater than 30 VAC) wiring.
Isolate all network wiring and all network devices from high-voltage wiring and equipment. Failure to isolate network wiring and
network devices from high-voltage wiring and equipment can result in damage to network devices or poor network performance.
Risk of Property Damage.
Label all wires prior to disconnecting the equipment. Failure to label the wires may cause improper equipment operation after
reconnecting the equipment.
IMPORTANT: Make all wiring connections in accordance with the National Electrical Code and local regulations. Use proper Electrostatic
Discharge (ESD) precautions during installation and servicing to avoid damaging the electronic circuits of the CMS-2000 Central
Monitoring Station.
IMPORTANT: Maintain proper polarity and voltage or current ratings. Improper polarity or exceeding the voltage or current ratings will
void the warranty.
IMPORTANT: Do not install the CMS-2000 Central Monitoring Station where the maximum temperature exceeds 125°F (52°C). Installing
the device where maximum temperatures exceed 125°F (52°C) may cause damage to the CMS-2000 Central Monitoring Station and may
void the warranty.
CMS-2000 Central Monitoring Station User Guide

CMS-2000
LIT-12013738
3
Risque de blessure corporelle ou de dommages matériels.
Pour utilisation dans un environnement contrôlé uniquement. Consulter le guide d’installation pour les conditions environnementales.
Risque de décharge électrique.
Débrancher l’alimentation avant de réaliser tout branchement électrique. Tout contact avec des composants conducteurs de tensions
dangereuses risque d’entraîner une décharge électrique et de provoquer des blessures graves, voire mortelles.
Déconnecter toutes les sources d’alimentation électrique du CMS-2000 Central Monitoring Station avant de ouvrir le capot du CMS-
2000 Central Monitoring Station.Tout contact avec des composants internes conducteurs de tensions dangereuses risque d’entraîner
une décharge électrique et de provoquer des blessures graves, voire mortelles.
Risque de dégâts matériels.
Ne pas mettre le système sous tension avant d’avoir vérié tous les raccords de câblage. Des ls formant un court-circuit ou
connectés de façon incorrecte risquent d’endommager irrémédiablement l’équipement.
Risque de dégâts matériels.
Ne passez pas les câbles de communication réseau dans les mêmes gaines, chemins de câbles ou panneaux que les câbles à
haute tension (supérieure à 30 Vca). Isolez tous les câbles et appareils réseau des câbles et appareils à haute tension. Un défaut
d’isolement des câbles et appareils à haute tension peut provoquer des dommages aux appareils réseau et réduire les performances
du réseau.
Risque de dégâts matériels.
Etiquetez tous les câbles avant de débrancher l’équipement. Le non-respect de cette précaution peut amener un fonctionnement
anormal après redémarrage de l’équipement.
IMPORTANT : N’installez ou n’utilisez pas CMS-2000 Central Monitoring Station dans, ou près, d’environnements où des substances
ou vapeurs corrosives peuvent être présentes. L’exposition du CMS-2000 à des environnements corrosifs peut endommager les
composantes internes de l’appareil et annulera la garantie.
IMPORTANT : N’installez pas CMS-2000 Central Monitoring Station dans un environnement humide, mouillé ou il se produit de la
condensation. L’humidité peut causer des dommages au CMS-2000.
IMPORTANT : Seul le personnel qualié peut installer et entretenir les produits Johnson Controls. Ces instructions constituent un guide
pour ce type de personnel. Suivez attentivement toutes les instructions de ce document et toutes les instructions du CMS-2000 Central
Monitoring Station.
IMPORTANT : Assurez-vous que tous les branchements de câbles sont eectués selon le Code national de l’électricité et les
réglementations locales. Utilisez une bonne protection contre les décharges électrostatiques (ESD) pendant l’installation et l’entretien
pour éviter d’endommager les circuits électroniques du CMS-2000 Central Monitoring Station.
IMPORTANT : Conservez la bonne polarité et la bonne tension ou le bon courant. Une mauvaise polarité ou le dépassement de la
tension ou du courant annulera la garantie.
IMPORTANT : N’installez pas le contrôleur d’environnement critique CMS-2000 où la température maximum dépasse 52 °C (125 °F).
Installer l’appareil dans un environnement où la température maximum dépasse 52 °C (125 °F) peut endommager CMS-2000 Central
Monitoring Station et peut annuler la garantie.
IMPORTANT : N’utilisez que des conducteurs en cuivre. Assurez-vous que tous les branchements de câbles sont eectués selon les
réglementations locales, nationales et régionales. Ne dépassez pas les spécications électriques du CMS-2000 Central Monitoring
Station.
CMS-2000 Central Monitoring Station User Guide

CMS-2000
LIT-12013738
4
Table of contents ......................................................................................................................................................................... 4
Introduction.................................................................................................................................................................................. 5
Display overview ......................................................................................................................................................................... 5
Initial setup................................................................................................................................................................................... 7
Completing the initial setup .................................................................................................................................................... 7
Conguration............................................................................................................................................................................... 7
Global settings............................................................................................................................................................................. 7
Choosing a language ............................................................................................................................................................ 7
Choosing a unit of measure .................................................................................................................................................. 7
Display module settings conguration ..................................................................................................................................... 7
Turning on and adjusting the brightness of the 360˚ Safety Halo ......................................................................................... 8
Adjusting the screen brightness ............................................................................................................................................. 9
Turning o/on the Keyboard Clicks ........................................................................................................................................ 9
User accounts and security........................................................................................................................................................ 9
Admin user capabilities ......................................................................................................................................................... 9
Restricted user capabilities ................................................................................................................................................... 9
User name and password requirements ............................................................................................................................... 9
Creating the admin user account and password ................................................................................................................. 10
Creating a restricted user and PIN password ...................................................................................................................... 10
Deleting users ..................................................................................................................................................................... 10
Changing a user name ........................................................................................................................................................ 10
Changing the access level of a restricted user to an admin user ........................................................................................ 10
Changing the access level of an admin user to a restricted user ........................................................................................ 11
Updating the PIN of a restricted user .................................................................................................................................. 11
Monitor setup............................................................................................................................................................................. 11
Adding a monitored device................................................................................................................................................... 11
Monitoring multiple parameters from the same device ........................................................................................................ 11
To add multiple parameters from the same device, you need to add the same device multiple times. ............................... 11
Delete a monitored device.................................................................................................................................................... 11
Edit the address of a monitored device................................................................................................................................ 12
Alarms ........................................................................................................................................................................................ 12
Enabling the alarm status .................................................................................................................................................... 12
Setting the audible alarm delay............................................................................................................................................ 12
Changing the alarm mode.................................................................................................................................................... 12
Silencing the alarm............................................................................................................................................................... 12
Diagnostics ................................................................................................................................................................................ 12
Viewing the About this CMS information ............................................................................................................................. 12
Rebooting the monitor ......................................................................................................................................................... 13
Restricted level user guide....................................................................................................................................................... 13
Navigating the home screen................................................................................................................................................. 13
Viewing Room Details ......................................................................................................................................................... 13
Changing the parameter displayed on the home screen...................................................................................................... 13
Changing the alarm mode.................................................................................................................................................... 14
Silencing the alarm............................................................................................................................................................... 14
Repair information..................................................................................................................................................................... 15
North American Emissions Compliance ................................................................................................................................. 15
Table of contents
CMS-2000 Central Monitoring Station User Guide

CMS-2000
LIT-12013738
5
Introduction
Display overview
Figure 1: CMS-2000 home screen monitoring multiple FMS controllers
1 2 3
4
5
67
8
Callout Description
1P = Positive isolation mode
2N = Negative isolation mode
3Analog input name
4Normal status icon
5Quick access audible alarm mode
6Sensor reading
7Settings menu
8End user demonstration video
Table 1: FMS-2000M Critical Environment Monitor display and icons
The CMS-2000 Central Monitoring Station provides instant status verication for up to eight rooms, eight fume hoods, or a combination
of rooms and hoods. You can use the CMS-2000 as a nurse station annunciator, or to monitor multiple spaces in large laboratories.
The CMS-2000 creates a centralized location to easily access critical information like room pressure, isolation mode, exhaust air ow,
face velocity, and alarm status of multiple spaces and fume hoods. If a monitored parameter goes outside its prescribed range, it
activates an audible and visual alarm that alerts staff to the alarm condition. Users can access vital information on a single screen to
quickly make informed decisions. This ensures that critical spaces are safe for occupancy.
The CMS-2000 features the patented 360˚ Safety Halo™ edge lighting, which you can use to monitor status down long corridors with a
simple glance. The green, yellow, and red visual alarms also help to reduce audible alarm fatigue beacuse you can silence the audible
alarm with the tap of a nger.
The CMS-2000 communicates on its own subnet with the FMS-2000C and HMS-1655 family of controllers.
Note: The CMS-2000 does not monitor the FMS-2000M Critical Environment Monitor.
CMS-2000 Central Monitoring Station User Guide

CMS-2000
LIT-12013738
6
Callout Description
1Occupied
2Unoccupied
3Quick access audible alarm mode
4Parameter status icon
5Warning status icon
6Alarm status icon
7Standby
Note: If you are monitoring an FMS controller, this icon displays as Neutral.
8Settings menu
1 2 3
64
5
7
8
Figure 2: CMS-2000 monitoring multiple HMS1655 controllers
Figure 3: CMS-2000 home screen monitoring one controller
Table 2: CMS-2000 monitoring HMS1655 controllers
CMS-2000 Central Monitoring Station User Guide

CMS-2000
LIT-12013738
7
Initial setup
Completing the initial setup
When the CMS-2000 Central Monitoring Station starts for the rst time, you need to congure the device language and units of
measurement.
The rst screen that appears in the initial setup is the Language screen.
1. On the Language screen, scroll to the language you want to use and tap the Checkmark icon.
2. On the Terms and Conditions screen, tap the Accept button
3. On the Global screen, expand Units and tap to select Imperial or Metric.
4. Tap the Checkmark icon to save the settings.
5. Tap Proceed to complete the initial setup.
Note: At any time, you can make changes to your initial settings in the Settings menu.
Conguration
Global settings
After you complete the initial setup, the settings menu appears. You can congure the following settings:
• Global settings
• User Accounts
• Monitor Setup
• Alarms
• Diagnostics
• Documentation
In Global settings, you can change settings that impact the entire CMS-2000 Central Monitoring Station.
Choosing a language
1. On the home screen, tap the Settings icon.
2. To view global settings, tap Global.
3. To view all language options, tap the Language arrow.
4. To choose a language, scroll to your preferred language.
5. To save your language selection, tap the Checkmark icon.
Choosing a unit of measure
1. On the home screen, tap the Settings icon.
2. To view global settings, tap Global.
3. On the Global screen, expand Units to select Imperial or Metric.
4. Collapse Units to save the settings.
Table 2: Monitor DIP switch congurations for the operating mode
Figure 4: DIP switch run and demo modes
Display module settings conguration
Run mode
12 3 4 12 3 4
Demo mode
On
O O O O O OO
CMS-2000 DIP switch position Run mode Demo mode
1Off Off
2Off Off
3Off Off
4 On Off
CMS-2000 Central Monitoring Station User Guide
Note: Demo mode is a test display for demonstration purposes. You do not need to connect the CMS-2000 to the FMS-2000C or the
HMS-1655 to use demo mode.

CMS-2000
LIT-12013738
8
Figure 4: Normal mode Figure 5: Alarm mode
Figure 6: Warning mode
Turning on and adjusting the brightness of the 360˚ Safety Halo
The 360˚ Safety Halo illuminated edge allows sta to easily monitor spaces down long corridors. A green light indicates normal status,
red indicates alarm status, and yellow indicates warning status.
1. On the home screen, tap the Settings icon to enter the Settings menu.
2. To view global settings, tap Global.
3. To adjust settings for the 360˚ Safety Halo, tap the Safety Halo arrow.
4. To turn the 360° Safety Halo on, switch on Enabled.
5. To adjust the brightness, move the slider to increase or decrease the brightness.
6. To conrm the new settings, tap the Checkmark icon.
Figure 7: Neutral isolation mode
CMS-2000 Central Monitoring Station User Guide

CMS-2000
LIT-12013738
9
Adjusting the screen brightness
1. On the home screen, tap the Settings icon.
2. To view global settings, tap Global.
3. Expand Screen Brightness and move the slider to increase or decrease the brightness of the screen.
4. To conrm the settings, tap the Checkmark icon.
Turning o/on the Keyboard Clicks
1. On the home screen, tap the Settings icon.
2. To view global settings, tap Global.
3. To turn the keyboard clicks on or o, tap the Keyboard Clicks switch.
User accounts and security
Admin user capabilities
Admin users have access to the settings menu and the ability to make changes to the settings.
When you create an admin user, the following conventions apply:
• After you create an admin user account, you cannot delete it unless you rst create another admin user.
• Only an authenticated admin user can create users.
• Admin users can delete admin users, restricted users, or multiple users simultaneously.
• Admin users can change a single restricted user or multiple restricted users to admin level simultaneously.
• Admin users can select all users.
• Admin users can delete multiple selected users.
Restricted user capabilities
A restricted user must authenticate to view the room detail screen and change the alarm status.
An individual user or group must identify themselves with a user name before they enter a personal identication number (PIN).
User name and password requirements
To create a user name, follow these minimum requirements:
• English only
• Alphanumeric
• One letter minimum
• 3 to 20 characters in length
• The @ symbol is the only special character that can be used for user names.
• You cannot duplicate user names.
To set up an admin password, follow these minimum requirements:
• English only
• Alphanumeric
• 6 to 12 characters in length
• One letter minimum
• One digit minimum
• The @ symbol is the only special character that can be used for passwords.
To set up a PIN password for a restricted user, use the following criteria:
• 0 to 9 numeric
• 4 to 8 digits in length
When you set up users and passwords, you restrict the use of the CMS-2000 Central Monitoring Station to specic groups of people.
This is not mandatory, but if you do not create users and passwords, anyone can access all functions of the CMS-2000. There are two
access levels:
• Admin level users
• Restricted users.
CMS-2000 Central Monitoring Station User Guide

CMS-2000
LIT-12013738
10
Creating the admin user account and password
The rst user must be an admin. You cannot set up a restricted user until you set up an admin. Admin level users have access to the
entire device.
1. On the home screen, tap the Settings icon to enter the Settings menu.
2. To view all user accounts information, tap User Accounts.
3. On the User Accounts screen, tap the Create User arrow.
4. To change the admin user name, tap the User Name arrow and enter the new user name. For more information, see User name
and password requirements.
5. To select the access level for the new admin user account, expand Access Level and tap Administrator.
6. To conrm your settings, tap the Checkmark icon.
7. On the Create Password screen, enter your new password twice. For more information, see User name and password
requirements.
8. To complete the admin user account and password setup, tap the Checkmark icon.
Creating a restricted user and PIN password
A restricted user can access the device detail screen and adjust the alarm mode.
1. On the home screen, tap the Settings icon to enter the Settings menu.
2. To view all user accounts information, tap User Accounts.
3. On the User Accounts screen, tap the Create User arrow.
4. To change the restricted user name, tap the User Name arrow and enter the new user name. For more information, see User name
and password requirements.
5. To select the access level for the new restricted user account, expand Access Level and tap Restricted User.
6. To conrm your settings, tap the Checkmark icon.
7. On the Create PIN screen enter your new PIN twice. For more information, see User name and password requirements.
9. To complete setting up the restricted user account and PIN, tap the Checkmark icon.
Deleting users
1. On the home screen, tap the Settings icon to enter the Settings menu.
2. To view all user accounts information, tap User Accounts.
3. On the user accounts screen, tap the Manage Users arrow.
4. Tap the three dots next to MANAGE USERS.
5. Tap the users you want to delete and tap Delete.
6. Optional: If you want to delete all users, tap Select All and Delete.
7. In the DELETE DEVICE screen, tap the Delete button.
Note: When you choose the optional step to delete all users, you delete all admin and restricted users except for the admin user
account that you used to log on.
Changing a user name
1. On the home screen, tap the Settings icon to enter the Settings menu.
2. To view all user accounts information, tap User Accounts.
3. To change a user name, tap Edit next to a user name.
4. On the Edit User screen, tap the User Name arrow and enter a dierent user name.
5. To conrm the new user name, tap the Checkmark icon.
Changing the access level of a restricted user to an admin user
1. On the home screen, tap the Settings icon to enter the Settings menu.
2. To view all user accounts information, tap User Accounts.
3. To change the access level of a restricted user, tap Edit.
4. On the Edit User screen, tap Restricted User and select Administrator.
5. Tap Create Password and enter a new password twice.
6. To conrm the change, tap the Checkmark icon.
CMS-2000 Central Monitoring Station User Guide

CMS-2000
LIT-12013738
11
Changing the access level of an admin user to a restricted user
1. On the home screen, tap the Settings icon to enter the Settings menu.
2. To view all user accounts information, tap User Accounts.
3. To change the access level of an admin user, tap Edit.
4. On the Edit User screen, tap Administrator and select Restricted.
5. Tap Create PIN and enter a new PIN twice.
6. To conrm the change, tap the Checkmark icon.
Updating the PIN of a restricted user
1. On the home screen, tap the Settings icon to enter the Settings menu.
2. To view all user accounts information, tap User Accounts.
3. To reset the PIN of a restricted user, tap Edit.
4. On the Edit User screen, tap the Reset PIN arrow.
5. Enter the new PIN twice.
6. Tap the Checkmark icon to conrm the reset.
Forgetting your password or PIN
If restricted users forget their PIN, they can contact the facility manager to get their new PIN. Admin users can create a new PIN for
restricted users. If admin users forget their password, they must complete the following procedure:
1. Contact Service@Triatek.com and provide the device identier that is on the screen of each CMS-2000 Central Monitoring Station.
For more information, see Contact information.
2. To erase all user accounts, on each monitor, enter the number you receive from the support team.
For information on how to set up new user accounts, see Creating the admin user account and password.
Note: You do not need to recongure the entire CMS-2000 Central Monitoring Station.
Monitor setup
The CMS-2000 can simultaneously display up to 8 parameters on the home screen. Only the parameters shown on the home screen
alarm when out of range. The range is set by the monitored controller. For more information about accessing real time readings of the
parameters not on the home screen, see Navigating the home screen.
To setup the CMS-2000, add the FMS or HMS controller’s address to the subnetwork. The home screen display automatically adjusts
based on the number of monitored addresses added. Each address added to the subnetwork displays as a tile on the home screen.
Adding a monitored device
1. On the home screen, tap the Settings icon to enter the Settings menu.
2. Tap Monitor Setup.
3. To add a device, tap the add device arrow.
4. Type in the device address, from 1-255. The device address is the MS/TP or MAC address.
5. To conrm the address, tap the Checkmark icon.
6. The Monitor Setup screen will appear showing all the monitored devices.
7. Tap the Checkmark icon to conrm.
Delete a monitored device
1. On the home screen, tap the Settings icon to enter the Settings menu.
2. Tap Monitor Setup.
3. To delete a device, tap the three dots next to the word MONITOR SETUP.
4. Tap the dot next to the device or devices you want to delete and tap the Delete button.
5. Optional: If you want to delete them all, tap the select all button, then tap the Delete button
6. In the DELETE DEVICE conrmation screen, tap the Delete button.
Monitoring multiple parameters from the same device
To add multiple parameters from the same device, you need to add the same device multiple times.
1. On the home screen, tap the Settings icon to enter the Settings menu.
2. Tap Monitor Setup.
3. To add a device, tap the add device arrow.
4. Type in the device address, from 1-255. The device address is the MS/TP or MAC address.
5. To conrm the address, tap the Checkmark icon. The Monitor Setup screen will appear showing all the monitored devices.
6. Repeat steps 3 to 5 for each parameter you want to see on the home screen.
7. Tap the Checkmark icon to conrm.
CMS-2000 Central Monitoring Station User Guide

CMS-2000
LIT-12013738
12
Edit the address of a monitored device
1. On the home screen, tap the Settings icon to enter the Settings menu.
2. Tap Monitor Setup.
3. To change the address of a monitored device, tap the arrow next to the device address.
4. Type in the new address and tap the check mark to conrm.
5. On the Monitor Device screen, tap the check mark icon to conrm.
Alarms
Enabling the alarm status
The home screen displays between one and eight tiles. Each tile represents a controlled parameter in a single room or fume hood. The
parameters that feature on the home screen alarm when out of range. Parameters not on the home screen do not alarm when out of range.
For the real time readings for other parameters, see Viewing Room Details.
You can choose to enable the alarm status for each parameter monitored on the CMS-2000. Parameters that are enabled show the
status icon, trigger the 360˚ Safety Halo and audible alarm. Disabled parameters display a gray screen, no status icon, and a green
360˚ Safety Halo. If the parameter goes out of range, it does not trigger the 360˚ Safety Halo or audible alarm. For a visual example, see
Turning on and adjusting the brightness of the 360˚ Safety Halo.
1. On the home screen, tap the Settings icon to enter the Settings menu.
2. To view alarm settings, tap Alarms.
3. To enable the alarm status for each monitored parameter, tap the switch.
4. To conrm the new settings, tap the Checkmark icon.
Setting the audible alarm delay
Adjust the audible alarm delay to reduce nuisance alarms.
1. On the home screen, tap the Settings icon to enter the Settings menu.
2. Tap Alarms.
3. To set the audible alarm delay, tap the arrow
4. Choose whether the delay will be in minutes or seconds by tapping the toggle at the top
5. Set the delay time by scrolling through the options
6. To conrm the new settings, tap the Checkmark icon.
Changing the alarm mode
This function only aects the audible alarm. If you change the audible alarm mode to mute, it remains muted until you change it to
audible. When you change the alarm mode it does not impact the 360˚ Safety Halo or Status icon on the home screen.
Note: When the room is in the normal or warning mode, tap the Alarm icon on the tile to toggle between audible alarm and muted
alarm.
Silencing the alarm
When a monitored parameter is out of range, the audible alarm sounds and the 360˚ Safety Halo ashes red. To silence the alarm, tap
the Alarm icon for the parameter that is in alarm. The alarm mutes temporarily until the issue resolves and then the alarm mode returns
to the audible alarm.
On the Diagnostics screens, you can nd information about your CMS-2000. You can also perform a soft reboot of the monitor.
Diagnostics
Viewing the About this CMS information
When you contact the technical support team, use the About this CMS screen to reference specic details about your monitor.
1. On the home screen, tap the Settings icon.
2. On the settings screen, tap Diagnostics.
3. On the diagnostics screen, tap the About this CMS arrow.
CMS-2000 Central Monitoring Station User Guide

CMS-2000
LIT-12013738
13
Rebooting the monitor
1. On the home screen, tap the Settings icon.
2. On the settings screen, tap Diagnostics.
3. On the diagnostics screen tap Reboot Monitor.
4. Tap Proceed to perform a soft reset.
Restricted level user guide
These instructions help you navigate the home screen of the CMS-2000, explain how to use the quick adjust icons and to silence the
audible alarm. If the CMS-2000 has passwords set up, navigation and changes to the CMS require a PIN. For a quick demonstration of
the CMS-2000, tap the Information icon in the upper left corner of the home screen and scan the QR code with your smart phone.
Viewing Room Details
To view all parameters being controlled in a specic room or fume hood, tap a tile. This displays the detail screen which has real-time
readings for each parameter controlled or monitored in that space.
1. Tap any tile on the home screen
2. To return to the home screen, tap the Home icon
Changing the parameter displayed on the home screen
Only the parameter shown on the home screen alarms when out of range.
1. Tap any tile on the home screen.
2. Tap the parameter you want to display on the home screen.
3. To return to the home screen and save your settings, tap the Home icon.
Note: Only the parameter displayed on the home screen triggers the alarm. Parameters displayed on the detail screen do not trigger the
alarm.
Figure 8: Home detail screen
Navigating the home screen
The home screen displays between one and eight tiles. Each tile represents one of the controlled parameters in a single room or fume
hood. The parameters that feature on the home screen alarm when out of range. For more information, see Display overview.
CMS-2000 Central Monitoring Station User Guide

CMS-2000
Silencing the alarm
When a monitored parameter is out of range, the audible alarm sounds and the 360˚ Safety Halo ashes red. To temporarily silence the
audible alarm, tap the Alarm icon. The alarm temporarily mutes until the issue resolves and then the alarm mode returns to audible
alarm.
Changing the alarm mode
This function only aects the audible alarm. If you change the audible alarm mode to mute, it mutes until you change it to audible. If you
change the alarm mode, it does not impact the 360˚ Safety Halo or Status icon on the home screen.
Note: When the room is in a normal mode or warning mode, tap the Alarm icon on the tile to toggle between audible alarm and muted
alarm. You can temporarily mute the alarm by tapping the alarm icon when the audible alarm sounds.
Figure 9: Audible and muted alarm screen
LIT-12013738
14 CMS-2000 Central Monitoring Station User Guide

CMS-2000
Patents
Patents: https://jcipat.com
Software terms
Product warranty
This product is covered by a limited warranty. Contact your representative/branch for more details.
Contact information
Use of the software that is in (or constitutes) this product, or access to the cloud, or hosted services applicable to this product, if any, is subject to
applicable end-user license, open-source software information and other terms set forth at www.johnsoncontrols.com/techterms.Your use of this
product constitutes an agreement to such terms.
North American Emissions Compliance
United States
This equipment has been tested and found to comply with the limits for a Class A digital device pursuant to Part 15 of the
FCC Rules. These limits are designed to provide reasonable protection against harmful interference when this equipment
is operated in a commercial environment. This equipment generates, uses, and can radiate radio frequency energy and, if
not installed and used in accordance with the instruction manual, may cause harmful interference to radio communications.
Operation of this equipment in a residential area may cause harmful interference, in which case users will be required to
correct the interference at their own expense.
Canada
This Class (A) digital apparatus meets all the requirements of the Canadian Interference-Causing Equipment Regulations.
Cet appareil numérique de la Classe (A) respecte toutes les exigences du Règlement sur le matériel brouilleur du Canada.
Repair information
If you purchased a service agreement, contact your Triatek® representative for a replacement unit. If you do not have a service
Contact your local Triatek representitive
Contact Johnson Controls: www.johnsoncontrols.com/contact-us
Contact Support: Call (+1) 770-242-1922 or email [email protected]
Table of contents
Other TRIATEK Measuring Instrument manuals
