Aufbauanleitung Assembling Instructions
2
TRIXIE Heimtierbedarf · Industriestraße 32 · 24963 Tarp · GERMANY · www.trixie.de
Um maximale Stabilität und Sicherheit zu erreichen, sind alle
Teile der Transportbox sehr genau aufeinander abgestimmt. Dies
erfordert absolut präzises Arbeiten bei der Montage. Nur so
können Sie die Box problemlos aufbauen und ihre hohe Qualität
später voll nutzen. Für den Aufbau werden mindestens zwei
Personen benötigt. Bitte planen Sie für den Aufbau 1–2 Stunden
Zeit ein. Sollten Sie beim Zusammensetzen einen Gummihammer
zur Hilfe nehmen, schützen Sie die Box bitte mit Polstermaterial.
For maximum stability and safety all parts of the transport box have
been compatibly matched with high precision. This requires utmost
precision during assembly. Only that way can the box be assembled
without problems and its high quality will be available to you once it
is finished. You need at least two people for the assembly. Please
reserve 1–2 hours for the assembly. If you use a rubber mallet during
assembly, protect the box with padded material.
1
2
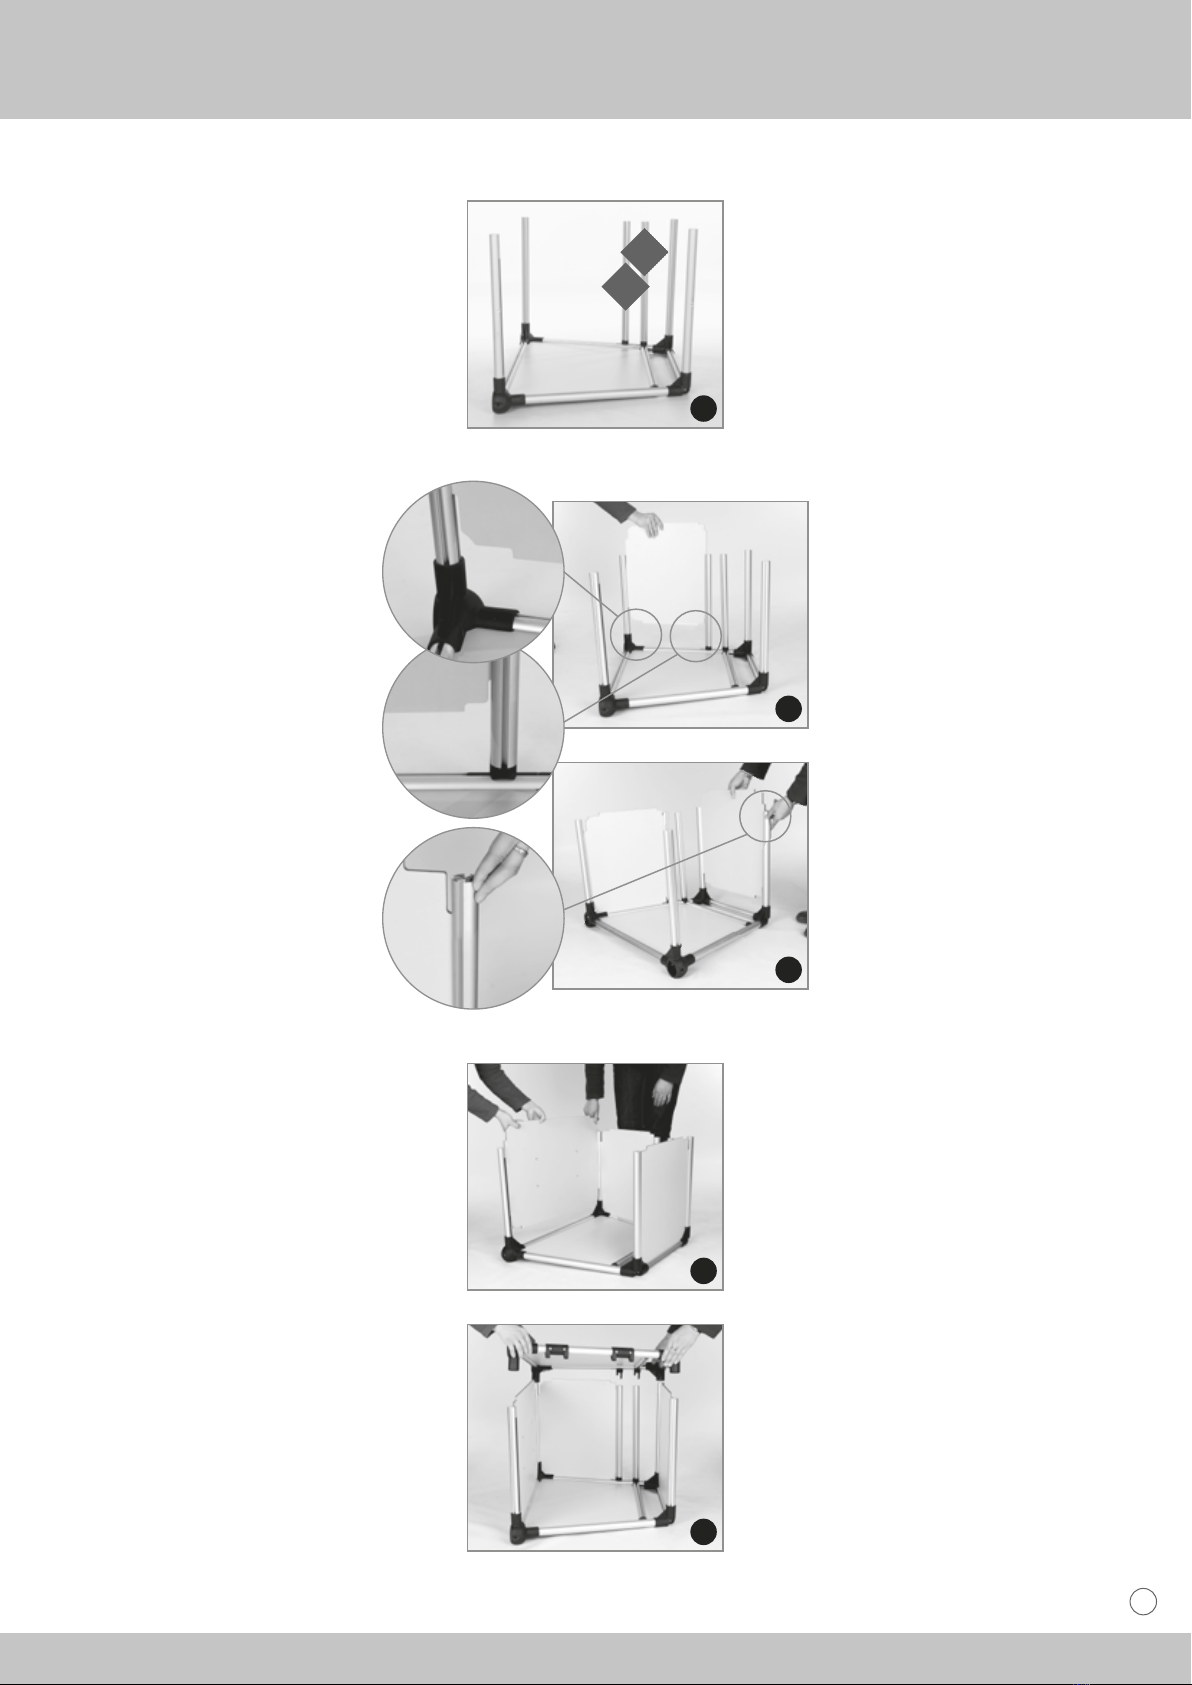
Legen Sie die rechte Seitenwand auf
den Boden und stecken Sie die vier
Stangen(BundC)ein.Diegeschlosse-
ne Seite der Stange muss immer nach
vorne bzw. hinten zeigen. Die Winkel
zwischen den Rillen sind nicht gleich.
Dies ist vor allem bei der in der Ab-
bildung markierten Stange wichtig.
Achten Sie hier besonders auf die
richtige Ausrichtung. Orientieren Sie
sich hierfür an der markierten Kante.
Place the right side panel on the floor
and insert the four bars (B und C). The
closed side of the bar has to face
towards the front respectively the
back. The angles between the grooves
are not identical. This is especially
important for the bar marked in the
picture. Pay special attention to the
correct alignment of this bar. Use the
marked edge as orientation.
Richten Sie die Box auf, um die
Stangen B lose anzuschrauben. Ver-
zichten Sie zunächst auf die Schutz-
kappen.
Turn the box upright to loosely screw
in the bars B. Do not place the protec-
tive caps on the bars yet.
3
4
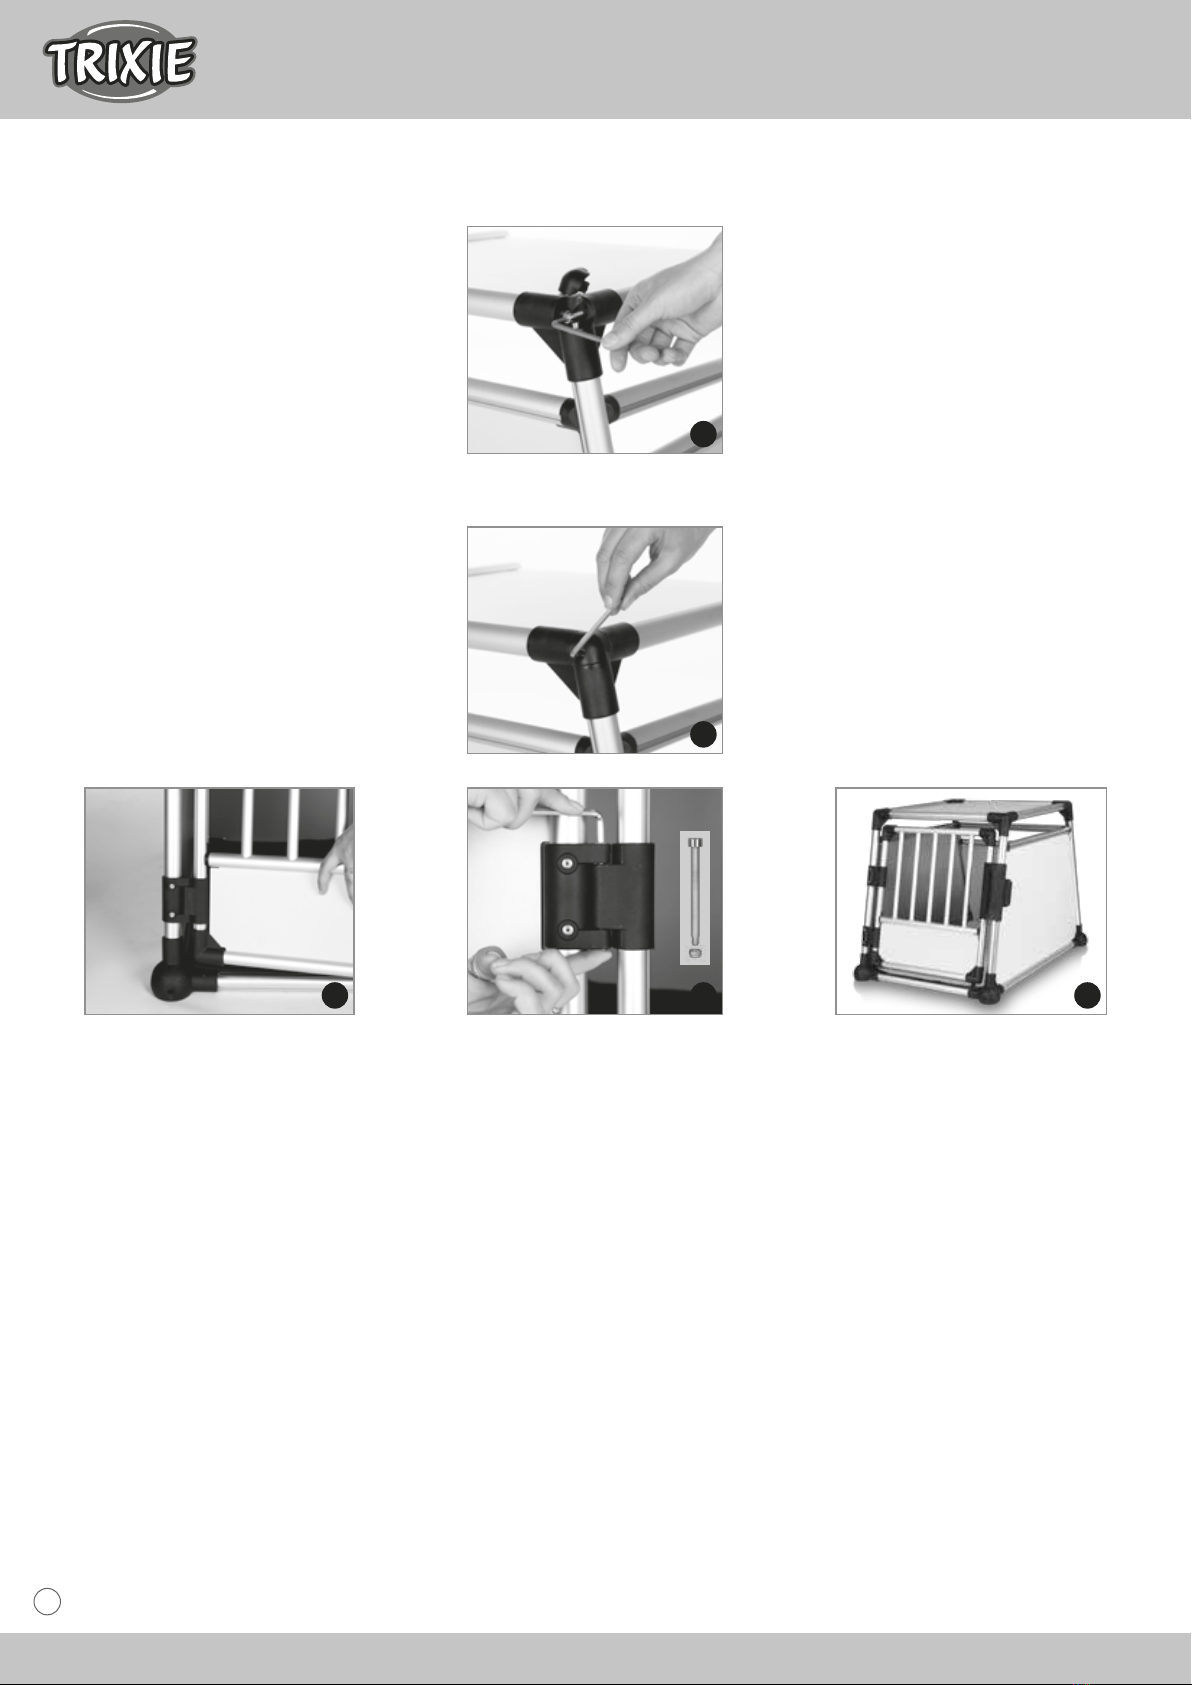
Schrauben Sie auch die Stangen C
lose an.
Screw also the bars C loosely in.
Die Verbinder für die Rückwand-Pro-
filstreben sitzen eventuell noch
nicht in der richtigen Position.
Schieben Sie sie falls nötig nach
oben Richtung Stange B.
The connectors for the back panel
profiles might not be in the right
position. Push them up towards bar B
if necessary.
Aufbauanleitung Assembling Instructions
2
TRIXIE Heimtierbedarf · Industriestraße 32 · 24963 Tarp · GERMANY · www.trixie.de
Um maximale Stabilität und Sicherheit zu erreichen, sind alle
Teile der Transportbox sehr genau aufeinander abgestimmt. Dies
erfordert absolut präzises Arbeiten bei der Montage. Nur so
können Sie die Box problemlos aufbauen und ihre hohe Qualität
später voll nutzen. Für den Aufbau werden mindestens zwei
Personen benötigt. Bitte planen Sie für den Aufbau 1–2 Stunden
Zeit ein. Sollten Sie beim Zusammensetzen einen Gummihammer
zur Hilfe nehmen, schützen Sie die Box bitte mit Polstermaterial.
For maximum stability and safety all parts of the transport box have
been compatibly matched with high precision. This requires utmost
precision during assembly. Only that way can the box be assembled
without problems and its high quality will be available to you once it
is finished. You need at least two people for the assembly. Please
reserve 1–2 hours for the assembly. If you use a rubber mallet during
assembly, protect the box with padded material.
1
2
Legen Sie die rechte Seitenwand auf
den Boden und stecken Sie die vier
Stangen(BundC)ein.Diegeschlosse-
ne Seite der Stange muss immer nach
vorne bzw. hinten zeigen. Die Winkel
zwischen den Rillen sind nicht gleich.
Dies ist vor allem bei der in der Ab-
bildung markierten Stange wichtig.
Achten Sie hier besonders auf die
richtige Ausrichtung. Orientieren Sie
sich hierfür an der markierten Kante.
Place the right side panel on the floor
and insert the four bars (B und C). The
closed side of the bar has to face
towards the front respectively the
back. The angles between the grooves
are not identical. This is especially
important for the bar marked in the
picture. Pay special attention to the
correct alignment of this bar. Use the
marked edge as orientation.
Richten Sie die Box auf, um die
Stangen B lose anzuschrauben. Ver-
zichten Sie zunächst auf die Schutz-
kappen.
Turn the box upright to loosely screw
in the bars B. Do not place the protec-
tive caps on the bars yet.
3
4
Schrauben Sie auch die Stangen C
lose an.
Screw also the bars C loosely in.
Die Verbinder für die Rückwand-Pro-
filstreben sitzen eventuell noch
nicht in der richtigen Position.
Schieben Sie sie falls nötig nach
oben Richtung Stange B.
The connectors for the back panel
profiles might not be in the right
position. Push them up towards bar B
if necessary.