Trotec BO22 User manual

TRT-BA-BO22-TC2019-31-001-EN
BO22
EN
OPERATING MANUAL
VIDEOSCOPE

2 EN
videoscope BO22
Table of contents
Notes regarding the operating manual.................................2
Safety .....................................................................................2
Information about the device................................................3
Operation ...............................................................................5
Errors and faults....................................................................8
Maintenance and repair ........................................................8
Disposal .................................................................................8
Notes regarding the operating manual
Symbols
Warning of electrical voltage
This symbol indicates dangers to the life and health of
persons due to electrical voltage.
Warning
This signal word indicates a hazard with an average
risk level which, if not avoided, can result in serious
injury or death.
Caution
This signal word indicates a hazard with a low risk
level which, if not avoided, can result in minor or
moderate injury.
Note
This signal word indicates important information (e.g.
material damage), but does not indicate hazards.
Info
Information marked with this symbol helps you to carry
out your tasks quickly and safely.
Follow the manual
Information marked with this symbol indicates that the
operating manual must be observed.
You can download the current version of the operating manual
and the EU declaration of conformity via the following link:
BO22
https://hub.trotec.com/?id=43579
Safety
Read this manual carefully before starting or using the
device. Always store the manual in the immediate vicinity
of the device or its site of use!
Warning
Read all safety warnings and all instructions.
Failure to follow the warnings and instructions may
result in electric shock, fire and/ or serious injury.
Save all warnings and instructions for future
reference.
This appliance can be used by children aged from
8years and above and persons with reduced physical,
sensory or mental capabilities or lack of experience
and knowledge if they have been given supervision or
instruction concerning use of the appliance in a safe
way and understand the hazards involved.
Children shall not play with the appliance. Cleaning and
user maintenance shall not be made by children
without supervision.
• Do not use the device in potentially explosive rooms.
• Do not use the device in aggressive atmosphere.
• Do not use the device in atmospheres containing oil,
sulphur, chlorine or salt.
• Protect the device from permanent direct sunlight.
• Only use the device in de-energized facilities and objects.
For reasons of safety, de-energize all plant components
and objects prior to every inspection.
• Before using the measuring probes and camera heads, de-
energize any circuits located in walls.
• Before using the measuring probes and camera heads in
metal pipes inside a wall, have an authorised specialist
company carry out a check to ensure that the metal pipes
are not electrically charged.
• For reasons of safety, do not use the measuring probes
and camera heads for inspections in moving parts.
• Do not remove any safety signs, stickers or labels from the
device. Keep all safety signs, stickers and labels in legible
condition.
EN 3
videoscope BO22
• Do not open the device.
• Observe the storage and operating conditions as given in
the Technical data chapter.
Intended use
Only use the device for the visualization of objects.
To use the device for its intended use, only use accessories and
spare parts which have been approved by Trotec.
Improper use
Do not use the device in potentially explosive areas. Do not use
the control unit with display underwater. Never use the device
on persons or animals. Trotec accepts no liability for damages
resulting from improper use. In such a case, any warranty
claims will be voided. Any unauthorised modifications,
alterations or structural changes to the device are forbidden.
Personnel qualifications
People who use this device must:
• take measures to protect themselves from direct contact
with live parts.
• have read and understood the operating manual, especially
the Safety chapter.
Residual risks
Warning of electrical voltage
Electric shock due to contact with live parts! Do not
touch any live parts. Secure neighbouring live parts by
covering them or by switching them off.
Warning of electrical voltage
There is a risk of a short-circuit due to liquids
penetrating the housing!
Do not immerse the device and the accessories in
water. Make sure that no water or other liquids can
enter the housing.
Warning of electrical voltage
Work on the electrical components must only be
carried out by an authorised specialist company!
Warning
Risk of suffocation!
Do not leave the packaging lying around. Children may
use it as a dangerous toy.
Warning
The device is not a toy and does not belong in the
hands of children.
Warning
Dangers can occur at the device when it is used by
untrained people in an unprofessional or improper way!
Observe the personnel qualifications!
Caution
Keep a sufficient distance from heat sources.
Note
To prevent damages to the device, do not expose it to
extreme temperatures, extreme humidity or moisture.
Note
Do not use abrasive cleaners or solvents to clean the
device.
Information about the device
Device description
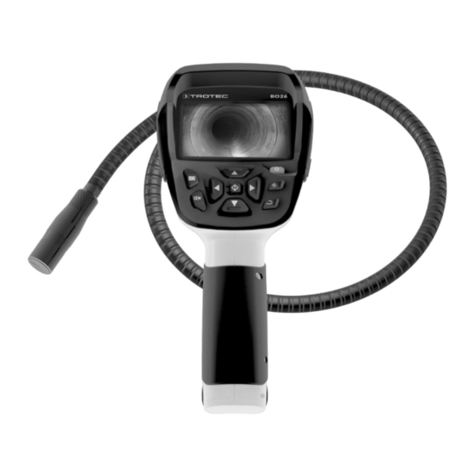
The videoscope BO22 serves for inspecting concealed machine
components and poorly accessible or inaccessible hollows.
The camera is connected to the device via a flexible gooseneck
probe.
The probe is water-proof and can be immersed in water along
with the camera head, e.g. to check whether there are any
objects underneath the surface or for leak detection in water-
carrying systems.
The device is equipped with a 3inch LC display. If it is used
along with a microSDcard (not included in the scope of
delivery), pictures and videos can be taken.
The device is further equipped with a freeze-frame function,
with additional lighting and offers the possibility to rotate the
image by180° (flip function).
The tip of the gooseneck probe can be replaced with three
further attachments:
• 45° mirror attachment
• hook attachment
• magnet attachment

4 EN
videoscope BO22
Device depiction
1
3
4
6
7
2
8
12
11
9
14
10
15
13
5
No. Element Function
1 Display camera image or menu indication
2 MicroSD card
indication
indicates whether a microSD card is
inserted
3 Battery status
indication
flashes red if batteries need to be
replaced
4 button starts recording pictures or videos
5 button runs menu function
runs indicated submenu
confirms input value
6 button up button for the menu
zoom function
7 button POWER button
freeze image
8 MicroSD card
recording
insert MicroSDcard up to 32 GB
9 button deletes data
activates camera light(4levels)
10 button down button for the menu
180° image rotation (flip function)
11 button activates rear light
12 Date and time
indication
settings are made via menu function
13 Rear light additional object lighting
14 Gooseneck probe with camera head and lamp,
extendable by95cm
15 Battery
compartment
4batteries, typeAA

EN 5
videoscope BO22
Technical data
Parameter Value
Model BO22
Weight (incl. batteries) approx. 385g
Dimensions
(lengthx widthx height)
162mmx 85mmx 35mm
Display 3.0inch digital
LCcolour display
Storage on microSD card (up to 32GB,
not included in the scope of
delivery)
Resolution 640x 480 pixels
Video format *.avi
Video resolution 1280x 720 pixels
Photo format *.jpg
Camera diameter 5.5mm
Length of the gooseneck probe 95cm
DOF approx. 1cm to30cm
Field of vision 65°
Zoom 1.0/1.5/2.0-fold zoom
Operating temperature -10°C to 60°C
Storage temperature -10°C to 60°C
Type of protection (gooseneck
probe and camera head)
IP67
Power supply 4x Alkaline LR6AA 1.5V
battery
Scope of delivery
• 1x Device BO22
• 4x Alkaline LR6AA 1.5V battery
• 1x Accessory kit with 45° mirror, hook and magnet
attachment
• 1 x Quick guide
Operation
Inserting the batteries
Note
Make sure that the surface of the device is dry and the
device is switched off.
1. Remove the cover of the battery compartment(15).
2. Insert the batteries (4x typeAA) into the device with
correct polarity(+/-).
3. Put the cover back onto the battery compartment.
Switch the device on and off
1. Press and hold the button(7) for approx. 2seconds to
switch the device on.
ðThe display(1) switches on.
ðThe device is ready for operation.
2. Press and hold the button(7) again for approx.
2seconds to switch the device off.

6 EN
videoscope BO22
Inserting the microSD card
To take pictures or record videos, you have to insert a microSD
card (not included in the scope of delivery) into the device.
Info
Do not push the microSD card forcefully into the
retainer(8). Otherwise the card could be damaged.
Make sure that the card is correctly aligned.
1. Carefully insert the card into the microSD card slot(8).
Settings and video menu
The device has an integrated menu where you can adjust
settings and take and view pictures and videos. After pressing
the (5) button, the main menu will open including the
following subitems:
Subitem Function
back - exits the menu
Video mode - opens the video mode
- press the button to start recording
Photo mode - opens the photo mode
- press the button to take a picture
Playback - opens the playback menu
- plays or deletes previously taken photos or
videos
Setup - opens the settings menu
- allows you to adjust date, time and language
and to format the microSD card
By pressing the (6) or (10) button, you can browse the
menus and adjust the indicated values.
By pressing the (5) button, you can access the displayed
submenu, confirm a setting or change the language in the
language settings menu.
Aligning/ moving the camera
To provide protection, the gooseneck probe is integrated into
the device and should be appropriately placed into the device if
the camera is not in use.
1. Take out the gooseneck probe(14) to the desired length by
unwinding it from the housing. Note that the stability of the
gooseneck decreases the more you unwind it from the
housing.
2. Move the camera on the tip of the gooseneck into the
desired position. For underwater photos the gooseneck
probe can be immersed. Make sure that the device itself
does not make contact with water, otherwise it might be
damaged.
3. If necessary, press the (10) button to turn the camera
image by180°.
4. Press the (10) button again to turn the camera image
back by180°.
Setting the camera light
The device is equipped with a camera light that
offers4brightness levels.
1. Press the (9)button up to four times to set the desired
brightness level.
2. Pressing the (9)button for the fifth time will switch off
the camera light.

EN 7
videoscope BO22
Taking photos/videos
With inserted microSD card (not included in the scope of
delivery) you can take photos or videos with the camera.
1. Briefly press the button(4) to take a photo with the
camera.
2. Press and hold the button(4) for approx. 2seconds to
access the video mode.
ðThe symbol of the photo icon on the top left in the
display changes to the symbol of a camera icon.
3. In the video mode, press the button(4) to start
recording the video.
ðThe video recording is started.
ðThe camera icon in the display starts flashing and the
video runtime is displayed.
4. Press the button(4) again to stop recording.
ðThe video recording is stopped.
ðThe camera icon stops flashing and the runtime display
disappears.
Freezing the image
By pressing the button(7) you can "freeze" the image to
obtain a better view on it.
By pressing the button(7) again, the display(1) switches
back to the live image of the camera.
Setting the zoom factor
By pressing the button(6) you can switch between three
different zoom levels:
• 1.0-fold zoom
• 1.5-fold zoom
• 2.0-fold zoom
The zoom level is indicated on the display(1).
Using the rear light
The device is equipped with an additional rear light(13) to be
able to illuminate objects in a better way or to be used as a
torch.
1. Press the button(11) to switch on the rear light(13).
2. Repress the button(11) to switch off the rear light(13)
again.
Using accessories
The scope of delivery includes three additional camera
attachments with the following functions:
45°
attachment
allows you to have an around-the-corner view
with the camera
hook
attachment
allows you to remove objects with the hook,
e.g. a ring that fell into the drain
magnet
attachment
allows you to remove metals containing iron,
nickel or cobalt, e.g. screws or nuts in places
that are difficult to access
1. Unscrew the thread protection from the camera.
2. Screw the required attachment on the camera.
I. II.
Info
After usage, always screw the thread protection back
on the camera head. Otherwise, the thread could be
damaged and it might not be possible to use the
accessory attachments any longer.

8 EN
videoscope BO22
Errors and faults
The device has been checked for proper functioning several
times during production. If malfunctions occur nonetheless,
check the device according to the following list.
Fault Cause Solution
The device
does not
switch on.
No batteries are
installed.
Make sure that batteries
are installed.
The batteries are
not properly
installed.
Make sure that batteries
are properly installed.
The batteries are
empty.
Make sure that the batteries
are new or charged
sufficiently.
Device did
not record
pictures/
videos.
No microSD card
inserted.
Insert a microSD card.
MicroSD card is
full.
Delete files no longer
needed to free up storage
space.
The device
switched off during
recording.
Terminate the recording
before the batteries have
run empty.
MicroSD card
cannot be
read.
Problem with
microSD card.
Make sure that the microSD
card is not damaged and
the storage space does not
exceed 32GB.
System has
crashed.
Restart the system.
Camera
image is too
bright or too
dark.
Camera light is set
too bright or too
dark.
Set the camera light
correctly (see Chapter
Operation).
The rear light
influences the
image.
Switch the rear light on and
off as needed.
Camera light
does not work,
no image
being
displayed.
The batteries are
not sufficiently
charged.
Insert new batteries.
Communication
error between
camera and device.
Check the connection
between gooseneck probe
and device.
The camera is
damaged.
Contact the Trotec Service
for further measures.
The recorded
video
stutters.
The microSD card
transfer speed is
lower than6MB/s.
Use another microSD card
with a transfer speed of at
least6MB/s.
Maintenance and repair
Battery change
Change the batteries if the battery status indication(3) flashes
in red or if the device can no longer be switched on. See section
Inserting the batteries in chapter Operation.
Cleaning
Clean the device with a soft, damp and lint-free cloth. Make
sure that no moisture enters the housing. Do not use any
sprays, solvents, alcohol-based cleaning agents or abrasive
cleaners, but only clean water to moisten the cloth.
Repair
Do not modify the device or install any spare parts. For repairs
or device testing, contact the manufacturer.
Disposal
The icon with the crossed-out waste bin on waste
electrical or electronic equipment stipulates that this equipment
must not be disposed of with the household waste at the end of
its life. You will find collection points for free return of waste
electrical and electronic equipment in your vicinity. The
addresses can be obtained from your municipality or local
administration. For further return options provided by us please
refer to our website https://de.trotec.com/shop/.
The separate collection of waste electrical and electronic
equipment aims to enable the re-use, recycling and other forms
of recovery of waste equipment as well as to prevent negative
effects for the environment and human health caused by the
disposal of hazardous substances potentially contained in the
equipment.
In the European Union, batteries and accumulators must not be
treated as domestic waste, but must be disposed of
professionally in accordance with Directive 2006/66/EC of the
European Parliament and of the Council of 6September 2006
on batteries and accumulators. Please dispose of batteries and
accumulators according to the relevant legal requirements.

Trotec GmbH
Grebbener Str. 7
D-52525 Heinsberg
+49 2452 962-400
+49 2452 962-200
www.trotec.com
Other manuals for BO22
1
Table of contents
Other Trotec Analytical Instrument manuals

Trotec
Trotec VSC106 User manual

Trotec
Trotec BD15 User manual

Trotec
Trotec BD26 User manual

Trotec
Trotec BQ21 User manual

Trotec
Trotec VSP3041 User manual

Trotec
Trotec BO26 User manual

Trotec
Trotec VSC3008 User manual

Trotec
Trotec VSC3008 User manual

Trotec
Trotec VSC106 User manual

Trotec
Trotec 3510009126 User manual