TRUST AMI MOUSE 300 WIRELESS DUAL SCROLL
3
GB
UK
-This product works at a frequency of 27MHz. It is approved according to the European R&TEE guidelines
and, therefore, meets the requirements for use within the EU. There may, however, be local restrictions
with regard to the use of this device. You are personally responsible for ensuring that the use of this
product is permitted according to local regulations. If in doubt, contact your local authorities. Frequency:
27.042 - 27.048MHz and 27.142 - 27.148 MHz
0678
-Nowadays, there are an increasing number of wireless products (video, audio, convenience, computer,
etc.) which work in the same frequency range as this device. It may, therefore, be possible that the
functionality of this product can be limited by or be limiting for other wireless products. This can only be
avoided by paying attention to the distance between products and, where possible, by changing
channels.
-Be careful when using wireless devices if you have a pacemaker or are dependent on other life-saving,
sensitive electronic equipment. This product transmits radio signals!
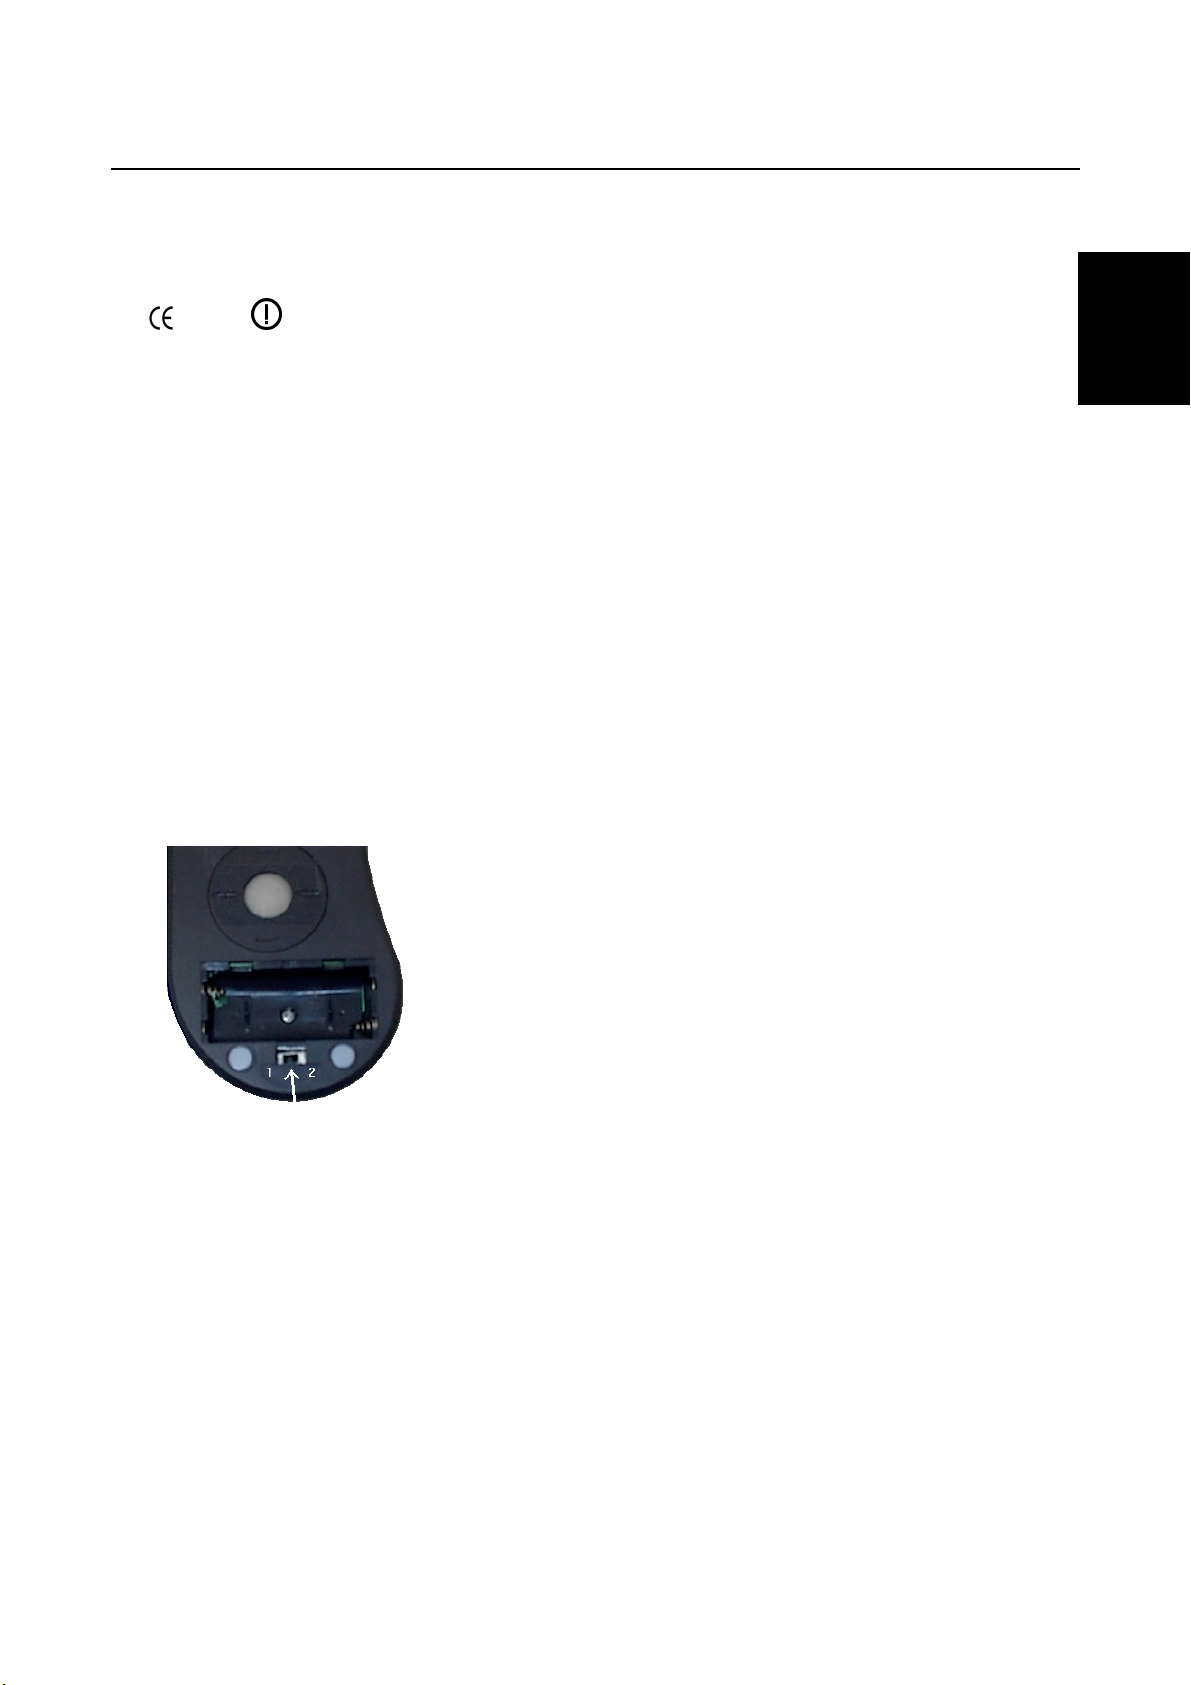
3. Inserting the batteries
1. Open the battery compartment on the bottom of the mouse.
2. Insert the two AAA batteries provided into the battery compartment as shown in the diagram (see figure
1).
3. Close the battery compartment by replacing the flap.
4. Selecting the channel
The mouse can work on two different channels, which ensures that there are no disturbances if the same
type of mouse is used near your mouse. You must select a channel before using the mouse.
1. Open the battery compartment on the bottom of the mouse. A switch will be visible (see figure 1).
Figure 1: The bottom of the mouse with an open battery compartment
2. Set the switch to position 1 or 2 and remember which position you have chosen. Use a pointed object,
such as a toothpick, to change the switch.
3. Close the battery compartment by replacing the flap.
4. Next, take the Wireless RF Receiver and find the switch used to change the channel on the right-hand
side of the Receiver. This is indicated with 1 and 2.
5. Set the switch on the Wireless RF Receiver to the same position you have just set the mouse to (position
1 or 2).
5. Uninstalling old drivers and devices
The most common cause of faults during installation is the presence of a driver for a similar, old product. The
best solution is to first remove all drivers related to old devices before installing the new driver.
1. Enter the Windows ‘Safe Mode’ (press F8 when starting Windows and then select ‘Safe Mode’ from the
menu which is displayed).
2. Go to ‘Start – Settings – Control Panel’ and double-click on the ‘Add/Remove Programs’ icon.