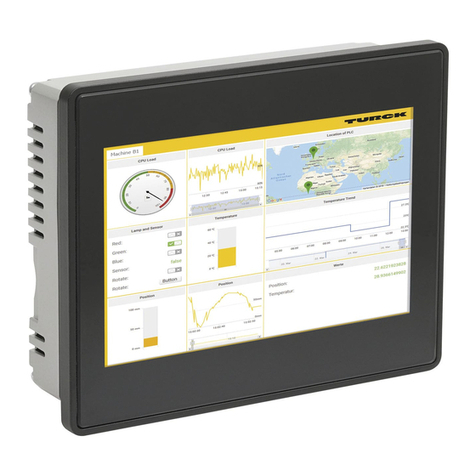
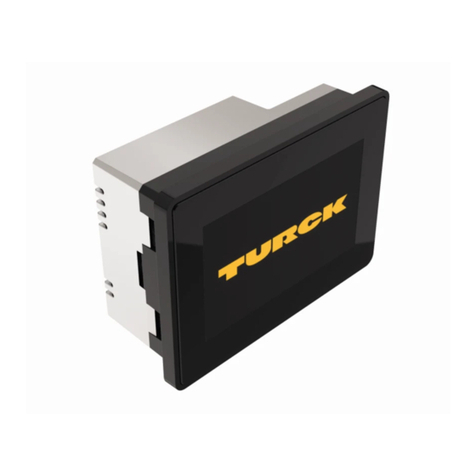
turck HMI – TX200 User manual

TX207
© Hans Turck GmbH & Co. KG | 100002509 2018-05 DE EN FR
Technical Data/Certication Data
Power Supply
Supply voltage 24 V DC (10 to 32 V DC)
Current consumption 0.3 A at 24 V DC (max.)
General Information
Operating temperature 0°C…50 °C (vertical installation)
Storage temperature -20 °C…+70 °C
Relative humidity 5…85 % RH, non condensing
Protection class IP66 (front), IP20 (rear)
For use in pollution degree 2 environment

TX207
Zu Ihrer Sicherheit
Bestimmungsgemäße Verwendung
Das HMI (Human Machine Interface) TX207 dient zum Steuern, Bedienen und
Beobachten von Maschinenprozessen.
Die Geräte dürfen nur wie in dieser Anleitung beschrieben verwendet werden.
Jede andere Verwendung gilt als nicht bestimmungsgemäß; für daraus resultie-
rende Schäden übernimmt Turck keine Haftung.
Allgemeine Sicherheitshinweise
■Nur fachlich geschultes Personal darf das Gerät montieren, installieren, betrei-
ben, parametrieren, programmieren und instand halten.
■Die Geräte erfüllen ausschließlich die EMV-Anforderungen für den industriel-
len Bereich und sind nicht zum Einsatz in Wohngebieten geeignet.
■Das Gerät nur in Übereinstimmung mit den geltenden nationalen und inter-
nationalen Bestimmungen, Normen und Gesetzen einsetzen.
Produktbeschreibung
Geräteübersicht
Siehe Abb. 1
A B C H L T
176 mm/
6.90”
136 mm/
5.35”
29 mm/
1.14”
147 mm/
5.79”
187 mm/
7.36”
5 mm/
0.19”
Funktionen und Betriebsarten
Das TX207 kombiniert die Funktionen„Steuern, Bedienen und Beobachten“
durch eine CODESYS V3-SPS mit integrierter Visualisierung zu einer vollwerti-
gen Steuerungseinheit. Die CODESYS 3 Steuerung des TX207 verfügt über die
Funktionen PROFINET-Controller, EtherNet/IP™-Scanner und Modbus TCP- sowie
Modbus RTU-Master. Darüber hinaus können die TX207 als Modbus TCP- sowie
Modbus RTU-Slave verwendet werden.
Weitere Funktionen
■Ethernet TCP/IP- oder UDP/IP-Kommunikation
■OPC-UA-Server und -Client
■Serielle Kommunikation über RS232, RS485 und RS422
Montieren
Siehe Abb. 2 und 3
A = TX200
B = Einbauausschnitt
Jede der Schrauben anziehen, bis die Ecken des Rahmens auf dem Panel
aufliegen. Das maximale Anzugsdrehmoment beträgt 0,75 Nm.
Anschließen
Anschlüsse und Steckplätze
Siehe Abb. 4
Anschluss/Steckplatz Funktion
1 Spannungsversorgung
2 X2 RS422/485 + CAN (COM2/CAN0)
3 X3 RS422/485 + CAN (COM3/CAN1)
4 X4 RS232 + RS232 (COM1/COM4)
5 X5 USB-Port
6 X6 USB-Port
7 X7 Ethernet-Port 0 (10/100/1000 Mbit)
8 X8 Ethernet-Port 1 (10/100 Mbit)
9 S1 RS485 + CAN Port-Konfiguration (DIP)
10 S2 RS485 + CAN Port-Konfiguration (DIP)
HINWEIS
Geräte der Schutzklasse III nach EN 61140 bzw. Class 2 nach UL-Standard:
Alle Anschlüsse sind SELV-Anschlüsse.
Spannungsversorgung
Gerät gemäß Abb. 5 und 6 an die Versorgungsspannung anschließen.
GEFAHR
Falsche Wahl der Spannungsversorgung
Lebensgefahr durch Überspannung und Stromschlag!
Geräte nur an SELV-Spannungsquellen betreiben.
Gerät erden
Der minimale Leitungsquerschnitt für den Erdungsanschluss beträgt 1,5 mm².
Gerät über Klemme 3 am Spannungsversorgungsanschluss erden.
ACHTUNG
Ungeschützte Elektronik
Zerstörung der Elektronik!
Gerät nicht unter Spannung öffnen
Serielle Schnittstellen/CAN-Schnittstellen
RS232 (X4)
Siehe Abb. 7
Pin RS232
1GND
2TxD
3RxD
4RTS
5CTS
6GND
7TxD
8RxD
9RTS
10 CTS
RS485/CAN (X2 und X3)
Siehe Abb. 8
Pin RS485 CAN
1 n.c. GND
2 Abschlusswiderstand
3 CAN-H
4 CAN-L
5 Abschlusswiderstand
6 Abschlusswiderstand n.c.
7 GND
8 Abschlusswiderstand
9 Y (TX+)
10 Z (TX-)
11 A (RX+)
12 B (RX-)
RS485 (CAN-Port-Konguration – DIP-Schalter S1 und S2)
Position Beschreibung
1 CAN-Abschlusswiderstand
2 CAN-Abschlusswiderstand
3 RS485 Halbduplex
4 RS485 Halbduplex
5 RS485-Abschlusswiderstand
6 RS485-Abschlusswiderstand
Instand halten
Die Geräte müssen in regelmäßigen Abständen mit einem feuchten Tuch gerei-
nigt werden.
Reparieren
Das Gerät ist nicht zur Reparatur durch den Benutzer vorgesehen. Sollte das
Gerät defekt sein, nehmen Sie es außer Betrieb. Bei Rücksendung an Turck
beachten Sie bitte unsere Rücknahmebedingungen.
Entsorgen
Die Geräte müssen fachgerecht entsorgt werden und gehören nicht in
den normalen Hausmüll.
Zulassungen und Normen
Konformität
Die Produkte wurden gemäß der geltenden Normen und Standards erstellt:
■EN 61000-6-2, EN 61000-6-4
■EN 61000-4-2 bis -4-6, EN 61000-4-8, EN 61000-4-11, EN 61000-4-29
DE Kurzbetriebsanleitung
HMI – TX207
Hans Turck GmbH & Co. KG | Witzlebenstraße 7 | 45472 Mülheim an der Ruhr | Germany | Tel. +49 208 4952-0 | Fax +49 208 4952-264 | more@turck.com | www.turck.com

TX207
For Your Safety
Intended Use
The HMI (Human Machine Interface) TX207 is used to control, operate and moni-
tor machine processes.
The devices may only be used as described in these instructions.
Any other usage shall be considered improper and Turck shall not be held liable
for any resulting damage.
General Safety Instructions
■The device may only be assembled, installed, operated, parameterized and
maintained by professionally-trained personnel.
■The device only meets the EMC requirements for industrial areas and is not
suitable for use in residential areas.
■The device may only be used in accordance with applicable national and
international regulations, standards and laws.
Product Description
Device overview
See fig. 1
A B C H L T
176 mm/
6.90”
136 mm/
5.35”
29 mm/
1.14”
147 mm/
5.79”
187 mm/
7.36”
5 mm/
0.19”
Functions and Operating Modes
The HMI (Human Machine Interfaces) TX207 combines control, operation and
monitoring in a full-scope control thanks to the CODESYS V3 PLC with inte-
grated visualization. The CODESYS 3 control of the TX500 has the functions
PROFINET controller, EtherNet/IP™ scanner and Modbus TCP as well as Modbus
RTU master. Additionally the TX207 can be used as Modbus TCP as well as
Modbus RTU slave.
Additional functions
■Ethernet TCP/IP or UDP/IP communication
■OPC-UA server and client
■Serial communication via RS232, RS485 and RS422
Mounting
See fig. 2 and 3
A = TX200
B = cut-out
Screw each fixing screw until the bezel corner gets in contact with the panel.
The maximum tightening torque is 0.75 Nm.
Connecting
Connectors and slots
See fig. 4
Connector/Slot Function
1 Power supply
2 X2 RS422/485 + CAN (COM2/CAN0)
3 X3 RS422/485 + CAN (COM3/CAN1)
4 X4 RS232 + RS232 (COM1/COM4)
5 X5 USB port
6 X6 USB port
7 X7 Ethernet port 0 (10/100/1000 Mbit)
8 X8 Ethernet port 1 (10/100 Mbit)
9 S1 RS485 + CAN port configuration (DIP)
10 S2 RS485 + CAN port configuration (DIP)
NOTE
Devices of protection class III according to EN 61140 or Class 2 according to UL
standards:
All connections are SELV connections.
Power supply
Connect the device to the voltage supply according to fig. 5 and 6.
DANGER
Wrong selection of power supply
Danger to life due to overvoltage and electric shock!
Only operate devices at SELV-power supplies.
Grounding the device
The minimum conductor cross-section for the ground connection is 1.5 mm².
Connect terminal 3 on the power supply terminal block to ground.
ATTENTION
Unprotected electronic circuits
Destruction of electronics!
Do not open the device under voltage.
Serial interfaces/CAN interface
RS232 (X4)
See fig. 7
Pin RS232
1GND
2TxD
3RxD
4RTS
5CTS
6GND
7TxD
8RxD
9RTS
10 CTS
RS485/CAN (X2 and X3)
See fig. 8
Pin RS485 CAN
1 n.c. GND
2 Terminating resistor
3 CAN-H
4 CAN-L
5 Terminating resistor
6 Terminating resistor n.c.
7 GND
8 Terminating resistor
9 Y (TX+)
10 Z (TX-)
11 A (RX+)
12 B (RX-)
RS485 (CAN port conguration – DIP switches S1 and S2)
position Description
1 CAN terminating resistor
2 CAN terminating resistor
3 RS485 halfduplex
4 RS485 halfduplex
5 RS485 terminating resistor
6 RS485 terminating resistor
Maintenance
The devices must be cleaned at regular intervals with a damp cloth.
Repair
The device must not be repaired by the user. The device must be decommis-
sioned if it is faulty. Observe our return acceptance conditions when returning
the device to Turck.
Disposal
The devices must be disposed of correctly and must not be included in
normal household garbage.
Approvals and standards
Compliance
The products have been designed in compliance with:
■EN 61000-6-2, EN 61000-6-4
■EN 61000-4-2 to 4-6, EN 61000-4-8, EN 61000-4-11, EN 61000-4-29
EN Quick Start Guide
HMI – TX200
© Hans Turck GmbH & Co. KG | 100002509 2018-05 DE EN FR

TX207
Pour votre sécurité
Utilisation conforme
Le HMI (Human Machine Interface) TX207 est utilisé pour la commande, la
gestion et le monitorage des processus machine.
Les appareils doivent être utilisés conformément aux indications du manuel.
Toute autre utilisation est considérée comme non conforme et Turck décline
toute responsabilité en cas de dommages qui en résulteraient.
Consignes générales de sécurité
■Seul un personnel qualifié est habilité à monter, installer, utiliser, paramétrer,
programmer et entretenir l’appareil.
■Les appareils répondent exclusivement aux exigences de la directive CEM
pour le secteur industriel et ne sont pas destinés à être mis en œuvre dans les
zones d’habitation.
■L’appareil doit uniquement être utilisé conformément aux dispositions,
normes et lois nationales et internationales en vigueur.
Description du produit
Aperçu de l'appareil
Voir fig. 1
A B C H L T
176 mm/
6.90”
136 mm/
5.35”
29 mm/
01:14”
147 mm/
5.79”
187 mm/
07:36”
5 mm/
00:19”
Fonctions et modes de fonctionnement
Le HMI (Human Machine Interface) TX207 combine commande, gestion et
monitorage dans une commande complète grâce à CODESYS V3 PLC avec une
visualisation intégrée. Le contrôleur CODESYS 3 du TX207 dispose des fonctions
contrôleur PROFINET, scanner EtherNet/IP™, maître Modbus TCP et maître
Modbus RTU. De plus, le TX207 peut être utilisé comme esclave Modbus TCP et
Modbus RTU.
Fonctions supplémentaires
■Communication Ethernet TCP/IP ou UDP/IP
■Serveur et client OPC-UA
■Communication sérielle via RS232,RS485 ou RS422
Montage
Voir fig. 2 et 3
A = TX200
B = découpe de montage
Serrer chacune des vis jusqu'à ce que la tête de celle-ci sera en contact avec
l‘afficheur. Le couple de serrage max. est 0.75 Nm.
Raccordement
Connecteurs et fentes
Voir fig. 4
Connecteur/fente Fonction
1 Alimentation
2 X2 RS422/485 + CAN (COM2/CAN0)
3 X3 RS422/485 + CAN (COM3/CAN1)
4 X4 RS232 + RS232 (COM1/COM4)
5 X5 Port USB
6 X6 Port USB
7 X7 Port Ethernet 0 (10/100/1000 Mbit)
8 X8 Port Ethernet 1 (10/100 Mbit)
9 S1 RS485 + configuration CAN port (DIP)
10 S2 RS485 + configuration CAN port (DIP)
NOTICE
Appareils de la classe de protection III selon EN 61140 ou Class 2 selon normes
UL:
Tous connexions sont connexions SELV (Extra Sécurité - Voltage bas).
Alimentation
Raccorder l'appareil à la tension d'alimentation comme indiqué sur les Fig. 5
et 6.
DANGER
Mauvaise sélection de l'alimentation
Danger de mort à cause de risque d'explosion!
Utiliser les appareils seulement avec alimentations SELV.
Mise à la terre de l'appareil
La section minimale du conducteur pour la mise à la terre est de 1,5 mm².
Mettez l'appareil à la terre via la borne 3 sur la connexion d'alimentation.
ATTENTION
Électronique sans protection
Destruction de l'électronique!
Ne pas ouvrir l'appareil sous tension.
Ports sériels/ports CAN
RS232 (X4)
Voir fig. 7
Pin RS232
1GND
2TxD
3RxD
4RTS
5CTS
6GND
7TxD
8RxD
9RTS
10 CTS
RS485/CAN (X2 et X3)
Voir fig. 8
Pin RS485 CAN
1 n.c. GND
2 Résistance terminale
3 CAN-H
4 CAN-L
5 Résistance terminale
6 Résistance terminale n.c.
7 GND
8 Résistance terminale
9 Y (TX+)
10 Z (TX-)
11 A (RX+)
12 B (RX-)
RS485 (port conguration CAN – DIP S1 et S2)
Position Description
1 Résistance terminale CAN
2 Résistance terminale CAN
3 RS485 half duplex
4 RS485 half duplex
5 Résistance terminale RS485
6 Résistance terminale RS485
Maintenance
Les appareils doivent être nettoyés à intervalles réguliers à l'aide d'un chiffon
humide.
Réparation
L’appareil ne peut pas être réparé par l’utilisateur. En cas de dysfonctionnement,
mettez l’appareil hors tension. Veuillez tenir compte de nos conditions de
reprise lorsque vous souhaitez renvoyer l’appareil à Turck.
Mise au rebut
Les appareils doivent être mis au rebut convenablement et ne doivent
pas être jetés dans les poubelles traditionnelles.
Certications et normes
Conformité
Les produits ont été désignés en conformité aux normes:
■EN 61000-6-2, EN 61000-6-4
■EN 61000-4-2 à -4-6, EN 61000-4-8, EN 61000-4-11, EN 61000-4-29
FR Mode d’emploi simplifié
HMI – TX207
Hans Turck GmbH & Co. KG | Witzlebenstraße 7 | 45472 Mülheim an der Ruhr | Germany | Tel. +49 208 4952-0 | Fax +49 208 4952-264 | more@turck.com | www.turck.com
Table of contents
Languages:
Other turck Controllers manuals
Popular Controllers manuals by other brands

Bernini
Bernini Be242 AMF ATS installation manual

iNels
iNels RF KEY quick start guide

DAINCUBE
DAINCUBE DTP10-L API Manual

Worthington
Worthington CS100 Operation & maintenance instructions

Baelz Automatic
Baelz Automatic mCelsitron 6490B Device manual

Johnson Controls
Johnson Controls Hitachi C4IRK01 Operation manual