TurfEx US1000-1 Operating instructions

November 15, 2018
Lit. No. 85759, Rev. 00
Sprayer System
US1000-1
Owner's Manual and Installation Instructions
Original Instructions
This manual and instructions are for US1000-1 Sprayer Systems
with serial numbers beginning with 181001 and higher.
This document supersedes all editions with an earlier date.
CAUTION
Read this document before operating
or servicing the equipment.


Lit. No. 85759, Rev. 00 3 November 15, 2018
TABLE OF CONTENTS
PREFACE.................................................................... 4
Warranty Registration ........................................... 4
Owner's Information Form .................................... 4
SAFETY ...................................................................... 5
Safety Definitions.................................................. 5
Warning/Caution Labels ....................................... 5
Serial Number Label ............................................. 6
Safety Precautions................................................ 6
Personal Safety..................................................... 7
Fire and Explosion ................................................7
Cell Phones........................................................... 7
Ventilation ............................................................. 8
Battery Safety ....................................................... 8
Torque Chart ......................................................... 8
Chemical Safety.................................................... 9
LOADING .................................................................. 10
Certification......................................................... 10
Specifications...................................................... 10
First Time Filling.................................................. 10
INSTALLATION INSTRUCTIONS ............................ 11
Assembly / Installation ........................................ 11
Electrical System ................................................ 12
Wiring Instructions .............................................. 12
OPERATING INSTRUCTIONS................................. 13
During Operation ................................................ 13
Before Spraying .................................................. 14
Adding Liquid ...................................................... 14
Sprayer Operation............................................... 14
During Spraying .................................................. 15
After Spraying ..................................................... 15
Transp or t in g Safet y ............................................. 15
MAINTENANCE........................................................ 16
Clean Out............................................................ 16
Periodic Maintenance ......................................... 16
End of Season and Storage................................ 16
Nozzle Maintenance ........................................... 16
TROUBLESHOOTING.............................................. 17

Lit. No. 85759, Rev. 00 4 November 15, 2018
PREFACE
This manual has been prepared to acquaint you with
the safety information, operation, and maintenance of
your new machine. Improper installation and operation
could cause personal injury and/or equipment and
property damage. Read and understand the Owner's
Manual before installing, operating, or making
adjustments. Keep this manual accessible.
When service is necessary, call TurfEx®Technical
Service at 1-800-SALTERS (725-8377).
NOTE: This unit is designed to be used with
fertilizer, pesticides, and herbicide solutions; the
use of additives may impact performance.
NOTE: Do not modify or alter the machine.
Altering the unit in any way will void the warranty.
OWNER'S INFORMATION
Owner's Name: ______________________________________________________________________
Date Purchased: _____________________________________________________________________
Outlet Name: ______________________________________________ Phone:_________________
Outlet Address: ______________________________________________________________________
Vehicle Model: _______________________________________________ Year: _______________
Equipment Model: ____________________________________ Serial #:______________________
Length:________________________ Weight: __________________ lb/kg: _________________
The sprayer system is designed to spray chemicals,
such as fertilizer, for different applications. Each unit
consists of a holding tank, along with a pumping
system and control.
WARRANTY REGISTRATION
Warranty registration is available online at
www.SnowExproducts.com. Under "Support" click
"Warranty Registration" and submit the form online.

Lit. No. 85759, Rev. 00 5 November 15, 2018
SAFETY
SAFETY DEFINITIONS
NOTE: Indicates a situation or action that can lead
to damage to your sprayer and vehicle or other
property. Other useful information can also be
described.
Both Sides
WARNING
Indicates a potentially hazardous situation
that, if not avoided, could result in death or
serious personal injury.
CAUTION
Indicates a potentially hazardous situation
that, if not avoided, may result in minor or
moderate injury. It may also be used to alert
against unsafe practices.
WARNING/CAUTION LABELS
Become familiar with and inform users about the
warning and caution labels on the machine.
If labels are missing or cannot be read, call
1-800-SALTERS (725-8377).

Lit. No. 85759, Rev. 00 6 November 15, 2018
SAFETY
Code Definition
YY 2-Digit Year
MM 2-Digit Month
DD 2-Digit Day
LL 2-Digit Location Code
XXXX 4-Digit Sequential Number
ZZZZZZ Model #
SAFETY PRECAUTIONS
Improper installation and operation could cause
personal injury and/or equipment and property
damage. Read and understand labels and the
Owner's Manual before installing, operating, or making
adjustments.
WARNING
• Before working with the equipment, secure all
loose-fitting clothing and unrestrained hair.
• Before operating the sprayer system, verify
that all safety guards are in place.
• Always shut vehicle OFF before attempting
to attach, detach, or service sprayer system.
• Never attempt to take a unit off a truck with
liquid in it.
• Do not climb into or ride on the machine.
WARNING
Securely bolt and strap unit into place on
the vehicle bed. Unit must be strapped down
and bolted into position before operating or
transporting.
WARNING
Vehicle handling and characteristics will
change with the unit installed. Avoid any
sudden steering maneuvers, starts, or stops
that could create sloshing and instability.
WARNING
Always make sure personnel are clear of
areas of danger when using equipment.
Maintain 60' distance from all bystanders
when operating the sprayer system.
WARNING
Overloading could result in an
accident or damage. Do not exceed
GVWR or GAWR ratings as found
on the driver-side vehicle door
cornerpost. See Loading section to determine
maximum volumes of spraying material.
SERIAL NUMBER LABEL

Lit. No. 85759, Rev. 00 7 November 15, 2018
SAFETY
WARNING
Do not install the control for this product in
the deployment path of an air bag. Refer to
vehicle manufacturer's manual for air bag
deployment area(s).
WARNING
Inspect the unit periodically for defects. Parts
that are broken, missing, or worn out must be
replaced immediately. Do not alter any part of
the unit without prior written permission from
the manufacturer.
CAUTION
Do not leave material in the unit for long
periods of time.
CAUTION
During the sprayer system installation
we recommend the addition of an OSHA
compliant Backup Alarm. This alarm is
required for OSHA governed employers.
CAUTION
• Do not operate a sprayer system in need of
maintenance.
• Before operating the sprayer system,
reassemble any parts or hardware removed
for cleaning or adjusting.
• Before operating the sprayer system,
remove materials such as cleaning rags,
brushes, and hand tools from the unit.
• While operating the unit, use auxiliary
warning lights, except when prohibited by
law.
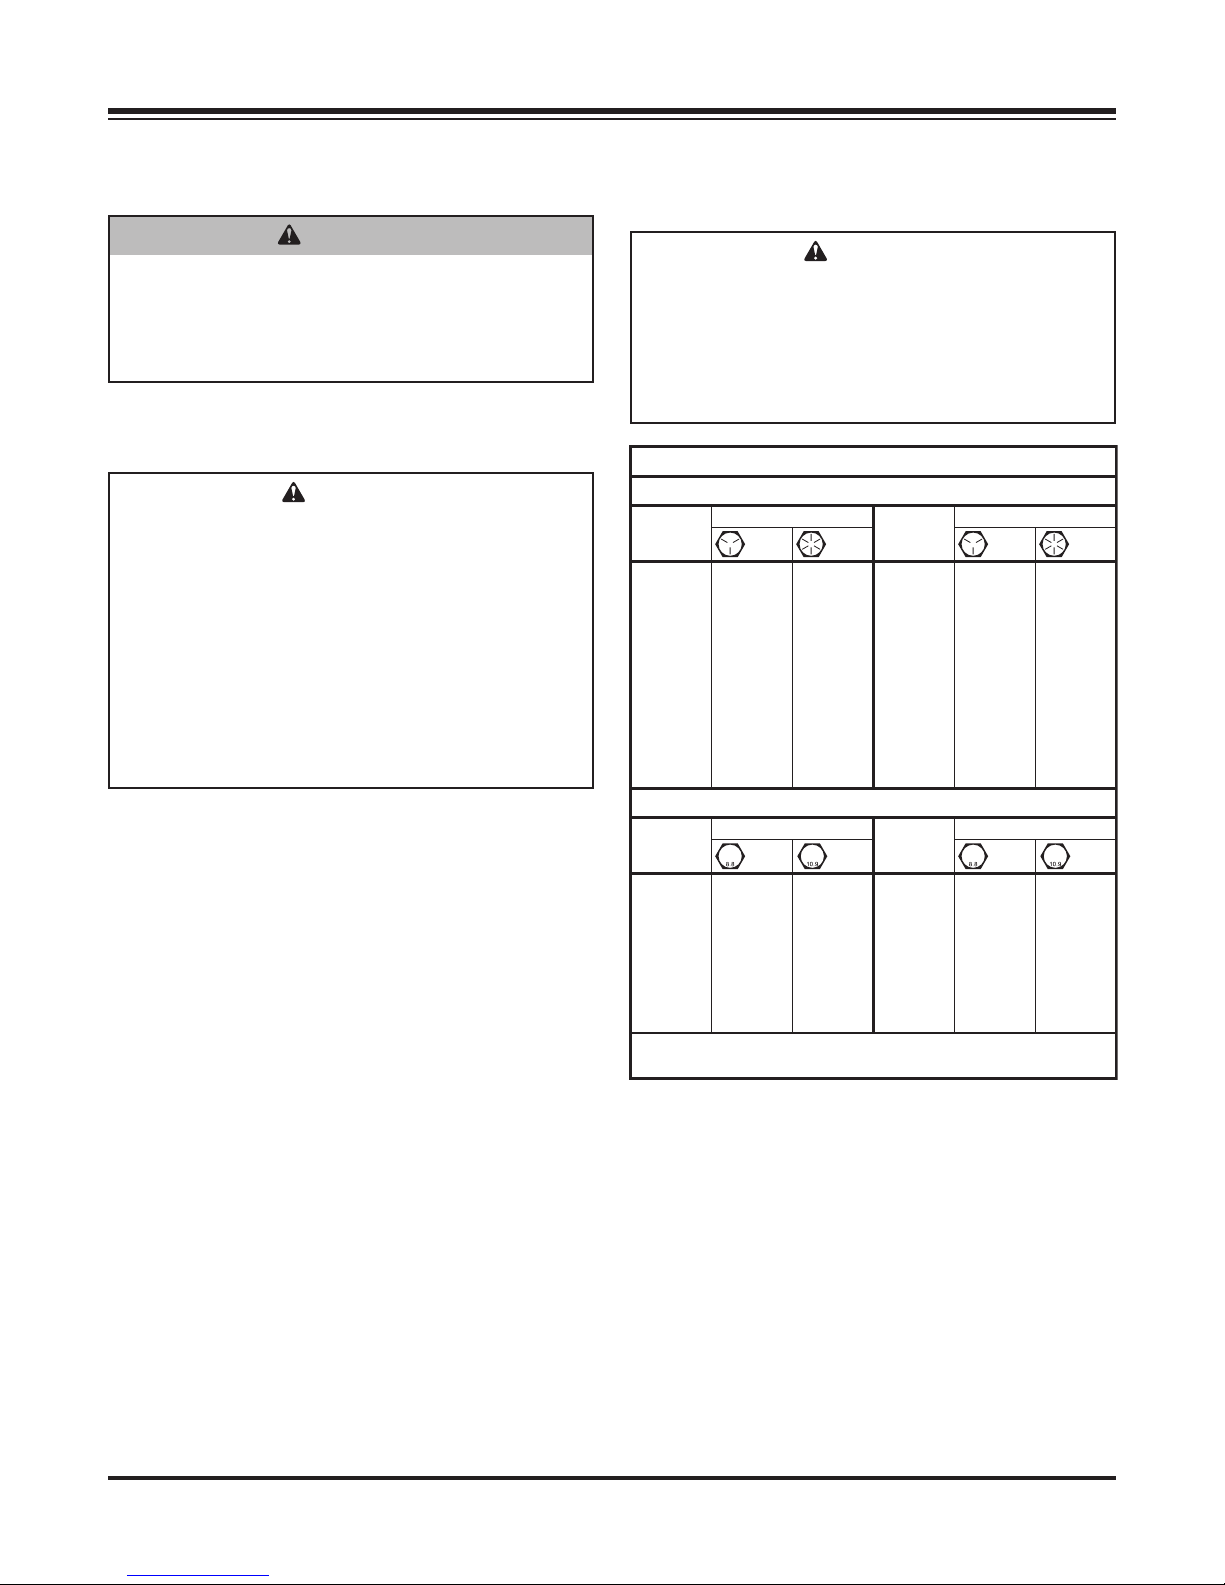
• Tighten all fasteners according to the
Torque Chart. Refer to the Torque Chart for
the recommended torque values.
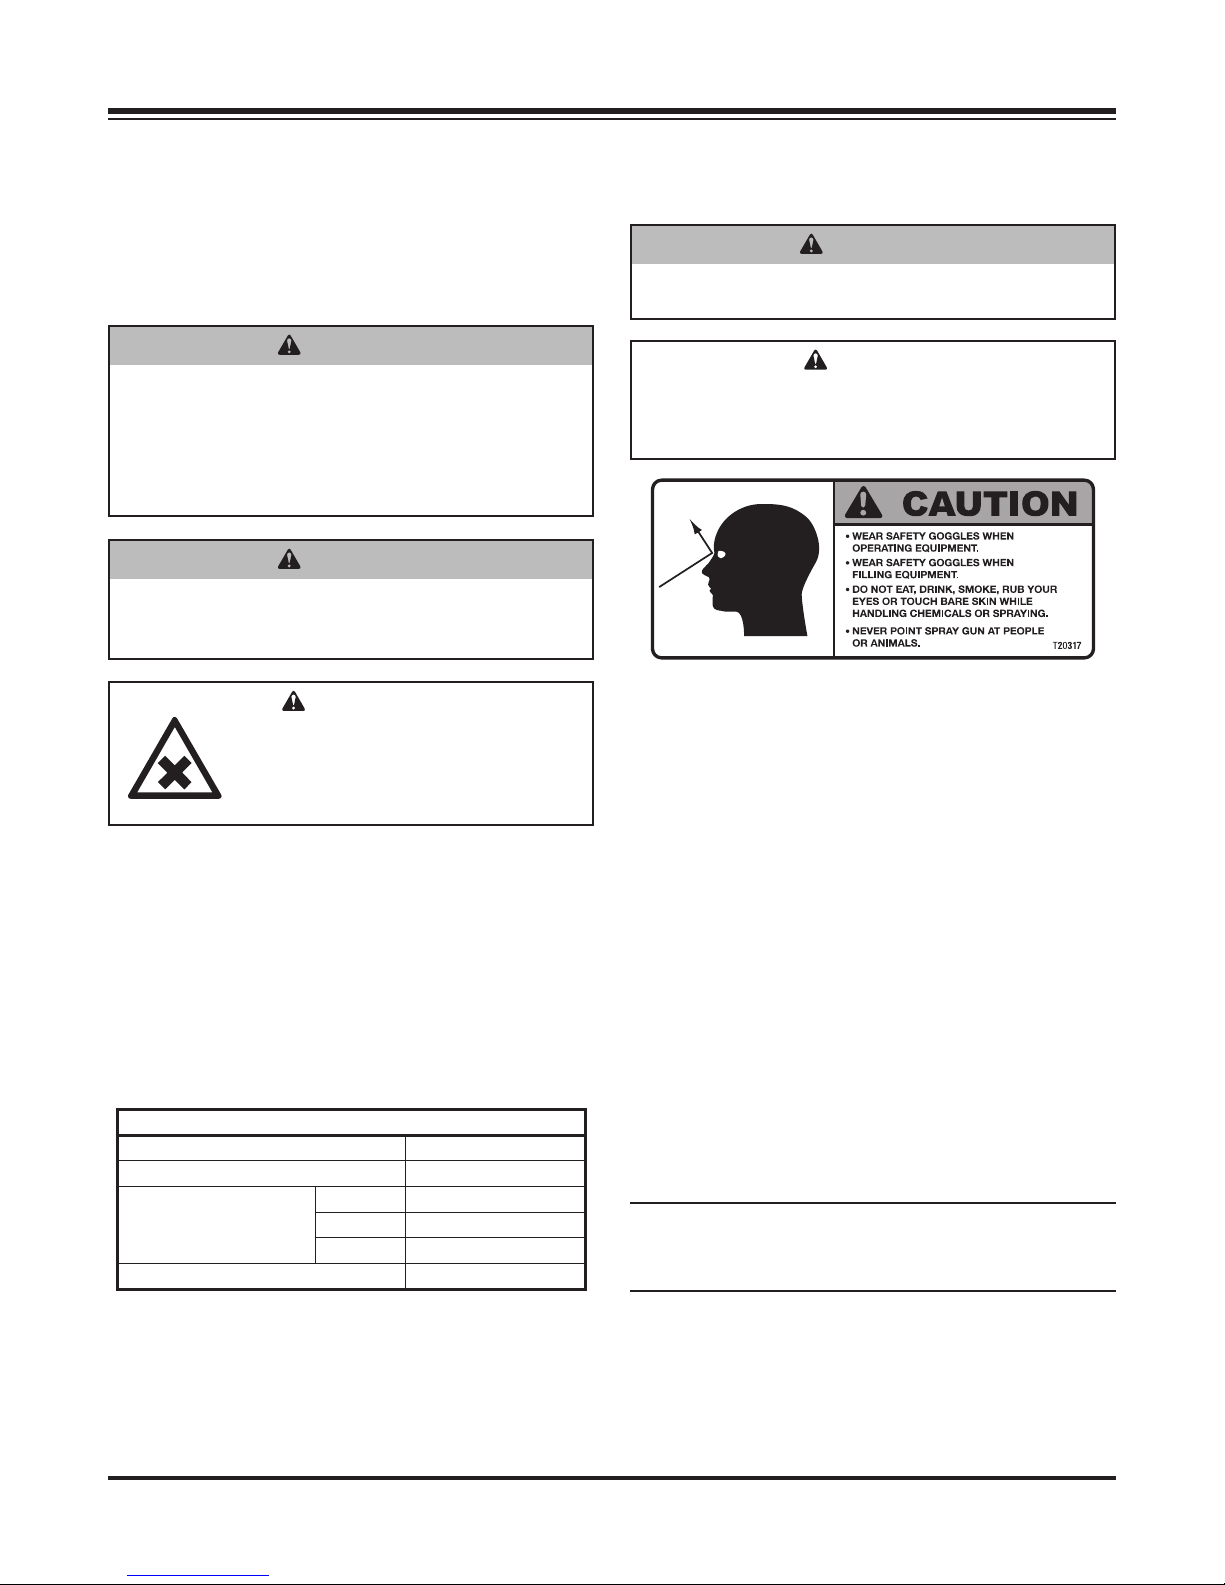
PERSONAL SAFETY
• Remove ignition key and put the vehicle in PARK or
in gear to prevent others from starting the vehicle
during installation or service.
• Wear only snug-fitting clothing while working on
your vehicle or sprayer system.
• Wear protective clothing, eye protection, and
chemical-resistant gloves when filling, using,
and cleaning the sprayer. Wear additional
protective gear, such as face mask or apron, as
recommended on the chemical label.
• Do not wear jewelry or a necktie, and secure long hair.
• Wear safety goggles to protect your eyes from
brine, battery acid, gasoline, dirt, and dust.
• Do not eat, drink, smoke, rub your eyes, or touch
bare skin while spraying.
• Avoid touching hot surfaces such as the engine,
radiator, hoses, and exhaust pipes.
• Always have a fire extinguisher rated BC handy, for
flammable liquids and electrical fires.
• Never point spray wand at people or animals.
FIRE AND EXPLOSION
Be careful when using gasoline. Do not use gasoline
to clean parts. Store only in approved containers away
from sources of heat or flame.
CELL PHONES
A driver's first responsibility is the safe operation of
the vehicle. The most important thing you can do
to prevent a crash is to avoid distractions and pay
attention to the road. Wait until it is safe to operate
Mobile Communication Equipment such as cell phones,
text messaging devices, pagers, or two-way radios.
CAUTION
Disconnect electric and/or hydraulic power
and tag out if required before servicing or
performing maintenance.
WARNING
Vehicles <10,000 lb GVWR: Obstructing the
visibility from the vehicle's rear camera could
result in serious injury or damage. An auxiliary
camera system shall be installed if the
vehicle's rear camera is removed or blocked.
WARNING
Gasoline is highly flammable and gasoline
vapor is explosive. Never smoke while
working on vehicle. Keep all open flames
away from gasoline tank and lines. Wipe up
any spilled gasoline immediately.

Lit. No. 85759, Rev. 00 8 November 15, 2018
1/4-20 109 154
1/4-28 121 171
5/16-18 150 212
5/16-24 170 240
3/8-16 269 376
3/8-24 297 420
7/16-14 429 606
7/16 -20
9/16-12
9/16-18
5/8-11
5/8-18
3/4-10
3/4-16
7/8-9
7/8-14 474 669
644 9091-8
1-12 704 995
1/2-13
1/2-20
11.9
13.7
24.6
27.3
43.6
26.9
53.3
93
148
49.4
69.8
77.9
106.4
120.0
8.4
9.7
17.4
19.2
30.8
35.0
49.4
55.2
75.3
85.0
M6 x 1.00
M12 x 1.75
M8 x 1.25
M14 x 2.00
M10 x 1.50
M27 x 3.00
M22 x 2.50
M30 x 3.50
M24 x 3.00
M20 x 2.5011.1
19.5
38.5
67
107
7.7
613
778
1139
1545
450
428
562
796
1117
M33 x 3.50
M36 x 4.00
2101
2701
1468
1952
325
M16 x 2.00 231
167
M18 x 2.50 318222
Recommended Fastener Torque Chart
Size Size
Torque (f t-lb)
Grade
5
Grade
8
Metric Fasteners Class 8.8 and 10.9
These torque values apply to fasteners
except those noted in the instructions.
Torque (f t-lb)
Grade
5
Grade
8
Size Size
Torque (f t-lb)
Class
8.8
Class
10.9
Torque (f t-lb)
Class
8.8
Class
10.9
Inch Fasteners Grade 5 and Grade 8
SAFETY
TORQUE CHART
CAUTION
Read instructions before assembling.
Fasteners should be finger tight until
instructed to tighten according to the Torque
Chart. Use standard methods and practices
when installing equipment, including proper
personal protective safety equipment.
VENTILATION
BATTERY SAFETY
CAUTION
Batteries normally produce explosive gases
which can cause personal injury. Therefore,
do not allow flames, sparks, or lit tobacco
to come near the battery. When charging or
working near a battery, always cover your
face and protect your eyes, and also provide
ventilation.
• Batteries contain sulfuric acid, which burns
skin, eyes, and clothing.
• Disconnect the battery before removing or
replacing any electrical components.
WARNING
Vehicle exhaust contains lethal fumes.
Breathing these fumes, even in low
concentrations, can cause death. Never
operate a vehicle in an enclosed area without
venting exhaust to the outside.

Lit. No. 85759, Rev. 00 9 November 15, 2018
SAFETY
WARNING
Always shut vehicle OFF before attempting to
attach, detach, or service sprayer system.
WARNING
Overloading could result in an accident or
damage. Do not exceed GVWR or GAWR as
found on the driver-side cornerpost of vehicle.
CHEMICAL SAFETY
Immediate response is necessary in the event of sprayer leaks, bodily chemical contact, poisoning, or spills. See
instructions below:
Sprayer Leak If the sprayer develops a leak, immediately stop spraying. Turn OFF power to
the sprayer and follow directions below, as applicable.
Bodily Chemical
Contact
Personal contamination can occur when chemicals splash, spill, or spray
directly onto a person.
1. Immediately follow First Aid instructions on chemical label.
General procedures include:
1a. Eyes – immediately flush with water.
1b. Skin – wash all contaminated skin surfaces with soap and water.
1c. Clothing – remove contaminated clothing. Dispose of heavily contaminated
clothing per chemical label instructions.
2. Seek medical advice if instructed on the label or if the victim experiences
symptoms of harmful effects. Bring the chemical label for reference.
Poisoning by
Ingestion or
Inhalation
In case of poisoning from ingestion or inhalation:
If the victim has collapsed or is not breathing, call 911. Otherwise:
1. If you are the victim, immediately seek assistance from nearby personnel, because
you may become incapacitated.
2. Immediately follow First Aid instructions on chemical label.
3. Call a poison control center for further advice. In the U.S., call 1-800-222-1222.
Have the chemical label available for reference.
Chemical Spills Chemical spills must quickly be contained and properly cleaned up.
Refer to the chemical label for any specific clean-up instructions.
General procedures include:
1. Control the spill by stopping the source of the spill.
2. Contain the spill so that it does not spread and get into water sources.
3. Clean up the spill immediately.
4. Seek additional advice from:
– Chemical manufacturer: See chemical label for contact information.
– State pesticide regulatory agency: In the U.S., call the National
Pesticide Information Center at 1-800-858-7378 for assistance in
contacting your state's agency.
WARNING
Never exceed 45 mph (72 km/h) when loaded
sprayer system is attached to vehicle. Braking
distances may be increased and handling
characteristics may be impaired at speeds
above 45 mph (72 km/h).
WARNING
Never operate equipment when under the
influence of alcohol, drugs, or medication
that might alter your judgment and/or reaction
time.

Lit. No. 85759, Rev. 00 10 November 15, 2018
LOADING
Sprayer System
Tank Model US1000-1
Capacity (gal) 100
Tank and Pump
Dimensions (in)
Length 55
Width 31
Height 55
Empty Unit Weight (lb) 179
SPECIFICATIONS
This Owner's Manual covers vehicles that have been
recommended for carrying the sprayer system. Please
see your local dealer for proper vehicle applications.
CERTIFICATION
WARNING
Overloading could result in an accident or
damage. Do not exceed GVWR or GAWR as
found on the driver-side cornerpost of vehicle.
WARNING
New untitled vehicle installation of a sprayer
system requires National Highway Traffic
Safety Administration altered vehicle
certification labeling. Installer to verify that
full sprayer does not exceed GVWR or GAWR
rating label and complies with FMVSS.
CAUTION
Read and adhere to manufacturer's
fertilizer material package labeling,
including Safety Data Sheet
requirements.
FIRST TIME FILLING
1. Install the sprayer and any optional equipment.
See the Installation Instructions section of this
manual for details.
2. Install or attach any other equipment that will be
on the vehicle while the sprayer will be in use
(step bumper, trailer hitch, snowplows, etc.) and fill
gas tanks.
3. Obtain the Gross Vehicle Weight Rating (GVWR),
Front Gross Axle Weight Rating (FGAWR), and
Rear Gross Axle Weight Rating (RGAWR) from
the certification label typically located inside the
driver-side door.
4. With the occupants in the truck for normal sprayer
operation, weigh the vehicle to obtain gross
vehicle weight (GVW).
5. Subtract the GVW from the GVWR to determine
the available material payload.
NOTE: Full Unit Weight is dependent upon the
material used in the tank. The user is responsible
for ensuring that the GVWR is not exceeded.
WARNING
Always shut vehicle OFF before attempting to
attach, detach, or service sprayer system.
CAUTION
Always use appropriate personal protective
equipment, including gloves and safety
goggles, when filling sprayer.

Lit. No. 85759, Rev. 00 11 November 15, 2018
3. Secure sprayer frame in place with supplied
3/8" x 1-1/2" hex cap screws, 3/8" flat washers,
and 3/8" locknuts. If the mounting holes are not
directly over the truck box supports, the truck
bed must be braced to the frame to prevent
buckling or deforming the truck bed.
NOTE: Pay special attention when drilling or
clamping dissimilar metals to aluminum bodies.
Galvanic corrosion can occur if not handled
properly. Contact vehicle manufacturer for
recommended attachment practices.
ASSEMBLY / INSTALLATION
During assembly, check and test completed assembly
as directed in this manual. Serious injury could result
from chemical leaks if sprayer is improperly assembled.
IMPORTANT: DO NOT modify sprayer design.
NOTE: To prevent leaks, use a thread-sealing
compound on all threaded connections. Do
not use Teflon®tape, as fragments will clog the
spray nozzle. Clamped connections may require
periodic retightening.
1. Lift main assembly using the four lift points and
position onto vehicle. Center sprayer system left to
right on the vehicle.
2. Construct Sill Spacer: Measure the distance
from the front end of the sprayer frame to the
front of the vehicle bed and make a spacer from
2" x 8" lumber to fit that area. Failure to install this
spacer could result in damage to the sprayer.
INSTALLATION INSTRUCTIONS
Teflon®is a registered trademark of E. I. du Pont de Nemours and Company.
WARNING
Always shut vehicle OFF before attempting to
attach, detach, or service sprayer system.
WARNING
Never attempt to take a unit off a truck with
liquid in it.
WARNING
Overloading could result in an
accident or damage. Do not exceed
GVWR or GAWR ratings as found
on the driver-side vehicle door
cornerpost. See Specifications section to
determine maximum volumes of spraying
material.
WARNING
New untitled vehicle installation of a sprayer
system requires National Highway Traffic
Safety Administration altered vehicle
certification labeling. Installer to verify that
full sprayer does not exceed GVWR or GAWR
rating label and complies with FMVSS.
3/8" x 1-1/2"
Hex Cap Screw
3/8" Flat
Washer
3/8"
Locknut
Front of
Truck Bed
Measure distance.
18"
Fit to vehicle.
Measured
Distance
Frame Space
r
Built to Fit

Lit. No. 85759, Rev. 00 12 November 15, 2018
ELECTRICAL SYSTEM – WIRING INSTRUCTIONS
WIRING INSTRUCTIONS
1. Install switch at desired location. This will
determine what the proper wire length should be.
2. Run spreader/vehicle harness from the rear of
vehicle to switch area. Remove approximately
3" of the black outer jacket, exposing two single
leads (red and black). Strip 1/4" off each lead.
Crimp 1/4" female connector on red lead and
crimp the butt connector to the black lead. Place
the female spade/red wire to the ON/OFF switch
and leave the black wire for the next step.
3. Route the power harness from the battery to the
switch. This will determine proper length to cut
wires. Repeat Step 2 regarding cable jacketing
and connection points to the switch and butt
connector.
4. Install an in-line 25A fuse on the POSITIVE (+)
(red) lead from the battery to the switch. Locate
an easily accessible place, out of the elements,
for the fuse. Remove approximately 3" of the black
outer jacket, exposing two single leads (red and
black). Cut the red lead in half and strip a 1/4"
off each lead. Insert into the fuse connector and
crimp. Insert 25A blade fuse into connector.
5. At the battery end of the power harness, remove
8" of the black outer jacket, exposing two single
leads (red and black). Strip 1/4" off each lead.
Crimp a 3/8" lug terminal to each lead, and attach
the red lead to the POSITIVE (+) side of the
battery and the black lead to the NEGATIVE (–)
side of the battery.
6. Install rubber weatherproof boot on switch before
finishing installation.
25A
(+) POSITIVE Red
(–) NEGATIVE Black
(–) NEGATIVE Black
(+) POSITIVE Red
12V
BATTERY
Electrical Diagram and Instructions
12V DC Motor
10"
Spreader
Splice
Cord
10"
Harness
Splice
Cord 20' Vehicle Harness
10' Battery Harness
Rubber Switch
Boot
Spade
Connector
ON/OFF
Switch
Butt
Connecto
r
25A Fuse Circuit Breaker
Fuse Holder
Ring Terminal

Lit. No. 85759, Rev. 00 13 November 15, 2018
OPERATING INSTRUCTIONS
WARNING
Always make sure personnel are clear of
areas of danger when using equipment.
Maintain 60' distance from all bystanders
when operating the sprayer system.
WARNING
Vehicle handling and characteristics will
change with the unit installed. Avoid any
sudden steering maneuvers, starts, or stops
that could create sloshing and instability.
WARNING
Before operating the sprayer, verify that all
safety guards are in place.
WARNING
Unit must be strapped down and locked into
position before operating or transporting.
CAUTION
Starting the motor with no antifreeze
will damage the seal in the pump. Check
antifreeze levels before starting.
DURING OPERATION
IMPORTANT: Do not modify sprayer design.
• Read and follow each chemical label's instructions
and warnings.
• Avoid inhaling, ingesting, or coming into contact
with any chemicals.
• Know applicable licensing and regulatory
requirements for the chemical(s) you plan to use.
• Know emergency procedures before handling
chemicals. Carefully review the Chemical Safety
section. Also see First Aid instructions on the
chemical label.
• Wear protective clothing, eye protection, and
chemical-resistant gloves when filling, using,
and cleaning the sprayer. Wear additional
protective gear, such as a face mask or apron, as
recommended on the chemical label.
• Exercise extra caution around children and pets.
Keep sprayer and spray materials away from them
at all times.
• Do not mix or pour chemicals in an enclosed,
unventilated area.
• Do not use flammable or corrosive chemicals in
the sprayer.
• Flush the sprayer before switching chemicals in
order to prevent dangerous chemical interactions.
• Store pesticides in a correctly labeled container, in
a secure location.
• Monitor the health of operators frequently exposed
to pesticides, as recommended by the chemical
label or local/federal regulations.
• Do not allow anyone younger than 16 years of age
to operate sprayer.
CAUTION
Never operate equipment when under the
influence of alcohol, drugs, or medication
that might alter your judgment and/or reaction
time.

Lit. No. 85759, Rev. 00 14 November 15, 2018
BEFORE SPRAYING
• Inspect and prepare sprayer before each use as
directed in this manual.
• Do not start sprayer until ready to spray in order to
avoid unintentional spray release.
• Wear protective clothing, eye protection, and
chemical-resistant gloves when filling, using,
and cleaning the sprayer. Wear additional
protective gear, such as a face mask or apron, as
recommended on the chemical label.
• Wear additional personal protective equipment
if you will be spraying overhead. Wear
chemical-resistant head and neck protection,
full-face mask (or half-face mask with sealed
goggles), and consider using a respirator.
• Do not spray when wind speed exceeds 4 mph in
order to minimize spray drift.
• Keep sprayer and spray materials away from
children and pets. Pesticides can be especially
toxic to children and animals.
• Do not allow anyone younger than 16 years of age
to operate sprayer since pesticides are especially
toxic to children.
ADDING LIQUID
• Be sure that the pump switch is in the "OFF"
position.
• Do not mix or pour chemicals in an enclosed,
unventilated area.
• Do not use flammable or corrosive chemicals in
the sprayer.
• Fill the tank to the desired level by filling through
the tank lid. Use the markings on the tank for
volume reference. During operation, if liquid is not
coming out of the tank, check the Maintenance
and Troubleshooting sections of this manual.
SPRAYER OPERATION
1. Be sure that the pump switch is in the "OFF" position.
2. Fill the sprayer with liquid through the port on the
top of the tank.
3. When ready to spray, turn the pump switch to the
"ON" position.
OPERATING INSTRUCTIONS
CAUTION
Always use appropriate personal protective
equipment, including gloves and safety
goggles, when filling sprayer.
CAUTION
When using spray wand, never point it at
objects (i.e., humans, vehicles, etc.). Keep at
least 10 feet away from objects while using
the spray nozzle.
WARNING
Always shut vehicle OFF before attempting to
attach, detach, or service sprayer system.

Lit. No. 85759, Rev. 00 15 November 15, 2018
4. Point the wand in the desired direction and pull the
trigger. Hold the trigger until spraying is concluded.
5. When done spraying, be sure to turn the pump
switch to the "OFF" position.
6. Flush the sprayer before switching chemicals, in
order to prevent dangerous chemical interactions.
DURING SPRAYING
• Do not overapply pesticide. Apply at rate
recommended by chemical manufacturer.
Excess pesticide can be dangerous to humans
and animals, damage desirable plants, and
contaminate soil and water sources.
• Do not eat, drink, smoke, rub your eyes, or touch
your bare skin while handling chemicals and/or
spraying.
• Never point the spray wand at people or animals.
• Always hold the spray wand firmly when using it to
spray at higher pressures in order to prevent wand
from whipping. Keep good footing and balance at
all times.
• Do not spray near open flames or sources of heat.
• Exercise extra caution when spraying near areas
accessible to children and/or pets.
• Clean up spills immediately per instructions on the
chemical label.
• Turn vehicle OFF and set brake or block wheels,
turn sprayer OFF, and relieve system pressure
before leaving sprayer unattended.
• See Troubleshooting section of this manual before
attempting any repairs. Wear personal protective
equipment and follow safety instructions.
OPERATING INSTRUCTIONS
AFTER SPRAYING
• Clean sprayer immediately after use according to
the directions provided in this manual.
• Decontaminate yourself after you are done
spraying and have cleaned the sprayer. Wash all
exposed areas of the body with soap and water,
and remove and launder clothing.
• Dispose of or store remaining chemicals in secure
storage with correctly-marked container.
TRANSPORTING SAFETY
• Read safety instructions in your vehicle manual
with regard to carrying heavy cargo loads.
• Do not ride on or transport cargo on the sprayer.
• Do not allow drivers younger than 16 to drive the
vehicle with the filled sprayer attached.
• Make sure sprayer is securely attached to vehicle.
• Exercise caution in vehicle handling when driving
with filled sprayer to avoid loss of control or rollover.
• Keep speed to a minimum so that you can
maintain control. Reduce speed prior to making
turns.
• Allow for more distance to stop.
• Avoid any sudden steering maneuvers, starts,
or stops that could create instability from liquid
sloshing in the sprayer.
• Slow down and exercise extra caution on sloped
or uneven terrain. Pick the most level route
possible across fields—drive up and down slopes
when necessary, rather than across. Use a vehicle
equipped with a roll-over protection system if you
will be working on non-level terrain.
• Be aware that visibility may be reduced when
making turns or backing up.
• Turn OFF both the sprayer and the vehicle, and
set the brakes before leaving unattended.

Lit. No. 85759, Rev. 00 16 November 15, 2018
6. Add water to flush the tank.
7. Reinstall quick-disconnect from nozzle
assemblies.
8. Run pump until clear liquid is running out of each
nozzle.
PERIODIC MAINTENANCE
• When servicing, you may need to close the
shut-off valve and/or the return valve, to prevent
stored solution from exiting the holding tank.
• Wash unit after each use to prevent material
build-up and corrosion.
• Use dielectric grease on all electrical connections
to prevent corrosion each time power or signal
plugs are disconnected.
• Paint or oil all bare metal surfaces as needed.
• Inspect unit for defects: broken, worn, or bent
parts, and similar.
• Inspect all tubing, hoses, and harnesses for
cracks and leaks.
• Clean the filter as needed. Close the shut-off valve
and access the filter by unscrewing the top cap,
then unscrewing the filter cover.
• Retighten bolts, screws, and other connections
after first use and as needed.
END OF SEASON AND STORAGE
• Before long periods of storage, flush out the tank,
pumping system, and spray wand to remove
build-up and prevent corrosion.
• Do not leave unused material in the unit for a
prolonged period of time.
NOZZLE MAINTENANCE
Remove nozzles by pushing in and rotating the nozzle
cap counterclockwise and clean as necessary.
MAINTENANCE
NOTE: To prevent leaks, use a thread-sealing
compound on all threaded connections. Do
not use Teflon®tape, as fragments will clog the
spray nozzles. Clamped connections may require
periodic retightening.
CLEAN OUT
• Read and follow each chemical label's instructions
and warnings.
• Wear protective clothing, eye protection, and
chemical-resistant gloves when filling, using, and
cleaning sprayer. Wear additional protective gear,
such as face mask or apron, as recommended on the
chemical label.
1. Disconnect nozzle assembly at quick-disconnect
point.
2. Make a hose with matching male quick-disconnect
to hook up at quick-disconnect point.
3. Install hose at quick-disconnect point and put the
other end in the storage tank.
4. Turn pump ON until the tank is empty.
5. Check the chemical's Safety Data Sheet (SDS) for
how to properly clean out the remaining solution in
the tank and how to properly dispose of liquid.
Teflon®is a registered trademark of E. I. du Pont de Nemours and Company.
WARNING
Inspect the unit periodically for defects. Parts
that are broken, missing, or worn out must be
replaced immediately. Do not alter any part of
the unit without prior written permission from
the manufacturer.
WARNING
Always shut vehicle OFF before attempting to
attach, detach, or service sprayer system.
WARNING
Do not operate a machine in need of
maintenance.
CAUTION
Always use appropriate personal protective
equipment, including gloves and safety
goggles, when filling or emptying sprayer.

Lit. No. 85759, Rev. 00 17 November 15, 2018
TROUBLESHOOTING
NOTE: To prevent leaks, use a thread-sealing
compound on all threaded connections. Do
not use Teflon®tape, as fragments will clog the
spray nozzles. Clamped connections may require
periodic retightening.
Problem Possible Cause Suggested Solution
Pump doesn't run.
Loose electrical connections. Check all connections.
Blown fuse. Replace fuse.
Pump seized. Replace pump.
Dead (or dying) battery. Charge or replace battery.
Control shut down.
Poor electrical connections. Clean or replace connectors. Use dielectric
grease.
Electrical short. Check electrical connections. Check for
bare wires.
Dead (or dying) battery. Charge or replace battery.
Control failure. Replace control.
Liquid not spraying.
Empty tank. Fill tank.
Full strainer. Clean or replace element.
Pump not running. Refer to Problem 1 ("Pump doesn't run").
Dead (or dying) battery. Charge or replace battery.
Obstructed nozzle. Remove and clean.
Teflon®is a registered trademark of E. I. du Pont de Nemours and Company.
WARNING
Always shut vehicle OFF before attempting to
attach, detach, or service sprayer system.
WARNING
Do not operate a machine in need of
maintenance.
Whenever service is necessary, your local
Tur f Ex ®dealer knows your sprayer system best.
Take your sprayer system to your local dealer for any
maintenance or service needs on your unit. If this is
not possible, the Troubleshooting Guide below may
assist you in identifying the problem.
Preliminary Checks:
• Make sure that all electrical connections are tight
and clean.
• Make sure that nothing is obstructing the nozzle.
WARNING
Read all warning instructions and safety
messages before servicing the sprayer.
WARNING
Always wear safety glasses with side shields
when servicing sprayer system. Failure to do
this could result in serious injury to the eyes.

Lit. No. 85759, Rev. 00 18 November 15, 2018
Copyright © 2018 Douglas Dynamics, LLC. All rights reserved. This material may not be reproduced or copied, in whole or in part, in
any printed, mechanical, electronic, film, or other distribution and storage media, without the written consent of TrynEx International, LLC.
Authorization to photocopy items for internal or personal use by TrynEx International outlets or equipment owner is granted.
TrynEx International reserves the right under its product improvement policy to change construction or design details and furnish equipment
when so altered without reference to illustrations or specifications used. TrynEx International or the vehicle manufacturer may require or
recommend optional equipment for sprayers. Do not exceed vehicle ratings with a sprayer. TrynEx International offers a limited warranty for
all equipment and accessories. See separately printed page for this important information. The following are registered (®) or unregistered (™)
trademarks of Douglas Dynamics, LLC: TurfEx®.
Printed in U.S.A.
A DIVISION OF DOUGLAS DYNAMICS, LLC
TrynEx International, LLC
531 Ajax Drive
Madison Heights, MI 48071-2429
www.TurfExproducts.com
Table of contents
Other TurfEx Paint Sprayer manuals