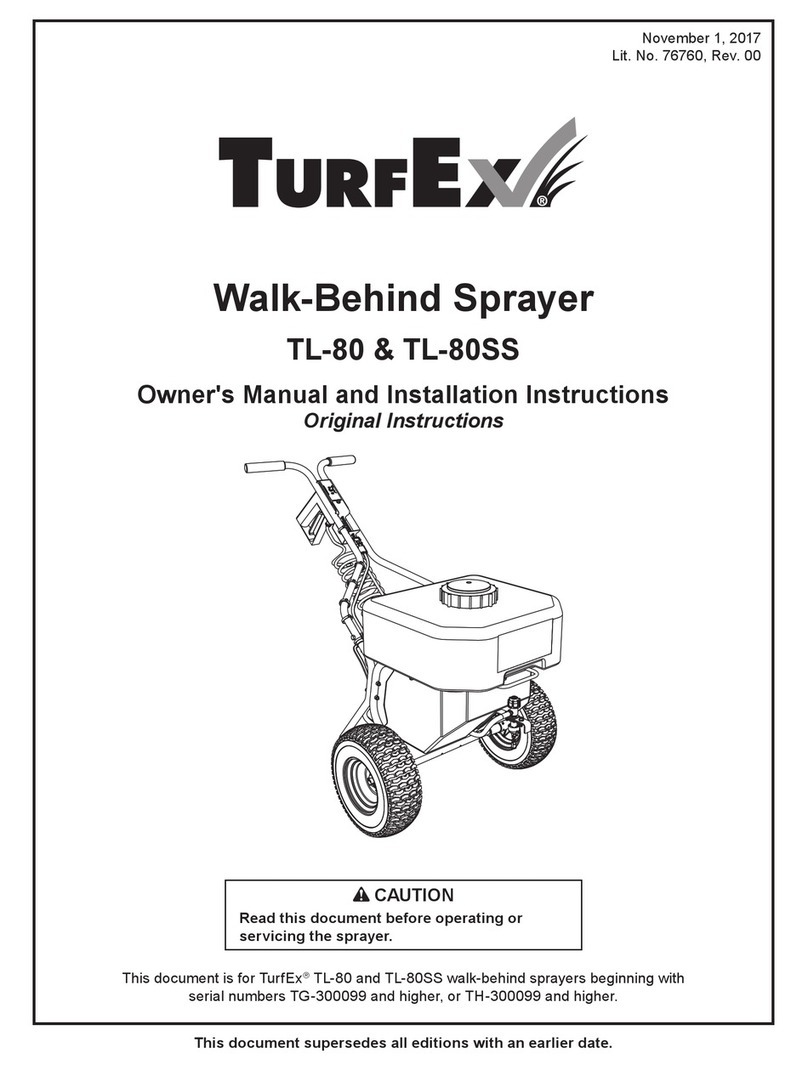
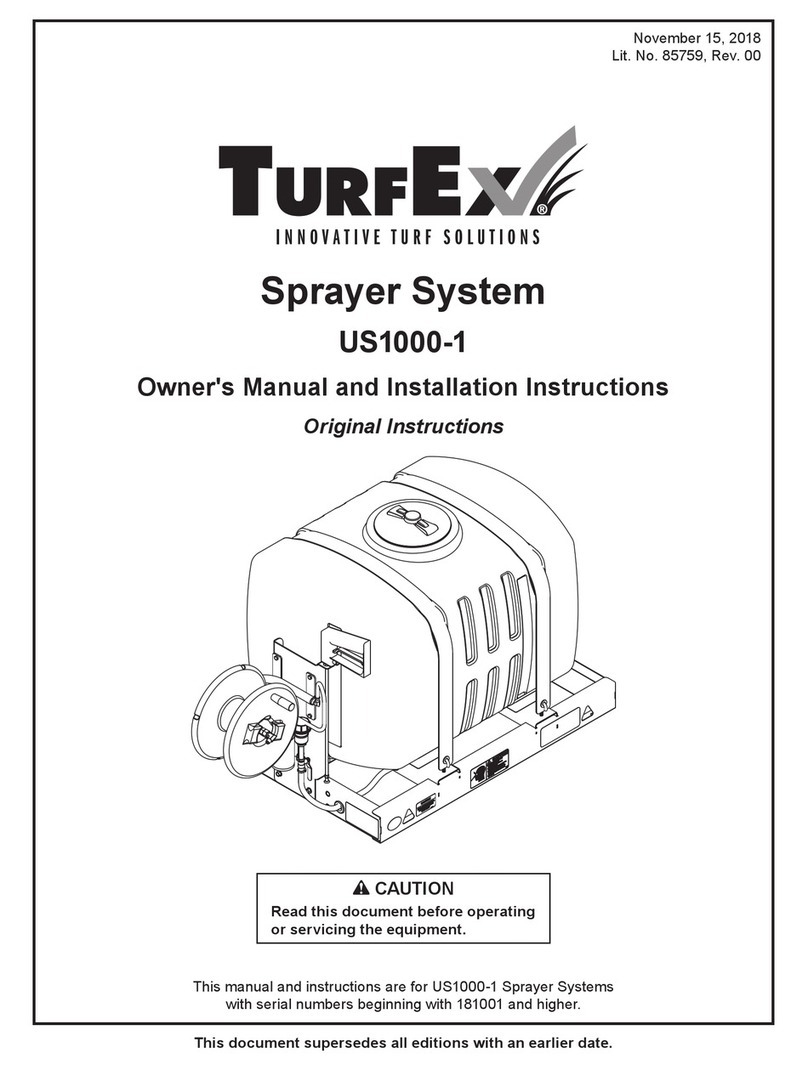
TurfEx US200 Operating instructions

25-Gallon ATV Sprayer
US200
Owner's Manual and Installation Instructions
Original Instructions
April 15, 2019
Lit. No. 72623, Rev. 00
This document supersedes all editions with an earlier date.
CAUTION
Read this document before operating or
servicing the sprayer.
California Proposition 65
WARNING
This product can expose you to chemicals, including
lead, which are known to the State of California to cause
cancer and birth defects or other reproductive harm.


Lit. No. 72623, Rev. 00 3 April 15, 2019
TABLE OF CONTENTS
PREFACE & OWNER'S INFORMATION FORM......................................................................................................4
SAFETY ....................................................................................................................................................................5
AS S EMBLY ............................................................................................................................................................. 10
OPER ATION ........................................................................................................................................................... 11
AFTER USE / MAINTENANCE / WINTER STORAGE ......................................................................................... 12
FAQs....................................................................................................................................................................... 13
ACCESSORY SPRAY BOOM CALIBRATION ...................................................................................................... 14
PUMP SPECIFICATIONS & INFORMATION......................................................................................................... 16
TROUBLESHOOTING............................................................................................................................................ 18

Lit. No. 72623, Rev. 00 4 April 15, 2019
PREFACE
This manual has been prepared to acquaint you with
the safety information, operation, and maintenance
of your new sprayer. Improper operation could cause
personal injury and/or equipment and property
damage. Read and understand this Owner's Manual
before operating or making adjustments. Keep this
manual accessible.
Your authorized dealer is the best source of
replacement parts & service. To obtain prompt,
efcient service, remember to give the following
information:
• Correct part description and part number.
• Model number of your sprayer.
OWNER'S INFORMATION
Owner's Name: ______________________________________________________________________
Date Purchased: _____________________________________________________________________
Sales Outlet Name: _________________________________________ Phone:_________________
Sales Outlet Address: _________________________________________________________________
Sprayer Type (Model): _________________________________________________________________
Production date (stamped on last page of this manual): _______________________________________
Part description and part numbers can be obtained
from the illustrated Parts List. For warranty work
always take your original sales slip, or other evidence
of purchase date, to your distributor/dealer.
WARRANTY REGISTRATION
Warranty registration is available online at
www.TurfExproducts.com. Under "Support" click
"Warranty Registration" and submit the form online.

Lit. No. 72623, Rev. 00 5 April 15, 2019
SAFETY
SAFETY DEFINITIONS
NOTE: Indicates a situation or action that can lead
to damage to your sprayer and vehicle or other
property. Other useful information can also be
described.
CAUTION
Indicates a potentially hazardous situation
that, if not avoided, may result in minor or
moderate injury. It may also be used to alert
against unsafe practices.
WARNING
Indicates a potentially hazardous situation
that, if not avoided, could result in death or
serious personal injury.
SAFETY PRECAUTIONS
Improper installation and operation could cause
personal injury and/or equipment and property
damage. Read and understand labels and this
Owner's Manual before installing, operating, or making
adjustments.
WARNING
• Always shut vehicle OFF before attempting
to attach, detach, or service sprayer.
• Never attempt to take a unit off a truck when
the unit contains liquid.
• Do not climb into or ride on the sprayer.
WARNING
Securely bolt and strap unit into place on
the vehicle bed. Unit must be strapped down
and bolted into position before operating or
transporting.
WARNING
Vehicle handling and characteristics will
change with the unit installed. Avoid any
sudden steering maneuvers, starts, or stops
that could create sloshing and instability.
WARNING
Never exceed 10 mph (16 km/h) when loaded
sprayer is attached to vehicle. Braking
distances may be increased and handling
characteristics may be impaired at speeds
above 10 mph (16 km/h).
WARNING
Overloading could result in an
accident or damage. Do not exceed
GVWR, GAWR, or maximum vehicle
load capacity.
WARNING
Always make sure personnel are clear of areas
of danger when using equipment. Maintain
60' distance from all bystanders when operating
the sprayer.
WARNING
Never operate equipment when under the
inuence of alcohol, drugs, or medication that
might alter your judgment and/or reaction time.
CAUTION
Do not leave material in the unit for long
periods of time.
CAUTION
• Do not operate a sprayer in need of
maintenance.
• Before operating the sprayer, reassemble
any parts or hardware removed for cleaning
or adjusting.
• Before operating the sprayer, remove
materials such as cleaning rags, brushes,
and hand tools from the unit.

Lit. No. 72623, Rev. 00 6 April 15, 2019
FUSES
If a problem should occur and fuse replacement is
necessary, the replacement fuse must be of the same
type and amperage rating as the original. Installing a
fuse with a higher rating can damage the system and
could start a re. Fuse Replacement, including fuse
ratings and locations, is located in the Maintenance
section of this Owner's Manual.
VENTILATION
BATTERY SAFETY
NOISE
Airborne noise emission during use is below 70 dB(A)
for the sprayer operator.
VIBRATION
Operating sprayer vibration does not exceed 2.5 m/s2
to the hand-arm or 0.5 m/s2to the whole body.
SAFETY
WARNING
Gasoline is highly ammable and gasoline
vapor is explosive. Never smoke while
working on vehicle. Keep all open ames
away from gasoline tank and lines. Wipe up
any spilled gasoline immediately.
WARNING
Vehicle exhaust contains lethal fumes.
Breathing these fumes, even in low
concentrations, can cause death. Never
operate a vehicle in an enclosed area without
venting exhaust to the outside.
PERSONAL SAFETY
• Remove ignition key and put the vehicle in PARK or
in gear to prevent others from starting the vehicle
during installation or service.
• Wear only snug-tting clothing while working on
your vehicle or sprayer.
• Wear protective clothing, eye protection, and
chemical-resistant gloves when lling, using,
and cleaning the sprayer. Wear additional
protective gear, such as face mask or apron, as
recommended on the chemical label.
• Do not wear jewelry or a necktie, and secure long hair.
• Wear safety goggles to protect your eyes from
brine, battery acid, gasoline, dirt, and dust.
• Do not eat, drink, smoke, rub your eyes, or touch
bare skin while spraying.
• Avoid touching hot surfaces such as the engine,
radiator, hoses, and exhaust pipes.
• Always have a re extinguisher rated BC handy, for
ammable liquids and electrical res.
• Never point spray wand at people or animals.
FIRE AND EXPLOSION
Be careful when using gasoline. Do not use gasoline
to clean parts. Store only in approved containers away
from sources of heat or ame.
CELL PHONES
A driver's rst responsibility is the safe operation of
the vehicle. The most important thing you can do
to prevent a crash is to avoid distractions and pay
attention to the road. Wait until it is safe to operate
Mobile Communication Equipment such as cell phones,
text messaging devices, pagers, or two-way radios.
CAUTION
Batteries normally produce explosive gases
which can cause personal injury. Therefore,
do not allow ames, sparks, or lit tobacco
to come near the battery. When charging or
working near a battery, always cover your
face and protect your eyes, and also provide
ventilation.
• Batteries contain sulfuric acid, which burns
skin, eyes, and clothing.
• Disconnect the battery before removing or
replacing any electrical components.

Lit. No. 72623, Rev. 00 7 April 15, 2019
SAFETY
CHEMICAL SAFETY
Sprayer Leak If the sprayer develops a leak, immediately stop spraying. Turn OFF power to
the sprayer and follow directions below, as applicable.
Bodily Chemical
Contact
Personal contamination can occur when chemicals splash, spill, or spray
directly onto a person.
1. Immediately follow First Aid instructions on chemical label.
General procedures include:
1a. Eyes – immediately ush with water.
1b. Skin – wash all contaminated skin surfaces with soap and water.
1c. Clothing – remove contaminated clothing. Dispose of heavily contaminated
clothing per chemical label instructions.
2. Seek medical advice if instructed on the label or if the victim experiences
symptoms of harmful effects. Bring the chemical label for reference.
Poisoning by
Ingestion or
Inhalation
In case of poisoning from ingestion or inhalation:
If the victim has collapsed or is not breathing, call 911. Otherwise:
1. If you are the victim, immediately seek assistance from nearby personnel, because
you may become incapacitated.
2. Immediately follow First Aid instructions on chemical label.
3. Call a poison control center for further advice. In the U.S., call 1-800-222-1222.
Have the chemical label available for reference.
Chemical Spills Chemical spills must quickly be contained and properly cleaned up.
Refer to the chemical label for any specic clean-up instructions.
General procedures include:
1. Control the spill by stopping the source of the spill.
2. Contain the spill so that it does not spread and get into water sources.
3. Clean up the spill immediately.
4. Seek additional advice from:
– Chemical manufacturer: See chemical label for contact information.
– State pesticide regulatory agency: In the U.S., call the National
Pesticide Information Center at 1-800-858-7378 for assistance in
contacting your state's agency.
CAUTION
Read and adhere to manufacturer's
material package labeling,
including Safety Data Sheet
requirements.
Immediate response is necessary in the event of
sprayer leaks, bodily chemical contact, poisoning, or
spills. See instructions below.

Lit. No. 72623, Rev. 00 8 April 15, 2019
SAFETY
DURING ASSEMBLY
Check and test completed assembly as directed in
this manual. Serious injury could result from chemical
leaks if sprayer is improperly assembled.
IMPORTANT: Do not modify sprayer design.
DURING OPERATION
• Read and follow each chemical label's instructions
and warnings.
• Avoid inhaling, ingesting, or coming into contact
with any chemicals.
• Know applicable licensing and regulatory
requirements for the chemical you plan to use.
• Know emergency procedures before handling
chemicals. Carefully review the Chemical Safety
procedures listed in this manual. Also, see First
Aid instructions on the chemical label.
• Wear protective clothing, eye protection, and
chemical resistant gloves when lling, using,
and cleaning the sprayer. Wear additional
protective gear, such as face masks or aprons, as
recommended on the chemical label.
• Exercise extra caution around children and pets.
Keep sprayer and spray materials away from them
at all times.
• Do not mix or pour chemicals in an enclosed,
unventilated area.
• Do not use ammable or corrosive chemicals in
the sprayer.
• Flush the sprayer before switching chemicals in
order to prevent dangerous chemical interactions.
BEFORE SPRAYING
• Inspect and prepare sprayer before each use as
directed in this manual.
• Do not start sprayer until ready to spray, in order
to avoid unintentional spray release.
• Wear additional personal protective equipment
if you will be spraying overhead. You will be
exposed to much more mist or errant spray in
these applications. Wear chemical resistant head
and neck protection, a full face mask or half-face
mask with sealed goggles, and consider using a
respirator.
• Do not spray when wind speed exceeds
4 miles per hour, in order to minimize spray drift.
• Keep sprayer and spray materials away from
children and pets.
• Do not allow anyone younger than 16 to operate
sprayer.

Lit. No. 72623, Rev. 00 9 April 15, 2019
DURING SPRAYING
• Do not over-apply. Apply at a rate recommended
by the chemical manufacturer.
• Do not eat, drink, smoke, rub your eyes, or touch
your bare skin while handling chemicals and
spraying.
• Never point the spray wand at people or animals.
• Do not spray near open ames or sources of heat.
• Always hold the spray wand rmly when using it to
spray at higher pressures in order to prevent wand
from whipping. Keep good footing and balance at
all times.
• Exercise extra caution when spraying near areas
accessible to children and pets.
• Clean up spills immediately per instructions on the
chemical label.
• Turn OFF sprayer and relieve system pressure
before leaving sprayer unattended.
• See the Troubleshooting section of this
manual before attempting any repairs. Wear
personal protective equipment and follow safety
instructions.
SAFETY
AFTER SPRAYING
• Clean sprayer immediately after use according to
the directions provided in this manual.
• Decontaminate yourself after you are done
spraying and have cleaned the sprayer. Wash all
exposed areas of the body with soap and water,
and remove and launder clothing.
• Dispose or store remaining chemicals in secure
storage with correctly marked container.
TRANSPORTING SAFETY
• Exercise caution in vehicle handling when driving
with sprayer to avoid loss of control or rollover.
◦Keep speed to a minimum so you can
maintain control. Reduce speed prior to turns.
◦Allow for more distance to stop.
◦Avoid any sudden steering maneuvers, starts,
or stops that could create liquid sloshing in the
sprayer and instability.
• Slow down and exercise caution on sloped or
uneven terrain.
• Turn OFF sprayer before leaving it unattended.
• Do not attempt to lift sprayer with liquid in the tank.

Lit. No. 72623, Rev. 00 10 April 15, 2019
ASSEMBLY
INSTALL GAUGE, LEAD WIRES, AND
WAND HOSE
This sprayer is designed to be attached to a stable
surface.
NOTE: For added stability, secure the sprayer to
the vehicle using ratchet straps (available from
your TurfEx dealer, PN RS-72PK).
1. Install the pressure gauge into the elbow tting
between the pump and the manifold. Use a
good quality thread sealant and be careful not to
overtighten.
Pressure
Gauge Pump
2. Connect the lead wire assembly plug to the plug at
the rear of the pump.
3. Connect the Red POSITIVE (+) wire of the lead
wire assembly to a 12V source. Connect the
Black wire to ground or to the NEGATIVE (–)
battery post.
4. Slide the supplied 5/8" hose clamp onto the open
end of the wand assembly hose. Press the end of
the hose onto the swivel barb labeled "WAND" on
the pump manifold and tighten the hose clamp.
To add the PBA-22 Spray Boom accessory, follow the
instructions included in the spray boom kit.
Swivel Barb Wand Assembly Hose
5/8" Hose Clamp
WARNING
Do not allow the lead wires to become
pinched or damaged, which could damage
the pump or cause the lead wires to overheat,
resulting in a meltdown or re.

Lit. No. 72623, Rev. 00 11 April 15, 2019
OPER ATION
OVERVIEW
The pumping system draws solution from the tank,
through the suction hose and into the pump. The
pump forces the solution under pressure through the
pump manifold, where it is directed to the spray wand
and (if equipped) the optional spray boom.
Regularly inspect the suction hose strainer inside
the tank. Flush with water to clear any accumulated
debris.
Relief Hose
(return to tank)
To Spray Wand
To Spray Boom
Use BYP
ASS valve to
adjust pressure to
spray wand and boom
.
Use BOOM valve
to turn spray
boom o
n/off.
• Current weather and terrain conditions must be
considered when setting up the sprayer.
• Do not spray when wind speed exceeds 11 mph.
• Protective clothing must be worn when applying
some products. Be sure to read the chemical label
carefully.
SPRAY APPLICATION
Spray Wand: Maximum range 35'.
Accessory Spray Booms
PBA-22: 2-Nozzle Boom, 80" spray width.
PBA-77: 7-Nozzle Boom, 140" spray width.
For application rates, refer to the Accessory Spray
Boom Calibration section of this manual.
OPERATING PRESSURE
Optimal operating pressure is 40 psi. The pump has
a pressure switch that will shut off the pump when
pressure reaches 60 psi.
Typically the spray wand will be operated at between
20 and 40 psi. Refer to the Spray Boom Calibration
section for data on boom operating pressures.
To adjust the system pressure, make sure the wand
(and spray boom, if equipped) are turned OFF. Turn
the pump ON and adjust the BYPASS valve until the
gauge reads 40 psi. The pump will run continuously.
Once the spray wand or boom is activated, the
pressure will drop slightly.
CAUTION
Always use appropriate personal protective
equipment, including gloves and safety
goggles, when lling sprayer.
CAUTION
When using spray wand, never point it at
objects (i.e., humans, vehicles, etc.). Keep at
least 10 feet away from objects while using
the spray nozzle.
CAUTION
Read and adhere to manufacturer's
material package labeling,
including Safety Data Sheet
requirements.

Lit. No. 72623, Rev. 00 12 April 15, 2019
AFTER USE / MAINTENANCE / WINTER STORAGE
AFTER USE / CLEAN OUT
1. Fill the sprayer partway with water. Start the
sprayer and allow clear water to be pumped
through the sprayer plumbing system and out the
spray wand and the boom nozzles (if equipped).
2. Rell the tank about half full with plain water and
add a chemical neutralizer such as Nutra-Sol®or
equivalent. Pump the cleaning solution through
the sprayer plumbing system, spray wand, and
boom nozzles (if equipped). Flush the entire
sprayer with the neutralizing agent.
3. Follow the chemical manufacturer’s disposal
instructions for all wash or rinsing water.
WARNING
Some chemicals will damage the pump valves
if allowed to soak untreated for a long period
of time. Always ush the pump with water
after use. Do not allow chemicals to sit in
pump for extended times of idleness. Follow
chemical manufacturer's instructions on
disposal of all waste water from the sprayer.
CAUTION
Always use appropriate personal protective
equipment, including gloves and safety
goggles, when lling or emptying sprayer.
Cleaning Spray Boom Nozzles (If Equipped)
1. Remove the spray tips and screens from the
boom, Wash the tips thoroughly with water or
cleaning solution (appropriate for the chemical just
sprayed). Blow out the orice, clean and dry.
2. If the orice remains clogged, clean it with a ne
bristle brush (not a wire brush) or a toothpick,
taking care not to damage the orice. Water rinse
and dry the tips before storing.
MAINTENANCE
Fuse Replacement
The lead wire assembly includes an inline fuse. When
necessary, replace with a new 7A fuse.
WINTER STORAGE
Proper care and maintenance will prolong the life of
the sprayer.
1. Drain all water and chemical out of the sprayer
and clean as described in the "After Use/Clean
Out" section of this manual. Pay special attention
to pump and valves, as these items are especially
prone to damage from chemicals and freezing
temperatures.
2. The sprayer should be winterized before storage
by pumping a solution of RV antifreeze through
the entire plumbing system.
WARNING
Always shut vehicle OFF before attempting to
attach, detach, or service the sprayer.
WARNING
Do not operate a sprayer in need of
maintenance.

Lit. No. 72623, Rev. 00 13 April 15, 2019
SPRAY & PUMP FAQs
• Why does the pump not run all the time?
This is a demand pump and only runs with ow
through the spray wand, by-pass valve, or spray
boom nozzles.
• Why does the pump surge while using the
spray wand?
Low ow may cause the pump to surge (or cycle).
This could happen when the spray wand is adjusted
for a small or ne spray pattern. To overcome this,
slightly open the bypass valve on the pump manifold.
• How do I adjust the pressure?
Operating pressure should be adjusted by regulating
the bypass valve. (See full instructions in the
Operation section.)
To adjust the pump OFF pressure setting, see full
instructions under "Adjusting the Pressure Switch" in
the Pump Specications & Information section.
• Can the spray tip on the wand be replaced with
a different type of tip?
Your wand comes with a #18 tip. It may be replaced
by other types of tip. Brass tips generally produce
better spray patterns than plastic.
FAQs

Lit. No. 72623, Rev. 00 14 April 15, 2019
ACCESSORY SPRAY BOOM CALIBRATION
Chemical product labels may show application rates
in gallons per acre, per 1000 ft2, or per 100 ft2. The
Spray Coverage tables show all three rates.
After determining how much mixed solution you
are going to spray for your job, select the spraying
pressure (psi) and spraying speed (mph) needed. You
will nd optimal spraying in the 20 to 30 psi range.
Adjust the boom height if needed to position the
nozzles 18" to 20" above the ground. For the best
spray pattern coverage, the nozzles may be rotated
rearward 15°.
To determine the ground speed of your sprayer,
measure and mark driving distances of 100, 200, or
300 feet. The table below indicates the number of
seconds needed to travel these distances. Set the
throttle and, with a rolling start, drive the measured
distance of your choice.
Adjust the throttle until you can match the number
of driving seconds needed. Mark the throttle setting
and note the gear range so you can use them while
spraying.
Add water and chemicals in the proper amounts in the
spray tank and drive to your starting point. When you
are ready to spray, turn the boom control valve OFF.
Once the pump is turned ON, the unit will begin
spraying. The system pressure will decrease slightly
as uid begins owing from the spray nozzles. This
is normal; the pressure will recover when the control
valve is turned OFF.
15°
CAUTION
Always use appropriate personal protective
equipment, including gloves and safety
goggles, when lling sprayer.
Speed
(mph)
Time (sec) Required to Travel a Distance of:
100 ft 200 ft 300 ft
1.0 68.0 136 205
2.0 34.0 68 102
3.0 23.0 45 68
4.0 17.0 34 51
5.0 14.0 27 41
6.0 11.0 23 34
7.0 9.7 19 29
8.0 8.5 17 26
9.0 7.6 15 23
10.0 6.8 14 20
Converting gal/acre to gal/1000 ft2
Most chemical labels indicate a chemical
application rate in 1,000 ft2.
If the rate on the chemical label is indicated in
gallons per acre, divide the per acre rate by 43.56
to convert to gallons per 1,000 ft2.
1 acre = 43,560 ft2
1 gallon per 1000 ft2= 43.56 gallons per acre
Other Conversion Factors
1 oz = 2 Tbl
1 cup = 8 oz
1 pint = 2 cups = 16 oz
1 quart = 2 pints = 32 oz
1 gallon = 4 quarts = 8 pints = 128 oz

Lit. No. 72623, Rev. 00 15 April 15, 2019
SPRAY COVERAGE TABLE: 2-NOZZLE BOOM (#3 Tip, Spray Height 18")
Pressure Capacity
Speed
1 mph
88 ft/min
2 mph
176 ft/min
3 mph
264 ft/min
4 mph
352 ft/min
5 mph
440 ft/min
7.5 mph
660 ft/min
10 mph
880 ft/min
(psi) (gal/min) Gallons per Acre – Based on Water
10.0 0.30 44.0 22.0 14.9 11.1 8.9 5.9 4.5
20.0 0.42 63.0 31.5 20.9 15.7 12.6 8.4 6.3
30.0 0.52 76.0 38.0 26.0 19.3 15.4 10.3 7.7
40.0 0.60 90.0 45.0 30.0 22.0 17.8 11.8 8.9
(psi) (gal/min) Gallons per 1000 ft2– Based on Water
10.0 0.30 1.01 0.50 0.340 0.254 0.204 0.135 0.10 3
20.0 0.42 1.40 0.72 0.480 0.360 0.290 0.19 0 0.14 0
30.0 0.52 1.74 0.87 0.596 0.440 0.350 0.236 0.176
40.0 0.60 2.06 1.00 0.688 0.500 0.408 0.270 0.200
(psi) (gal/min) Gallons per 100 ft2– Based on Water
10.0 0.30 0.100 0.050 0.034 0.025 0.020 0.013 0.010
20.0 0.42 0.140 0.072 0.048 0.036 0.029 0.019 0.014
30.0 0.52 0.174 0.087 0.059 0.044 0.035 0.024 0.017
40.0 0.60 0.206 0.10 0 0.068 0.050 0.040 0.027 0.020
ACCESSORY SPRAY BOOM CALIBRATION
SPRAY COVERAGE TABLE: 7-NOZZLE BOOM (80/110-02 Spray Tip, 20" Spacing)
Pressure Capacity
Speed
1 mph
88 ft/min
2 mph
176 ft/min
3 mph
264 ft/min
4 mph
352 ft/min
5 mph
440 ft/min
7.5 mph
660 ft/min
10 mph
880 ft/min
(psi) (gal/min) Gallons per Acre – Based on Water
20.0 0.14 41.8 20.9 14.0 10.5 8.4 5.6 4.2
30.0 0.17 51.2 25.6 17. 2 12.9 10.3 6.9 5.1
40.0 0.20 59.2 29.6 19.8 14.9 11.9 7. 9 5.9
50.0 0.23 66.4 33.2 22.2 16.6 13.3 8.8 6.6
(psi) (gal/min) Gallons per 1000 ft2– Based on Water
20.0 0.14 0.96 0.48 0.32 0.24 0.19 0.13 0.10
30.0 0.17 1.18 0.59 0.39 0.30 0.24 0.16 0.12
40.0 0.20 1.36 0.68 0.45 0.34 0.27 0.18 0.14
50.0 0.23 2.06 0.76 0.51 0.38 0.31 0.20 0.15
(psi) (gal/min) Gallons per 100 ft2– Based on Water
20.0 0.14 0.96 0.048 0.032 0.024 0.019 0.012 0.009
30.0 0.17 0.117 0.059 0.039 0.029 0.024 0.015 0.011
40.0 0.20 0.13 5 0.066 0.045 0.034 0.027 0.018 0.013
50.0 0.23 0.152 0.76 0.050 0.038 0.030 0.020 0.015

Lit. No. 72623, Rev. 00 16 April 15, 2019
PUMP SPECIFICATIONS & INFORMATION
PowerFLO™ 7800 Series
12V DC Motor-Driven Diaphragm Pumps
Motor
Type: 12V DC, permanent magnet, totally enclosed,
nonventilated
Leads: 16 AWG, 12" long
Temperature Limits: Not equipped with thermal
protection. For user safety, optimal performance,
and maximum motor life, the motor surface
temperature should not exceed 150°F (66°C).
Pump
Type: 3-chamber positive displacement diaphragm
pump, self-priming, capable of being run dry,
demand or bypass model.
Certications: NSF Standard 58
Maximum Liquid Temperature: 140°F (60°C)
Priming Capabilities: 14 feet (4 m)
Maximum Pressure: 60 psi
Inlet/Outlet Ports: Quick Attach (7802 model)
Materials of Construction
Housing: polypropylene
Diaphragm: Santoprene
Valves: Viton
Fasteners: stainless steel
Weight: 6 lb (2.7 kg)
Model 7802
2.2 gal/min
Pressure Sensing Demand Switch
The PowerFLO Series 7800 pump is controlled by
a built-in pressure sensing demand switch. When a
faucet or valve is opened downstream of the pump, line
pressure drops, thus starting the pump automatically.
Conversely, when the valve shuts, the line pressure
increases, turning the pump off automatically.
The pressure switch actuates in response to the
pump outlet pressure at a predetermined and preset
pressure. The pump label indicates the predetermined
ON and OFF pressures. Typically, the OFF pressure
is accurately set at the factory and the ON pressure is
within an allowable range below that value.
These pressure settings may vary in response to the
characteristics of the system in which the pump is
installed, the exibility and length of the tubing, the
faucet or valves and the duration that they are open.
Therefore, variation in pressure setting is expected
with use and over time.
Adjusting the Pressure Switch
Should the pressure sensing demand switch OFF
setting vary with use and time to an unsuitable value,
it may be adjusted for optimum performance. Turn
the set screw clockwise to increase the OFF pressure
setting and counterclockwise to decrease the setting.
The screw should not be adjusted more than one-half
turn without consulting the factory. Excessive
adjustment of the pressure switch could cause low
system pressure, rapid cycling ON/OFF operation, and
reduced pump and motor life. Damage may occur. The
Warranty does not cover improper adjustment of the
pressure switch.

Lit. No. 72623, Rev. 00 17 April 15, 2019
PUMP SPECIFICATIONS & INFORMATION
CAUTION
Do not operate pump in an explosive
environment. Arcing from the motor brushes
or switch, or excessive heat from an improperly
cycled motor, may cause an explosion.
CAUTION
To prevent electrical shock, disconnect power
before initiating any work. In the case of
pump failure, the motor housing and/or pump
uid may carry high voltage to components
normally considered safe.
Installation and Operation Precautions
• Always consider electrical shock hazard when
working with and handling electrical equipment.
Electrical wiring should only be done by a qualied
electrician per local and state electrical codes.
• Do not pump gasoline or other ammable liquids.
Pump head materials are designed for use with
water only. Do not use with petroleum products.
• Do not locate the pump motor near low-temperature
plastics or combustible material. The surface
temperature of the motor may exceed 250°F
(120°C).
• Never subject the pump to pressures above 125
psi (8.5 bars).
• The pump is equipped with a pressure sensing
demand switch that controls the maximum
operating pressure.
• As long as there is inlet water pressure, the pump
will not stop forward ow of water even if the motor
is turned off. Be sure the system has a positive
means of shutting off the water supply.
• Do not assume uid compatibility. If the uid is
improperly matched to the pumps’ elastomers, a
leak may occur.
Servicing
Every Year: Check the system against operating
standards.
Every 2 to 3 Years: We recommend replacing the
diaphragm and checking against operating standards.
Important Warranty Return Safety
Instructions
When you return your pump for warranty or repair, you
must always do the following:
• Flush chemical residue from the pump (best done
in the eld).
• Attach a tag to the pump identifying the type of
chemicals sprayed with that pump.
• Include complete description of the operation
problem, such as how pump was used, symptoms
of malfunction, etc.
Since pumps can contain residues of toxic chemicals,
these steps are necessary to protect all the people
who handle return shipments and to help pinpoint the
reason for the breakdown.

Lit. No. 72623, Rev. 00 18 April 15, 2019
TROUBLESHOOTING
Your local TurfEx®dealer knows the sprayer best.
Take the unit to the local dealer for any maintenance
or service needs. If this is not possible, the
troubleshooting table below may assist in identifying
the problem.
Preliminary Checks
Before proceeding with the Troubleshooting Guide
steps, conrm that:
• All electrical connections are tight and clean.
• Pump switch is in "ON" position.
• Nothing is obstructing the wand spray tip (or
accessory boom nozzles).
TROUBLESHOOTING
WARNING
Read all Warning and Caution statements and
instructions before servicing the sprayer.
TROUBLESHOOTING GUIDE
Issue Check For
Pump will not start.
Correct voltage (12V ±10%).
Blown fuse
Pressure switch operating; correct voltage at switch
Open or grounded circuit at rectier or motor
Locked drive assembly
Pump will not prime
(no discharge w/ motor running).
Debris in strainer
Restriction (kinks) in inlet/outlet hoses
Debris or swelling in inlet/outlet valves
Pump will not shut off.
Air trapped in outlet line or pump head
Correct voltage to pump
Debris in pump inlet/outlet valves
Loose drive assembly or pump head screws
Pressure switch operation; adjustment required?
Pump quit and will not restart. Check in-line fuse and/or fuse in car adapter end.
Correct voltage (12V ±10%)
Pump continues to run and surge
when not spraying.
Leaks in system
Bypass valve not completely closed
Fluid owing through bypass hose when valve is
closed: replace valve.
Low ow or no ow. Clogged suction hose and/or suction strainer
Correct voltage (12V ±10%)
Fuse blows whenever pump is
switched on.
Excessive voltage
Damaged wiring
Improper adjustment of pump pressure sensing
demand switch
Leaking from pump head or switch.
Loose screws at switch or pump head
Switch diaphragm ruptured or pinched
Punctured diaphragm, if uid is present
WARNING
Do not operate a sprayer in need of
maintenance.
WARNING
Always wear safety glasses with side shields
when servicing the sprayer. Failure to do this
could result in serious injury to the eyes.


Copyright © 2019 Douglas Dynamics, LLC. All rights reserved. This material may not be reproduced or copied, in whole or in part, in
any printed, mechanical, electronic, lm, or other distribution and storage media, without the written consent of TrynEx International, LLC.
Authorization to photocopy items for internal or personal use by TrynEx International outlets or sprayer owner is granted.
TrynEx International reserves the right under its product improvement policy to change construction or design details and furnish equipment
when so altered without reference to illustrations or specications used. TrynEx International may require or recommend optional
equipment for sprayers. TrynEx International offers a limited warranty for all sprayers and accessories. Warranty information available at
www.TurfExproducts.com. The following are registered (®) trademarks of Douglas Dynamics, LLC: TurfEx®.
Printed in U.S.A.
A DIVISION OF DOUGLAS DYNAMICS, LLC
TrynEx International
531 Ajax Drive
Madison Heights, MI 48071-2429
www.turfexproducts.com
Lit. No. 72623, Rev. 00 April 15, 2019
Table of contents
Other TurfEx Paint Sprayer manuals