manuals.online logo
Brands
  1. Home
  2. •
  3. Brands
  4. •
  5. Unic
  6. •
  7. Coffee Maker
  8. •
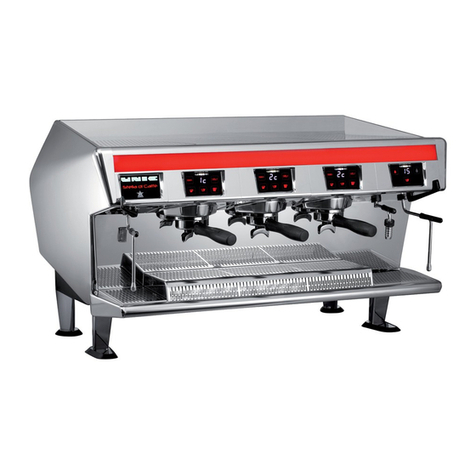
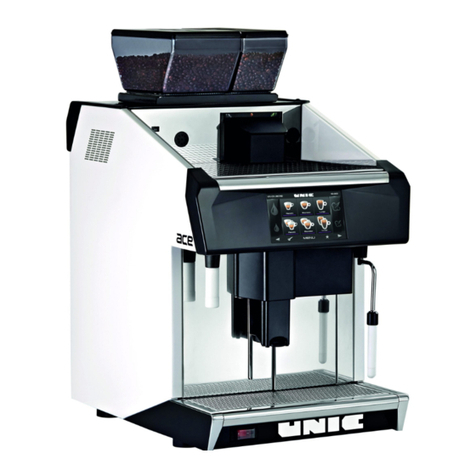
  9. Unic Tango Ace Service manual

Unic Tango Ace Service manual

Install...............................................................3
Adjust Voltage............................................................................4
GrinderAdjustmentandCalibration........................................5
PM Service Schedule.................................................................9
BrewingPistonEvaluation.................................................11-12
Brewing Piston Exchange.........................................................13
Piston Field Rebuild.................................................................17
Turntable Adjustment............................................................43
Turntable Service.....................................................................25
PartsSchematics................................................................34-49
Co󰀨ee Cleaning.......................................................................50
Steam Wand and Milk Cleaning..............................................51
Service & PM Guide
3
Tango 0060 11-2019
Installation
Use the provided shims on
the rear legs if necessary
to level the Tango. Angled
slightly forward is also OK
Power:
NEMA L6-30
30 Amps
Minimum 200 Volts
Maximum 242 Volts
The transformer MUST be ad-
justed to match the incoming
voltage! (See next page)
Water: Minimum Maximum
Pressure 45 PSI 100 PSI
Flow Rate 1 Gallon/ Minute
TDS 50 ppm 125 ppm
Total Hardness 3 GPG 5 GPG
PH 6.5 7.5
Free Chlorine na 0.5 ppm
Total Chlorine na 1 ppm
Drain:
Tango must be installed level
or angled slightly forward!
Install the drain line running
continuously downward so
that no “trap” is formed.
!
Back pressure in the drain
line will cause problems
with the brewing system.
!
4Tango 0060 11-2019
Voltage Setting
The jumper wire at the rear of the machine must be set to match the incoming voltage.
Incorrect voltage can cause problems with the touchscreen and valves.
!
Move the GREY wire to the terminal that best
matches the incoming voltage
(Red wire stays on 230 volt center terminal)
Move the RED wire to the terminal that best
matches the incoming voltage
(Grey wire stays on 230 volt center terminal)
All 2019 machines and some older machines
Di󰀨erent conguration for older machines
200 Volts
230 Volts
240 Volts
10 terminal block
200 Volts
230 Volts
240 Volts
8 terminal block
Sticker on
rear frame
Sticker on
rear frame
5
Tango 0060 11-2019
Adjust Grinder Setting
Fine/Coarse
Re-run and time test drink (Double shot)
18-26 seconds is usually the target time
Adjust grinder ner for longer extraction
Adjust grinder coarser for faster extraction
Repeat test and adjust as needed until extraction is in range
Adjust Grinders for best extraction: Each PM visit
Step 1: Adjust the grinders ne or coarse for best extraction
time. Typically done with the double espresso drink.
Adjust both grinders.
Run a test drink
(Double shot)
Turn counter-clockwise
for ner left (red) grinder.
Turn clockwise
for ner right (green)
grinder.
Adjustments are opposite for each grinder
Step 2: Capture a sample of the dry ground coee.
Weight the sample and enter the amount into the
calibration programming. (2 sample cycles)
Run 2-3 drinks after
each adjustment.
Note co󰀨ee
ow time Adjust grinder
ne or coarse
as needed
6Tango 0060 11-2019
Weigh & Calibrate
Grinder Output
Weigh and enter co󰀨ee amount of
2 sample cycles during calibration
Tools needed:
Scale accurate to 0.1
grams
2 Paper cups
Optional:
Unic magnetic tray
holder and sampling
tray
Select Calibrate Weight
Select Purple (left) or Green (right)
grinder
Enter 9191 - Press OKPress menu Select
Setup
Select
Other
Settings
Select
Grinder
Calibration
9191
7
Tango 0060 11-2019
Tape a 2nd cup in the back of the
drawer about 1” below the top
“0” the scale with an empty
cup
Insert the empty cup into
the taped cup Replace the drawer with
both cups in place
Calibrate Grinder Dose
Select “Calibrate Weight” to start co󰀨ee weighing process.
(Adjust grind ne or coarse rst, see previous pages)
Follow screen instructions
Remove drawer
Press conrm to start
Grinds Tamps, and Ejects
Remove and weight the cup
with grounds
1st Sample
See next page
for 2nd grind
cycle
8Tango 0060 11-2019
Weight the grounds from
the 2nd cycle:
Empty and replace the
measuring cup
7
Remove and weight the cup
with grounds from the 1st cycle
Replace the drawer with
both cups in place
Enter the weight
Press conrm to save
Press conrm to start 2nd
grind cycle
Enter the weight
press conrm to save
Done!
Press check mark conrm
& save
Repeat the process for the Green (right, decaf ) grinder!
Calibrate Grinder Dose
2nd Sample
Continued from previous page
9
Tango 0060 11-2019
Page 5 this manual
Page 43 this manual
Page 11 this manual
Tango ACE PM Schedule Unic Parts listing Description
from ACE Parts Manual TG9060 Part # Parts
Manual Page
Quantity
6
Months
Odd
Years
Even
Years
6-Year
Rebuild
1 3 5 2 4 6
Coffee Service
Calibrate Grinder N/A 
Adjust Turntable Tension N/A 
Test Coffee System Water Flow N/A 
Coffee Service Parts
Piston Rebuild Kit N/A FR-1948 425 1
Coffee Brew Piston PISTON ASSEMBLY WITHOUT MOTOR FR-1010 425 1 
Coffee Dosing Funnel Assembly FUNNEL MOBILE KIT FR-1006 410 1 
Turntable Cover PLASTIC TURNTABLE FR-7000 420 1 
Turntable Rebuild Kit N/A FR-1551 420 1 
Brew Valve 3/8 Copper Gasket WASHER - COPPER - 3/8
CH-16 420 1

Brew Valve 3/8 to 1/8 Reducer Fitting FITTING
R-100 420 1

Brew Valve O-ring - 2x9.5mm GASKET 2 X 9.5 28134
420 2

Coffee Brew Valve EV 3 WAYS 24V D1.2
35025 420 1

Coffee Spout Valve SPOUT ELECTROVALVE 35540 435 1
Venturi Milk Service Parts
Venturi Milk Foamer Assembly LC SET FR1046 611 1
O-ring - 1.17x6.07mm O RING - 1.78 X 6.07 27737 611 4
O-ring - 2.62x26.64mm ROUND RING 26.64 X 2.62 - 75 RR-32B 611 1
O-ring - 8.73x1.78mm GASKET 8.73 X 1.78 CN-436 611;612 3
O-ring - 1.78x12.42mm O RING - 1.78 X 12.42 27796 611;612;613 7
O-ring - 2x9.5mm GASKET 2 X 9.5 28134 611;613 7
Gicleur Metering Jets Parts
Copper Gasket for Pipe Fitting N/A CN-618 420 1 
Gicleur Filter Screen FILTER 25400 420 1 
Gicleur Holder JET HOLDER 23773 420 1 
Gicleur Metering Jet (0.7mm) JET DIAM. 0.7 23117 420 1 
Gicleur O-ring - 1.78x2.9mm GASKET 1.78 X 2.90 FKM TC-80 420 1 
Steam/Water Wands Service
Steam Wand Swivel O-ring O RING - 9.13 X 2.62 PH-78 201;241 1
Copper Spacer Washer N/A AG-14 201;241 1
Wand Spring SPRING PA-43 201;241 1
Wand Spring Holder BRASS END RR-67 201;241 1
Upper O-ring for Steam/Water Wands O RING - 13.95 X 2.62 PH-54 201;241;251 2
SteamAir Autosteam Service
12 Hole Steam Tip 12 HOLES END PIPE 25909 241 1
O-ring - 2x9.5mm GASKET 2 X 9.5 28134 241 2
O-ring - 8.73x1.78mm GASKET 8.73 X 1.78 CN-436 241 1
O-ring - 9.13x2.62mm O RING - 9.13 X 2.62 PH-78 241 1
Set-screw - M5x8mm POINT END SCREW PC-38 241 1
Spring Inserts THRUST BALL BEARING RO-58 241 2
General Service Parts
Drip Tray O-ring O RING - 2.62 X 17.13 27845 361 1
Cleaning Cap O-ring GASKET 3.53 X 34.52 EPDM 27907 361 1
Cleaning Cap Flat Seal GASKET 28700 361 1
Vacuum Break Plunger O-ring GASKET 6.07 X 1.78 CN-198 201 1
Vacuum Break Upper & Lower O-rings GASKET 10.82 X 1.78 CN-2850 201 2
Steam Boiler Safety Valve LP VALVE 3.5 BARS 27200 340 1
Water Inlet Filter 80 Microns FILTER CARTRIDGE 80 MICRONS CN-96B 620 1
Water Inlet filter Cap O-ring GASKET 3.53 X 29.75 83501 620 1
Complete Vacuum Break Kit VACUUM VALVE KIT 27224 201 1
Hot Water/Coffee Flow Meter Impeller TURBINE CN-829 251;330 2
Hot Water/Coffee Flow Meter O-ring GASKET - DOSING DEVICE CN-828 251;330 2
High-Level Probe Assembly HIGH LEVEL PROBE 26526 340 1
Low-Level Probe Assembly LOW LEVEL PROBE 26527 340 1
Americano Valve ELECTROVALVE 2 WAYS 24V D2.3 35500 345 1
Americano Valve O-ring - 1.78x12.42mm O RING - 1.78 X 12.42 27796 345 2
Americano Valve O-ring - 2x9.5mm GASKET 2 X 9.5 28134 345 4
Grinder Burrs 64mm GRINDING WHEEL SET 37516 401 2
10 Tango 0060 11-2019
Tango ACE PM Schedule Unic Parts listing Description
from ACE Parts Manual TG9060 Part # Parts
Manual Page
Quantity
6
Months
Odd
Years
Even
Years
6-Year
Rebuild
Additional 6 Year Service Parts
Flat Rubber Gasket (Steam Valve) GASKET - 20 X 12 X 2 28352 201 1
Steam Valve ELECTROVALVE 3/2 24V-50/60HZ 35140 201 1
Steam Valve O-ring - 1.78x12.42mm O RING - 1.78 X 12.42 27796 201 2
Hot Water Valve ELECTROVALVE 2W ADJ. 24V-50/60HZ CN-631R 251 1
Hot Water Valve O-ring - 1.78x12.42mm O RING - 1.78 X 12.42 27796 251 3
Hot Water Valve O-ring - 2x9.5mm GASKET 2 X 9.5 28134 251 1
Hot Water Valve O-ring - 8.73x1.78mm GASKET 8.73 X 1.78 CN-436 251 2
Hot Water Valve O-ring - 1.78x2.9mm GASKET 1.78 X 2.90 FKM TC-80 251 1
Hot Water/Coffee Flow Meter Cap WATER DOSING DEVICE LID CN-827 251;330 2
Fluid-O-Tech Pump Head 200L/H PROCON PUMP 200L/H 37207 321 1
Pump Coupler Kit COUPLING KIT 37216 321 1
Pump Head 3/8 Copper Gasket WASHER - COPPER - 3/8
CH-16 321 2

Expansion Valve COMPLET H.P. VALVE DO-191
330 1

Filling Valve ELECTROVALVE 2W ADJ. 24V-50/60HZ CN-631R
330 1

Filling Valve Jetted Copper Gasket JET COPPER GASKET D1.7X14.5 ID-98
330 1

Filling/Expansion Valve O-ring - 2x9.5mm GASKET 2 X 9.5 28134
330 4

Heating Element Gasket GASKET 66.68 X 3.53
CV-20 340 1

Heat Exchanger O-ring - 1.78x17.17mm O RING 1.78 X 17.17
27716 345 1

Heat Exchanger Teflon Seals PTFE FLAT GASKET
28720T 345 2

Cleaning Cap CLEANING CAP
FR4038 361 1

Spare parts
Coffee Outlet Spout COFFEE SPOUT FR-1015 113 1
Left (Purple) Hopper Gate Assembly INT. CLOSING HATCH FOR HOPPER 150 FR-1096 130 1
Left (Purple) Hopper w/ Lid HOPPER 150 FOR COFFEE GRINDER FR-1605 130 1
Right (Green) Hopper Gate Assembly INT. CLOSING HATCH FOR HOPPER 150 FR-1095 130 1
Right (Green) Hopper w/ Lid HOPPER 100 FOR COFFEE GRINDER FR-1600 130 1
Main Check Valve VALVE - NON-RETURN CN-663 330 1
Heating Element 230v 45000W HEATING ELEMENT 230V 4500W 29855 340 1
Drain Valve ELECTROVALVE N.O 24V 60HZ UL 35560 361 1
Drain Valve O-ring - 9.13x2.62mm O RING - 9.13 X 2.62 PH-78 361 2
Upper Turntable Drive Coupling REINFORCING GANGING COUPLING FR-7003 430 1
Lower Turntable Drive Coupling MOTOREDUCER RING FR-7002 430 1
Turntable Motor Assembly TURNTABLE MOTOR ASSEMBLY 37300 430 1
Milk Heating/Frothing Valve ELECTROVALVE 3W WITHOUT COIL 35021 611 2
Milk Cleaning Valve ELECTROVALVE 2W ADJ. 24V-50/60HZ CN-631R 612 1
Milk Cleaning Valve O-ring - 8.73x1.78mm GASKET 8.73 X 1.78 CN-436 612 1
Coffee Cleaning Check Valve NO RETURN VALVE 1/8 26301 362;612 1
Coffee Cleaning Valve ELECTROVALVE 2W 24V CN-245R 362;612 1
Coffee Cleaning Valve O-ring - 1.78x12.42mm O RING - 1.78 X 12.42 27796 362;612 2
Grinder Collar Extension Ring N/A TG4069 N/A 2
Electronic Spare parts
ACE Front Panel with Display ACE FRONT PANEL TG-1073 124 1
SteamAir Wand Probe V+ THERMOSTATED STEAM PROBE 34406 241 1
Steam/Water Pressure Sensor 0-16b PRESSURE SENSOR 36510MP 330;340 2
Cleaning Switch WATERPROOF MICROSWITCH CN-642E 361 1
Roller Lever for Cleaning Switch LEVER WITH CASTOR CN-620 361 1
Turntable Klixon Switch 115°C SAFETY THERMOSTAT 115°C 34210 420 1
Turntable/Piston Position Sensor FORK SENSOR 36500 420;425 3
Coffee Brew Piston Motor PISTON MOTOR ASSEMBLY FR-1011 425 1
Piston Lower Position Sensor SENSOR Ø16 36501 425 1
Grounds Drawer Switch WATER SAFETY MINI SWITCH CN-526 430 2
Lever for Drawer Switch LEVER FOR MICROSWITCH 43510 430 2
Main Contactor 220V 25A CONTACTOR 220V 25A 43800 504 1
Tango ACE Mother Board ELECTRONIC MAIN BOARD 45386 504 1
Tango ACE/ST CPU Card CPU CARD 45381 504 1
Tango ACE/ST Driver Card ELECTROVALVE DRIVER CARD 45382 504 1
Solid State Relay (SSR) 25A SOLID STATE RELAY 25A 44410 510 3
Ribbon Cable - Front Panel LEFT DISPLAY WIRE TG-8013 551 1
11
Tango 0060 11-2019
Press and Hold YES for 3 seconds
to start the rinsing cycle
Piston Water ow test
Record value on Service Data Form
180-250 ml = Normal ow
150-200 ml = Slight restriction, run a
cleaning cycle and test again
Less than 150 ml = Piston clogged.
Remove piston to clean or replace.
Remove and replace
grounds drawer to start the rinsing cycle.
Ace / STP:
20 Second Flow
~225 ml rinse
Measure the water ow through the
Piston during the spout rinsing cycle.
Clean or replace the Piston
if the ow is restricted.
12 Tango 0060 11-2019
Piston Friction
Range: 0.8Amps - 2.3 Amps
Piston Information Screen
Insert USB key
Insert USB, Press Cancel Press Single or Double
to run a test cycle
1.4 Amps shown
Insert Technicians USB
Piston information is displayed
while each drink is pouring
with the USB is in place
Tango ACE / ST
Piston Amp draw test
The piston should be replaced if it draws more than 2.3 amps.
13
Tango 0060 11-2019
Co󰀨ee Line to Spout
10 mm Nut
Drive-shaft coupler
Drive nut & Cover
Piston Movement
Sensor Plug
Piston Bottom Position
Sensor Plug
Turntable drive-shaft
Rear Piston Threaded
Attachment Rod -12 mm
Front Piston Attachment
Allen Screw - 6 mm
Tango UNO/SOLO - ACE/ST
Tools needed:
Flat Blade Screwdriver
10 mm wrench
12 mm wrench
6 mm Allen Wrench
Tango Brewing Piston Exchange
14 Tango 0060 11-2019
Lift aluminum reinforcement
cover from lower coupling
Remove the Inner Panel Relieve tension on Turn-
table shaft by rocking it
with a 10 mm wrench
Slide upper coupling
down
Unplug Machine Remove Grounds Drawer Remove the 4 side
screws from the Inner
panel
Use a at screwdriver to
push coupling down if nec-
essary
Turntable shaft released
Tango Brewing Piston Exchange
!
45
3
2
1
8
7
6
15
Tango 0060 11-2019
Unplug Piston Movement
Sensor Plug
Unscrew rear mounting
post - 12 mm wrench Remove front mounting
bolt - 6 mm Allen
Remove Turntable drive-
shaft Remove line to spout
10 mm compression tting
Unplug Piston lower posi-
tion sensor
Lift nylon drive nut from
lower coupling
Co󰀨ee output line to
spout
Remove rear mounting
post
Tango Brewing Piston Exchange
14
15
13
12
11
17
16
910
16 Tango 0060 11-2019
Reinstall Piston
Tighten screws, Attach
plugs & Co󰀨ee Line
Replace Turntable shaft
Slide coupler up
Slide O-ring up to notch
Transfer Motor
Rotate shaft of new Piston
part-way down rst!
Rotate to the right to remove Remove piston halfway
Unplug piston motor wires
Tango Brewing Piston Exchange
Slide piston down
Orient motor at this angle Clamp must be on the left
with the screw facing out
Tighten screw rmly
Reattach motor wires!
Polarized 1/8’ & 1/4” plugs
Turn shaft
partway down
!
New Piston
19
18
22 2321
20
26
25
24 Lubricate
O-ring with
Molykote 111
17
Tango 0060 11-2019
Tango Brewing Piston
Field Service
Brewing Piston Field Service for co󰀨ee clogs
Limited eld rebuild
Clean areas of co󰀨ee contact
Replace Seals and O-rings
Replace lter screen Allowed substitute for a piston
change if the lower bearing is OK
and the electronic sensors are in
good condition
Dow Molykote 111 grease
IKV-Fluor
UNIC turntable
grease
FR1948
Piston rebuild kit
FR1948
18 Tango 0060 11-2019
Press and Hold YES for 3 seconds
to start the rinsing cycle
Piston water Flow Test
Tango all versions
180-250 ml = Normal ow
150-200 ml = Slight restriction, run a
cleaning cycle and test again
Less than 150 ml = Piston clogged.
Remove piston to clean or replace.
Measure the water ow through the
Piston during the spout rinsing cycle.
Consider a Field Rebuild if the ow is
restricted.
Remove and replace
grounds drawer to start the rinsing cycle.
Ace / STP:
20 Second Flow
~225 ml rinse
19
Tango 0060 11-2019
Clean
Replace
Clean
Clean
through holes
Wipe clean only!
Clean
Replace
Replace
Replace Clean
Locktite 242
IKV-Fluor grease on ends
Thin coat of Molykote grease
Tango Brewing Piston
Field Service Overview
20 Tango 0060 11-2019
Remove the Bottom
Plate, Threaded Follower,
and Spring
Remove Screen, Seals,
and Spacers Soak the dirty parts in
co󰀨ee cleaner
Pull the brew chamber o󰀨
of the piston Remove outlet nipple
12 mm wrench
Remove the 3 mm Allen
screws from the lower plate
The spring will decompress!
Remove the piston from
the machine
Unscrew the inner piston
from the jack-screw
Left hand threads!
Use a 1/8” drill bit to clear
co󰀨ee pathways
9
Tango Brewing Piston
Field Service
45
32
1
87
6

Other manuals for Tango Ace

1

This manual suits for next models

5

Other Unic Coffee Maker manuals

Unic Tango ST Duo Instruction Manual

Unic

Unic Tango ST Duo Instruction Manual

Unic epic Configuration guide

Unic

Unic epic Configuration guide

Unic Mira User manual

Unic

Unic Mira User manual

Unic AURA 2 User manual

Unic

Unic AURA 2 User manual

Unic Stella Epic Specification sheet

Unic

Unic Stella Epic Specification sheet

Unic Stella di Caffe User manual

Unic

Unic Stella di Caffe User manual

Unic Phoenix-R Owner's manual

Unic

Unic Phoenix-R Owner's manual

Unic Tango Ace Instruction Manual

Unic

Unic Tango Ace Instruction Manual

Unic Tango STP Configuration guide

Unic

Unic Tango STP Configuration guide

Unic Rumba Operation and maintenance manual

Unic

Unic Rumba Operation and maintenance manual

Unic Tango Configuration guide

Unic

Unic Tango Configuration guide

Unic Stella di Caffe User manual

Unic

Unic Stella di Caffe User manual

Unic AURA 2GR Instruction Manual

Unic

Unic AURA 2GR Instruction Manual

Unic STELLA EPIC 3 User manual

Unic

Unic STELLA EPIC 3 User manual

Unic DIVA User manual

Unic

Unic DIVA User manual

Unic Stella di Caffe Manual

Unic

Unic Stella di Caffe Manual

Unic Tango Instruction Manual

Unic

Unic Tango Instruction Manual

Unic Phoenix-R User manual

Unic

Unic Phoenix-R User manual

Unic Mira Instruction Manual

Unic

Unic Mira Instruction Manual

Unic Tnira classic Configuration guide

Unic

Unic Tnira classic Configuration guide

Unic Pony 4 User manual

Unic

Unic Pony 4 User manual

Unic STELLA User manual

Unic

Unic STELLA User manual

Unic Stella Epic User manual

Unic

Unic Stella Epic User manual

Popular Coffee Maker manuals by other brands

Krups EA875 INTUITION PREFERENCE manual

Krups

Krups EA875 INTUITION PREFERENCE manual

AMANTI Technologica instruction manual

AMANTI

AMANTI Technologica instruction manual

CBTL Contata S03 user manual

CBTL

CBTL Contata S03 user manual

Bunn MCR Installation & operating guide

Bunn

Bunn MCR Installation & operating guide

Cecilware GB3M-10-LD-U Operator's manual

Cecilware

Cecilware GB3M-10-LD-U Operator's manual

GE 681131690690 owner's manual

GE

GE 681131690690 owner's manual

Bosch TASSIMO finesse TAS16B Series user manual

Bosch

Bosch TASSIMO finesse TAS16B Series user manual

Coline CM23-1-UK instruction manual

Coline

Coline CM23-1-UK instruction manual

Saeco Classic Service manual

Saeco

Saeco Classic Service manual

Franke SINFONIA operating instructions

Franke

Franke SINFONIA operating instructions

Krups Nescafe Dolce Gusto KP500510 user manual

Krups

Krups Nescafe Dolce Gusto KP500510 user manual

Philips Senseo Latte Duo HD6570/60/B Service manual

Philips

Philips Senseo Latte Duo HD6570/60/B Service manual

HOFFEN ECM-9399 instruction manual

HOFFEN

HOFFEN ECM-9399 instruction manual

DeLonghi EC220 CD Get started

DeLonghi

DeLonghi EC220 CD Get started

Scarlett SC-CM33015 instruction manual

Scarlett

Scarlett SC-CM33015 instruction manual

Newco FC 3 Operation manual

Newco

Newco FC 3 Operation manual

Saeco NINA CAPPUCCINO operating instructions

Saeco

Saeco NINA CAPPUCCINO operating instructions

Bunn CDBC OPERATING & SERVICE MANUAL

Bunn

Bunn CDBC OPERATING & SERVICE MANUAL

manuals.online logo
manuals.online logoBrands
  • About & Mission
  • Contact us
  • Privacy Policy
  • Terms and Conditions

Copyright 2025 Manuals.Online. All Rights Reserved.