Uninet XEROX WORKCENTER 3210 Installation and maintenance instructions

XEROX®WORKCENTER 3210 •3220
TONER CARTRIDGE REMANUFACTURING INSTRUCTIONS
XEROX®WORKCENTRE 3210 TONER CARTRIDGE
© 2011 UniNet Imaging Inc. All trademark names and artwork are property of their respective owners. Product brand names mentioned are intended to show compatibility only.
UniNet Imaging does not warrant downloaded information. Unauthorized sale, reproduction or distribution of this article is prohibited. For additional support, please contact [email protected]
www.uninetimaging.com

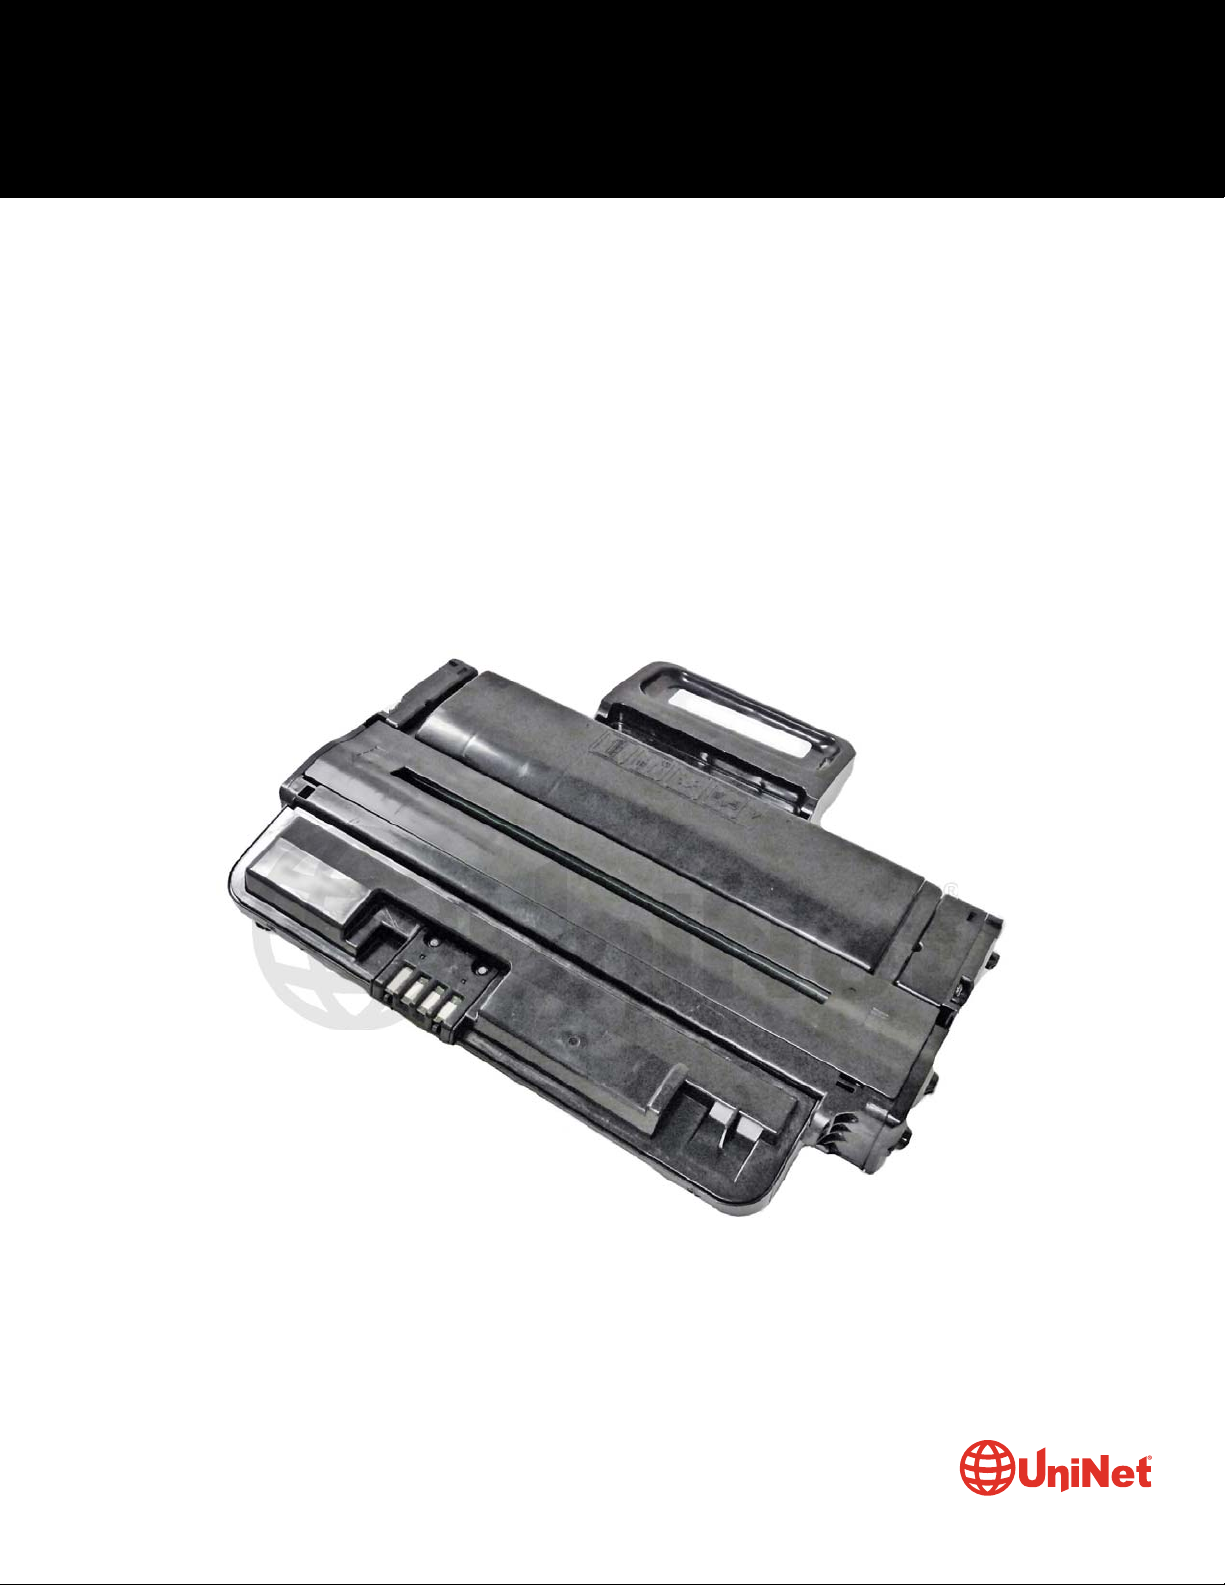
The Xerox WorkCentre 3210 is based on a 24/28ppm (depending on the model), 1200 dpi multifunction engine. These machines
can print/copy/fax and scan all with a first page out in less than 8.5 seconds.
The standard cartridge (Xerox part #106R01485) is rated for 2,000 pages. The high yield cartridge (#106R01486) is rated for
4,100 pages. As with most cartridges these days the cartridge has a chip and it has to be replaced each cycle.
The #106R01485 cartridge has a list price of $69.95* USD, and the #106R01486 has a list price of $95.95* USD.
*Pricing, in U.S. American Dollars, is current as of June 2011.
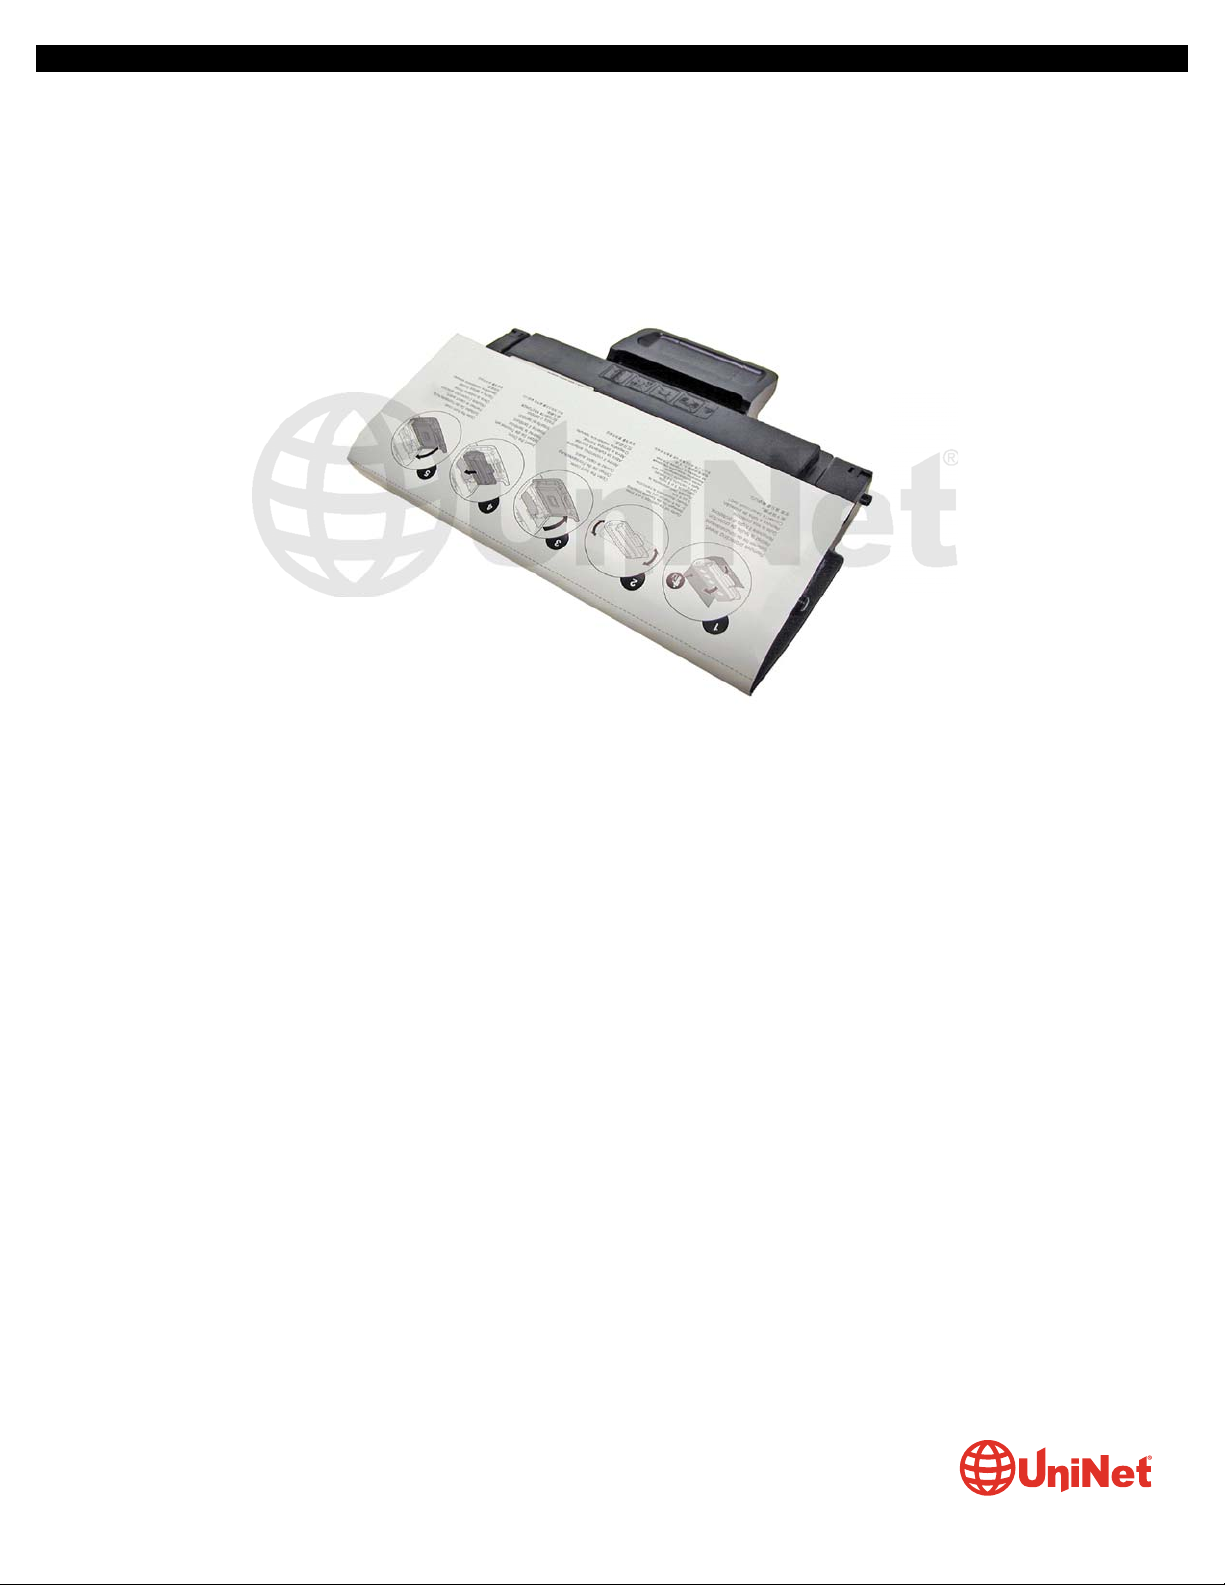
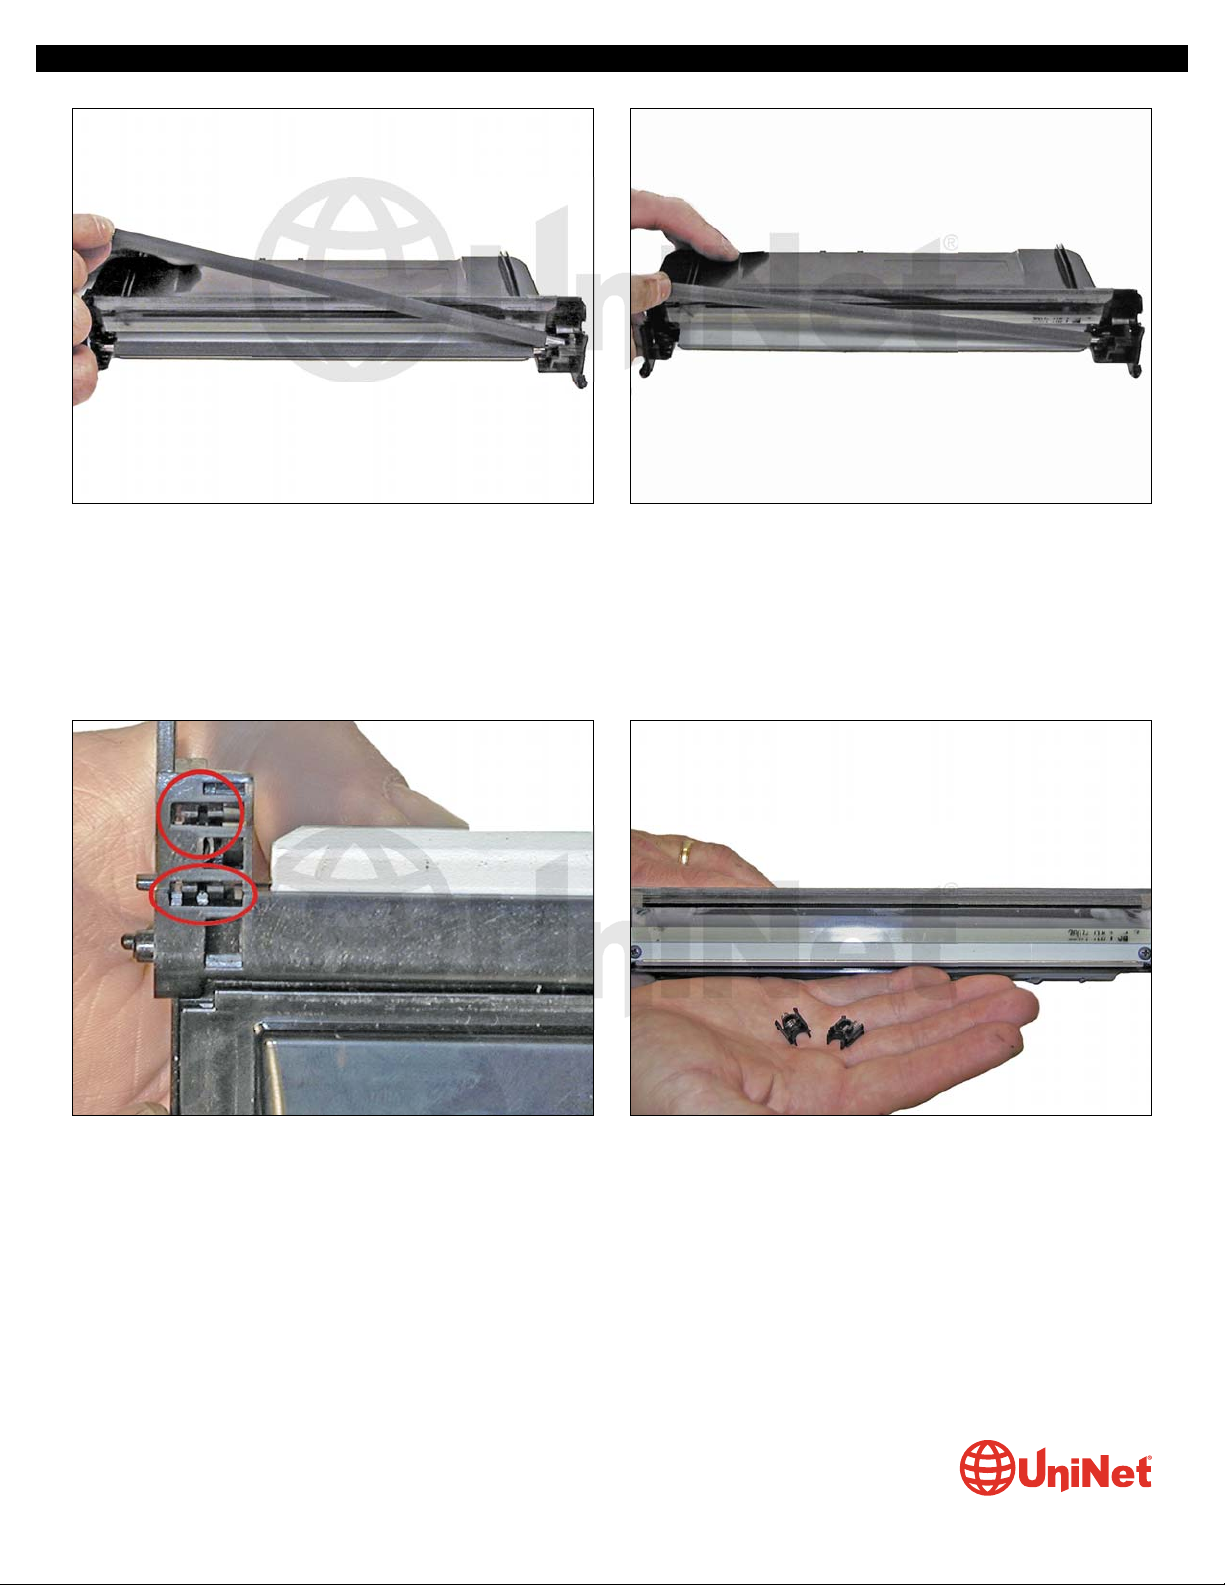
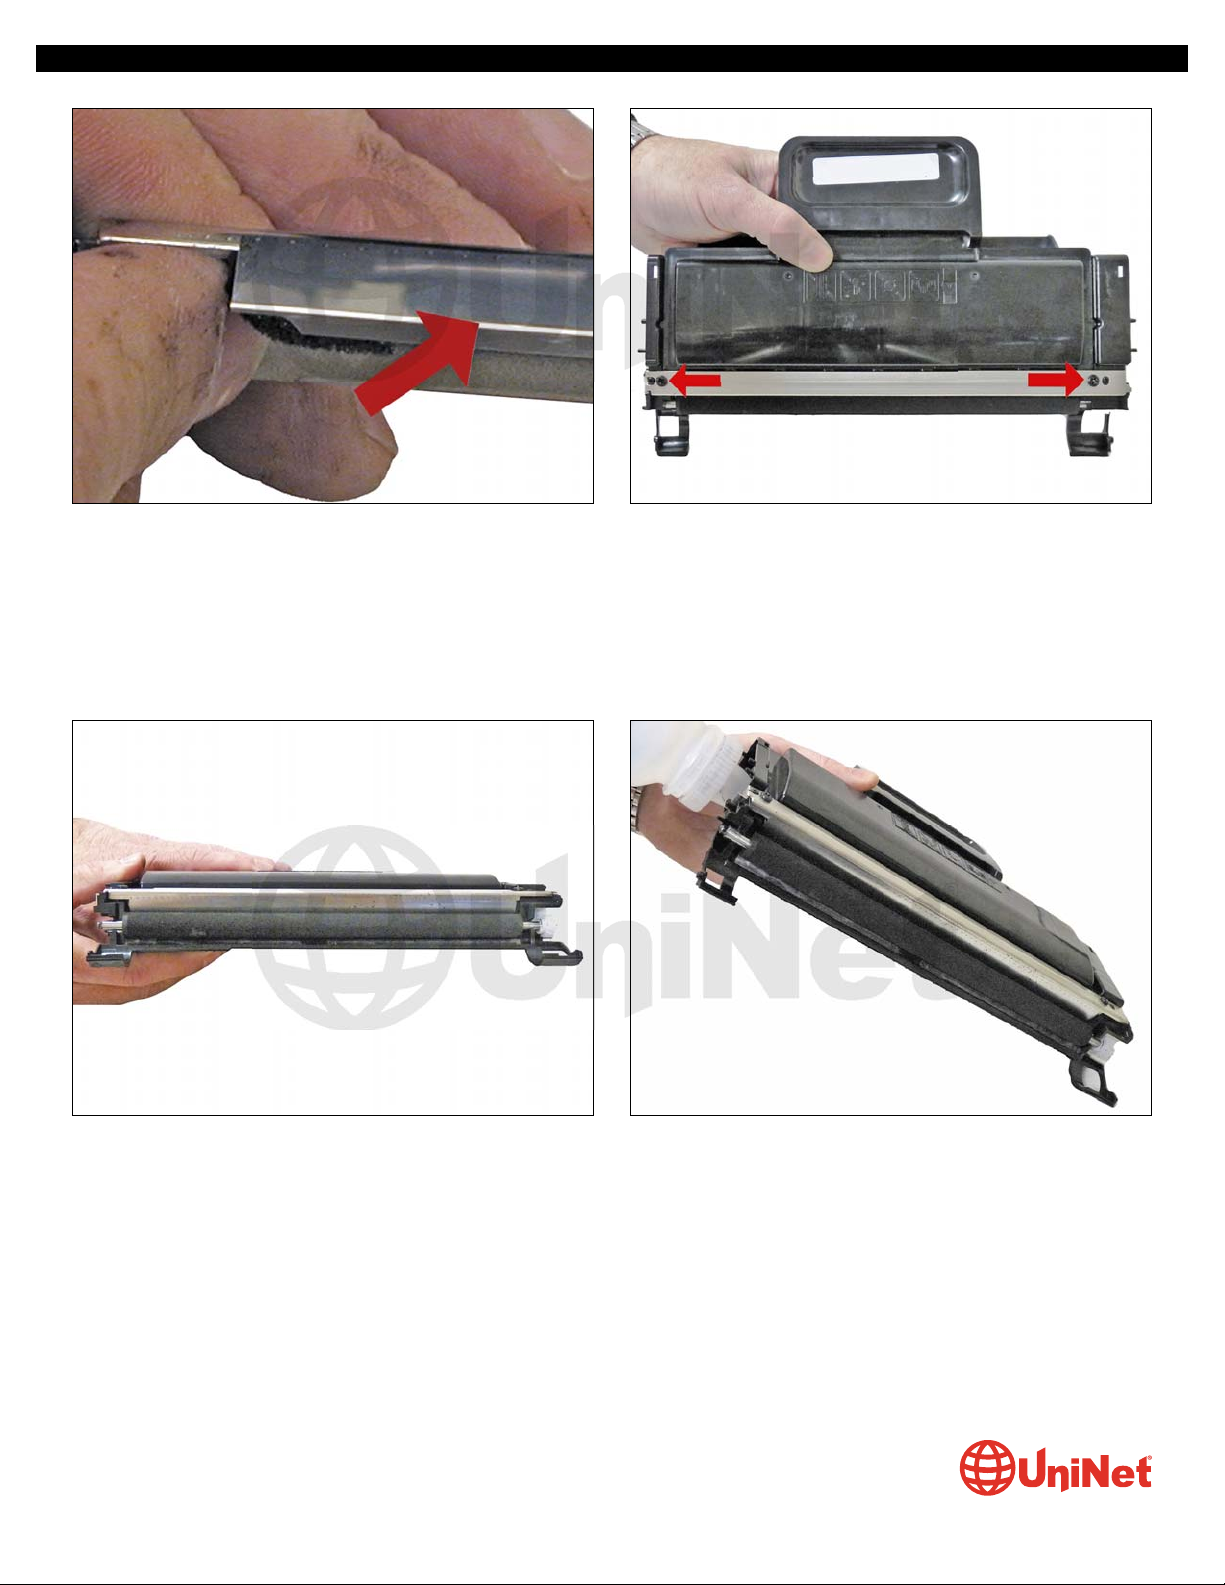
These cartridges do not have a drum cover and come new with a piece of heavy paper taped around the cartridge as pictured
above. All new cartridges opened so far have shown some toner leakage on the drum that would have shown on any prints for at
least a few pages.
Cartridge troubleshooting will be listed at the end of these instructions.
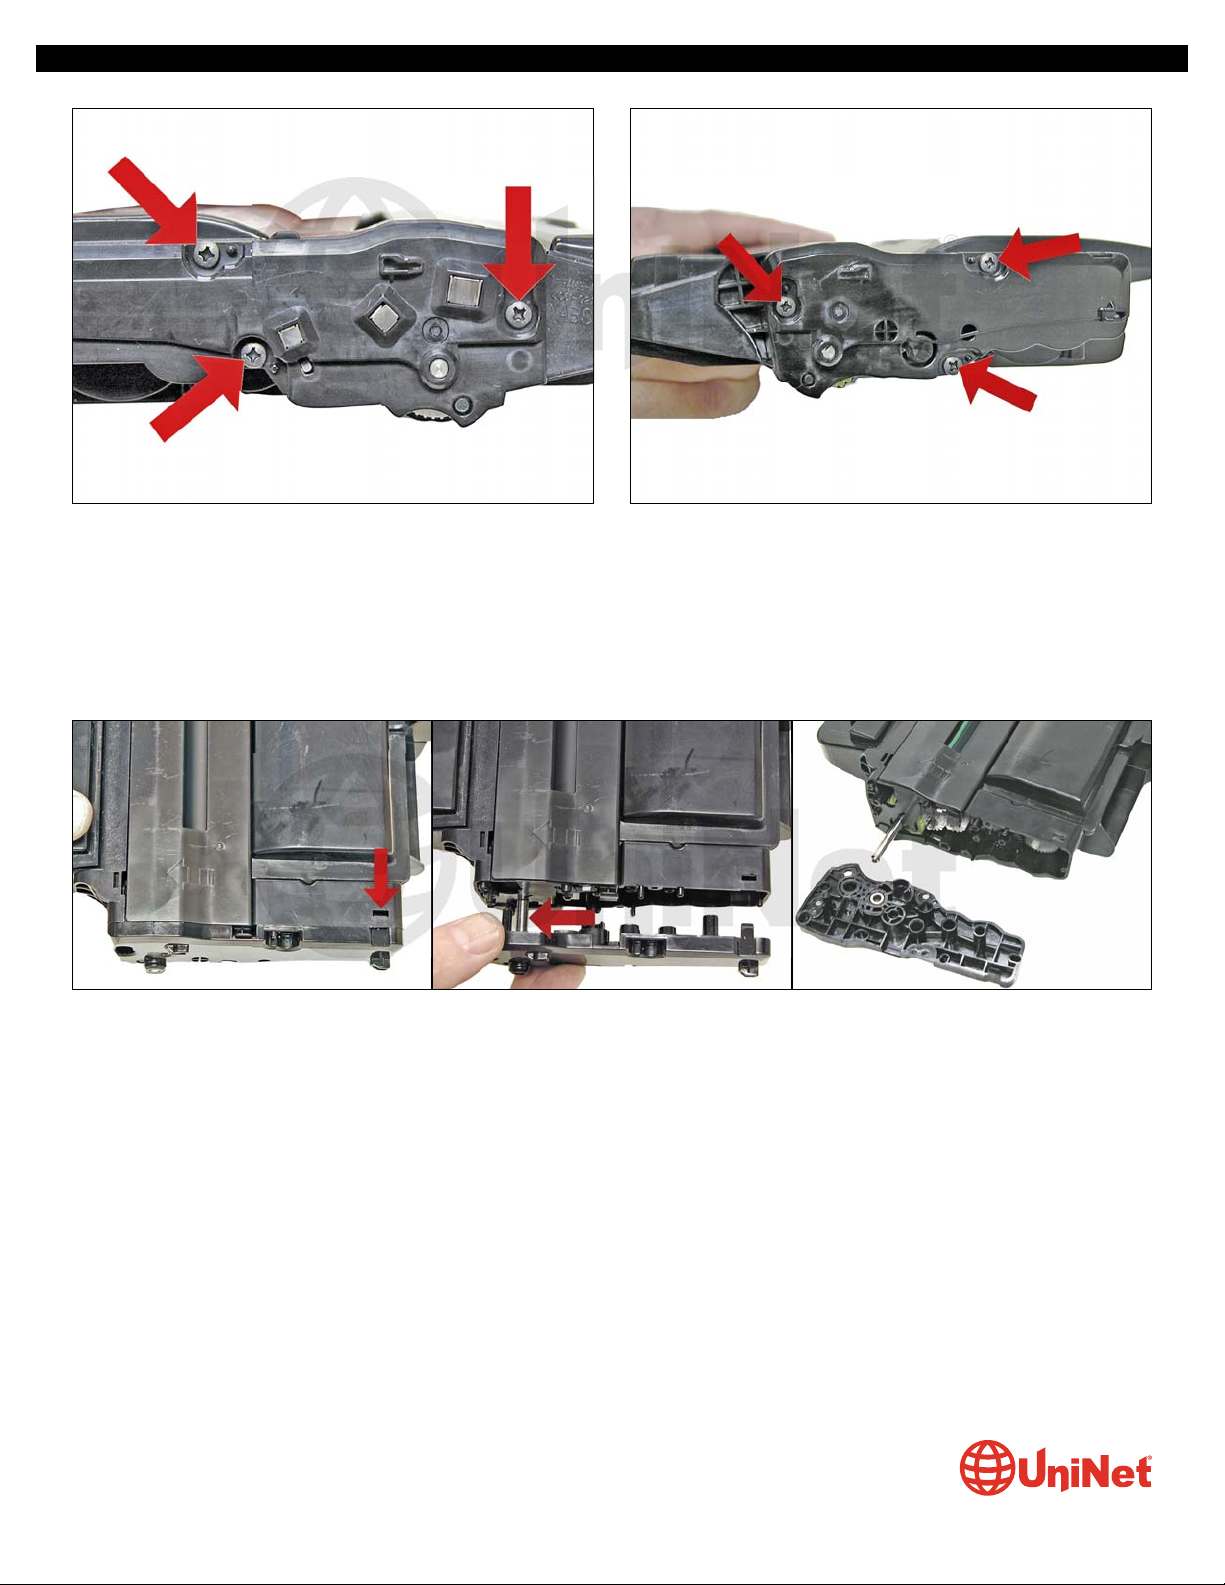
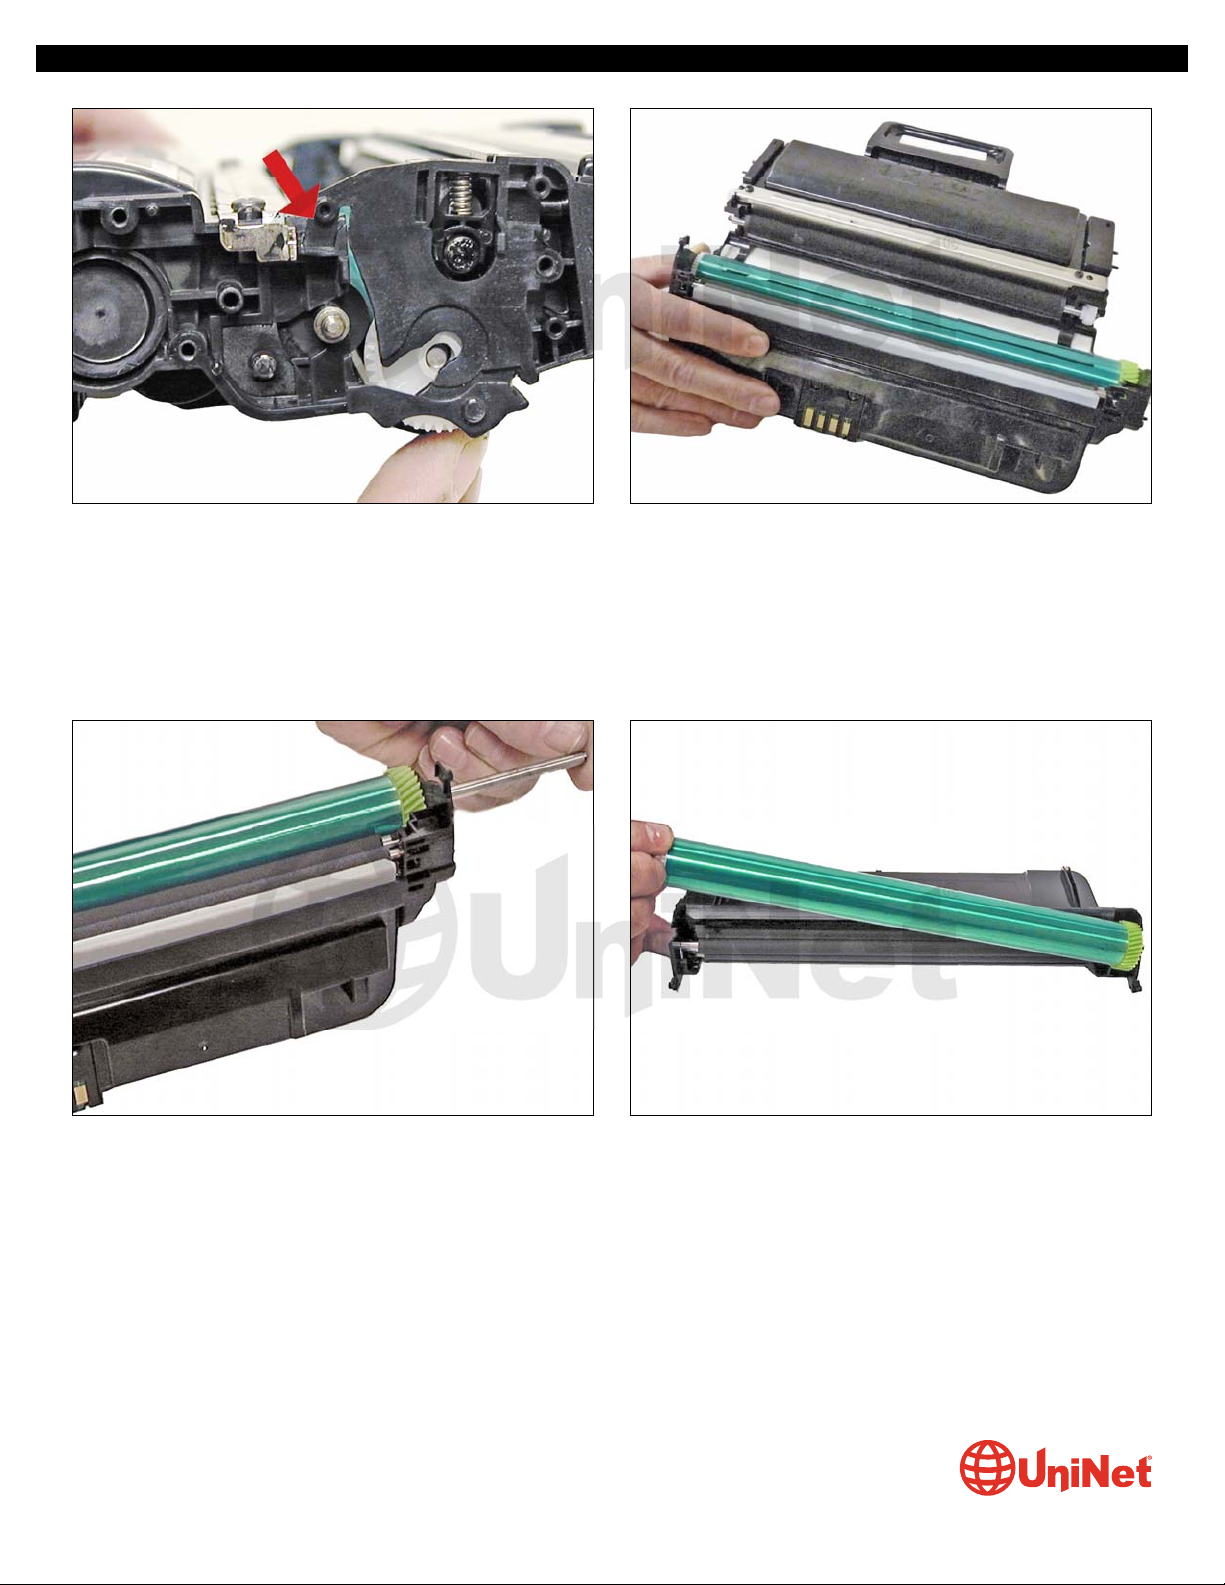
REQUIRED TOOLS
1. Toner approved vacuum
2. A small common screwdriver
3. A Phillips head screwdriver
4. Needle nose pliers
REQUIRED SUPPLIES
1. Toner for use in Xerox WorkCentre 3210
2. New replacement chip
3. Conductive grease
4. 99% isopropyl alcohol
5. Drum lubricating powder
XEROX WORKCENTRE 3210 •3220 TONER CARTRIDGE REMANUFACTURING INSTRUCTIONS
REMANUFACTURING THE XEROX
WORKCENTRE 3210/3220 TONER CARTRIDGE
By the Technical Staff at UniNet
© 2011 UniNet Imaging Inc. All trademark names and artwork are property of their respective owners. Product brand names mentioned are intended to show compatibility only.
UniNet Imaging does not warrant downloaded information. Unauthorized sale, reproduction or distribution of this article is prohibited. For additional support, please contact [email protected]
www.uninetimaging.com

1. Place the cartridge with the handle up facing towards you.
Remove the three screws from the right side end cap.
Leave the end cap in place for now.
2. On the left side end cap, remove the three screws.
3. While still on the left end cap, locate the top tab.
Press in on the tab, and remove the end cap.
The drum axle may come out with the end cap. Separate the two.
XEROX WORKCENTRE 3210 •3220 TONER CARTRIDGE REMANUFACTURING INSTRUCTIONS
© 2011 UniNet Imaging Inc. All trademark names and artwork are property of their respective owners. Product brand names mentioned are intended to show compatibility only.
UniNet Imaging does not warrant downloaded information. Unauthorized sale, reproduction or distribution of this article is prohibited. For additional support, please contact [email protected]
www.uninetimaging.com

4. On the right side end cap, press in on the top tab and remove the end cap.
5. Separate the two halves slightly and lift off the middle top
cover.
XEROX WORKCENTRE 3210 •3220 TONER CARTRIDGE REMANUFACTURING INSTRUCTIONS
© 2011 UniNet Imaging Inc. All trademark names and artwork are property of their respective owners. Product brand names mentioned are intended to show compatibility only.
UniNet Imaging does not warrant downloaded information. Unauthorized sale, reproduction or distribution of this article is prohibited. For additional support, please contact [email protected]
www.uninetimaging.com

6. Lift up on the drum/waste hopper and remove.
If the drum axle came loose, be careful to hold the drum so it does not become damaged.
Remove the drum/waste assembly.
7. Remove the drum axle from the large gear side of the waste assembly.
Remove the drum.
XEROX WORKCENTRE 3210 •3220 TONER CARTRIDGE REMANUFACTURING INSTRUCTIONS
© 2011 UniNet Imaging Inc. All trademark names and artwork are property of their respective owners. Product brand names mentioned are intended to show compatibility only.
UniNet Imaging does not warrant downloaded information. Unauthorized sale, reproduction or distribution of this article is prohibited. For additional support, please contact [email protected]
www.uninetimaging.com

8. Remove the PCR from the assembly. 9. Remove the PCR cleaning roller. Clean the PCR with your
normal PCR cleaner.
WARNING: Do not clean the OEM PCR with alcohol, as this will
remove the conductive coating from the roller. If the PCR is an
aftermarket, follow the cleaning methods recommended by
the manufacturer. If the PCR is an OEM, we recommend it be
cleaned with your standard PCR cleaner.
10. Remove both the PCR holders by pressing in on the tabs at the bottom of the holder.
These holders need to be removed to allow access to the wiper blade.
XEROX WORKCENTRE 3210 •3220 TONER CARTRIDGE REMANUFACTURING INSTRUCTIONS
© 2011 UniNet Imaging Inc. All trademark names and artwork are property of their respective owners. Product brand names mentioned are intended to show compatibility only.
UniNet Imaging does not warrant downloaded information. Unauthorized sale, reproduction or distribution of this article is prohibited. For additional support, please contact [email protected]
www.uninetimaging.com

11. Remove the two screws from the wiper blade.
Remove the blade.
12. Clean out all the waste toner from the hopper.
Make sure the seal are clean.
13. Install the cleaned or new wiper blade and two screws. 14. Install the two PCR holders.
XEROX WORKCENTRE 3210 •3220 TONER CARTRIDGE REMANUFACTURING INSTRUCTIONS
© 2011 UniNet Imaging Inc. All trademark names and artwork are property of their respective owners. Product brand names mentioned are intended to show compatibility only.
UniNet Imaging does not warrant downloaded information. Unauthorized sale, reproduction or distribution of this article is prohibited. For additional support, please contact [email protected]
www.uninetimaging.com

15. Blow off or vacuum the PCR cleaning roller.
Install in the waste hopper.
16. Place a small amount of conductive grease in the holders
and install the PCR.
17. The large gear side of the drum axle shaft has conductive
grease on it. Regardless of whether you are replacing the drum
or not, clean the old grease off and replace with new.
18. Install the drum and axle from the small gear side of the
drum into the waste hopper. Make sure the keyed end of the
shaft is on the large gear side.
XEROX WORKCENTRE 3210 •3220 TONER CARTRIDGE REMANUFACTURING INSTRUCTIONS
© 2011 UniNet Imaging Inc. All trademark names and artwork are property of their respective owners. Product brand names mentioned are intended to show compatibility only.
UniNet Imaging does not warrant downloaded information. Unauthorized sale, reproduction or distribution of this article is prohibited. For additional support, please contact [email protected]
www.uninetimaging.com

19. On the supply hopper, carefully pry out the fill plug and
dump out any remaining toner. The fill plug can be difficult to
remove as it is recessed. Take a small common screwdriver
and work it around the edge lifting slightly until it comes loose.
20. Remove the developer roller.
21. Remove the two screws from the doctor blade, remove the
blade. Clean out all the remaining toner from the hopper.
22. Make sure the doctor blade sealing foam and the
developer roller seals are clean and intact.
XEROX WORKCENTRE 3210 •3220 TONER CARTRIDGE REMANUFACTURING INSTRUCTIONS
© 2011 UniNet Imaging Inc. All trademark names and artwork are property of their respective owners. Product brand names mentioned are intended to show compatibility only.
UniNet Imaging does not warrant downloaded information. Unauthorized sale, reproduction or distribution of this article is prohibited. For additional support, please contact [email protected]
www.uninetimaging.com

23. Clean the doctor blade edge so there is no evidence of
build up along the edge. If any buildup exists, the cartridge will
streak. No chemicals should be used. We have found using a
clean ice cream type wooden stick works great for scraping the
blade clean without damaging it.
24. Install the doctor blade and two screws.
25. Clean the developer roller with a dedicated DVR cleaner
and replace into the hopper.
26. Fill the hopper with toner for use in Xerox
WorkCentre 3210. Replace the fill plug and check for leaks.
XEROX WORKCENTRE 3210 •3220 TONER CARTRIDGE REMANUFACTURING INSTRUCTIONS
© 2011 UniNet Imaging Inc. All trademark names and artwork are property of their respective owners. Product brand names mentioned are intended to show compatibility only.
UniNet Imaging does not warrant downloaded information. Unauthorized sale, reproduction or distribution of this article is prohibited. For additional support, please contact [email protected]
www.uninetimaging.com

27. Fit both sides of the waste hopper tabs into the toner
hopper.
28. Slide the middle top cover/PCR assembly into place.
Make sure all the middle tabs fit under the edge of the waste hopper.
XEROX WORKCENTRE 3210 •3220 TONER CARTRIDGE REMANUFACTURING INSTRUCTIONS
© 2011 UniNet Imaging Inc. All trademark names and artwork are property of their respective owners. Product brand names mentioned are intended to show compatibility only.
UniNet Imaging does not warrant downloaded information. Unauthorized sale, reproduction or distribution of this article is prohibited. For additional support, please contact [email protected]
www.uninetimaging.com

29. Clean the contacts on the left side end cap, and replace the conductive grease.
Align the drum axle keyed end so it will fit into the keyed slot of the end cap.
Snap the end cap into place.
30. Install the three screws into the end cap.
XEROX WORKCENTRE 3210 •3220 TONER CARTRIDGE REMANUFACTURING INSTRUCTIONS
© 2011 UniNet Imaging Inc. All trademark names and artwork are property of their respective owners. Product brand names mentioned are intended to show compatibility only.
UniNet Imaging does not warrant downloaded information. Unauthorized sale, reproduction or distribution of this article is prohibited. For additional support, please contact [email protected]
www.uninetimaging.com

31. Clean the contacts on the right side end cap and replace the conductive grease.
Snap the end cap into place and replace the three screws.
32. To replace the chip, drill out the two plastic rivets with a
small drill. Remove the cover and chip.
XEROX WORKCENTRE 3210 •3220 TONER CARTRIDGE REMANUFACTURING INSTRUCTIONS
© 2011 UniNet Imaging Inc. All trademark names and artwork are property of their respective owners. Product brand names mentioned are intended to show compatibility only.
UniNet Imaging does not warrant downloaded information. Unauthorized sale, reproduction or distribution of this article is prohibited. For additional support, please contact [email protected]
www.uninetimaging.com

33. Install the new chip and cover.
Insert the two small screws that correspond to the holes drilled to hold everything in place.
REPETITIVE DEFECT CHART
Upper heat roller: 77.6 mm
OPC drum: 75.5 mm
Lower pressure roller (1st): 62.8 mm
Lower pressure roller (2nd): 37.7 mm
Supply roller: 47.1 mm
Transfer roller: 47.0 mm
Developer roller: 35.2 mm
PCR: 26.7 mm
XEROX WORKCENTRE 3210 •3220 TONER CARTRIDGE REMANUFACTURING INSTRUCTIONS
© 2011 UniNet Imaging Inc. All trademark names and artwork are property of their respective owners. Product brand names mentioned are intended to show compatibility only.
UniNet Imaging does not warrant downloaded information. Unauthorized sale, reproduction or distribution of this article is prohibited. For additional support, please contact [email protected]
www.uninetimaging.com
This manual suits for next models
1
Table of contents
Other Uninet Printer Accessories manuals

Uninet
Uninet KONICA 4600 Sreies User manual

Uninet
Uninet OKIDATA B6300 Installation and maintenance instructions

Uninet
Uninet XEROX WORKCENTRE PE120 Installation and maintenance instructions

Uninet
Uninet OKIDATA C9000 User manual

Uninet
Uninet Dell 5130 Series User manual

Uninet
Uninet LEXMARK C520 Installation and maintenance instructions

Uninet
Uninet OKIDATA C9600 Series User manual

Uninet
Uninet LEXMARK C520 Installation and maintenance instructions