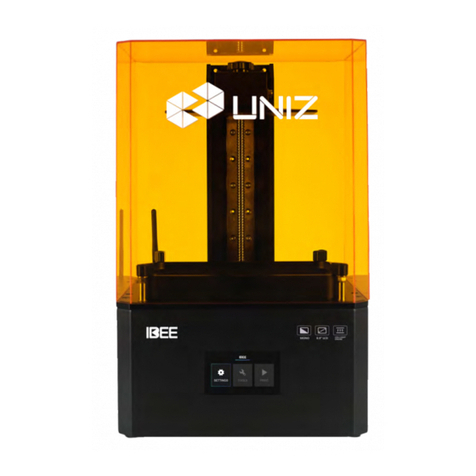
Uniz SLASH 2 User manual

USER
MANUAL
UNIZ DESKTOP PRINTER
APPLICABLE TO
SLASH 2


DISCLAIMER
Please read and understand the contents of this installation and user manual.
Failure to read the manual may lead to personal injury, inferior results or damage to the
SLASH 2 printers. Always make sure that anyone who uses the 3D printer knows and
understands the contents of the manual to make the most out of the SLASH 2 printer.
The conditions or methods used for assembling, handling, storage, use or disposal of the device are beyond
our control and may be beyond our knowledge. For this and other reasons, we do not assume responsibility
and expressly disclaim liability for loss, injuries, damage, or expense arising out of or in any way connected
with the assembly, handling, storage, use or disposal of the product. The information in this document was
obtained from sources which we believe are reliable. However, the information is provided without any
warranty, express or implied, regarding its correctness.
Intended use
SLASH Series 3D printers are designed and built for liquid crystal display (LCD) based on Stereo lithography
Appearance (SLA) modeling for various high quality photopolymer resins within a commercial/business
environment. The combination of precision and speed makes the SLASH 2 3D printers the perfect machines
for concept models, functional prototypes and also the production of small series.
UNIZ does not warrant that the operation of the Hardware Product will be uninterrupted or error-free. UNIZ is
not responsible for damage arising from failure to follow instructions relating to the Hardware Product's use.
UNIZs warranty does not apply: a) to damage caused by use with non-UNIZ products including third-party
resins; b) to damage caused by accident, abuse, misuse, flood, fire, earthquake, or other external causes; c)
to damage caused by operating the Hardware Product outside the permitted or intended uses described by
UNIZ; d) to damage caused by service (including upgrades and expansions) performed by anyone who is not
a representative of UNIZ; e) to a Hardware Product or part that has been modified to alter functionality or
capability without the written permission of UNIZ; f) to consumable parts, unless damage has occurred due
to a defect in materials or workmanship; g) to cosmetic damage, including but not limited to scratches, dents;
or h) if any UNIZ serial number has been removed or defaced. THIS WARRANTY GIVES YOU SPECIFIC
LEGAL RIGHTS, AND YOU MAY ALSO HAVE OTHER RIGHTS WHICH VARY FROM STATE TO STATE
OR COUNTRY TO COUNTRY. UNIZ's RESPONSIBILITY FOR HARDWARE DEFECTS IS LIMITED TO
REPAIR OR REPLACEMENT SERVICE AS DETERMINED BY UNIZ IN ITS SOLE DISCRETION.


TABLE OF CONTENTS
A SLASH 2 3D PRINTER .............................................................................................................. 1
MEET THE PRINTER......................................................................................................................................................1
PACKING LIST ..............................................................................................................................................................5
SPECIFICATIONS ..........................................................................................................................................................6
B GET STARTED......................................................................................................................... 7
UNBOXING ..................................................................................................................................................................7
SOFTWARE PREPARATION...........................................................................................................................................8
C PRINTER ACTIVATE AND UPGRADE......................................................................................... 9
PRINTER NETWORK SETUP ..........................................................................................................................................9
ACTIVATE THE PRINTER .............................................................................................................................................12
UPDATE THE FIRMWARE ...........................................................................................................................................13
D UNIZ SOFTWARE...................................................................................................................15
INTRODUCTION TO UNIZ DESKTOP............................................................................................................................15
PREPARE PRINT FILE ..................................................................................................................................................23
PRINTER CONTROL ....................................................................................................................................................39
ADDITIONAL TOOLS...................................................................................................................................................47
EMAINTENANCE .....................................................................................................................51
PRINTER PLACEMENT AND LEVELING ........................................................................................................................51
BUILD PLATFORM AND RESIN TANK ..........................................................................................................................52
CHANGE LCD PROTECTIVE FILM.................................................................................................................................59
Z-AXIS COMPENSATION.............................................................................................................................................61
RESIN LEVEL CONTROL SYSTEM .................................................................................................................................62
CHANGE BOTTOM FILTER ..........................................................................................................................................68
RELEASE PRESSURE IN COOLING SYSTEM ..................................................................................................................69
FHELP AND SUPPORT ..............................................................................................................72
G CERTIFICATE .........................................................................................................................78


1
ASLASH 2 3D PRINTER
ASLASH 23D PRINTER
This user manual is designed to help you start your SLASH 2 printer experience. Learn everything
about using your 3d printer by following the instructions in this user manual and experience how
easy it is to produce great quality prints.
You might be familiar with other types of 3D printers. Regardless, it is still essential that you read
this manual carefully in order to make the most out of your 3d printer.
MEET THE PRINTER

2
ASLASH 2 3D PRINTER

3
ASLASH 2 3D PRINTER
SLASH 2 3D PRINTING SYSTEM

4
ASLASH 2 3D PRINTER
FRONT BUTTON COLOR GUIDE

5
ASLASH 2 3D PRINTER
PACKING LIST
NO.
DESCRIPTION
QTY
1
SLASH 2 3D Printer
1
2
Power Brick
1
3
Power Cable
1
4
USB cable
1
5
Bottom Filter
4
6
Scrapping Card
5
7
Sand Paper
1
8
Protective Film
5
9
Shovel
1
10
Resin Bottle
1
11
Clean Bottle
1
12
Open Spanner-17mm
1
13
Hexagon Wrench M3
1
14
Injector
1
15
Cross Screwdriver
1
16
Warranty Card
1
17
MSDS
1
18
Quick Guide
1
19
User Manual
1
20
Detail Packing List
1
21
Sample Piece
1

6
ASLASH 2 3D PRINTER
SPECIFICATIONS
SLASH 2
PRINTING
HARDWARE
100-240V 6A 50/60Hz
-
DESKTOP
SOFTWARE
-
-
-
-
MOBILE
APPS
*Maximum accuracy only achievable at integer multiples of smallest pixel sizes.

7
B GET STARTED
BGET STARTED
Now your SLASH 2
your printer and set it up according to the following instructions.
UNBOXING
The SLASH 2 comes in reusable, durable packaging that has been specially designed to protect
your printer in transport. To properly unpack your printer, please follow the steps described below.
START UNBOXING
Start unpacking by correctly orienting the cardboard box, and then slide the foam packaging out of
the box by pulling the cardboard handle beneath the printer while holding the box.
You can scan the QR code to get the SN number of your printer.

8
BGET STARTED
OPEN IT UP
On the foam packaging, you will find the Quick Start Guide and accessories.
REMOVE THE FOAM PACKAGING
On the top foam part, you will find all accessories of your SLASH 2. Take these out and put them
aside. Open up the package by removing the foam wrap at the middle. Now you may take out the
printer and place it on your desk. Make sure you hold it by the aluminum casing while carrying it.
REMOVING PROTECTION WRAP
Remove the protection wrap around the machine and your SLASH 2 is ready to use!
SOFTWARE PREPARATION
Open web browser, open https://www.uniz.com/software.
Choose the software according to your corresponding system and download.
INSTALLATION
Windows
UNIZ Desktop supports Windows 7 and above. Please use the following steps:
1. Double click the installation program.
2. Check the user agreement, and then follow the prompts to finish the installation.
Mac
UNIZ Desktop supports Mac OS X 10.7 and above. Please use the following steps:
1. Double click the installation program.
2. Agree to the user agreement.
3. Drag UNIZ to your Applications folder.
Note: Once your computer is connected to the Internet, UNIZ Desktop will detect new versions
automatically and prompt whether you wish to update.

9
C PRINTER ACTIVATE AND UPGRADE
CPRINTER ACTIVATE AND UPGRADE
In order to start printing, a few extra steps are necessary. Please follow the instruction to activate
your printer and keep its software and firmware up-to-date.
PRINTER NETWORK SETUP
The printer must be connected to the Internet before activation and updating the firmware.
Method1: Set on the UNIZ Desktop
1. Plug into a power supply and switch on the printer.
2. Connect the printer and PC via USB and start the software.
3. Select the Control interface in the software.
4. Select the SLASH 2 type in the printer list and click .
5. View network status.
Press the Printer Settingsbutton to open the
submenu. The first item is the Network which shows
the connection status.

10
C PRINTER ACTIVATE AND UPGRADE
·Disconnected icon means the printer is not connected to any wireless network.
·Wi-Fi icon with Wi-Fi name shows the printer is connected to this wireless network.
·Ethernet Disconnected shows the printer is not connected to Ethernet.
·Ethernet Connected shows the printer is connected to Ethernet.
6. Set up the network
This function only supports setting via USB connection.
-Fi list will pop up in the left if it is Wi-Fi connection;
Click the Wi-Fi name on Wi-Fi list configure the IP address settings.
In the box you may enter password and obtain IP address automatically or set fixed IP
address manually.
In the box you may obtain IP address automatically or set fixed IP address manually.

11
C PRINTER ACTIVATE AND UPGRADE
Method2: Using web page Settings
1. Plug into a power supply and switch on the printer. Connect to the printer's Wi-Fi hot spot.
a. Find the SSID and Password on the S/N label.
b. Access the Wi-Fi Setting of your PC or mobile device, and connect to UNIZ3D##:##:##:##:##:##
as shown in the label.
2. Check and set the Network
a. Find IP address on the side label.
b. Open the browser on PC or mobile device and enter the IP address; open the printer page and
select the Networkoption.
c. Click Check Network to check if the printer is connected to your network.
d. If the printer is not connected to the Internet, please choose your home Wi-Fi hot spot, type in
the password and click the Connect button.
e. After the printer is connected to your home Wi-Fi hot spot and Internet, disconnect your PC or
mobile device from the printer Wi-Fi and reconnect to home or office network.

12
C PRINTER ACTIVATE AND UPGRADE
Tips: After setting up the connection, please make sure that PC or mobile device and printer are
connected to the same LAN to ensure that PC or mobile phone may control the printer through
the network.
ACTIVATE THE PRINTER
Before activation, make sure that the printer is powered on, connected to the network and login
your account. If you already registered an UNIZ account via www.uniz.com website, you may use it
to login UNIZ Desktop directly. If you do not have an account, please use https://www.uniz.com
/customer/account/create/ to register one.
Note: You can also use the printer to print normally without activation.
Method1: Activate from the UNIZ Desktop
1. Start the UNIZ Desktop and select the printer in the list to open the printer control interface.
2. Click the Printer Settingsbutton to open the submenu. The second option shows the activation
status.
•Inactivatedmeans activation is unsuccessful.
•Activatedmeans the printer is successfully activated.
3. Click the item to execute the activation function.
If the printer is inactivated, clicking this item will activate the printer and the system will bind the
printer to the currently logged-in user.
If the printer is activated, clicking this item will reactivate the printer and the system will bind the
printer to the logged-in account.
Method2: Activate from the UNIZ App
1. Click the Printerbutton in the main menu of App, find the printer that needs to be activated in
the list of printers, and open the printer control panel.
2. Click the Utilitiesbutton on the control interface to enter the setting interface. The third item
is the activation function, showing the activation status (Unactivatedor Activated).

13
C PRINTER ACTIVATE AND UPGRADE
3. Click Unactivated/ Activatedto activate/reactivate the printer with the current login account.
Method3: Activate from the webpage
1. Connect the PC or mobile device to the printers Wi-Fi and open the printer page in the browser.
2. Select the Activation tab in the printer page and input UNIZ account and password, then click
the Activate to complete the activation.
3. When activation is complete, disconnect the device from the hot spot connected to the printer
and reconnect to the home or work network.
UPDATE THE FIRMWARE
Before upgrading the firmware, make sure that the printer is powered on and is connected to the
internet.
Method1: Upgrade from the UNIZ Desktop
1. Launch the software and select the printer to open the printer control interfaced.
2. An icon will show next to the firmware version when there is a new version available. Click
the icon to start upgrading. Restart the printer when the upgrade is finished.

14
C PRINTER ACTIVATE AND UPGRADE
Method2: Upgrade from the UNIZ APP
1.Check the firmware version of the current printer Click Printerin the main menu of App, find
the printer that needs to be updated in the list of printers, open the printer control panel, click the
Utilitiesbutton, and you may see the current firmware version in the window.
2. Updating the firmware.
An icon Newwill show next to the firmware version when there is new version firmware available.
Click the icon to start upgrading. Restart the printer when the upgrade is finished.
Method3: Upgrade from the webpage
1. Connect the PC or mobile device to the printer Wi-Fi and open the printer page in the browser.
2. Select the Upgrade tab in the printer page and click Upgrade firmware to start the printer
firmware updated. Restart the printer after nearly 10 seconds when the upgrade is complete.
Table of contents
Other Uniz 3D Printer manuals