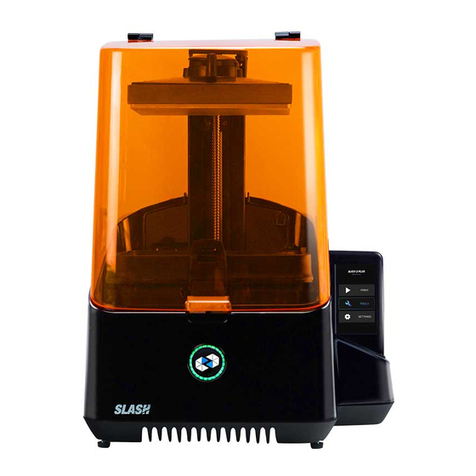
Uniz Slash OL User manual

UNIZ DESKTOP 3D PRINTER
USER
MANUAL
APPLICABLE TO
SLASH OL/SLASH PLUS/SLASH PLUS UDP
SLASH PRO OL/SLASH PRO/SLASH PRO UDP
SLASH J UDP/SLASH DJ2

DISCLAIMER
lease read and understand the contents of this user manual carefully. Failure to read
the manual may lead to personal injury, inferior results or damage to the SLASH. All
users who operate the Slash are expected to understand the contents of the manual
in order to operate the device smoothly, efficiently and safely.
The conditions or methods used for assembling, handling, storage, use or disposal of the
device are beyond the control of UNIZ Technology LLC. For this and other reasons, UNIZ does
not assume responsibility and expressly disclaim liability for loss, injuries, damage, or expense
arising out of or in any way connected with the assembly, handling, storage, use or disposal of
the product.
The information in this document was obtained from sources which we believe are reliable.
However, the information is provided without any warranty, express or implied, regarding its
correctness.
P
UNIZ DESKTOP 3D PRINTER
USER
MANUAL
APPLICABLE TO
SLASH OL/SLASH PLUS/SLASH PLUS UDP
SLASH PRO OL/SLASH PRO/SLASH PRO UDP
SLASH J UDP/SLASH DJ2

CONTENTS
A
B
C
D
E
F
G
WELCOME
SETTING UP YOUR PRINTER
UNIZ SOFTWARE USER
MANUAL
DESIGN RULES
TROUBLE SHOOTING
ROHS AUTHENTICATION
APPENDIX
SLASH SERIES 3D PRINTER DESIGN RULE
TROUBLE SHOOTING
ROHS AUTHENTICATION
TECHNICAL SPECIFICATIONS
UNBOXING
PRODUCT DESCRIPTION
SLASH PRINTER TYPES
ACTION BUTTON COLOR GUIDE
PRINTER ACTIVATE AND UPGRADE
SOFTWARE INTERFACE
START YOUR FIRST PRINTING JOB
ADDITIONAL TOOLS
·····················01
·····························34
·······································33
························42
··················43
··························17
··········19
·······························32
···········································02
························04
·············07
····························06
·········18

01
AWELCOME
his user manual is designed to help you start your SLASH series 3D printer
experience. Learn everything about using your SLASH 3D printer by following
the instructions in this user manual and experience how easy it is to produce
great quality prints.
You might be familiar with other types of 3D printers. Regardless, it is still essential
that you read this manual carefully in order to make the most out of your SLASH
printer.
T
SLASH SERIES 3D PRINTER
Federal
Communications
Commission
Conformite
Europeenne

02
BSETTING UP YOUR
PRINTER
UNBOXING
UNBOXING
START UNBOXING
REMOVE THE FOAM PACKAGING
REMOVING PROTECTION
The SLASH comes in reusable, durable packaging that has been specially designed to protect your
SLASH in transport. To properly unpack your SLASH, please follow the steps described below.
Start unpacking by correctly orienting the cardboard box, then slide the foam packaging out of the
box by pulling the cardboard handle beneath the printer while holding the box.
On the foam packaging, you will find the Quick Start Guide and accessories.
In the foam part on top of your SLASH, you will find all accessories of your SLASH. Take these out
and put them aside. Open up the package by removing the foam wrap at the middle. Now you can
take out the SLASH and place it on your desk. Make sure you hold the SLASH by the aluminium
casing while carrying it.
There is some packaging material around the machine. You may remove it.Then, your SLASH is
ready for use!
OPEN IT UP

03
A . UNIZ Desktop 3D Printer
B . Power Adapter x 2
C . Power Cable x 2
D . USB Cable
E . Resin Tank
F . Building Platform
G . Resin Bottle
H . Power Combiner
I . Cleaning Bottle
Supplied with your package is the UNIZ desktop 3D printer and several other accessories. This is
everything you need to start printing. Check if all accessories are included before continuing.
PACKING LIST

04
PRODUCT DESCRIPTION

05

06
SLASH PRINTER TYPES
You can identify the printer’s type by checking the label
underneath the printer and on the box.

07
ACTION BUTTON COLOR GUIDE
Breathing red
Printer busy (starting up/paused/z axis moving)
Progressing blue
Data transfer in progress
Green
STANDBY-The printer is connected and waits for a command.
Breathing green
Data transferred, waiting for touch confirmation.
Progressing green
Printing in progress-The lights indicate completed progress.

08
PRINTER ACTIVATE AND UPGRADE
1. Printer Network
Method 1: UNIZ Desktop
Check if the printer is connected to the Internet and set up for the printer connection.
1. Plug into a power supply and switch on the printer.
2. Connect the printer and PC via USB and start the software.
3. Select the printer in the list to open the printer control interface.
4. View network status
Press the “Printer Settings” button open the submenu. The first item is
the Network which shows the connection status.
●Wi-Fi Disconnected means the current Wi-Fi is not connected and needs to be
configued.
●Wi-Fi Name means the current Wi-Fi is connected.
●Ethernet Disconnected means the current Ethernet is not connected and needs to be
configured
●Ethernet Connected means the current Ethernet is connected.
Note: The Printer's Wi-Fi feature supports 2.4GHz band only, it does not support 5 GHz connections.

09
In the box you can enter password and obtain IP address automatically or set fixed IP
address manually.
In the box you can obtain IP address automatically or set fixed IP address manually.
5. Set up the network
This function only supports setting via USB connection.
Click the Wi-Fi name on Wi-Fi list configure the IP address settings.
●Click the first item. The Wi-Fi list will pop up in the left if it is Wi-Fi connection;
●Click the first item. The IP address settings should pop up if you are connected via Ethernet.
(software should be 1.2.0 or higher version and firmware should be 4.1 or higher version).

10
Method webpage·
1. Plug into a power supply and switch on the printer.
2. Connect to the printer's Wi-Fi hotspot.
a. Find the SSID and Password on the side label.
b. Access the Wi-Fi Setting of your mobile device, and connect to
UNIZ3D##:##:##:##:##:## as shown in the SSID.
3. Check and Set Network.
a. Find IP address on the side label.
b. Open the browser on PC or mobile device and enter the IP address; open the printer page
and select the "Network" option.

11
c. Click Check Network to check if the printer is connected to your network.
d. If the printer is not connected to the Internet, please choose your home Wi-Fi hotspot, type in
the password and click the Connect button.
e. After the printer is connected to your home Wi-Fi hotspot and Internet, disconnect your PC or
mobile device from the printer Wi-Fi and reconnect to home or office network.
Tips: After setting up the connection, please make sure that PC or mobile device and printer are
connected to the same LAN to ensure that PC or mobile phone can control the printer through
the network.
2. Activate the printer
Before activation, make sure that the printer is powered on and connected to the network. Slash OL
or SLASH PRO OL models must be activated before printing. After successful activation, the printer
will automatically launch a seven-day trial period in which the SLASH OL/PRO OL will become and
function as a SLASH PLUS UDP/SLASH PRO UDP.
Method 1: UNIZ Desktop
Method 2: UNIZ App
a. Start the UNIZ Desktop and select the printer in the list to open the printer control interface
b. Click the “Printer Settings” button to open the submenu. The second option shows the activation
status
Printer activation is supported by UNIZ App of 1.2.0 or higher.
a. Click the "Printer" button in the main menu of App, find the
printer that needs to be activated in the list of printers, and
open the printer control panel.
b. Click the "Utilities" button on the control interface to enter
the setting interface. The third item is the activation function,
showing the activation status ("Inactivated "or" Activated ").
c. Click “Inactivated”/ “Activated” to activate/reactivate the
printer with the current login account.
c. Click the item to execute the activation function.
If the printer is inactivated, clicking this item will activate the
printer and the system will bind the printer to the currently
logged-in user.

12
Method 3: Activate from the webpage
a. Connect the PC or mobile device to the printer’s Wi-Fi and open the printer page in the
browser.
b. Select the Activation tab in the printer page and input UNIZ account and password, then click
the Activate to complete the activation.
3. Updating the Firmwaret
Before upgrading the firmware, make sure that the printer is powered on and is connected to the
internet.
Method 1: Upgrade from the UNIZ Desktop
Method 2: Upgrade from the UNIZ App
a. Launch the software and select the printer to open the printer control interfacet.
b. An icon will show next to the firmware version when there is a new version available.
available. Click the icon to start upgrading. Restart the printer when the upgrade is finished.
(1) Check the firmware version of the current printer
Click "Printer" in the main menu of App, find the printer
that needs to be updated in the list of printers, open
the printer control panel, click the "Utilities" button,
and you can see the current firmware version in the
window.
(2) Updating the firmware
An icon “New” will show next to the firmware version
when there is new version firmware available. Click the
icon to start upgrading. Restart the printer when the
upgrade is finished.
Network
Activation
Upgrade

13
4. Upgrading the Printer License
Before Upgrading the license, make sure that the printer is powered on and is connected to the
network.t
Software Requirements:
UNIZ APP 1.2 or higher
UNIZ Desktop 1.2 or higher
Printer Firmware 4.0 or higher
SLASH OL and SLASH PRO OL support license upgrades. The printer type will change as follows:
SLASH OL-> SLASH PLUS UDP
SLASH PRO-> SLASH PRO UDP
(1) You can purchase license upgrades from the online store by visiting official website https://
www.uniz.com.
(2) Click My Printer in the left menu of the Dashboard from the website to show the activated
printers under the current username and choose the one that needs to be upgraded. Select the
purchased license in the Upgrade License list and click Upgrade to complete the process.
Method 4: Upgrade from the webpage
a. Connect the PC or mobile device to the printer Wi-Fi and open the printer page in the browser.
b. Select the Upgrade tab in the printer page and click Upgrade firmware to start the printer
firmware updated. Restart the printer after the upgrade is complete.
Network
Activation
Upgrade

14
Tips: The printer will be shown only when activated with the current account.
(3)License upgrades can be executed in the UNIZ App or
the UNIZ Desktop printer control interface.
●UNIZ Desktop
a. From the ‘connected printers menu’ in the top right,
select the printer in the list of printers, and open the
printer control interface.
b. Click the "Upgrade License" button below
If the user has not purchased the license or if the printer
and the license have not been bound, the system will
display a notification that directs to the purchasing
webpage.
If the printer and the license have been bound, the system
will start the upgrading process.
Please restart the printer manually after the upgrade is
complete. The printer model should change upon the next
power up.
●UNIZ App
a. Click the "Printer" button in the main menu the app,
select the corresponding printer in the list of printers, open
the printer details control panel, click the "Utilities" button,
and the “Upgrade License” option can be seen in the
window.
b. Click the “Upgrade License” option
If the user has not purchased the license or if the printer
and the license have not been bound, the system will link to
the corresponding license purchasing webpage or remind
the user to go Dashboard for binding;
If the printer and the license have been bound, the system
will start the upgrading.
Please restart the printer manually after upgrade is
complete and the printer model will shift into the
upgraded model.

15
5. Trial and Trial Expiration
SLASH OL and SLASH PRO OL models automatically get a seven-day free trial with SLASH PLUS UDP
or SLASH PRO UDP models after successful activation.
In trial
During the trial period, check whether the printer is connected to the Internet and whether the
resin bottle information is normal before printing.
During the trial period, the trial status will be shown under the firmware version in the printer
control panel (ln use/Expired).
On the left is the Desktop printer control interface, and on the right is the App printer control
interface.

16
(2) Click “OK” and the printer will perform the printer reset operation. After the reset operation is
completed, the system will prompt as below.
(3) After the next restart, the printer will be restored to its original model.
(1) If the trial period has expired, the system will pop up the dialog box as shown below after
opening software control panel or clicking “Starting Print”.
Trial Expiration

17
1. Software Interface
Open UNIZ Desktop and click Control button to show the 3D model viewer.
1.1 Viewer
CUNIZ SOFTWARE USER
MANUAL
This manual suits for next models
8
Table of contents
Other Uniz 3D Printer manuals