US Robotics MAXg User manual

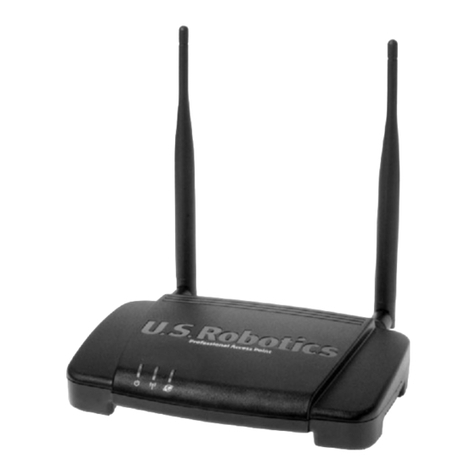
Wireless MAXg Access Point
Quick Installation Guide
Guide d'installation rapide
Installationsanleitung
Guida per l'installazione rapida
Guía breve de instalación
Beknopte Installatiegids
HõzlõKurulum Kõlavuzu
Οδηγός γρήγορης εγκατάστασης
Pokyny k instalaci naleznete v uživatelské prírucce na instalacním disku CD-ROM.
A telepítési utasításokat lásd a telepíto CD-ROM Felhasználói kézikönyvében.
Instrukcja instalacji jest dostepna w podreczniku uzytkownika na dysku instalacyjnym CD-ROM.
Installationsanvisningar finns i användarhandboken på installationsskivan.
#R24.0724.00
rev 0.4 08/07


Contents
English . . . . . . . . . . . . . . . . . . . . . . . . . . . . . . . . . . . . . . 3
Installation ............................................................................ 3
Connecting a Wireless Device ................................................... 8
Troubleshooting .....................................................................10
Additional Information ............................................................12
Français. . . . . . . . . . . . . . . . . . . . . . . . . . . . . . . . . . . . . 15
Installation ...........................................................................15
Connexion d'un périphérique sans fil ....................................... 20
Dépannage ........................................................................... 22
Informations complémentaires ................................................ 24
Deutsch . . . . . . . . . . . . . . . . . . . . . . . . . . . . . . . . . . . . . 27
Installation .......................................................................... 27
Anschließen eines Wireless-Geräts .......................................... 32
Fehlerbehebung .................................................................... 34
Weitere Informationen ........................................................... 36
Italiano . . . . . . . . . . . . . . . . . . . . . . . . . . . . . . . . . . . . . 39
Installazione ........................................................................ 39
Connessione di un dispositivo wireless .................................... 44
Risoluzione di problemi ......................................................... 46
Informazioni aggiuntive ......................................................... 48
Español . . . . . . . . . . . . . . . . . . . . . . . . . . . . . . . . . . . . . 51
Instalación ............................................................................51
Conexión de un dispositivo inalámbrico ................................... 56
Solución de problemas........................................................... 58
Información adicional ............................................................ 60
Nederlands . . . . . . . . . . . . . . . . . . . . . . . . . . . . . . . . . . 63
Installatie ............................................................................ 63
Draadloze apparatuur aansluiten ............................................ 68
Problemen oplossen .............................................................. 70
Aanvullende informatie .......................................................... 72
Türkçe . . . . . . . . . . . . . . . . . . . . . . . . . . . . . . . . . . 75
Kurulum ............................................................................ 75
Kablosuz bir Cihazõn Bağlanmasõ......................................... 80
Sorun Giderme ................................................................... 82
Ek Bilgiler ......................................................................... 84
Ελληνικά . . . . . . . . . . . . . . . . . . . . . . . . . . . . . . . . . 87
Εγκατάσταση ..................................................................... 87
Σύνδεση ασύρματης συσκευής ............................................. 92
Αντιμετώπιση προβλημάτων ................................................ 94
Πρόσθετες πληροφορίες ...................................................... 97
2
Support / Assistance / Servizio assistenza / Asistencia técnica / Destek /
Υποστήριξη . . . . . . . . . . . . . . . . . . . . . . . . . . . . . . . . . . . . . . . . . . . . . . . . . 99
Cesky
Pokyny k instalaci naleznete v uživatelské prírucce na instalacním disku CD-ROM.
Magyarország
A telepítési utasításokat lásd a telepíto CD-ROM Felhasználói kézikönyvében.
Polska
Instrukcja instalacji jest dostepna w podreczniku uzytkownika na dysku instalacyjnym CD-ROM.
Svenska
Installationsanvisningar finns i användarhandboken på installationsskivan.

English
3
English
Installation
English
Package Contents:
Physical Features
Front
The access point has the following status LEDs:
•WirelessMAXg Access Point • 9VDC power supply
• Quick Installation Guide • USRobotics Installation CD-ROM
• Ethernet cable • Detachable antenna
Symbol Name State Condition
Power
Off Not receiving power.
Solid Receiving power.
WLAN
(Wireless Net-
work)
Off Wireless connection is disabled.
Solid Wireless connection is enabled.
Flashing Sending and receiving data.
LAN
Off No LAN connection.
Solid LAN link is achieved.
Flashing Sending and receiving data.

4
English
Back
System Requirements
!A computer with an Ethernet adapter installed
!A router or other networking device with a DHCP server
!An Ethernet-based cable or DSL modem or other WAN connection for
Internet access
!Safari users: Safari 1.2 or later
All other users: An HTML 4.01-compliant Web browser with JavaScript ena-
bled
Installation Instructions
You must have administrator rights on your computer in order to install this
access point.
Step One: Connect the Access Point
1. Look at the label on the bottom of the access point and note its LAN MAC
address. You may need it to distinguish the access point from other devices
on your network.
LAN MAC Address: _________________________
Item Function
Connects an antenna to the access point.
LAN
Connects the access point to a networking device.
Reset
Reboots your access point or restores your access
point to its factory default settings.
!To reboot your access point without changing
your current settings, press and hold the Reset
button for 1 second.
!To restore your access point to the factory
default settings, press and hold the Reset button
for at least 10 seconds.
9VDC
Connects the power adapter to your access point.
9VDC
Reset
LAN

English
5
2. Connect the provided antenna to the access point if it is not already con-
nected.
3. Use the supplied Ethernet cable to connect the LAN port on the access point
to a LAN port on your networking device.
4. Supply power to the access point:
A. Connect the supplied power adapter to the 9VDC port on the access
point.
B. Plug the power adapter into a standard power outlet.
Step Two: Configure the Basic Settings
To configure the basic settings using an operating system other than Windows,
see the installation section in the User Guide on the USRobotics Installation CD-
ROM.
Note:
This product is intended to be supplied by a Listed Direct Plug-
in Power Unit marked Class 2 and rated 9VDC, 1.2A.
WAN
123415VDC
Reset
USB
Secure
Easy
Setup
Reset
5VDC
WAN
123415VDC
Reset
USB
Secure
Easy
Setup
Reset
5VDC

6
English
If you are using a Windows operating system, you can use the setup program on
the USRobotics Installation CD-ROM to install and run the Network Device
Locator and configure basic settings in one easy, continuous process:
1. Insert the USRobotics Installation CD-ROM in the CD or DVD drive.
If the CD doesn’t start automatically, start it manually as follows:
A. Windows Vista: Click Windows Start > Computer.
Windows XP: Click Windows Start > My Computer.
Windows 2000: On the desktop, double-click My Computer.
B. Double-click the CD drive.
2. If prompted, click Run autorun.exe. If prompted by User Account Control,
click Continue.
3. If prompted, select your preferred language. If asked to read the license
agreement, read the agreement and click Yes.
4. Click Setup and follow the on-screen instructions to install the locator.
When the locator is installed, it starts automatically:
5. Click Next.
6. If your computer has more than one network adapter, select the one that is
connected to the same network as the access point and click Next.

English
7
The locator lists the access point as well as any other USRobotics devices that
were found:
7. Select the device whose MAC address matches the LAN MAC address on
the bottom of the access point, and click Next.
The locator displays the IP address and LAN MAC address of the access
point. Note the IP address for later use.
8. Click Finish.
The locator starts the setup wizard for the access point.
9. In the setup wizard, follow the on-screen instructions to complete the initial
configuration of the access point.
For step-by-step instructions in using the wizard, see the User Guide on the
USRobotics Installation CD-ROM
10. The access point confirms initial configuration, click Continue.
11. If prompted, enter the user name and password that you created during the
initial configuration.
The access point displays its Status page. If you intend to connect wireless
devices to the access point manually, you will need the information on the
status page. Consider bookmarking the page for easy access to the required
information.

8
English
Congratulations. You have successfully completed the installation proce-
dure. You can verify your network connection by registering your Wireless
MAXg Access Point at
www.usr.com/productreg/
.
Connecting a Wireless Device
The Wireless MAXg Access Point supports Wi-Fi Protected Setup™ (WPS). If
your wireless device also supports WPS, you can use it to connect the device to
the access point. See the documentation for your wireless device to determine
whether it supports WPS. If it does not, follow the instructions in “Without Wi-
Fi Protected Setup” on page 9.
With Wi-Fi Protected Setup
1. Be ready to start WPS on your wireless device.
2. Log in to the configuration pages of the access point:
If you know the IP address of the access point, simply type it in your Web
browser's location or address line and press ENTER. If you do not know the
IP address of the access point, follow one of the procedures below to find it:
Using the Network Device Locator (Windows Users Only)
A. Windows Vista or XP: Click Windows Start > All Programs > USRo-
botics Network Device Locator.
All Other Windows Operating Systems: Click Windows Start > Pro-
grams > USRobotics Network Device Locator.
The locator displays its welcome screen.
B. Click Next.
The locator lists the access point as well as any other USRobotics devices
that were found:
C. Find the Wireless MAXg Access Point in the list. (If you have more than
one Wireless MAXg Access Point, find the device whose MAC address
matches the LAN MAC address on the bottom of the access point that
you are trying to access). Note the IP address associated with the LAN
MAC address of the access point.
D. Click Next.
Manually Finding the IP Address of the Access Point
A. Access the configuration program or configuration pages of the network-
ing device connected to the access point. For detailed instructions, con-
sult the documentation for the networking device.
B. Find the list of clients associated with the networking device.
C. On the client list, find the LAN MAC address of the access point.

English
9
D. Note of the IP address associated with the LAN MAC address of the
access point.
3. In the location or address line of your Web browser, enter the IP address of
the access point and press ENTER.
4. On the Status page, click the link “Add wireless device”.
5. Do one of the following:
"To connect a WPS device using a push button, click Find Device, then
push the WPS button on the device.
"To connect a WPS device using a PIN, enter the device's PIN and click
Add Device, then start WPS on the device.
The wireless device detects the security settings of the access point and cre-
ates a secure wireless connection to the network.
Without Wi-Fi Protected Setup
1. Ensure that the wireless device to be connected to the network is set to infra-
structure mode. For instruction in changing your device’s wireless mode, see
your wireless device’s documentation.
2. Set the network name or SSID in the wireless device’s settings to the network
name that is used on the access point. You can find the network name for the
access point on the Status page displayed when you log in to the configura-
tion pages (see step 2 on page 8).
3. Ensure that the wireless security settings for the wireless device match those
that you set on the access point. You can find the wireless security settings
for the access point on the Status page. For instruction in changing your
device’s wireless security settings, see your wireless device’s documentation.

10
English
Troubleshooting
General
This basic procedure addresses a number of symptoms that you might experi-
ence with your access point:
1. Verify that the power cord and the Ethernet cable are connected securely.
See the installation illustrations on page 4.
2. Ensure that the power outlet to which the access point is connected is a live
outlet.
3. Make sure that you are receiving power and that all 3 LEDs are lit.
4. For connectivity issues:
A. Turn off all of you networking devices. If a device does not have a power
switch, disconnect its power supply.
B. Starting with the device closest to your ISP connection and ending with
the access point, supply power to the networking devices, one at a time,
letting each device’s LEDs stabilise before supplying power to the next
one.
C. Restart your computer.
5. For wireless connections:
"Low link quality or range can be caused by environmental interference,
such as lead-based paint and concrete walls, or some electronic items,
such as 2.4GHz phones. Try moving the antenna of the access point or
repositioning the wireless device to improve the link quality.
"Verify that the following settings on the connected device match those of
the access point.
oMode (must be Infrastructure mode)
oNetwork name or SSID
oSecurity type and key or passphrase.
Refer to your wireless device’s documentation to determine how to change these
settings.
Specific Problems
If following the basic procedure above does not help solve your problem, find
the procedure below whose description best matches the symptom that you are
observing.

English
11
The Network Device Locator does not find the Wireless
MAX
g Access
Point
1. Click Detect to rescan the network.
2. If the locator still does not find the access point, look at the client list for the
networking device that is connected to the access point. Refer to the device’s
documentation to find out how to view the client list.
3. In the client list, find the MAC address shown on the bottom of the access
point and note the IP address associated with that MAC address. This is the
IP address of the access point.
4. Start a web browser, type the IP address of the access point, and press
ENTER.
5. Verify that the connection information is correct for the network to which
the access point is connected.
The Wireless
MAX
g Access Point does not appear when I scan for it with a
wireless device
The access point may not be broadcasting its network name. Ensure that the net-
work name is being broadcast as follows:
1. Using a computer connected to the same networking device as the access
point, start a Web browser.
2. Type the IP address of the access point, and press ENTER to display the
configuration pages of the access point. You can get the IP address from the
locator.
3. Click the Wireless tab and verify that Broadcast network name is selected.
If it is not selected, select it, scroll to the bottom of the Wireless page, and
click Save.
My wireless device is not communicating with the Wireless
MAX
g Access
Point
!The access point may not have received a valid IP address for your network.
If the IP address is set to Dynamic, make sure that the access point is con-
nected to a DHCP server. If you use a static IP address, verify that it is in the
same subnet as your wireless device’s IP address.
!The access point may not be responding. Try the following:
1. Reconnect by following the steps in “Connecting a Wireless Device” on
page 8.
2. If you still are not communicating with the access point, restore the fac-
tory default settings of the access point to reactivate it.
Note:When you restore the factory default settings, the access point
will lose all custom settings.

12
English
To restore the factory default settings, use a small object such as a paper
clip to press in and hold the reset button on the back of the access point
for 10 seconds.
After you restore the access point, reconfigure the access point by per-
forming “Step Two: Configure the Basic Settings” on page 5.
My wireless device does not establish a wireless connection to the
access point after I changed the settings
In the configuration utility for your wireless device:
1. Ensure that you are connecting to the Wireless MAXg Access Point by veri-
fying the WLAN MAC address.
2. Ensure that the same encryption options, and their passphrase or key, are
used on both the wireless device and the access point. If you change the set-
ting on the access point, you must also change the settings of every wireless
device that is intended to connect to the access point.
I cannot access the configuration pages
1. In your Web browser, make sure that you are entering the correct IP address
for the access point. If you are using a Windows operating system, you can
find the IP address by running the Network Device Locator. To run the util-
ity:
Windows Vista or XP: click Windows Start > All Programs > USRobotics
Network Device Locator and click Next.
Windows 2000: click Windows Start > Programs > USRobotics Network
Device Locator and click Next.
2. If you are trying to access the configuration pages wirelessly, try to access
them with a wired connection as follows:
A. Using a computer connected by Ethernet cable to the same networking
device as the access point, start a Web browser.
B. Enter the IP address of the access point and press enter.
If you can access the configuration pages with a wired connection, you
are experiencing a wireless connectivity issue. See step 5 under “General”
on page 10.
Additional Information
For regulatory and warranty information, see the User Guide on the
USRobotics Installation CD-ROM.
For operation and configuration information, see the User Guide on the
USRobotics Installation CD-ROM.
For troubleshooting and technical support, see:

English
13
1. The User Guide on the USRobotics Installation CD-ROM.
2. The Support section of the USRobotics Web site at
www.usr.com/support/.
Many of the most common difficulties that users experience have been
addressed in the FAQ and Troubleshooting Web pages for your access point.
The Support pages also contain current support contact information and
documentation.
3. The support contact information on the last page of this guide.

14
English

Français
15
Français
Installation
Français
Contenu de la boîte :
Caractéristiques matérielles
Face avant
Le point d'accès comporte les voyants de statut suivants :
•WirelessMAXg Access Point • Adaptateur secteur 9V
• Guide d'installation rapide • CD-ROM d'installation USRobotics
• Câble Ethernet • Antenne amovible
Symbole Nom Etat Condition
Alimentation
Eteint Hors tension.
Continu Sous tension.
WLAN
(réseau sans fil) Eteint La connexion sans fil est désactivée.
Continu La connexion sans fil est activée.
Clignotant Envoi ou réception de données.
LAN
Eteint Pas de connexion LAN.
Continu Connexion LAN établie.
Clignotant Envoi ou réception de données.

16
Français
Face arrière
Configuration minimale requise
!Un ordinateur équipé d'un adaptateur Ethernet
!Un routeur ou un autre périphérique réseau, avec un serveur DHCP
!Un modem câble Ethernet ou DSL, ou une connexion WAN pour l'accès à
Internet
!Utilisateurs Safari : Safari 1.2 ou version ultérieure
Autres utilisateurs : un navigateur Web compatible HTML 4.01 avec
activation Javascript
Instructions d'installation
Vous devez disposer de droits d'administrateur sur votre ordinateur afin
d'installer ce point d'accès.
Etape 1 : connexion du point d'accès
1. Lisez l'étiquette placée sous le point d'accès et notez l'adresse LAN MAC
de celui-ci. Vous devrez peut-être distinguer le point d'accès d'autres
périphériques présents sur votre réseau.
Adresse LAN MAC : _________________________
2. Connectez l'antenne fournie au point d'accès si elle n'est pas déjà connectée.
Elément Fonction
Connecte une antenne au point d'accès.
LAN
Connecte le point d'accès à un périphérique réseau.
Reset (Réinitialiser)
Redémarre votre point d'accès ou rétablit les réglages
d'usine par défaut de votre point d'accès.
!Pour redémarrer votre point d'accès sans
modifier vos paramètres actuels, appuyez sur le
bouton Reset (Réinitialiser) pendant 1 seconde.
!Pour rétablir les réglages d'usine de votre
point d'accès, appuyez sur le bouton Reset
(Réinitialiser) pendant au moins 10 secondes.
9VDC
Connecte l'adaptateur secteur à votre point d'accès.
9VDC
Reset
LAN

Français
17
3. Utilisez le câble Ethernet fourni pour connecter le port LAN du point
d'accès à un port LAN de votre périphérique réseau.
4. Mettre sous tension le point d'accès :
A. Branchez le bloc d'alimentation fourni dans la prise d'alimentation
(9VDC) du point d'accès.
B. Branchez l'autre extrémité dans une prise murale d'alimentation standard.
Etape 2 : configuration des paramètres de base
Pour configurer les paramètres de base avec un autre système d'exploitation que
Windows, reportez-vous à la section installation du Guide de l'utilisateur sur le CD-
ROM d'installation USRobotics.
Si vous utilisez un système d'exploitation Windows, vous pouvez utiliser le
programme d'installation du CD-ROM d'installation USRobotics pour installer
Remarque :
Ce produit doit être alimenté par un bloc d'alimentation
électrique à brancher agréé de 9 V ; 1,2 A.
WAN
123415VDC
Reset
USB
Secure
Easy
Setup
Reset
5VDC
WAN
123415VDC
Reset
USB
Secure
Easy
Setup
Reset
5VDC

18
Français
et exécuter le Network Device Locator et configurer des paramètres de base en
un même processus simple et continu :
1. Insérez le CD-ROM d'installation USRobotics dans le lecteur CD ou DVD.
Si le CD ne se lance pas automatiquement, démarrez-le manuellement
comme suit :
A. Windows Vista : cliquez sur Démarrer > Ordinateur.
Windows XP : cliquez sur Démarrer > Poste de travail.
Windows 2000 : à partir du bureau, double-cliquez sur Poste de travail.
B. Double-cliquez sur le lecteur de CD.
2. Si le programme vous le demande, cliquez sur Exécuter autorun.exe. Si le
contrôle de compte d'utilisateur vous le demande, cliquez sur Continuer.
3. Si le programme vous le demande, sélectionnez votre langue préférée. Si vous
êtes invité à consulter l'accord de licence, veuillez le lire et cliquer sur Yes
(Oui).
4. Cliquez sur Setup (Installer) et suivez les instructions à l'écran pour installer
le Locator.
Après avoir été installé, celui-ci démarre automatiquement :
5. Cliquez sur Next (Suivant).
6. Si votre ordinateur est équipé de plus d'un adaptateur réseau, sélectionnez
celui qui est connecté au même réseau que le point d'accès et cliquez sur
Next (Suivant).
Other manuals for MAXg
5
Table of contents
Languages:
Other US Robotics Wireless Access Point manuals

US Robotics
US Robotics USR5450 User manual

US Robotics
US Robotics USR8054 User manual

US Robotics
US Robotics USR2450 User manual

US Robotics
US Robotics USR2249 User manual

US Robotics
US Robotics USR2450 User manual

US Robotics
US Robotics Instant802 APSDK Service manual

US Robotics
US Robotics USR805453A User manual

US Robotics
US Robotics USR2450 User manual

US Robotics
US Robotics USR5450 User manual

US Robotics
US Robotics USR5453 User manual