7
Look foward to it.
Assembly / preparation
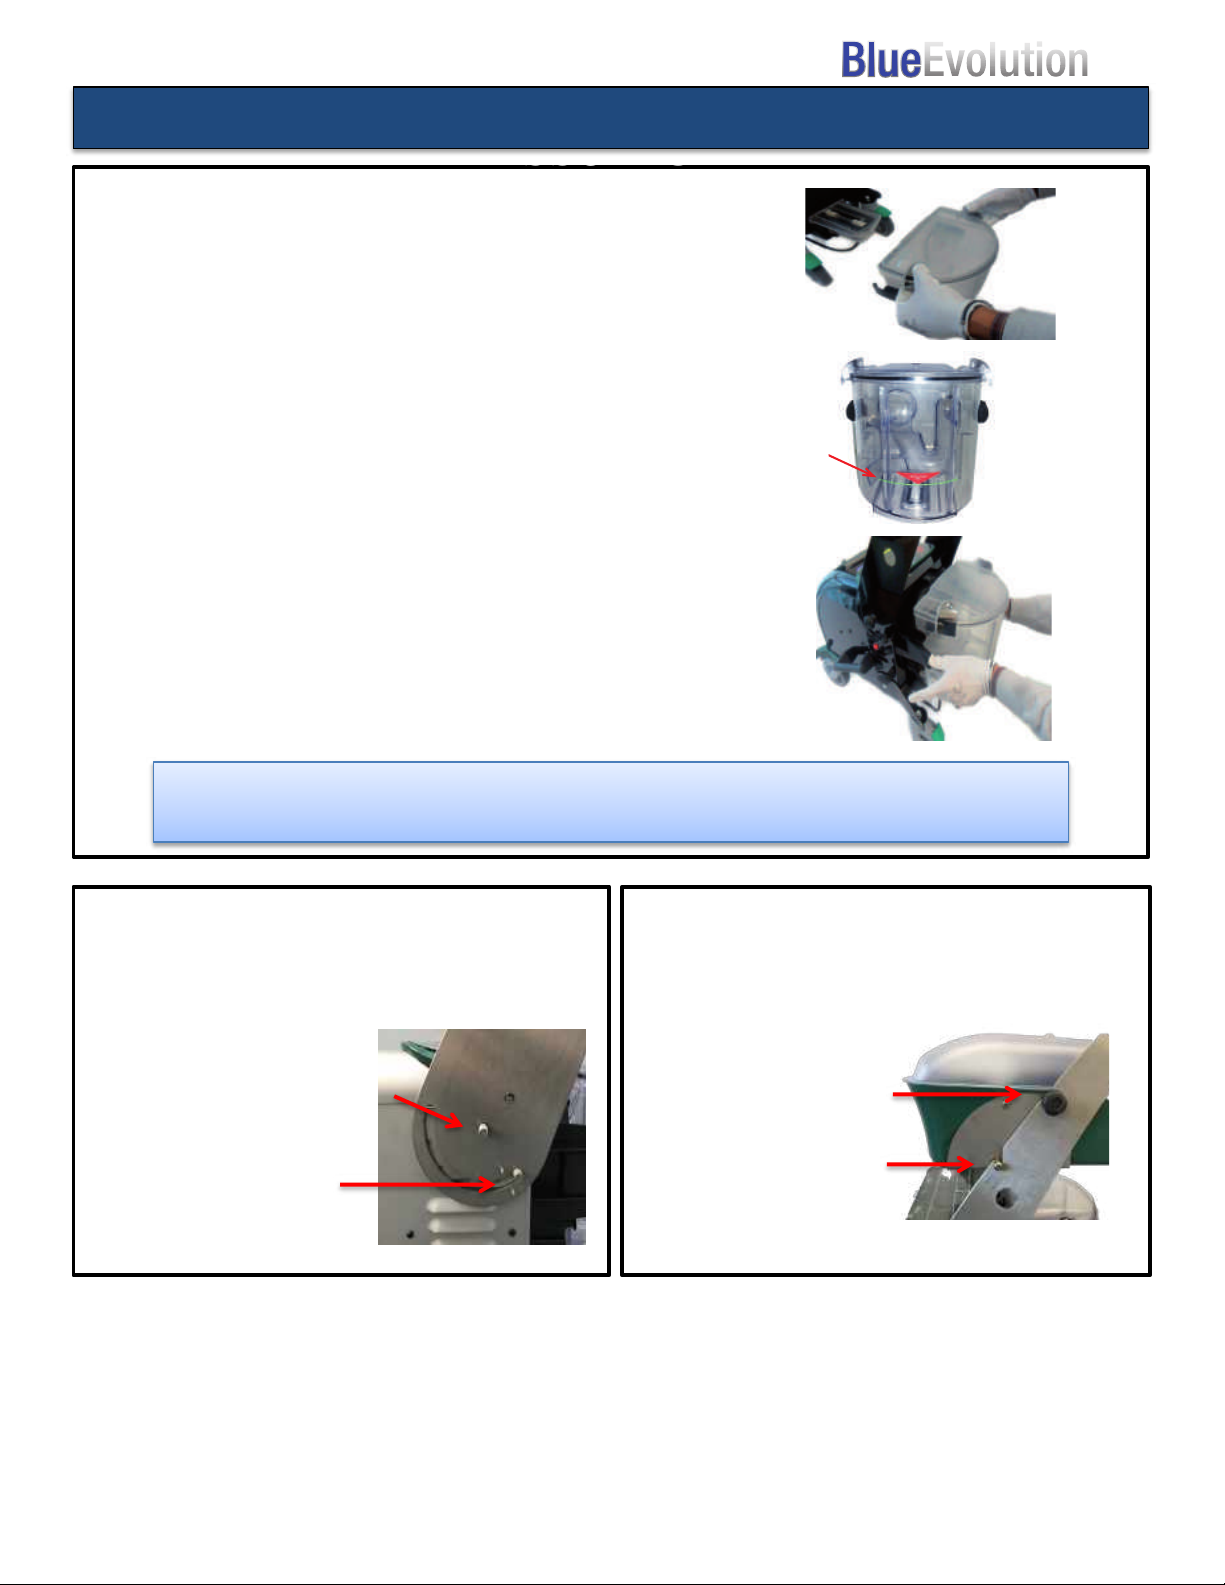
Filling the filter bowl
Your appliance is fitted with a hygienic water filter. You must
fill the filter bowl with water before starting, in order to bind
the extracted dirt in the water and to clean the suctioned air
in the water bath as well.
• Loosen the clips on the right and left of the filter bowl and
remove from its slot.
• Open the cover on the filter bowl by pushing off the rele-
vant clips.
• Fill with tap
water
up to the
green line
(approx.
2.0 litres).
• Re-insert the filter bowl, ensuring the switch cam on the
cover is in the correct position.
WARNING:
The appliance can suck in up to approx. 1.5 litres of liquid.
If you exceed this amount, the fill level sensor will stop suc-
tion automatically and LED D (page 2) on the display will
flash.
INFO:
If you only wish to suction liquid, such as accidental water
spills, it is not necessary to fill the appliance's filter bowl with
water.
When sucking liquids, the MAX. capacity in the container is
approx. 4 litres.
Inserting the steam suction hose
• Insert the connector of the steam suction hose into the
socket until you hear the click of the safety hook.
• To remove the hose from the appliance, press release but-
ton A and pull on the connector.
A
½gallon
capacity
for each
tank
ExtractionSteam
7
Look foward to it.
Assembly / preparation
Filling the filter bowl
Your appliance is fitted with a hygienic water filter. You must
fill the filter bowl with water before starting, in order to bind
the extracted dirt in the water and to clean the suctioned air
in the water bath as well.
• Loosen the clips on the right and left of the filter bowl and
remove from its slot.
• Open the cover on the filter bowl by pushing off the rele-
vant clips.
• Fill with tap
water
up to the
green line
(approx.
2.0 litres).
• Re-insert the filter bowl, ensuring the switch cam on the
cover is in the correct position.
WARNING:
The appliance can suck in up to approx. 1.5 litres of liquid.
If you exceed this amount, the fill level sensor will stop suc-
tion automatically and LED D (page 2) on the display will
flash.
INFO:
If you only wish to suction liquid, such as accidental water
spills, it is not necessary to fill the appliance's filter bowl with
water.
When sucking liquids, the MAX. capacity in the container is
approx. 4 litres.
Inserting the steam suction hose
• Insert the connector of the steam suction hose into the
socket until you hear the click of the safety hook.
• To remove the hose from the appliance, press release but-
ton A and pull on the connector.
A
ON/OFF
2) Add water to the vacuum
collection tank:
ØAdd water to fill line
ØAttached lid to collection tank before
installing
vLid must sit flush on the collection tank
and in the locked into position
1) Add water to reservoir tanks:
ØRemove tank caps and add water to
the steam and extraction tanks
ØReplace tank caps
Blue Evolution is ready when:
ØTemperature ≥330 ℉
ØIt will take 10 minutes for the steamer to
heat and reach working temperature after
powering on
5) Insert Hose:
ØLock front wheels
ØInsert the hose and press until you hear
it click
6) Steam Control:
ØUnlock the trigger by pressing red
button on hose handle
ØSqueeze trigger
7) Adjust Steam Pressure:
ØPush and hold the button to
increase or decrease steam pressure
5
3) Plug into electrical outlet:
ØThe Blue Evolution should be the
ONLY appliance plugged into the
electrical outlet
Extension Cord
ØUse only a 12 gauge / 15AMP rated or
higher extension cord
Ø25ft maximum length
4) Push ON/OFF button:
This symbol will flash during operation
indicating the Blue Evolution is heating.
9
Look foward to it.
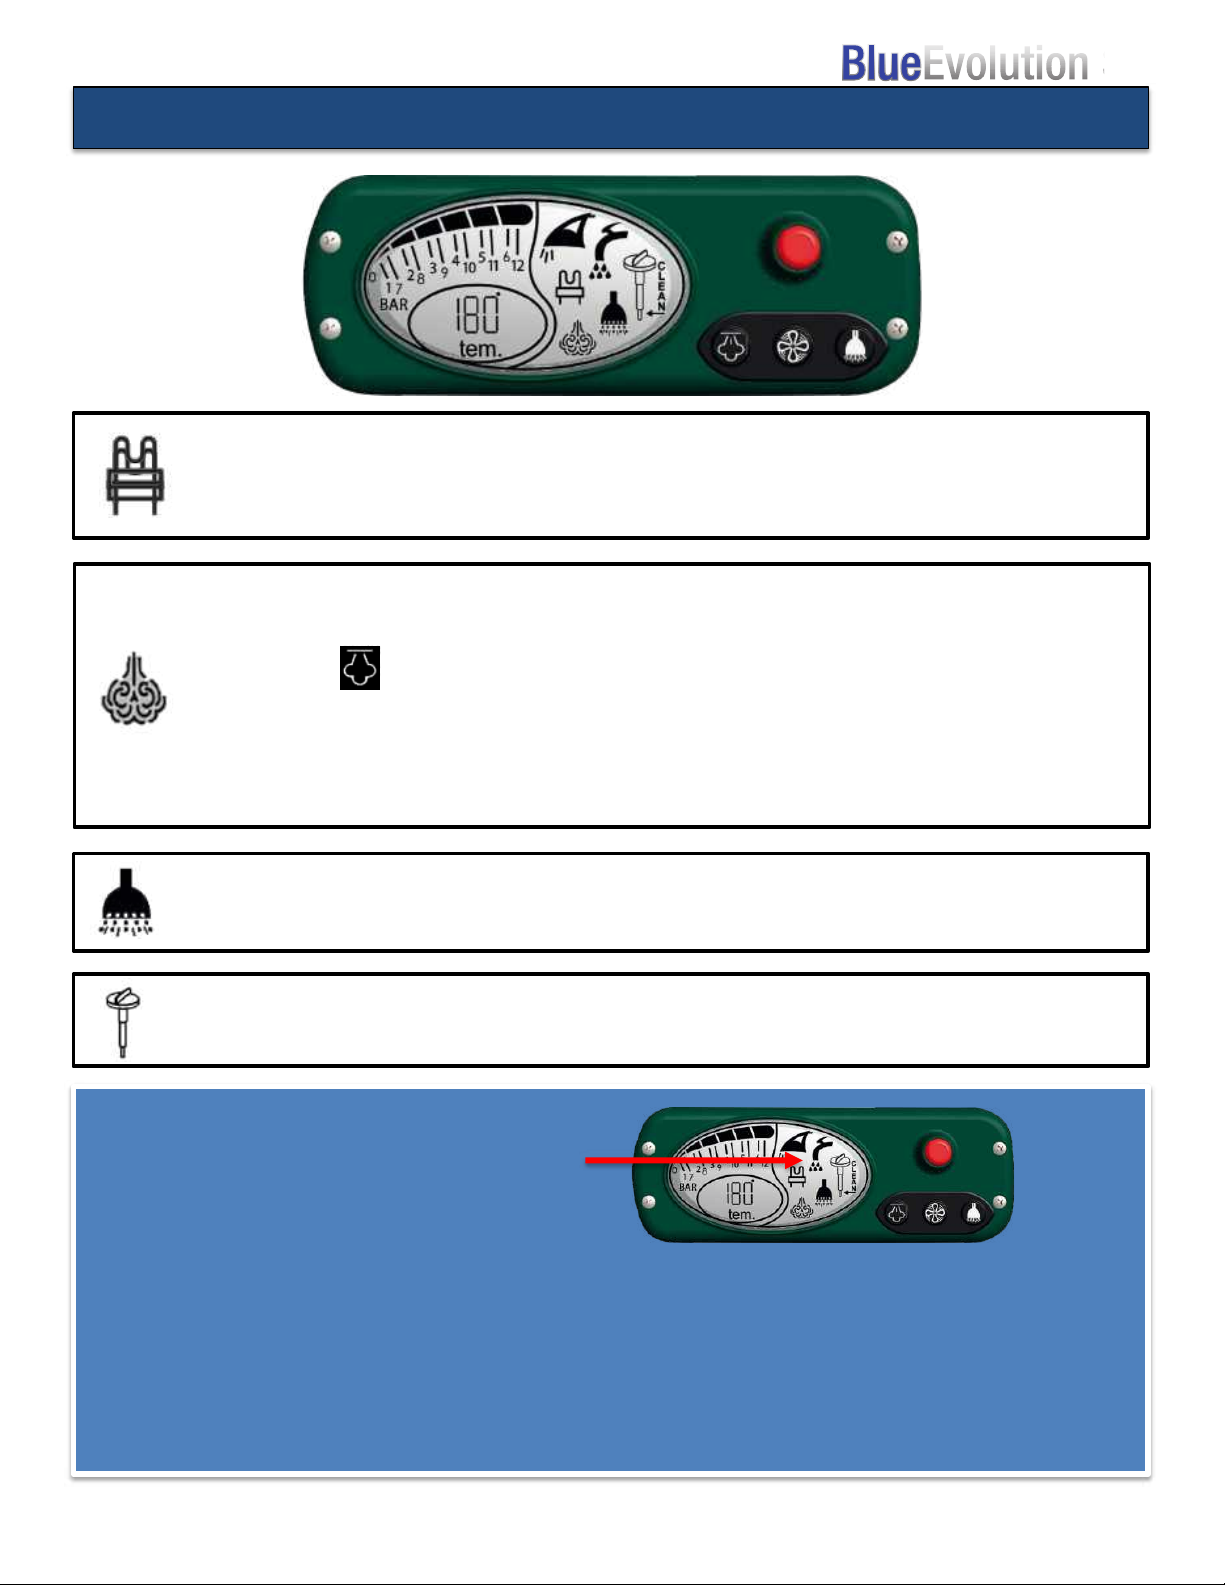
Start-up steam with hot water module Start-up suction
The soaking effect and, thus, cleaning performance can be
increased for heavy soiling by switching the hot water mo-
dule to steam.
INFO:
Do not use on sensitive surfaces or materials.
Switching on “hot water module”
Press button Con the control panel to activate the hot wa-
ter module. The symbol Non the display begins to flash.
Pressing button
T4
on the handle for the hot water module
switches the function on and symbol Non the display stays
illuminated.
Always use button
T4
on the handle to switch the hot water
module on and off.
T3
T4
The "hot water module" flow-through can be adjustet, by
pressing the button
Cin 10% increments. This is indicated
between 010 an 100 in the display.
Display shows 010 = 10% minimum amount of hot water
Display shows 100 = 100% maximum amount of hot water
Suction
Press button Bon the display to activate suction.
LED Dfor suction turns red. (Suction mode 3 = max.)
Press button
T3
on the handle to switch on suction.
Briefly press button
T5
+ or
T5
on the side to vary suction
power.
MIN = LED Dturns green
MED = LED Dturns orange
MAX = LED Dturns red
Press button
T3
briefly to turn suction off again.
INFO:
As there is liquid in the hose and in the extension pipes du-
ring suction operation, the sucker should not disconnected
immediately after cleaning finishes.
A short delay (approx. 30 seconds) is required.
T5
B
D
CN