manuals.online logo
Brands
  1. Home
  2. •
  3. Brands
  4. •
  5. VADO
  6. •
  7. Bathroom Fixture
  8. •
  9. VADO IND-81389/RO Installation and operating instructions

VADO IND-81389/RO Installation and operating instructions

IND-81389/RO
Pop up bath filler waste
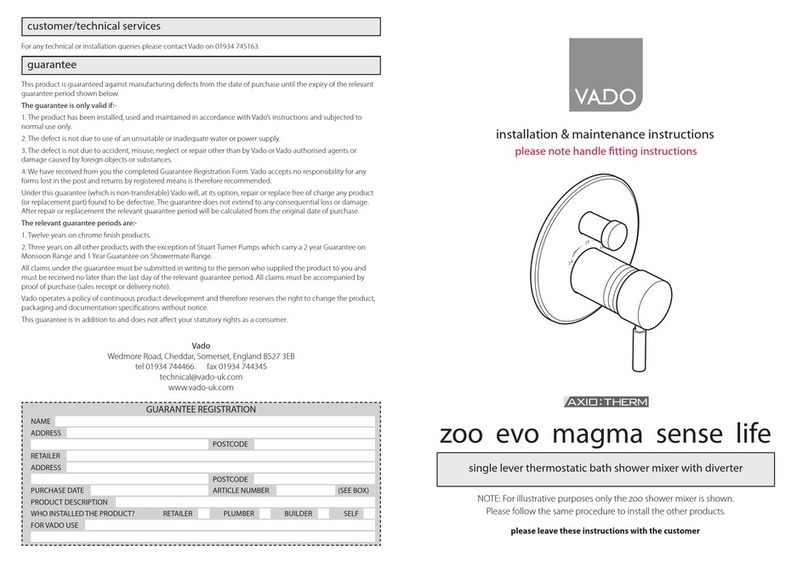
Installation & maintenance instructions
Please leave these instructions with the customer
Guarantee
Customer/technical services
For any technical or installation queries please contact VADO on 01934 745163.
GUARANTEE REGISTRATION
NAME
ADDRESS
RETAILER
ADDRESS
PURCHASE DATE
PRODUCT DESCRIPTION
WHO INSTALLED THE PRODUCT?
FOR VADO USE
POSTCODE
POSTCODE
ARTICLE NUMBER (SEE BOX)
RETAILER PLUMBER BUILDER SELF
This product is guaranteed against manufacturing defects from the date of purchase until the expiry of the relevant
guarantee period shown below.
The guarantee is only valid if:-
1. The product has been installed, used and maintained in accordance with Vado’s instructions and subjected to
normal use only.
2. The defect is not due to use of an unsuitable or inadequate water or power supply.
3. The defect is not due to accident, misuse, neglect or repair other than by Vado or Vado authorised agents or
damage caused by foreign objects or substances.
4. We have received from you the completed Guarantee Registration Form. Vado accepts no responsibility for any
forms lost in the post and returns by registered means is therefore recommended.
Under this guarantee (which is non-transferable) Vado will, at its option, repair or replace free of charge any product
(or replacement part) found to be defective. The guarantee does not extend to any consequential loss or damage.
After repair or replacement the relevant guarantee period will be calculated from the original date of purchase.
The relevant guarantee periods are:-
1. Twelve years on chrome nish products.
2. Six years on Vado Identity products.
3. Three years on all other products with the exception of Stuart Turner Pumps which carry a 2 year Guarantee on
Monsoon Range and 1 Year Guarantee on Showermate Range.
All claims under the guarantee must be submitted in writing to the person who supplied the product to you and
must be received no later than the last day of the relevant guarantee period. All claims must be accompanied by
proof of purchase (sales receipt or delivery note).
Vado operates a policy of continuous product development and therefore reserves the right to change the product,
packaging and documentation specications without notice.
This guarantee is in addition to and does not affect your statutory rights as a consumer.
VADO
Wedmore Road, Cheddar, Somerset, England BS27 3EB
tel 01934 744466 fax 01934 744345
[email protected]
www.vado.com
Important - please read Installers/users notes
Operating Specications
Operating Pressure:
Minimum operating pressure 1 bar
Maximum operating pressure 5 bar
Please read these instructions carefully before starting installation and keep for future
reference.
Remove all packaging and check the product for missing parts or damage before
starting installation.
Any alterations made to this product and ttings may infringe water regulations and
will invalidate the guarantee.
The installation must comply with all Local/National Water Supply Authority
Regulations/Byelaws and Building and Plumbing (UK:BS6700) Regulations.
We strongly recommend that you use a qualied and registered plumber.
Installer must comply with current regulations.
Please note if installing in an enclosed environment, access should be left for servicing
and maintenance. No costs relating to inadequate access can be accepted.
Care of the waste
Our products are nished to the highest standard and due care needs to be taken to
ensure their looks are retained.
We recommend cleaning all products with a soft damp cloth ONLY and advise strongly
against the use of ALL cleaning products i.e. powders and liquids.
Use only mild soap and water to clean the surface of your mixer valve and dry wit a
soft dry cloth.
If the above instructions are not followed this will invalidate your guarantee in the
event of a problem occurring.
Assembly and installation 81389
The length of the overow pipe can be adjusted by pulling apart or pushing together
the inner and outer overow pipes.
Should you need to reduce the length even more, pull the outer overow out of the
collet, cut both the outer overow pipe and the inner overow pipe to the required
length, remove any burrs and reassembly.
Ensure all calculations are correct before cutting pipes.
Remove the blanking plug(s) from the overow assembly. Using PTFE tape t the inlet
elbow(s).
Push the rubber seal onto the overow/waste assembly, and from the outside hold in
place over the bath overow hole.
Screw on the overow housing, tighten with an allen key.
Caution: do not overtighten as this may damage the parts and/or the bath.
Place the overow fascia over the overow housing, make sure the slots for the outlet
and overow are on the underside. Tighten by screwing the grubscrew located on the
underside of the overow fascia.
Connect to the supply pipe work.
Overow/waste
assembly
Rubber seal
Overow fascia
Inner overow pipe
Inlet elbow
Inlet elbow
Overow
housing
Allen key
Allen key socket
Outlet and
overow slots
Outer overow pipe
Collet
Assembly and installation 81389
Push the seal onto the waste assembly
From below push the assembly up under the hole in the bath, and hold in place.
From inside the bath screw the waste ange into the assembly and tighten by hand,
(do not over tighten as this may damage the parts and/or the bath).
Slide the compression nut, washer and seal over the pipe, push the pipe fully into the
waste assembly, slide along the seal and washer and nally screw on the nut, hand
tight only.
Screw on the plug.
Decreasing the pipe length.
The pipe can be shortened by carefully cutting, removing any burrs.
Ensure all calculations are correct before cutting the pipe.
Finish by following the above procedure.
Operation
Plug
Seal
Seal
Compression
nut
Washer
Seal
Overow/waste
assembly
Overow pipe
Waste ange
with seal
Push down again to close the plug.Push down to open the plug.

This manual suits for next models

4

Other VADO Bathroom Fixture manuals

VADO BLACK CHIC User manual

VADO

VADO BLACK CHIC User manual

VADO AXCES EKKO AX-EKO-100M/CC-CP Instruction Manual

VADO

VADO AXCES EKKO AX-EKO-100M/CC-CP Instruction Manual

VADO AXCES METIZ AX-MET-100M/CC-CP Instruction Manual

VADO

VADO AXCES METIZ AX-MET-100M/CC-CP Instruction Manual

VADO AXCES IRLO AX-IRO-100/CC-CP Instruction Manual

VADO

VADO AXCES IRLO AX-IRO-100/CC-CP Instruction Manual

VADO ARRONDITM User manual

VADO

VADO ARRONDITM User manual

VADO AXCES KORE AX-KOR-110-CP Instruction Manual

VADO

VADO AXCES KORE AX-KOR-110-CP Instruction Manual

VADO Individual Origins User manual

VADO

VADO Individual Origins User manual

VADO WG-81389-C Installation and operating instructions

VADO

VADO WG-81389-C Installation and operating instructions

VADO AXCES NURI AX-NUR-145A-CP Instruction Manual

VADO

VADO AXCES NURI AX-NUR-145A-CP Instruction Manual

VADO OMIKA OMI-133 User manual

VADO

VADO OMIKA OMI-133 User manual

VADO AXCES IRLO AX-IRO-100M/CC-CP User manual

VADO

VADO AXCES IRLO AX-IRO-100M/CC-CP User manual

VADO OMIKA User manual

VADO

VADO OMIKA User manual

VADO AXCES METIZ AX-MET-137-CP User manual

VADO

VADO AXCES METIZ AX-MET-137-CP User manual

VADO AXCES AX-SIR-140/RO/DIV Operation manual

VADO

VADO AXCES AX-SIR-140/RO/DIV Operation manual

VADO BOOTH & Co BC-AXB-188-CP User manual

VADO

VADO BOOTH & Co BC-AXB-188-CP User manual

VADO AXCES AX-MAT-110-CP User manual

VADO

VADO AXCES AX-MAT-110-CP User manual

VADO STRA-149RRK-CP User manual

VADO

VADO STRA-149RRK-CP User manual

VADO BOOTH & Co BC-AXB-181-CP User manual

VADO

VADO BOOTH & Co BC-AXB-181-CP User manual

VADO AXCES ASTRA AX-AST-153/CD-CP Instruction Manual

VADO

VADO AXCES ASTRA AX-AST-153/CD-CP Instruction Manual

VADO STRA-149RRK-CP User manual

VADO

VADO STRA-149RRK-CP User manual

VADO AXCES NURI AX-NUR-100/CC-CP Instruction Manual

VADO

VADO AXCES NURI AX-NUR-100/CC-CP Instruction Manual

VADO AXCES ASTRA AX-AST-137/CD-CP Instruction Manual

VADO

VADO AXCES ASTRA AX-AST-137/CD-CP Instruction Manual

VADO AXCES IRLO AX-IRO-137-CP Instruction Manual

VADO

VADO AXCES IRLO AX-IRO-137-CP Instruction Manual

VADO AXCES MATRIX AX-MAT-137-CP Instruction Manual

VADO

VADO AXCES MATRIX AX-MAT-137-CP Instruction Manual

Popular Bathroom Fixture manuals by other brands

Spectrum Pfister Marielle LG89 MB Series Maintenance & Care Guide

Spectrum

Spectrum Pfister Marielle LG89 MB Series Maintenance & Care Guide

Conti+ CONSMART CONE4111221109 installation manual

Conti+

Conti+ CONSMART CONE4111221109 installation manual

OVE MILANO 48 manual

OVE

OVE MILANO 48 manual

Kohler K-6015 installation guide

Kohler

Kohler K-6015 installation guide

Hans Grohe AXOR 28469 Series Assembly instructions

Hans Grohe

Hans Grohe AXOR 28469 Series Assembly instructions

Helvex Nuva 9104 installation guide

Helvex

Helvex Nuva 9104 installation guide

Fondovalle Shape Shower tray 150 Assembly instructions

Fondovalle

Fondovalle Shape Shower tray 150 Assembly instructions

Villeroy & Boch Subway 3.0 Waste Overflow installation instructions

Villeroy & Boch

Villeroy & Boch Subway 3.0 Waste Overflow installation instructions

KWC MIRANIT F5ST2028 Installation and operating instructions

KWC

KWC MIRANIT F5ST2028 Installation and operating instructions

Gessi iPsa 33095 Bath Mixing Program

Gessi

Gessi iPsa 33095 Bath Mixing Program

Franke RODX602E Installation and operating instructions

Franke

Franke RODX602E Installation and operating instructions

Viega Advantix 4982.45 Instructions for use

Viega

Viega Advantix 4982.45 Instructions for use

MAAX 105539 installation instructions

MAAX

MAAX 105539 installation instructions

CANTERBURY AGORA Z2328-45IN quick start guide

CANTERBURY

CANTERBURY AGORA Z2328-45IN quick start guide

Toto YH 200 Installation and owner's manual

Toto

Toto YH 200 Installation and owner's manual

Signature Hardware BERWYN 953652 quick start guide

Signature Hardware

Signature Hardware BERWYN 953652 quick start guide

Orbital Systems Panel Quick installation guide

Orbital Systems

Orbital Systems Panel Quick installation guide

ProFlo PF3880CP instructions

ProFlo

ProFlo PF3880CP instructions

manuals.online logo
manuals.online logoBrands
  • About & Mission
  • Contact us
  • Privacy Policy
  • Terms and Conditions

Copyright 2025 Manuals.Online. All Rights Reserved.