manuals.online logo
Brands
  1. Home
  2. •
  3. Brands
  4. •
  5. Vantage Hearth
  6. •
  7. Touchscreen
  8. •
  9. Vantage Hearth Equinox 73-II User manual

Vantage Hearth Equinox 73-II User manual

©Vantage, 8/11/2016 / IS-00700-A Equinox 73-II LCD In-Wall Touchscreen – MODEL: EQ73TB-TI-II page 1 of 4
INSTALLATION
VANTAGECONTROLS.COM VANTAGE INSTALL GUIDES
2168 West Grove Parkway, Suite 300, Pleasant Grove, UT. 84062 USA
Telephone: 801 229-2800 ●Fax: 801 224-0355 Equinox 73-II LCD In-Wall Touchscreen – MODEL: EQ73TB-TI-II
Overview
Vantage's Equinox 73-II (second generation) active matrix LCD
touchscreen continues the Vantage commitment to LCD
in-wall control centers. The Equinox 73-II LCD Interface is a
dedicated system portal to whole home control. The 7"
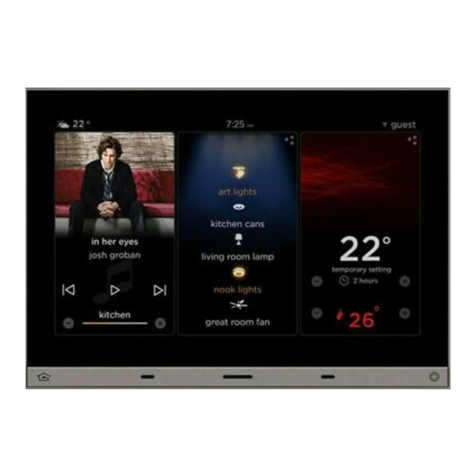
touchscreen displays media rich widgets in a dashboard
layout. Each widget’s content has been carefully designed to
provide the ultimate user experience. Navigate and control,
with real-time feedback, lighting, audio, video, climate,
weather, security, cameras, and more through a single layer
navigation experience. For additional personalization and
control, individual widgets may be edited directly from the
touchscreen.
Equinox 73-II Features/Operations
Wide screen orientation only.
Equinox 73-II has more memory and a faster processor.
Equinox platform provides built-in widgets using Vantage
proprietary auto discovery widgets for fast automatic
screen design.
Equinox 73-II fully incorporates Vantage’s consistent user
experience interface, eliminating learning curves normally
associated with switching interface devices.
Power, 48VDC PoE*/PoE+ or AUX. 12VDC transformer.
o*Optional, 48VDC, 4 port, PoE Injector, #DA2400.
NOTE: The DA2400 complies with IEEE 802.3
(Ethernet), IEEE 802.3u (Fast Ethernet), IEEE 802.3af
(Power over Ethernet) and 10/100Base-TX Ethernet
standards.
-or-
oAUX. power 12VDC adaptor, #VFA-0005.ernet ort.
Communicates over Vantage Ethernet bus (InFusion
controller and Equinox should be connected to the same
local network)
Firmware upgradable from Design Center over Ethernet.
Built-in ambient light sensor for “active,” AUTO mode
screen brightness and off when dark option when
“inactive”.
Inactive mode dims or turns screen off in 1 to 10 minutes
(adjustable) if no activity.
Built-in proximity activation, 6” maximum, may be
programmed to execute a task with a hand wave across
front of station.
Displays three widgets at a time.
Mechanical buttons, bottom left and right;
oleft navigates to home screen position---
oright may be assigned to a programmed task---
Profiles / Settings; personalize dashboard level and
hardware settings:
oSelect settings / dashboard, to arrange order of
widgets which widgets to display.
oSelect options to select language*, 12/24 hour clock,
and fahrenheit/celsius temperature display.
*Supported Languages
Arabic
German
English
Spanish
French
Hebrew
Italian
Japanese
Korean
Dutch
Portuguese
Russian
Chinese (simplified)
oSelect device, to view and set hardware settings,
system information, network settings, reset user
settings, and view additional information settings.
oSelect profiles, to create, delete, or rename profiles.
Equinox 73-II uses the same widgets as Android tablets and
phones, and iPads, iPhones, and iPods.
Top of screen displays:
o(left) icon for current weather conditions and
temperature, via Vantage weather service,
o(center) time of day, and
o(right) selected profile.
Middle to bottom of screen displays widgets (the order
may be changed within each profile).
oWidgets (some widgets require specific Vantage
drivers in the Design Center project file):
Scene,
Audio,
Video,
Climate,
Weather
Timers
Lighting,
Security,
Cameras,
Pool & Spa, and
Shades
Always more coming
Raise/Lower dimmable loads and volume control via minus
/ plus (-/+) graphical buttons.
Graphical icons and text color track load status, orange =
ON and white = OFF.
Press and release the upper right section on each
widget for additional control and/or personalization.
Manual reboot Equinox 73-II – press and hold both
mechanical buttons for 3 seconds, then release.
Service Mode reboot Equinox 73-II – press and hold both
mechanical buttons for 10 seconds, then release.
oService mode is automatically used when updating
firmware from Design Center.
oIf the application code is corrupt it may cause the
screen to lock preventing Design Center from
updating or reloading the firmware. Use the service
mode reboot option to allow Design Center to update
corrupted firmware.
oTo manually exit server mode use the manual reboot
of Equinox 73-II (above)
Specifications
Description Specification
Dimensions, HWD
(at wall surface)
5.0” x 7.0” x 0.37”
127mm x 178mm x 9mm
Dimensions, HWD
(overall)
5.0” x 7.0” x 2.1”
127mm x 178mm x 53mm
Weight 1.6 lb or 725.75g
Display Active Matrix Color LCD
Display Size 7” diagonal
Display Resolution 1024 x 600 – 24-bit color
Power
48VDC via PoE, PoE+, 10W
or aux. power via 12VDC adaptor
(see back panel drawing on the last page)
Surge Suppression Yes
Mounting See Installation section below
Sound Option Adjustable volume level - touch interaction
Wiring Connections Communication: Ethernet RJ45 or WiFi dongle
Power: PoE/PoE+ or 12VAC adaptor
Addressing self addressing through software
Finishes TRIM - Titanium
TOUCHSCREEN – Black Glass
Glass Surface Chemically Strengthened
Ambient Operating
Temperature 32-95°F -or- 0-35°C
Ambient Operating
Humidity 5-95% non-condensing
CE & FCC Yes
I N S T A L L A T I O N
©Vantage, 8/11/2016 / IS-00700-B Equinox 73-II LCD In-Wall Touchscreen – MODEL: EQ73TB-TI-II page 2 of 4
System Requirements
Equinox 73-II is compatible with InFusion Design Center
version 3.5 software or higher. For new projects it is
recommended that firmware and software be kept to the most
current release.
Installation
Installation of Vantage products should be performed or
supervised by a Certified Vantage Installer. Installation kits for
Equinox 73-II touchscreens are compatible with global
electrical and installation standards. For new construction or
retrofit installations. Please see the additional installation
sheets*referenced below for Equinox 73-II installation
preparation.
See Standard, Easy Retrofit, and TPT650 retrofit, respectively.
Click on the install method wanted:
Equinox 73 LCD Standard_EQ73ST-INSTALL_install_IS-0545.pdf
Equinox 73 LCD Easy-Retrofit_EQ73ER-INSTALL_install_IS-0697.pdf
Equinox 73 LCD Retrofit_EQ73RT-INSTALL_install_IS-0571.pdf
1. Connect Equinox 73-II to Ethernet PoE and/or other wiring
connection options used in the installation.
2. Insert the Equinox 73-II into the mounting ring from the
mounting option selected.
a. Make sure the Equinox 73-II’s four Spring Clips lock to
mounting option selected, Standard, Easy-Retrofit, or
Retrofit install options.
Configuration
1. Highlight the station in Design Center and click Configure
Stations.
2. Station displays, configure mode / touch to configure.
3. When configured station goes back to ready until
programmed.
-OR-
4. The station may also be configured by typing the serial
number in the project file, using this method the station
will automatically be configured when the system is
programmed.
Device & Info Settings
Device Settings are accessed through the Profile pages.
NOTE: Changes on the device page are specific to the device and are not part of any profile setting.
1. Press the profile button, (my home, upper right, in this example)
2. Press the settings button
3. The first time settings is pressed the screen will go to the dashboard edit
screen.
4. Pressing the upper left area on the dashboard page, opens
the settings thumbnail selections at left.
5. Select the device option from the four choices.
NOTE: The other pages are covered in the Equinox Widgets_install.pdf
installation sheet and in Design Center Help.
The first time the controller is programmed, the Equinox 73-II device should use
the brightness settings specified in the Equinox Widget Styles object in Design
Center. Subsequent controller program downloads depend on whether or not
the Keep DC Profile Changes and/or Keep Controller Profile Changes check
boxes are checked in Design Center.
When Keep Controller Profile Changes is checked, it will retain the brightness
settings on the device.
When Keep DC Profile Changes is checked, it will use the brightness settings
specified in the Equinox Widget Styles object in Design Center.
When both Keep DC Profile Changes and Keep Controller Profile Changes
check boxes are checked the two styles will be merged unless a conflict
occurs. Conflicts may then be corrected before programming continues.
6. The device screens are accessed by swiping up or down to see all of the
screen choices. The first device screen allows settings for:
brightness – brightness level for active and inactive modes
brightness Options
auto mode*– uses ambient light to adjust screen brightness
off when dark – when ambient light is very low the screen illumination turns
off
screen timeout – adjusts from 1 to 10 minutes (via seconds)
*auto mode:
auto mode calibration – these options only appear when the auto mode box is
checked.
low trim – (range 1%-25%) If screen is too dim when used in a dark room,
increase the low trim setting and conversely when screen is too bright.
Adjust – (range, -5 to +5) If screen is too dim when used in a moderately lit
room, increase the adjust setting and conversely when screen is too bright.
NOTE: Adjustments take a few seconds for the screen brightness to change. This
delay action is deliberate to avoid sudden changes in screen brightness.
I N S T A L L A T I O N
©Vantage, 8/11/2016 / IS-00700-B Equinox 73-II LCD In-Wall Touchscreen – MODEL: EQ73TB-TI-II page 3 of 4
7. Scroll down to the next device screen for:
security sounder volume –
set security sound level from 0% to 100% - sound is on the
Equinox security pad display.
proximity sensitivity –
Adjust value between 1 and 5
Test by clicking the test circle and moving your hand across the
front of the screen. A green watermark bar appears across the
screen when the sensor activates.
multiple homes –
Selecting multiple homes allows this device to connect to more
than one home.
NOTE: multiple homes is covered in Design Center Help.
8. Scroll down to the next device screen for:
default profile –
When the device is reset, (power outage, etc.) this selects whether
the first (enabled) profile in the profile list or the last (enabled)
used profile is active when the screen boots.
network settings –
Select dhcp or static*, see below if static is selected..
reset user settings / reload:
This will reload, (replace) all of the devices information from the
controller.
(network settings continued)
*network settings / static:
ip address – xxx.xxx.xxx.xxx
netmask – xxx.xxx.xxx.xxx
default gateway – xxx.xxx.xxx.xxx
dns server – xxx.xxx.xxx.xxx
Click save when finished entering static IP information.
9. Scroll left to the info screen:
device information –
ip address: xxx.xxx.xxx.xxx
part number: xxxxxx
serial number: xxxxxxx
app version – xx.xx.xx (used in diagnostics)
kernel version – version and date (used in diagnostics)
rootfs version – xx.xx.xx (used in diagnostics)
up time: x day(s) x:xx
controller info –
controller ip – xxx.xxx.xxx.xxx
controller firmware: x.x.x.x
connection location: local
connection mode: multicast
Widgets Overview
For detailed information about all widgets and other profile and settings screens, click on file link below to load Widget Instructions:
LINK: Equinox Widgets_install.pdf
Equinox 73-II Mounting Ring Adjustment Tool
Locate this tool-card shipped with the Equinox 73-II. Inside the wall box is a rectangular
ring that must be parallel with the wall surface and 1” behind the wall surface on the left
and right sides. Loosen the two inside screws and use this tool to set the mounting ring
depth at 1”. See install sheet links on page 2 for install options.
I N S T A L L A T I O N
©Vantage, 8/11/2016 / IS-00700-B Equinox 73-II LCD In-Wall Touchscreen – MODEL: EQ73TB-TI-II page 4 of 4
Please reference local
and NEC codes for
appropriate electrical
and communication
install methodolo
gy
CAUTION!
Left and Right Speakers are exposed. Use
extreme caution handling, installing and
removing. Do not accidentally touch or
push in on the speaker cones to avoid
damage
to either speaker.
Cleaning
Dampen a soft cloth
in water and wring-
out to barely damp
Use a light buffing
motion to wipe clean
Do not take the
station apart
Never spray station
with any cleaners
RJ45 PoE Ethernet Port
Power via 48VDC, PoE source.
Order an opt. 4-port, PoE
Injector from Vantage,
Part numbe
r
DA2400
Opt. power via 12VDC,
power supply.
Part numbe
r
VF
A
-0005
USB
No
End User
Service
Multi-View Line Drawing
Back-View

This manual suits for next models

1

Other Vantage Hearth Touchscreen manuals

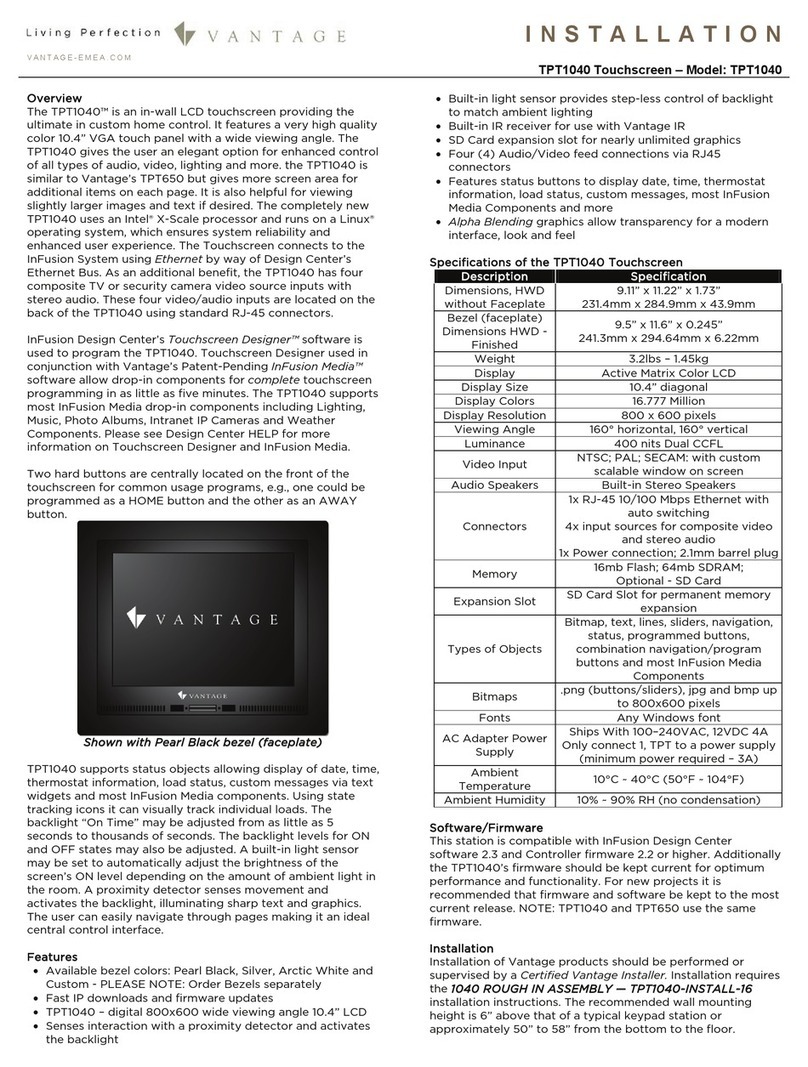
Vantage Hearth Equinox 73 EQ73TB-TI User manual

Vantage Hearth

Vantage Hearth Equinox 73 EQ73TB-TI User manual

Vantage Hearth Equinox 73 EQ73TB-TI User manual

Vantage Hearth

Vantage Hearth Equinox 73 EQ73TB-TI User manual

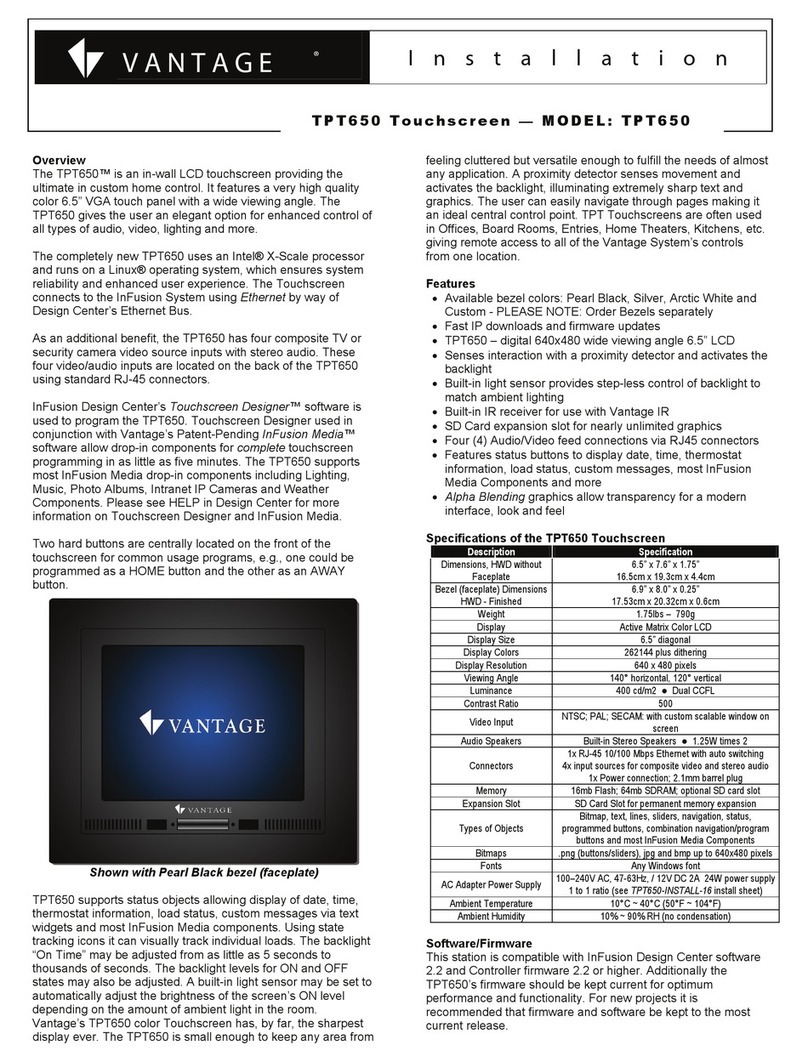
Vantage Hearth TPT650 User manual

Vantage Hearth

Vantage Hearth TPT650 User manual

Vantage Hearth TPT1040 User manual

Vantage Hearth

Vantage Hearth TPT1040 User manual

Popular Touchscreen manuals by other brands

Creator CR-WiFi WG7pip user manual

Creator

Creator CR-WiFi WG7pip user manual

TES MicroTouch OF-195P-A1 user manual

TES

TES MicroTouch OF-195P-A1 user manual

Elo TouchSystems ET1598L user manual

Elo TouchSystems

Elo TouchSystems ET1598L user manual

TES TDS-32F user manual

TES

TES TDS-32F user manual

FDI uEZ GUI Series quick start guide

FDI

FDI uEZ GUI Series quick start guide

Speechi ST-XX-UHD-AND-HP-007-S-QSG quick start guide

Speechi

Speechi ST-XX-UHD-AND-HP-007-S-QSG quick start guide

Elo TouchSystems 1537L specification

Elo TouchSystems

Elo TouchSystems 1537L specification

Entron EN7000-TS user guide

Entron

Entron EN7000-TS user guide

Elo TouchSystems E744255 Quick installation guide

Elo TouchSystems

Elo TouchSystems E744255 Quick installation guide

BeiJer X2 extreme 12 HP web installation manual

BeiJer

BeiJer X2 extreme 12 HP web installation manual

XtendLan DPM-IP71R Operation manual

XtendLan

XtendLan DPM-IP71R Operation manual

ViewSonic ViewBoard IFP50 Series quick start guide

ViewSonic

ViewSonic ViewBoard IFP50 Series quick start guide

Allo RemoteControl NICE Era TOUCH HSTS2FR instructions

Allo RemoteControl

Allo RemoteControl NICE Era TOUCH HSTS2FR instructions

Ctouch Canvas quick start guide

Ctouch

Ctouch Canvas quick start guide

Maple Systems Silver Series Installation and operation manual

Maple Systems

Maple Systems Silver Series Installation and operation manual

Magenta Mondo TC Quick reference & setup guide

Magenta

Magenta Mondo TC Quick reference & setup guide

PROMULTIS Tab Boxtop Series user manual

PROMULTIS

PROMULTIS Tab Boxtop Series user manual

Hitachi StarBoardLink EZ user guide

Hitachi

Hitachi StarBoardLink EZ user guide

manuals.online logo
manuals.online logoBrands
  • About & Mission
  • Contact us
  • Privacy Policy
  • Terms and Conditions

Copyright 2025 Manuals.Online. All Rights Reserved.