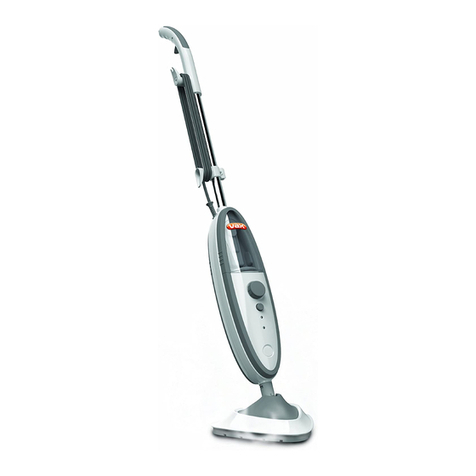
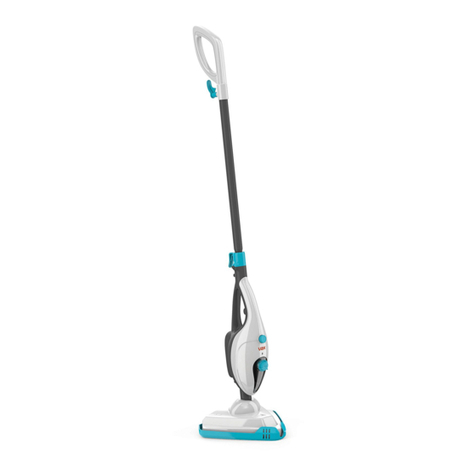
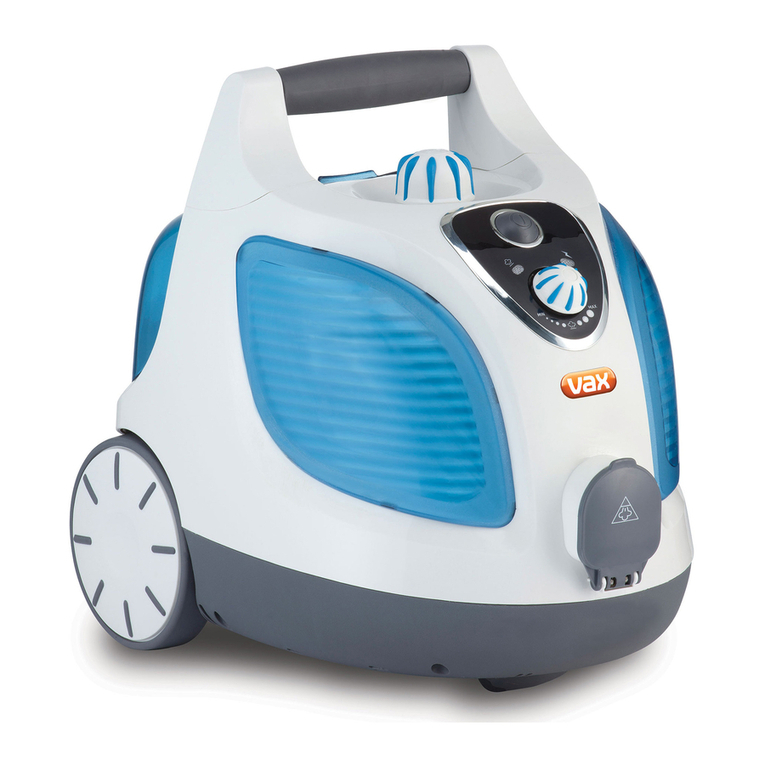
Vax S87-CX series User manual

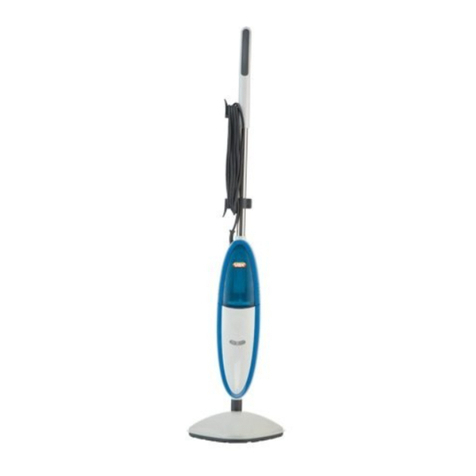
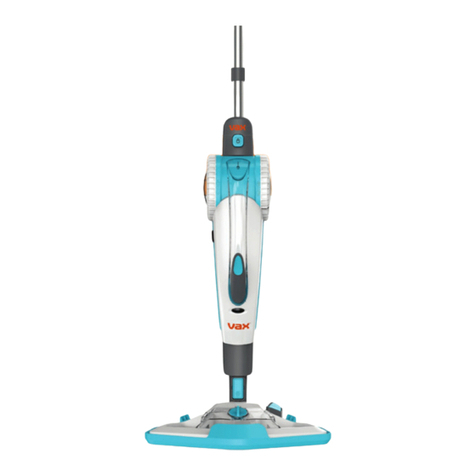
Stick Steam Cleaner
St eam
Cleane r
User Guide
vax.co.uk S87-CX series
Get Clean ng...
What’s your Vax model number? (Located on the flap of the packag ng)
What’s your ser al number? (Located on the base of the mach ne)
Note these down n case you need them n future. Please keep nstruct ons for further use.
– – – – –
e. . S87-C X

Machine Overview
Accessor es
10
Un t
8
3
2
1 Handle
2 Upper cord cl p
3 Lower cord cl p
4 Power cord
5 Clean water tank
6 LED nd cator
a) Water heat ng/power on
(orange LED)
b) Steam ready
(orange LED) +(green LED)
7 Floor head
8 Steam release tr gger
65
4
1
7
12
14
15
a
b
9
11
9 M crof bre clean ng pad
10 Carpet gl der (dependant on model)
11 Hard water f lter (h dden)
(pre-assembled n un t)
12 Cool ng base (dependant on model)
13 Measur ng jug (dependant on model)
14 Screw x 1
15 Washer x 1
2
13
12

FOR HOUSEHOLD USE ONLY.
When us ng the st ck steam cleaner, bas c safety precaut ons should
always be observed, nclud ng the follow ng:
IMPORTANT: Please refer to floor manufacturer’s care recommendations
before use and test the steamer on a discrete area of floorin to
be in with.
WARNING: The st ck steam cleaner head gets very hot
dur ng operat on.
WARNING: Dan er of scaldin . Avo d contact w th the steam.
1. Do not leave the appl ance unattended wh le t s sw tched on.
Unplug the appl ance from the ma ns supply socket before
carry ng out any ma ntenance or trouble shoot ng checks and
before you f ll/empty the water tank.
2. The appl ance must be kept out of ch ldren’s reach and should
not be used by ch ldren.
3. In order to ensure safety, the appl ance should only be
assembled, connected and operated as set out n the
nstruct ons. Only use accessor es, wh ch are recommended
by manufacturer.
4. Th s appl ance s not ntended for use by persons ( nclud ng
ch ldren) w th reduced phys cal, sensory or mental capab l t es,
or lack of exper ence and knowledge, unless they have been
g ven superv s on or nstruct on concern ng the use of the
appl ance by a person respons ble for the r safety.
5. Exam ne the appl ance before use n order to detect s gns of
damage. Do not operate f the appl ance, ts power cord or
plug, show any s gns of damage. In order to comply w th
safety regulat ons and to avo d hazards, qual f ed personnel
must carry out repa rs of electr cal appl ances. If repa r s
needed contact the Vax Carel ne.
6. Do not use the st ck steam cleaner f t has been dropped,
damaged, left outdoors or dropped nto water.
7. Check the appl ance and the ma ns w re before each use.
8. Do not unplug by pull ng on the cord.
9. Do not handle the plug or st ck steam cleaner w th
wet hands.
10. After use unplug the appl ance from the ma ns
supply socket.
11. When the appl ance s n operat on, the floor head should not
be d rected toward humans, an mals or plants.
12. Never mmerse the appl ance n water or other l qu d.
13. Only use water n th s appl ance. De-scal ng products,
perfume, detergent etc. should not be used w th th s
appl ance, n order to avo d damage.
14. Turn off all controls before unplugg ng.
15. Do not attempt to remove blockages w th sharp objects as
they may cause damage.
16. Store ndoors and put away after use to prevent
tr pp ng acc dents.
17. Us ng mproper voltage may result n damage to the motor
and poss ble njury to the user. The correct voltage s l sted on
the rat ng label.
18. A hazard may occur f the st ck steam cleaner runs over the
power supply cord.
NOTE: If the supply cord s damaged t must be replaced by the
manufacturer, or a s m larly qual f ed person n order to avo d a
hazard, or nval dat ng the guarantee.
NOTE: Before perform ng clean ng or ma ntenance tasks and after
each use unplug the appl ance from the ma ns supply socket and let
t cool down suff c ently.
NOTE: The l qu d or steam must not to be d rected towards
equ pment conta n ng electr cal components, such as the nter or
of ovens.
IMPORTANT: The clean water tank must not
be removed.
WARNING: The appl ance heats up dur ng operat on, therefore only
touch handle or buttons. Always let the appl ance cool down before
attach ng or remov ng accessor es
WARNING: Never try to mod fy or change the ma ns plug
of the appl ance. Make sure that the supply voltage corresponds to
the voltage marked on the rat ng label of the appl ance.
This stick steam cleaner is intended for household use only and
NOT for commercial or industrial use.
PLEASE KEEP INSTRUCTIONS
FOR FURTHER USE.
General Safety Information
vax.co.uk 3
Operation
Remove clean water tank. Insert handle nto ma n body. L ne
up the screw holes on the handle
and the ma n body.
Secure the handle n place w th
one of the screws prov ded.
Assemblin your stick steam cleaner
Before you be in cleanin
Remove the clean
water tank.
Tw st the cap ant -
clockw se to remove.
F ll the tank w th 500ml
of water and replace the
water cap, T ghten by
tw st ng clockw se.
Replace the clean water
tank, cl ck ng nto place
mak ng sure the hard water
f lter s n place.
WARNING: To reduce the r sk of personal njury, unplug the steamer when assembl ng the un t.
IMPORTANT: Do not over-f ll the water tank.
4
IMPORTANT: Please refer to floor manufacturer’s care recommendat ons before use and test the
steamer on a d screte area of floor ng to beg n w th.

Operation
WARNING: To reduce the r sk of personal njury, unplug the steamer when assembl ng the accessor es.
Place m crof bre
clean ng pad over
the floor head.
IMPORTANT: Never use the st ck steam cleaner w thout the m crof bre clean ng pad correctly attached to the floor head.
Attachin the microfibre cleanin pad
Orange LED w ll llum nate when the un t s
sw tched on at the plug and water s heat ng.
After approx mately 1 m nute the green LED w ll
also llum nate show ng steamer s ready to use.
The green LED w ll go off when un t water s
re-heat ng.
a
a
b
b
T ghten the
drawstr ng so the
m crof bre clean ng
pad s f tted securely.
1
2
vax.co.uk 5
Before you be in cleanin

Steam cleanin hard floors
Refreshin carpets (dependant on model)
IMPORTANT: Never use the st ck steam cleaner w thout the m crof bre clean ng pad properly attached
to the floor head.
IMPORTANT: When us ng on carpets, always ensure the m crof bre clean ng pad s properly attached to the
floor head.
WARNING: To reduce the r sk of personal njury, unplug the steamer when assembl ng the accessor es.
Plug nto ma ns and wa t
for the green l ght (on the
ma n body) to sw tch on
after 1 m n.
To recl ne the un t place
foot on floor head and
t lt handle.
To produce steam
squeeze the tr gger.
Move the st ck steam cleaner
slowly backwards and
forwards across the floor
pay ng part cular attent on
to h gh traff c areas.
Attach carpet gl der
attachment to
floor head.
To recl ne the un t place
foot on floor head and
t lt handle.
To produce steam
squeeze the tr gger.
Move the st ck steam cleaner
slowly backwards and
forwards across the floor
pay ng part cular attent on
to h gh traff c areas.
WARNING: Never leave the st ck steam cleaner n one spot on any surface for an extended per od of t me w th
a damp or wet m crof bre clean ng pad attached as th s may damage the floor surface.
WARNING: Your st ck steam cleaner should only be used on t les, l no or sealed wood floor ng.
Do not use on lam nate floor ng.
Operation
6
IMPORTANT: Please refer to floor manufacturer’s care recommendat ons before use and test the steamer on
a d screte area of floor ng to beg n w th.

Empty the water tank
IMPORTANT: Allow the un t to fully cool down before perform ng any ma ntenance or troubleshoot ng checks.
Remove the microfibre cleanin pad from the unit
IMPORTANT: Allow the un t to fully cool down before perform ng any ma ntenance or troubleshoot ng checks.
Mach ne washable at max temperature 40˚C. Always use a m ld detergent.
Leave the pad to dry for 24 hours.
1
2
Empty any excess water over the
s nk, replace water cap and
return to the un t.
Remove the clean water tank. Tw st the cap ant -clockw se
to remove.
Undo drawstr ng.
Cleanin the microfibre cleanin pad
IMPORTANT: Never use bleach or fabr c softener when wash ng the m crof bre clean ng pad.
Maintenance (Keep your Vax as ood as new)
Remove m crof bre
clean ng pad.
1
2
vax.co.uk 7

Replacin the hard water filter
IMPORTANT: The cond t on of the f lter affects the performance of your mach ne.
Check and change f lter (depend ng on level of use).
Your mach ne s f tted w th a hard water f lter. If you l ve n an area of hard water the f lter w ll
d scolour/darken over t me (2). Depend ng on water hardness and/or frequency of use the f lter should be
changed every 6 months, or once the f lter has completely darkened.
Replacin the washers (dependant on model)
IMPORTANT: Allow the un t to cool down fully before perform ng ma ntenance or troubleshoot ng checks.
Over t me, the floor head can become loose. You may need to replace the washers at the end of the body un t
w th the replacement washers prov ded.
12
Maintenance (Keep your Vax as ood as new)
8
After steamer use/usin coolin base/stora e (dependant on model)
After us ng the st ck steam cleaner and to avo d damage to your floors, unplug the un t and place st ck steam
cleaner on cool ng base unt l product cools. Once cooled, remove steamer pad and follow ‘cleanin the pads’
sect on. Empty out any rema n ng water n the tank and clean the external surface w th a dry cloth.

Is there an accessory missin ?
•Check the Parts Overv ew page n the gu de to make sure
the part s def n tely ncluded n your un t
• If the part s m ss ng we’re here to help. S mply call us on:
0844 412 8455
Why won’t the stick steam cleaner run?
•Un t may not be plugged nto the electr cal outlet correctly,
ensure the plug s pushed n securely
• The electr cal outlet may not be work ng properly, check
the fuse or breaker, or consult an electr c an
• The power cord may be damaged, f t s t must be
replaced by the manufacturer or s m larly
qual f ed person
What do I do if an accessory/the unit has become dama ed
or broken?
•V s t vax.co.uk for parts and spares
• Please call our Carel ne to purchase new spares or order
a replacement
Why is the stick steam cleaner not producin steam?
•There may be no water n the tank; please refer to the
operat on sect on
•The water tank may not be f tted correctly; please refer to
the operat on sect on
Why won’t the microfibre cleanin pad pick up dirt?
•The clean ng pad may already be saturated w th d rt and
needs wash ng, please refer to the ma ntenance sect on
FAQs
vax.co.uk 9
WARNING: to reduce the risk of personal injury, unplu the steam stick before performin
maintenance/troubleshootin checks.
we’re here if you need us
(UK) 0844 412 8455 (ROI) 1-800 928 308
vax.co.uk/support • vaxireland.ie
or call:
Instead of taking me back to the shop, simply visit;
This does not aect your statutory rights.

Other Information
10
UK Service & Help
Any quer es or concerns about us ng your Vax, s mply v s t; vax.co.uk/support – vax reland. e or call the
Vax Carel ne. Calls are charged at the UK local rate. Please make a note of the ser al number and model
number of the vacuum cleaner before call ng.
Vax Carel ne:
(UK) 0844 412 8455
(ROI) 1-800 928 308
Monday-Fr day 8.30am to 6.30pm
Saturday 9.00am to 5.00pm
Consumables
To purchase spares and accessor es, please v s t vax.co.uk
The use of genu ne vax spare parts helps to ma nta n opt m sed
performance and val dates your guarantee
Hard water f lter (Type 2): 1-1-132541-00
M crof bre clean ng pads (Type 2): 1-1-132541-00
Coral clean ng pads (Type 1): 1-1-131643-00
Technical Specification
Voltage: 220-240V
Wattage: 1400-1600W (dependant on model)
Water tank capac ty: 400ml
Cord length: 5.5m
We ght: 3.8kg
Subject to techn cal change w thout not ce.
EEC Statement of Compliance
Manufacturer/EEC mporter: Vax L m ted, hereby on our own respons b l ty, declare that the
S87-CX series s manufactured n compl ance w th the follow ng D rect ves:
Safet y: 2006/95/EC Low Voltage D rect ve
EMC: 2004/108/EC Electromagnet c Compat b l ty D rect ve
Waste electr cal products should not be d sposed of w th household waste. Please recycle where fac l t es ex st.
Check w th your Local Author ty or reta ler for recycl ng adv ce.

Notes
vax.co.uk 11

Version 1.0
Vax Ltd, Kin swood Road, Hampton Lovett, Droitwich, Worcestershire, WR9 OQH, UK
email: inf[email protected] - website: vax.co.uk

vax.co.uk
H87-WV-B
/VRS1WV
Window Vac
Window Cleaner Range
Let’s get started

This Window Vac is intended for household use only
and NOT for commercial or industrial use.
When using the Window Vac basic safety precautions should
always be observed, including the following:
• Keepngers,hairandlooseclothingfrommovingpartsand
openings whilst using the Window Vac.
• Thisappliancecanbeusedbychildrenaged8yearsand
aboveandpersonswithreducedphysical,sensoryormental
capabilities or lack of experience and knowledge if they
have been given supervision or instruction concerning use
of the appliance in a safe way and understand the hazards
involved. Children shall not play with the appliance.
Cleaningandusermaintenanceshallnotbemadeby
children without supervision.
• OnlyVaxrecommendcharger,accessoriesandsolution
should be used with this Window Vac.
Please keep instructions for future reference and use the
Window Vac only as instructed in this guide.
Basic safety precautions
Don’ts
Do’s
This Window Vac is intended for indoor use only
and NOT for outdoor use.
8 Don’tusethisWindowVacifithasbeendropped,damaged,
immersedinwaterorleftoutdoors.
8 Don’t unplug the Window Vac or pull the Window Vac by the
charger cord. Don’t use the charger cord as a handle, pull the
charger cord around corners or sharp edges or close a door
over the charger cord.
8 Don’t charge the Window Vac if the Charger cord or plug is
damaged.PleasecontactourCustomerCareLine.
8 Don’t use the Window Vac charger with incorrect voltage as this
mayresultindamageorinjurytotheuser.Thecorrectvoltageis
listed on the ratings label.
8 Don’t handle the plug or use the Window Vac with wet hands.
8 Don’t use the Window Vac whilst connected to the charger unit.
8 Don’tthrowtheWindowVacintoreorexposetohigh
temperatures,astheWindowVaccontainsarechargeable
batterywhichmaycausedamageorburst.Neverdismantlethe
battery or replace with a dierent type .
8 Don’tattempttoremoveblockageswithsharpobjectsasthis
maycausedamagetoyourWindowVac.
8 Don’tvacuumuphotcoals,cigarettebutts,matchesorsmoking
hotburningitemsoruseinanareawheretheremaybeharmful
uids(chlorine,bleach,andammoniadraincleaner).
Let’s talk safety
3OnlyusetheWindowVacindoorsonverticalsurfaces.
3Alwaysmakesurewatercontainerarettedcorrectlybefore
using your Window Vac.
3TurnoallcontrolsontheWindowVacbeforedisconnectingor
connecting the charger.
3Always switch o the Window Vac and disconnect the charger
beforecarryingoutanymaintenance.
3AlwaysreplacethefuseintheplugwithaBritish13ampfuse.
Alwaysprotectthechargercablefromheatedsurfacesornear
openames.
3UseonlyCEapproved13ampextensioncords,non-approved
extensioncordsmayoverheat.
3Always charge the Window Vac indoors.
3Always carry the Window Vac by the handle.
3StoreyourWindowVacinacool,dryareaawayfromchildren.
3OnlyuseVaxrecommendedbatteriesandsolution.

Thank you for buying this Window Vac
Taking care of your windows
TheWindowVacWindowCleanerisdesignedtocleanwindowsregularlyaseectivelyand
ecientlyaspossibleandthisuserguidewillhelpyougetthemostoutofyourmachine.
Cleanwindowslookbetterandmakeyourhomebrighter.
Taking care of your Window Vac
Alsoinsidethisguideareinstructionsonmaintainingyournewmachine,sothatit’salways
ready when you are to tackle your windows.
Taking care of you
We’re here if you need us. Insteadoftakingmeback
totheshop,simplyvisit:
vax.co.uk/support or call:
(UK) 0844 412 8455 (ROI)1-800928308
Monday-Friday 8.30am to 6.30pm, Saturday 9.00am to 5.00pm
CallsarechargedattheUKlocalrate.Pleasemakeanoteoftheserialnumberandmodelnumber
of the Window Vac before calling.
Alternatively, you can write to us at:
Vax Ltd., Kingswood Road, Hampton Lovett, Droitwich, Worcestershire, WR9 0QH, UK
Let us know what you think @VaxUK

Contents
Let’s talk safety
Getting to know your machine
Getting started
Using your machine
Taking care of your machine
Let’s talk technical
What to do if it goes wrong
Getting in touch
Window Vac
Charger
Included with
your machine
Microbrepad
Scrub pad
Vax window
cleaning solution

Contents
Getting to know your machine
PowerOn/Obutton
Powercharger
connector
Cleaning pad holder
Solution spray outlet
Water recovery squeegee
NameWindow Vac
Voltage 3.7V
Weight 0.75kg
Technical Specication
Subject to technical change without notice.
Microbrepads(Type1)*
1-1-133091-00
Scrubpads(Type2)*
1-1-133092-00
Accessories & Consumables
*To purchase consumables and accessories, please visit vax.co.uk
Spray trigger
Water tank
Watertankcap/
watertanklter
(unseen)

WARNING
Getting started
Using your machine
PLEASE READ ‘LET’S TALK SAFETY’ AT THE BEGINNING BEFORE USE
Plugchargerintothe
mainsandinsertthe
charger cable into the back
of the Window Vac.
Removefoamlter.
Topupwithwater(max40°C)tomaxlevel.Replacelter
andpushthewatertankcapbackintothemachine.When
ttingthewatertankcapbackintothemachineensure
the tab is facing downwards to prevent leaking.
Theindicatorlightwill
show red while the
machineischarging.
Pourin40mlVaxWindow
Cleaner solution.
Theindicatorlightwill
change to green when
fully charged.
Tollthewatertankliftthe
water tank cap.
Always switch o and unplug the
WindowVacfromtheelectrical
socketbeforeassembling,opening
oremptyingthewatertank,or
beforeconnecting/disconnecting
theattachmentsorperformingany
maintenance.
IMPORTANT: This Window Vac is to be used on vertical surfaces only.
NOTE: Fully charge the battery before rst use. Initial charge is 3 hours. Don’t use the Window Vac whilst
connected to the charger unit.

Using your Window Vac
Getting started
Using your machine
Pullthetriggertospray
solution onto the surface
to be cleaned.
ToturntheWindowVacon,
press the power button. You
will hear a click sound.
Wipe the surface with the
microbreorscrubpadon
thebackofthemachine.
Vacuumupwaterusing
slow, straight strokes.
Whilst pulling the trigger to spray solution,
youmayneedtopressthetriggerafew
timesrstbeforesolutionisdispensed,
thisclearsairfromtheWindowVac.
Finish with sideways strokes.
MovetheWindowVacinazig-zag
patterntoavoidover-saturatinga
single point.
After use press the power
button to turn o.

Storage
Taking care of your machine
After use, open the water tank,
removethelterandemptywater
into the sink.
TheWindowVacmustbe
stored in a vertical position.
Rinselterunderrunning
warmwater(Max40’C).
Squeeze any excess water
fromlterbeforereplacing
into the Window Vac.
Toremovethecleaningpadgrasponeend
of the cleaning pad and gently pull, this
canbemachinewashed(Max40’C).
Note: The Window Vac must be emptied after each use – DON’T store water/solution in the machine between uses.
Let’s talk technical
Table of contents
Other Vax Steam Cleaner manuals

Vax
Vax V-084 User manual

Vax
Vax V-085 Series User manual

Vax
Vax Hard Floor Ultimate User manual

Vax
Vax V-084N User manual

Vax
Vax S2 Series User manual

Vax
Vax DualPower MAX User manual

Vax
Vax S87-T2 Series User manual

Vax
Vax Essentials VEU-101 User manual

Vax
Vax Mach2 VZL-6012 User manual

Vax
Vax Steam Fresh Pro User manual

Vax
Vax VSTM1500 User manual

Vax
Vax VSTDUO1600 User manual

Vax
Vax VX69 Specification sheet

Vax
Vax Home Pro User manual

Vax
Vax Grime Pro User manual

Vax
Vax Steam Grime Master User manual

Vax
Vax Home Pro VX86 User manual

Vax
Vax S5-CM User manual

Vax
Vax S84-W7-P Installation instructions

Vax
Vax VCSD-03 User manual