manuals.online logo
Brands
  1. Home
  2. •
  3. Brands
  4. •
  5. Velleman
  6. •
  7. Controllers
  8. •
  9. Velleman VM192RF User manual

Velleman VM192RF User manual

VM192RF: Usermanual - Gebruikershandleiding - Notice d’emploi - Bedienungsanleitung - Manual del usuario
1
32
4
1
(RGBR)
(RBGR)
Select the desired colour* • Kies een gewenste kleur* • sélectionnez la couleur souhaitée* •
Die gewünschte Farbe Auswächlen* • Seleccionar el color deseado*
2
(*) Pressing ‘1’ or ‘2’ will deactivate automatic colour looping , if it was active. If ‘single colour’-mode was
selected (JP3 removed) then these buttons will change the intensity instead of the colour).
(*) het bedienen van 1 of 2 desactiveert het automatisch faden indien dit ingeschakeld was. Indien de mode
‘enkele kleur’ gekozen is (JP3 verwijderd) regelen deze toetsen de intensiteit ipv de kleur).
(*) En appuyant sur ‘1’ ou ‘2’, la boucle de couleurs automatique est désactivée (si la fonction était activée). En
mode unicolore (JP3 supprimé), ces boutons règlent l’intensité au lieu de la couleur.
(*) Drücken Sie Taste 1 oder 2, dann wird der automatische Farbübergang ausgeschaltet, wenn dieser einge-
schaltet war. Haben Sie den ‘Single Colour’-Modus (1 Farbe, JP3 entfernt) ausgewählt, so regeln diese Tasten
die Intensität statt Farbe.
(*) La transición automática de colores se desactiva al pulsar el botón 1 ó 2 si estaba activada. Estos botones
ajustan la intensidad en lugar del color si ha seleccionado el modo ‘Single Colour’ (1 color, JP3 ha sido quitado).
Intensity • intensiteit • intensité • Intensität •
intensidad
4
Press to adjust the intensity between minimum and maximum
level. At release, the dim direction toggles. Also turns-on the unit
when it was previously turned off.
Druk om de intensiteit tussen minimum en maximum niveau in te
stellen. Bij loslaten keert de dimrichting om. Schakelt ook de unit
in indien de unit uitgeschakeld was.
Appuyez pour régler l’intensité entre le niveau minimum et
maximum.En relâchant le bouton, la direction de variation s’inverse.
Permet également d’allumer l’appareil si celui-ci était éteint.
Drücken Sie diese Taste, um die Intensität zwischen dem
Minimum und dem Maximum einzustellen. Lassen Sie los, dann
ändert sich die Dimmrichtung. Mit dieser Taste schalten Sie das
Gerät auch ein.
Pulse este botón para ajustar la intensidad entre el nivel mínimo
y máximo. La dirección de regulación del dimmer se cambia al
soltarlo. También es posible activar el aparato con este botón.
Select the mode** • selecteer de modus** • Sélectionnez le mode** • Sélectionnez le
mode** • Den Modus auswählen** • Seleccionar el modo
3
(**) Automatic colour looping cannot be selected when ‘single colour’-mode is selected (JP3 removed).
(**) Indien de mode ‘enkele kleur’ gekozen is (JP3 verwijderd) kan het automatisch faden niet geactiveerd worden).
(**) En mode unicolore (JP3 supprimé), il est impossible d’activer la boucle de couleurs automatique.
(**) Haben Sie den ‘Single Colour’-Modus (1 Farbe, JP3 entfernt) ausgewählt, dann kann der der automatische
Farbübergang nicht eingeschaltet werden
(**) No es posible activar la transición automática de colores si ha seleccionado el modo ‘Single Colour’ (1 color, JP3
ha sido quitado).
50s
Colour loop time
•
Doorlooptijd van de
kleuren
•
Durée de la boucle
des couleurs
•
Loop-Zeit der Farben
•
Tiempo de bucle de
los colores
1m40s
2m30s
3m20s
5
Setup button • set-up drukknop • bouton “ Setup ” • botón “ Setup ” • “ Setup ”- Taste
6
LED strip connection • LED strip aansluiting • Connexion exible LED • Anschluss für LED-Leiste • Conexión para cinta de LEDs
7
8
Power supply (12/24VDC) • Voedingsspanning (12/24VDC) • Tension d’alimentation (12-24 VCC) • Spannungsversorgung (12-24VDC) • Tensión de alimentación (12-24VDC)
Antenna • Antenne • L’antenne • antena
5
76
8
SW1
Remark: When the unit is turned of by pressing and holding ‘3’, the current colour, intensity and mode are
stored in memory.
At power-on, the unit will restore the saved settings.
Opm: Wanneer men de unit uitschakelt door lang op toets 3 te drukken, worden de laatst gekozen kleur,
intensiteit en mode opgeslagen in het geheugen. Na een spanningsonderbreking zal de unit terug opstarten
met de instellingen die in het geheugen bewaard werden.
Remarque : En maintenant enfoncé le bouton 3, l’appareil s’éteint et mémorise les derniers paramètres
sélectionnés (couleur, intensité et mode). En cas de coupure de courant, l’appareil redémarre avec les
paramètres mémorisés.
Bemerkung: Halten Sie Taste 3 lang gedrückt, um das Gerät auszuschalten. Die eingestellte Farbe, die
eingestellte Intensität und den eingestellten Modus werden gespeichert. Nach Stromausfall startet das Gerät
auch mit diesen gespeicherten Einstellungen.
Observación: El aparato se desactiva al pulsar prolongadamente el botón 3. El último color, la última
intensidad y el último modo seleccionados se guardan. El aparato se activa también con los ajustes
guardados después de una interrupción del suministro eléctrico.
Long press: Turn off the unit
Lang drukken: uitschakelen van de unit.
Un appui long : éteindre l’appareil
Langer Tastendruck: Das Gerät wird ausgeschaltet.
Pulsar prolongadamente: el aparato se desactiva.
Soludam auconte culture senatquid non
Jumper settings
-
jumperinstellingen
-
Conguration des
cavaliers
-
Einstellung der
Steckbrücken
-
Ajustes de los jumper
Short press: activates automatic colour looping
Kort drukken: activeer automatisch faden tussen de
verschillende kleuren
Un appui court : activer la boucle de couleurs automatique
Kurzer Tastendruck: Der automatische Farbübergang
zwischen den verschiedenen Farben wird eingeschaltet.
Pulsar brevemente: La transición automática de colores se activa
Connection diagram - Aansluitschema - Schéma de connexion -
Schaltplan - esquema de conexión
R G B
COM
+-
-
+
NOT USED
NIET GEBRUIKT
NON UTILISE
NICHT BENUTZT
NO SE UTILIZA RGB LED STRIP
RGB LEDSTRIP
FLEXIBLE LED RVB
RGB LED-LEISTE
CINTA DE LED RGB
Modications and typographical errors reserved - © Velleman nv. Legen Heirweg 33, 9890 Gavere (Belgium) HVM192RF - 2013 - ED1
voedingsspanning 12-24VDC
tension d’alimentation 12-24 VCC
Spannungsversorgung 12-24VDC
tensión de alimentación 12/24VDC
3 x 2.5A MAX !
SINGLE COLOUR
EENKLEURIGE LEDSTRIP
FLEXIBLE LED UNICOLORE
EINFARBIGE LED-LEISTE
CINTA DE LED DE 1 COLOR
LED STRIP 1 x 8A max.
1
2
/
2
4
V
D
C
P
O
W
E
R
S
U
P
P
L
Y
JP3 : Single Colour / RGB mode • 1
kleur / RGB mode • mode unicolore /
mode RGB • 1 Farbe / RGB-Modus •
1 Color / Modo RGB
JP1 JP2
Remove all remotes from memory - Verwijderen van alle zendercodes uit het
geheugen - Pour enlever tous les émetteurs de la mémoire -
Die Codes aller Fernbedienungen aus dem Speicher löschen - borrar los códi-
gos de todos los mandos a distancia de la memoria
• Switch off the VM192RF power supply.
• Press and hold SW1.
• While holding SW1, turn on VM192RF power supply.
• The red indicator led and the red channel of the connected led strip will turn on with a low intensity.
All remotes are now removed from memory.
• Release the button.
• Schakel de voedingsspanning van de VM192RF uit.
• Druk op de toets SW1 en hou deze ingedrukt.
• Terwijl SW1 ingedrukt is, schakel de spanning in.
• De rode indicatieled en het rode kanaal van de aangesloten ledstrip zullen zwak oplichten.
Alle afstandbedieningen zijn nu uit het geheugen gewist.
• Laat de toets los.
• Coupez l’alimentation du VM192RF.
• Maintenez enfoncé le bouton SW1 et branchez l’alimentation.
• La LED rouge et le canal rouge du exible LED connecté s’allument faiblement.
• Maintenant, toutes les télécommandes sont effacées de la mémoire.
• Relâchez le bouton.
• Schalten Sie den VM192RF aus.
• Halten Sie SW1 gedrückt.
• Während Sie SW1 gedrückt halten, schalten Sie den VM192RF ein.
• Die rote Anzeige-LED und der rote Kanal der angeschlossenen LED-Leiste leuchten schwach.
• Alle Fernbedienungen sind nun gelöscht worden.
• Lassen Sie die Taste los.
• Desactive el VM192RF.
• Mantenga pulsado SW1.
• Active el VM192RF mientras está pulsando SW1.
• El LED indicador rojo y el canal rojo de la cinta de LEDs conectada se iluminan con baja intensidad.
• Ahora, todos los mandos han sido borrados de la memoria.
• Suelte el botón.
Important:
When all stored remotes are deleted from the VM192RF memory, the unit will only respond to a remote set to factory code. Furthermore, colour, intensity and mode will also
be reset to factory settings. Factory defaults are red, intensity 20% and no automatic colour looping. Once a remote has been linked to the unit, the VM192RF will no longer
respond to a remote set to factory code
Belangrijk:
Als alle afstandbedieningen uit het geheugen gewist zijn, zal de VM192RF enkel reageren op een afstandbediening die ingesteld is op de fabriekscode. Verder zal ook kleur,
intensiteit en mode terug naar de fabrieksinstellingen gezet worden. Deze zijn rood, 20% intensiteit en manuele kleurinstelling. Zodra 1 afstandbediening aangeleerd werd,
zal de unit niet meer reageren op de fabriekscode.
Important :
Lorsque tous les codes ont été effacés de la mémoire, le VM192RF ne réagira qu’à une télécommande réglée par défaut. La couleur, l’intensité et le mode sont également
réinitialisés. Les réglages par défaut sont : rouge, intensité 20% et pas de boucle de couleurs automatique. Après la connexion d’une télécommande, le VM192RF ne réagira
plus à une télécommande réglée par défaut.
Wichtig:
Sind alle Fernbedienungen gelöscht worden, dann reagiert der VM192RF nur auf eine Fernbedienung, mit Standardcode. Auch die Farbe, die Intensität und den Modus
werden auf Werkseinstellungen zurückgesetzt: rot, 20% Intensität und manuelle Farbeinstellung. Wird eine Fernbedienung programmiert, so reagiert der VM192RF nicht
mehr auf den Standardcode.
Importante:
El VM192RF reacciona sólo a un mando a distancia con código estándar después de haber borrado todos los mandos a distancia de la memoria. Además, los ajustes de
fábrica para el color, la intensidad y el modo se restablecen también: rojo, intensidad 20% y ajuste manual de los colores. El VM192RF ya no reacciona al código estándar
en cuanto programe un mando a distancia.
Program your unique code - Uw unieke code programmeren -
Pour programmer votre code unique - Ihren einzigartigen Code
programmieren - Programar su código único
• Hold button “1”
• Briey press button “4” 3 times. The LED will ash 3 times.
• Release button “1”.
• Your unique 32-bit code has been generated and stored.
• Hou drukknop “1” ingedrukt
• Druk 3x kort op de knop “4”. De LED zal 3 keer knipperen
• Laat drukknop “1” los
• Uw unieke 32-bits code is gegenereerd en opgeslagen
• Enfoncez bouton “1”.
• Pressez 3 fois le bouton “4”. La LED clignotera 3 fois
• Lâchez le bouton “1”.
• Votre code 32-bit unique a été généré et sauvegardé
• Halten Sie Taste “1” gedrückt
• Drücken Sie Taste “4” drei Mal kurz. Die LED blinkt drei Mal.
• Lassen Sie Taste “1” los
• Ihr einzigartiger 32-Bit Code ist generiert und gespeichert worden
• Mantenga pulsado botón “1”.
• Pulse el botón “4” 3 veces brevemente. El LED parpadeará 3 veces
• Suelte botón “1”.
• Su código único de 32 bits ha sido generado y guardado.
• Hold button “1”
• Hold button “4”. After +/- 10s the led will ash 5 times.
• Release both buttons.
• Your code has been erased.
• Hou drukknop “1” ingedrukt.
• Hou drukknop “4” ingedrukt. Na +/- 10s zal de LED 5 keer knipperen.
• Laat beide knoppen los.
• De zender is nu terug op de standaardcode ingesteld.
• Enfoncez bouton “1”.
• Enfoncez le bouton “4”. Après +/- 10s la LED clignotera 5 fois
• Lâchez les 2 boutons
• Votre code a été effacé
• Halten Sie Taste “1” gedrückt
• Halten Sie Taste “4” gedrückt. Nach +/- 10 Sek. blinkt die LED fünf Mal.
• Lassen Sie beide Tasten los
• Ihr Code ist gelöscht worden
• Hold button “1”
• Hold button “4”. After +/- 10s the led will ash 5 times.
• Release both buttons.
• Your code has been erased.
Return to the default code - Terugkeren naar de standaarddcode - Pour
retourner au code standard - Kehren Sie zum Standardcode zurück - Volver
al código de fábrica
RESET
Linking a remote control - Aanleren van een afstandbediening -
Programmer une télécommande - Eine Fernbedienung
programmieren - Programar un mando a distancia
• Turn on the power supply of the VM192RF. The connected led strip and the indicator leds light.
• Press and hold button SW1. The connected led strip and the indicator leds turn off.
• While holding SW1, press and hold any key of the remote until the connected led strip and the indicator leds turn on.
• Release all buttons. The remote has been linked and can be used to control the VM192RF unit.
Up to 5 remotes can be linked to a single VM192RF unit. Linking a 6th remote will erase the rst remote.
• Schakel de VM192RF unit in. De aangesloten led strip en de indicatorleds lichten op.
• Druk op de toets SW1 en hou deze ingedrukt. De aangesloten led strip en de indicatorleds doven.
• Terwijl SW1 ingedrukt is, druk op eender welke toets van de afstandbediening en hou deze ingedrukt tot de aangesloten ledstrip en de indicatorleds terug oplichten.
• Laat alle toetsen los. De afstandbediening is nu aangeleerd en kan gebruikt worden om de unit te bedienen.
Maximum 5 afstandbedieningen kunnen aangeleerd worden. Bij het aanleren van een 6de afstandbediening zal de eerste uit het geheugen gewist worden.
• Allumez l’alimentation du VM192RF. Le exible LED connecté et l’indicateur LED s’allument.
• Maintenez enfoncé le bouton SW1. Le exible LED connecté et l’indicateur LED s’éteignent.
• Maintenez enfoncé le bouton SW1 et appuyez sur un bouton quelconque de la télécommande jusqu’à ce que le exible LED et l’indicateur LED s’allument.
• Relâchez tous les boutons. La télécommande est programmée et peut être utilisée pour piloter le VM192RF.
Le VM192RF permet de programmer jusqu’à 5 télécommandes. Si vous programmez 6 télécommandes, la première télécommande sera supprimée.
• Schalten Sie den VM192RF ein. Die angeschlossene LED-Leiste und die Anzeige-LEDs leuchten.
• Halten Sie die SW1-Taste gedrückt. Die angeschlossene LED-Leiste und die Anzeige-LEDs erlöschen.
• Während Sie SW1 gedrückt halten, halten Sie ebenfalls eine der Tasten der Fernbedienung gedrückt bis die angeschlossene LED-Leiste und die Anzeige-LEDs leuchten.
• Lassen Sie alle Tasten los. Die Fernbedienung ist nun verbunden und kann verwendet worden, um den VM192RF anzusteuern.
Es können bis zu 5 Fernbedienungen mit einem VM192RF verbunden werden. Schließen Sie eine sechste Fernbedienung an, so wird die erste gelöscht.
• Active el VM192RF. La cinta de LEDs conectada y los LEDs indicador se iluminan.
• Mantenga pulsado SW1. La cinta de LEDs conectada y los LEDs indicador se apagan.
• Mientras está pulsando SW1, mantenga pulsado también cualquier botón del mando a distancia hasta que la cinta de LEDs y los LEDs indicador se iluminen.
• Suelte todos los botones. Ahora, el mando a distancia está conectado y puede utilizarlo para controlar el VM192RF.
Es posible conectar máx. 5 mandos a distancia a un solo VM192RF. El primer mando a distancia se borra al conectar un sexto.
LEaRn
REmoTE
REmoVE
REmoTES
LEaRn
CoDE
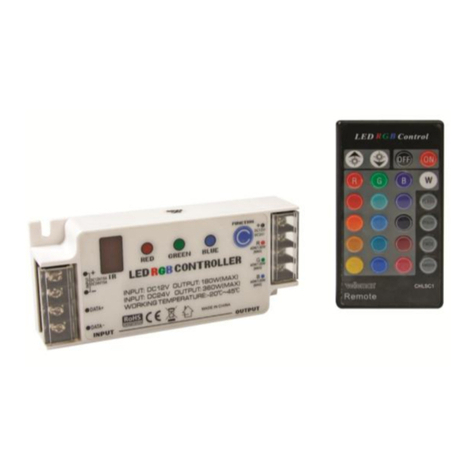
Other Velleman Controllers manuals

Velleman AER Domus Installation guide

Velleman

Velleman AER Domus Installation guide

Velleman VMA333 User manual

Velleman

Velleman VMA333 User manual

Velleman HQRC10001 User manual

Velleman

Velleman HQRC10001 User manual

Velleman HQ Power VDPC130 User manual

Velleman

Velleman HQ Power VDPC130 User manual

Velleman High-Q Velleman-kit K6000 User manual

Velleman

Velleman High-Q Velleman-kit K6000 User manual

Velleman TRCV2A User manual

Velleman

Velleman TRCV2A User manual

Velleman CHLSC1 User manual

Velleman

Velleman CHLSC1 User manual

Velleman K8088 User manual

Velleman

Velleman K8088 User manual

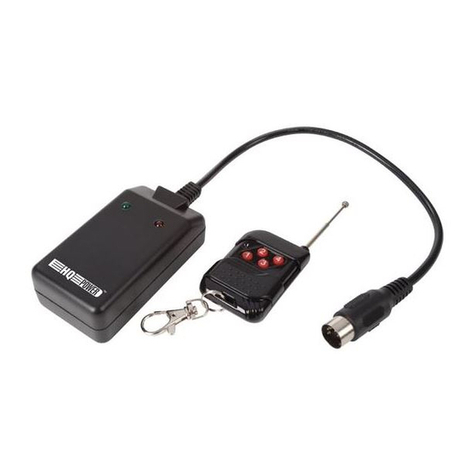
Velleman K2639 User manual

Velleman

Velleman K2639 User manual

Velleman HQ-Power VDPDMXC146 User manual

Velleman

Velleman HQ-Power VDPDMXC146 User manual

Velleman SOL10UC3 User manual

Velleman

Velleman SOL10UC3 User manual

Velleman HQ Power VDPDMXC136 User manual

Velleman

Velleman HQ Power VDPDMXC136 User manual

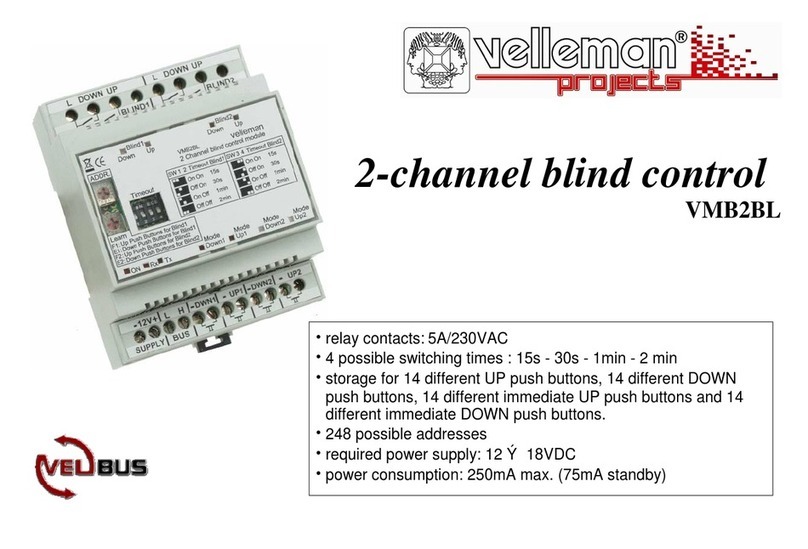
Velleman VMB2BL User manual

Velleman

Velleman VMB2BL User manual

Velleman SOL30UC2 User manual

Velleman

Velleman SOL30UC2 User manual

Velleman VMB2BL User manual

Velleman

Velleman VMB2BL User manual

Velleman Vellight LEDC25 User manual

Velleman

Velleman Vellight LEDC25 User manual

Velleman CAMCOLD/CK User manual

Velleman

Velleman CAMCOLD/CK User manual

Velleman SOL4UCN2 User manual

Velleman

Velleman SOL4UCN2 User manual

Velleman vellight CHLSC4 User manual

Velleman

Velleman vellight CHLSC4 User manual

Velleman VMA409 User manual

Velleman

Velleman VMA409 User manual

Velleman HQ POWER VDPC174 User manual

Velleman

Velleman HQ POWER VDPC174 User manual

Velleman HQ POWER VDPDMXC144 User manual

Velleman

Velleman HQ POWER VDPDMXC144 User manual

Velleman SOL10UC User manual

Velleman

Velleman SOL10UC User manual

Velleman HQ-Power VDLC6000 User manual

Velleman

Velleman HQ-Power VDLC6000 User manual

Popular Controllers manuals by other brands

bar SmartControl 2.0 Operation manual

bar

bar SmartControl 2.0 Operation manual

KE2 Therm Solutions Evaporator Efficiency installation manual

KE2 Therm Solutions

KE2 Therm Solutions Evaporator Efficiency installation manual

Inovance AC800 Series user guide

Inovance

Inovance AC800 Series user guide

ACTUATECH GD08 instruction manual

ACTUATECH

ACTUATECH GD08 instruction manual

Nidec Leroy-Somer R450 M Installation and Maintenance

Nidec

Nidec Leroy-Somer R450 M Installation and Maintenance

Trio MC206X Quick connection guide

Trio

Trio MC206X Quick connection guide

Show Tec Lite-12 manual

Show Tec

Show Tec Lite-12 manual

HomeMatic HM-LC-BI1PBU-FM Installation and operating manual

HomeMatic

HomeMatic HM-LC-BI1PBU-FM Installation and operating manual

Philips iPlayer3 installation instructions

Philips

Philips iPlayer3 installation instructions

Niko 05-350 manual

Niko

Niko 05-350 manual

nekos KIMO 202 User instructions

nekos

nekos KIMO 202 User instructions

Agilent Technologies Turbo-V 81-AG user manual

Agilent Technologies

Agilent Technologies Turbo-V 81-AG user manual

FAAC E124S Translation of the original instructions

FAAC

FAAC E124S Translation of the original instructions

Associated Equipment KwikStart Pro Series Operator's manual

Associated Equipment

Associated Equipment KwikStart Pro Series Operator's manual

Prolon M2000 SERIES Hardware guide

Prolon

Prolon M2000 SERIES Hardware guide

IBM ServeRAID M5025 user guide

IBM

IBM ServeRAID M5025 user guide

Pixsys ATR144 user manual

Pixsys

Pixsys ATR144 user manual

Emerson Dixell XM660K Installing and operating instructions

Emerson

Emerson Dixell XM660K Installing and operating instructions

manuals.online logo
manuals.online logoBrands
  • About & Mission
  • Contact us
  • Privacy Policy
  • Terms and Conditions

Copyright 2025 Manuals.Online. All Rights Reserved.