manuals.online logo
Brands
  1. Home
  2. •
  3. Brands
  4. •
  5. Velleman
  6. •
  7. Thermometer
  8. •
  9. Velleman TA4 User manual

Velleman TA4 User manual

TA4 VELLEMAN1
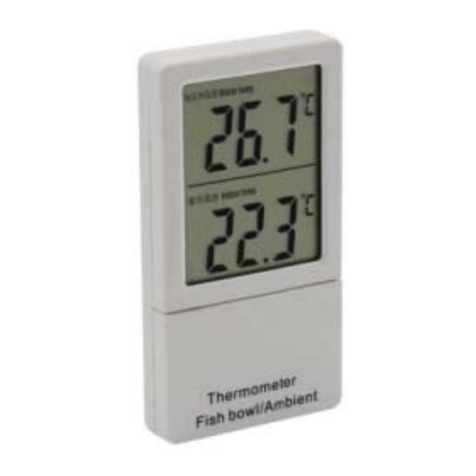
TA4 – In/Out Thermometer With Backlight
1. Description
Nr./N° English Nederlands français español Deutsch
1 backlight button achtergrondverlichting éclairage de fond retroiluminación Hintergrundbeleuchtung
2 front panel frontpaneel panneau frontal panel frontal Frontplatte
3 °C/°F switch °C/°F schakelaar comutateur °C/°F conmutador °C/°F °C/°F-Schalter
4 in/out temperature binnen-/buitentemp. t° intér./extérieure temperatura interior / exterior Innen-/Außentemp.
5 velcro tape velcrostrip adhésif velcro cinta de velcro Velcro-Klebepad
6 AAA-battery (1.5V) AAA-batterij (1.5V) pile LR3 (1.5V) pila AAAj (1.5V) AAA-Batterie (1.5V)
7 back panel achterpaneel panneau arrière panel posterior Rückseite
8 outdoor sensor buitensensor capteur extérieur sensor exterior Außenfühler
2. Installation & Care
Mount the device in a spot protected from direct sunlight, water and extreme temperatures. Wipe the mounting area
clean, remove the protective paper from the velcro strips and press the device firmly into position.
Use a soft cloth moistened with a mild detergent to wipe the device clean. Do not use alcohol or solvents.
3. Controls
1. Press the backlight button (1 in fig.) to illuminate the LCD display for ± 3 seconds. Keep in mind that frequent
use of this button will wear down your battery.
2. Use the slide control (3 in fig.) to display the temperature in °C or °F.
3. Press the in/out button (4 in fig.) to alternately display the inside and outside temperature.
4. Battery
Remove the cover of the battery compartment, insert a new AAA-battery of 1.5V while respecting the polarity
indications inside the battery compartment and replace the cover.
TA4 VELLEMAN2
TA4 – Binnen-/buitenthermometer met achtergrondverlichting
1. Beschrijving (zie figuur en tabel op blz. 1)
2. Installatie & onderhoud
Bevestig het toestel op een plaats waar het beschermd is tegen rechtstreeks zonlicht, water en extreme
temperaturen. Veeg de montageplaats schoon, verwijder het beschermende papier van de velcrostrips, bevestig het
toestel op de gewenste plaats en druk stevig aan.
Reinig het toestel met een zachte doek en een milde detergent. Gebruik geen alcohol of solventen.
3. Regelingen
1. Druk op de knop voor de achtergrondverlichting (1 in fig. blz. 1) om de LCD display gedurende ± 3 sec. te
verlichten. Bij herhaaldelijk gebruik van deze functie zal de batterij sneller leeg zijn.
2. Gebruik de schuifregelaar (3 in fig. blz. 1) om de temperatuur weer te geven in °C of °F.
3. Druk op de in/out knop (4 in fig. blz. 1) om afwisselend de binnen- en buitentemperatuur uit te lezen.
4. Batterij
Verwijder het batterijdeksel, breng een nieuwe AAA-batterij van 1.5V in (let op de polariteitsindicaties) en breng het
deksel weer aan.
TA4 – Thermomètre int./ext. avec retro-éclairage
1. Description (voir figure et table à la p. 1)
2. Installation & maintien
Montez l’appareil à un endroit protégé contre les rayons solaires, la pluie et les températures extrêmes. Essuyez le
lieu de montage, enlevez le papier protectif des bandes velcro, fixez l’appareil au lieu de montage prévu et serrez-le
fermement.
Essuye l’appareil avec un chiffon propre humidifié d’un détergent doux. N’utilisez ni alcool ni solvants.
3. Réglages
1. Pressez le bouton de l’éclairage de fond (1 dans la fig. à la p. 1) pour éclairer l’afficheur LCD pendant ± 3 sec.
L’emploi répété de cette fonction réduira la durée de vie de la pile.
2. Affichez la température en °C ou °F avec la glissière (3 dans la fig. à la p. 1).
3. Pressez le bouton in/out (4 dans la fig. à la p. 1) pour alterner entre l’affichage de la température intérieure et
extérieure.
4. Pile
Enlevez le couvercle du compartiment des piles, insérez une nouvelle pile LR3 (AAA) de 1.5V en respectant les
indications de polarité et replacez le couvercle.
TA4 VELLEMAN3
TA4 – Termómetro con temperatura interior / exterior y retro ilumina ción
1. Descripción (véase figura y lista en p. 1)
2. Instalación & mantenimiento
Instale el aparato en un lugar donde no está expuesto a la lluvia, la humedad y calor extremo. Limpie el lugar de
montaje, quite el papel protector de las cintas de velcro, fije el aparato en el lugar de montaje previsto y apriételo
firmemente.
Limpie el aparato con un paño húmedo. Evite el uso de alcohol y de disolventes.
3. Ajustes
1. Apriete el botón de iluminación (1 en la fig. en la p. 1) para iluminar la pantalla LCD durante ± 3 seg. Un uso
frecuente de esta función disminuye la duración de vida de las pilas.
2. Visualice la temperatura en °C o °F mediante el conmutador deslizante (3 en la fig. en la p. 1).
3. Apriete el botón in/out (4 en la fig. en la p. 1) para cambiar entre la visualización de la temperatura interior y
exterior.
4. Pila
Quite la tapa del compartimiento de pilas, introduzca una nueva pila LR3 (AAA) de 1.5V respetando las indicaciones
de polaridad y devuelva la cubierta a su lugar.
TA4 – Innen- / Außenthermometer mit Hintergrundbeleuchtung
1. Beschreibung (siehe Abbildung und Tabelle, S. 1)
2. Installation & Wartung
Achten Sie bei der Wahl des Installationsortes darauf, dass das Gerät keinem direkten Sonnenlicht, keiner
Feuchtigkeit und extremen Temperaturen ausgesetzt wird. Machen Sie den Montageort sauber, ziehen Sie die weiße
Folie vom Klebepad ab, kleben Sie das Gerät auf die gewünschte Oberfläche und drücken Sie es fest.
Verwenden Sie zur Reinigung ein feuchtes Tuch. Verwenden Sie auf keinen Fall Alkohol oder irgendwelche
Lösungsmittel.
3. Regelungen
1. Drücken Sie die Taste für die Hintergrundbeleuchtung (1 in Abb. S. 1) um das LCD-Display während ± 3 Sek.
zu beleuchten. Um den Batterieverbrauch so gering wie möglich zu halten, sollten Sie diese Funktion nur bei
Bedarf drücken
.
2. Verwenden Sie den Schiebeschalter (3 in Abb. S. 1) um die Temperatur in °C oder °F anzuzeigen.
3. Drücken Sie die In/Out-Taste (4 in Abb. S. 1) um wechselweise die Innen- und Außentemperatur anzuzeigen.
4. Batterie
Schieben Sie das Batteriefach in Pfeilrichtung auf, legen Sie eine neue AAA-Batterie von 1.5V ein (achten Sie auf die
richtige Polung) und schließen Sie das Batteriefach wieder.
Other Velleman Thermometer manuals

Velleman DVM8810 User manual

Velleman

Velleman DVM8810 User manual

Velleman DEM102 User manual

Velleman

Velleman DEM102 User manual

Velleman PMTEMP1 User manual

Velleman

Velleman PMTEMP1 User manual

Velleman ED2A011 User manual

Velleman

Velleman ED2A011 User manual

Velleman DEM104 User manual

Velleman

Velleman DEM104 User manual

Velleman TA20 User manual

Velleman

Velleman TA20 User manual

Velleman SHE11 User manual

Velleman

Velleman SHE11 User manual

Velleman DEM103 User manual

Velleman

Velleman DEM103 User manual

Velleman PMTEMP1 User manual

Velleman

Velleman PMTEMP1 User manual

Velleman DVM002 User manual

Velleman

Velleman DVM002 User manual

Velleman DVM77N User manual

Velleman

Velleman DVM77N User manual

Velleman DEM100 User manual

Velleman

Velleman DEM100 User manual

Velleman VMA324 User manual

Velleman

Velleman VMA324 User manual

Velleman DVM8855 User manual

Velleman

Velleman DVM8855 User manual

Velleman DVM1322 User manual

Velleman

Velleman DVM1322 User manual

Velleman DEM103 User manual

Velleman

Velleman DEM103 User manual

Velleman DVM99 User manual

Velleman

Velleman DVM99 User manual

Velleman DTP1N User manual

Velleman

Velleman DTP1N User manual

Velleman DVM99 User manual

Velleman

Velleman DVM99 User manual

Velleman DTP9 User manual

Velleman

Velleman DTP9 User manual

Velleman DVM77 User manual

Velleman

Velleman DVM77 User manual

Velleman DVM8838 User manual

Velleman

Velleman DVM8838 User manual

Velleman TA2 User manual

Velleman

Velleman TA2 User manual

Velleman TA25 User manual

Velleman

Velleman TA25 User manual

Popular Thermometer manuals by other brands

VISIOMED EASYSCAN FTX3 user manual

VISIOMED

VISIOMED EASYSCAN FTX3 user manual

Microlife MT16K1-PRO instructions

Microlife

Microlife MT16K1-PRO instructions

EQUATION EM233B-W instruction manual

EQUATION

EQUATION EM233B-W instruction manual

ThermoProbe TL2-A Instructions for use

ThermoProbe

ThermoProbe TL2-A Instructions for use

Accurite 00603 instruction manual

Accurite

Accurite 00603 instruction manual

RS Components 51 206-3722 Operator's manual

RS Components

RS Components 51 206-3722 Operator's manual

Optex PT-3S manual

Optex

Optex PT-3S manual

Taylor OMG 812 instruction manual

Taylor

Taylor OMG 812 instruction manual

Oregon Scientific RMR683HG user manual

Oregon Scientific

Oregon Scientific RMR683HG user manual

Covidien Genius 2 operating manual

Covidien

Covidien Genius 2 operating manual

TytoCare TytoHome user guide

TytoCare

TytoCare TytoHome user guide

Rossmax TG100 user manual

Rossmax

Rossmax TG100 user manual

RADWAG GT105K-12/Z user manual

RADWAG

RADWAG GT105K-12/Z user manual

VOLTCRAFT PTM-130 operating manual

VOLTCRAFT

VOLTCRAFT PTM-130 operating manual

Maiyun HX-YL001 user manual

Maiyun

Maiyun HX-YL001 user manual

Youshiko YC9066 quick start guide

Youshiko

Youshiko YC9066 quick start guide

Microlife IR1DQ1-1 manual

Microlife

Microlife IR1DQ1-1 manual

Salter Heston Blumental 543 HBSSCR Instructions and guarantee

Salter

Salter Heston Blumental 543 HBSSCR Instructions and guarantee

manuals.online logo
manuals.online logoBrands
  • About & Mission
  • Contact us
  • Privacy Policy
  • Terms and Conditions

Copyright 2025 Manuals.Online. All Rights Reserved.