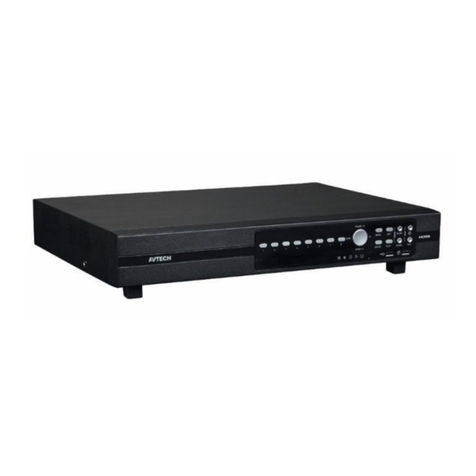
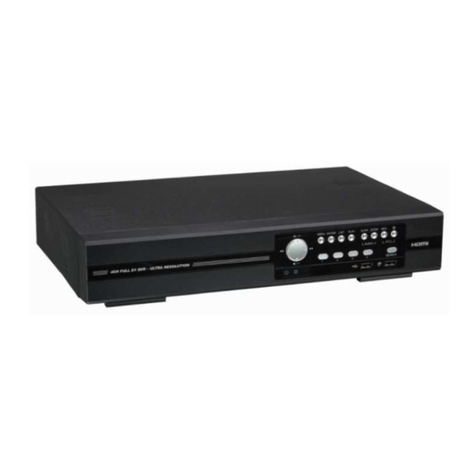
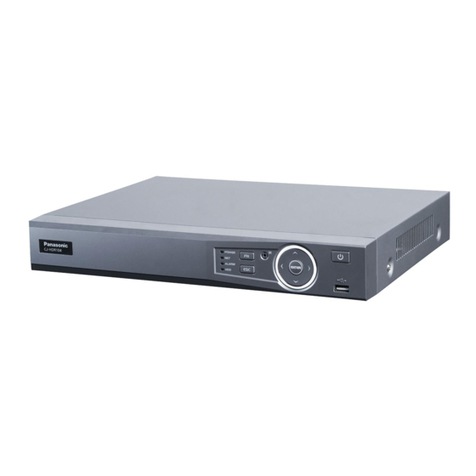
Velleman DVR4H3 User manual

DVR4H3
4-CH. H.264 DVR + ETHERNET + USB + VGA + 4 x AUDIO + ALARM INPUTS
+ MOBILE
4-KANAALS H.264 DVR + ETHERNET + USB + VGA + 4 x AUDIO +
ALARMINGANGEN + MOBILE
ENREGISTREUR NUMÉRIQUE H.264 À 4 CANAU + ETHERNET + USB + VGA
+ 4 x AUDIO + ENTRÉES ALARME + MOBILE
VIDEOGRABADORA DIGITAL H.264 DE 4 CANALES + ETHERNET + USB +
VGA + 4 x AUDIO + ENTRADAS ALARMA + MOBILE
4-KANAL H.264 DVR + ETHERNET + USB + VGA + 4 x AUDIO +
ALARMEINGÄNGE
+ MOBILE
QUICK INSTALLATION GUIDE 3
BEKNOPTE INSTALLATIEHANDLEIDING 11
GUIDE D’INSTALLATION RAPIDE 19
GUÍA RÁPIDA 27
SCHNELLEINSTIEG 35

DVR4H3
18/01/2012 ©elleman nv
2
FRONT IEW – OORZIJDE – UE FRONTALE
ISTA FRONTAL – ORDERANSICHT
REAR IEW – ACHTERZIJDE – UE ARRIÈRE ISTA POSTERIOR –
HINTERANSICHT
*HDD not included - *Harde schijf niet
meegeleverd - *Disque dur non inclus -
*Disco duro no incluido -
*Festplatte nicht
mitgeliefert
A B
power supply data bus (SATA)
voeding databus (SATA)
alimentation bus de données (SATA)
alimentación bus de datos (SATA)
Stromversorgung Datenbus (SATA)
Figure 1

DVR4H3 Rev. 01
18/01/2012 ©elleman nv
3
Quick installation guide
1. Introduction
To all residents of the European Union
Important environmental information about this product
This symbol on the device or the package indicates that disposal of the device after its
lifecycle could harm the environment. Do not dispose of the unit (or batteries) as unsorted
municipal waste; it should be taken to a specialized company for recycling. This device
should be returned to your distributor or to a local recycling service. Respect the local
environmental rules.
If in doubt, contact your local waste disposal authorities.
Thank you for choosing elleman! Please read the manual thoroughly before bringing this device into
service. If the device was damaged in transit, do not install or use it and contact your dealer. Damage
caused by disregard of certain guidelines in this manual is not covered by the warranty and the
dealer will not accept responsibility for any ensuing defects or problems.
NOTICE:
This document is a Quick installation guide. For more details, refer to the full user manual which
can be found on the included CD-ROM.
Package content:
•1x D R4H3
•1x power adaptor 100-240 AC 50/60Hz to 19 DC 2.21A + power cable
•1x mounting bracket for HDD + screws
•1x CD-ROM containing the full user manual
2. Safety Instructions
Keep the device away from children and unauthorised users.
Risk of electroshock when opening the cover. Touching live wires can cause life-
threatening electroshocks.
Always disconnect mains power when the device is not in use or when servicing or
maintenance activities are performed. Handle the power cord by the plug only.
3. General Guidelines
Refer to the Velleman® Service and Quality Warranty on the last pages of this manual.
Indoor use only
Keep this device away
form rain, moisture, splashing and dripping liquids. Never put
object filled with liquid on top.
Keep this device away from dust.
Keep this device away from extreme heat. Make sure the ventilation openings are
clear at all times. For sufficient air circulation, leave at least 1” (±2.5 cm) in front of
the openings.
Protect this device from shocks and abuse. Avoid brute force when operating the
device.
•Familiarise yourself with the functions of the device before actually using it.
•All modifications of the device are forbidden for safety reasons.
•Only use the device for its intended purpose. Using the device in an unauthorised way will void the
warranty.
•Damage caused by disregard of certain guidelines in this manual is not covered by the warranty and
the dealer will not accept responsibility for any ensuing defects or problems.
•Do not use this product to violate privacy laws or perform other illegal activities.

DVR4H3 Rev. 01
18/01/2012 ©elleman nv
4
4. Features
•GUI display and USB mouse control
•Gmail integration supports notification through Google mail server and any other mail support
•local and remote control completely independent
•H.264 video compression technology
ohighly improves video quality for live viewing and recording
orecording file size is minimized for longest recording time
olower bit rate required for fastest network transfer
•multiplex: allows live display, recording, playback, and backup at the same time
•supports video output for composite & GA simultaneously
•backup function: supports USB 2.0 flash drive backup
•advanced mobile surveillance via free EAGLE EYES software:
oCompatible with iPad, iPhone, Android Tablet, Android Smartphone, Blackberry,
Windows Mobile and Symbian
•remote surveillance on PC for operating systems:
ocompatible with Windows & MAC operating system
ofor web browsers: compatible with Internet Explorer, Mozilla Firefox, Google Chrome
& Safari
ofor CMS software: company-developed and free software " ideo iewer, on both
Windows and MAC operating systems
oalso via Apple's media player, QuickTime
•intelligent motion trigger recording
oadvanced motion detection
oscheduled motion detection recording (with 1 adjustable parameter)
oquick search function (time/motion/alarm)
oonly the channel with an event will be recorded to effectively save a significant
amount of hard disc space
•multi-language OSD: English, French, Dutch, German, Italian, Portuguese, Spanish, Czech,
Hungarian and Greek
•A/ support: supports 4 audio inputs and 1 audio output for sound recording
•full user manual: English, French, German, Spanish
•supports SATA HDD
•PTZ control: supports PELCO-D protocol
•alarm I/O: 4 inputs, 1 output
•supports daylight-saving function
•supports manual / timer / motion / network recording functions
•system auto recovery after power reconnected
•hard disks in option: 500GB (HD500GB/S) or 1TGB (HD1TB/S) (not included)
•supports TCP/IP, PPPoE, DHCP and DDNS network connection
5. Overview
Refer to the illustrations on page 2 of this manual.
Front panel
LED
indications
HDD reading or recording activities on the hard disk
ALARM an alarm was triggered
TIMER timed recording is enabled
PLAY the D R is in playing mode
POWER D R power is on
NA IGATE
Press one of the four positions on the navigate button to move the
cursor up ( ), down ( ), left ( ) or right ( ).
In play-back mode, press the buttons to play/pause ( ), stop
( ), fast rewind ( ) or fast forward ( ) the play-back file.
In setting mode, press the up ( ) or down ( ) button to change
the setting in the menu.
MENU Press to enter the main menu.
ENTER Press to confirm settings
LIST List the information of the recorded files.
QUICK SEARCH / RECORD / MOTION / ALARM / TIMER / FULL LIST

DVR4H3 Rev. 01
18/01/2012 ©elleman nv
5
PLAY Press to play the recorded video.
SLOW In playback mode, press to play the recorded file slowly.
ZOOM In live or playback mode, press to enlarge the image of the selected channel.
SEQ Press to show all screens sequentially in full screen mode. Press again to quit.
4CH: Press to show the 4 channel display mode.
1 ~4 Press a button to select the corresponding channel.
SEARCH
Enter time search mode. Set time range and press START to see all recordings within
the time range.
AUDIO = SLOW + ZOOM
Press SLOW and ZOOM simultaneous to select live or play-back sounds.
P.T.Z. = SLOW +
Press SLOW and simultaneous to enter or exit PTZ control mode.
USB port
(2x)
Connect a USB flash drive for video backup to one USB port; connect a USB mouse
to the other.
Note: do not connect two USB flash drives or USB mice at the same time.
rear panel
LAN port Connect the D R to a local network by plugging a network cable into this port.
GA connector for video monitor*
AUDIO IN 4 audio input channels to connect four external audio sources
e.g. from cameras
with audio.
AUDIO OUT 1 audio output to connect to an audio device, e.g. a speaker (mono).
IDEO IN 4 video input channels to connect 4 external video sources e.g. cameras.
MONITOR 1 video output channel to connect the D R to the main monitor.
EXTERNAL I/O use a 9 pin DSUB connector to connect external signals e.g. alarm, PTZ, ...
power switch
19 DC Power supply input.
6. Hardware setup
Installing the Hard Disk Drive (HDD)
Refer to the illustrations on page 2 of this manual.
•Obtain a suitable HDD (not included), type SATA (Serial Advanced Technology Attachment). The
HDD must be formatted.
•Make sure to unplug the device from the mains before servicing and do not touch any electronic
circuitry to avoid electrostatic discharge.
•Unscrew the 6 screws (1 on either side and 4 on the back) that hold the cover in place.
•Lift the cover (back first).
•Screw the mounting brackets on the HDD (screws included).
Note: the PCB must be facing upwards when mounting the HDD into the D R.
•Connect the SATA data cable and power supply to the HDD.
•Screw the HDD on the bottom of the D R housing PCB facing upwards using the included screws.
•Close the cover (front first) and secure it with the 6 screws.
Connecting a video monitor
•Obtain a suitable monitor (not included) and connect it to the BNC or GA video output port on the
back of the D R.
Connecting the power supply
•Plug the DC output connector of the included power adaptor into the 19 DC power input at the
back of the D R.
WARNING: only use the included adaptor.
•Plug the included power cable into the adaptor input connector and plug the other end into the
mains. Do not switch the D R on yet.
Connecting a camera
•Obtain up to four suitable cameras (not included). Each camera needs its own power supply.

DVR4H3 Rev. 01
18/01/2012 ©elleman nv
6
•Connect the video output of the camera to either video input at the back of the D R. The number
next to the input connectors represents the channel number. Connector type is BNC.
Connecting audio
•The DVR supports four audio inputs. Connect the audio output of an audio source to an audio
input of the D R. Make sure to connect the audio channel to the corresponding video channel.
Connector type is BNC.
•There is also an audio output connector. Connect an audio device e.g. a speaker to this connector
when desired. Connector type is BNC.
Connecting Local Area Network (LAN)
•Connect the D R to a local network by plugging a network cable into the LAN port at the back of
the D R. Connector type is 8P8C (RJ45). Setup is done through the OSD.
7. Preliminary settings
•Make sure the connected cameras are on and set the power switch at the rear of the device to the
on-position. It takes about 15 to 30 seconds to start up.
Menu overview
•Press the MENU button and enter the password to go into the menu list.
Note: default admin password is “0000” (4 times zero).
QUICK START GENERAL - TIME SETUP
DATE SETUP DATE INFO - DAYLIGHT
SYSTEM TOOLS - SYSTEM INFO – BACKUP DATA – BACKUP LOG
EVENT
INFORMATION
QUICK SEARCH - E ENT SEARCH - HDD INFO - E ENT LOG
ADVANCED
CONFIG
CAMERA – DETECTION – ALERT – NETWORK – DISPLAY – RECORD -
REMOTE
SCHEDULE
SETTING
RECORD – DETECTION - ALARM
For more details, refer to the full user manual.
Setting date and time
•Before using the D R the time and date should be set to get a valid time stamp.
•Press the MENU button and enter the admin password to go into the menu list.
•Select the QUICK START menu item.
•Use the NA IGATION button to move to the TIME SETUP menu item. Select it to set date and
time.
Note: once recording started, do not change date or time as this will make it very difficult to
find back the recorded files.
Note: when using the D R for the first time and the correct time is set, leave it on for at
least 48 hours.
Password setting
•Press the MENU button and enter the password to go into the menu list.

DVR4H3 Rev. 01
18/01/2012 ©elleman nv
7
•Select the SYSTEM menu item.
•Go to TOOLS. Select ADMIN PASSWORD (or OPERATOR PASSWORD) and press the ENTER button
to set the password.
Note: an operator can not access the main menu, only the quick menu bar (see below).
•Press the cursor up ( ) or down ( ) button to select the value of the first number and press
enter to save and go to the next character, or use the mouse to select the desired value. Repeat
this for all four password numbers.
Note: default admin password is “0000” (4 times zero).
Record settings
•Press the MENU button and enter the password to go into the menu list.
•Select the QUICK START menu item.
•Select the GENERAL menu item using the NA IGATION button.
•Set the image size, image quality and images per second for recording.
•Refer to the full user manual on the included CD-ROM for more details.
Audio playback
•Press the SLOW and ZOOM button simultaneously to select the desired audio channel or use the
quick menu bar (see below). The current audio channel is indicated in the status bar.
Switch users
•The D R can be accessed as administrator ( ) or operator ( ), icons are indicated in the status
bar.
•To switch between users, click on the user icon ( or ) to lock the current session ( ).
•Press on the key lock icon ( ) than enter the password of the desired profile.
8. Operation
Display
The following image shows the screen layout.
A
system date and time
B
general system status
C
available HDD capacity
D
channel status

DVR4H3 Rev. 01
18/01/2012 ©elleman nv
8
live audio channel 1 .. 4 enabled
playback audio channel 1 .. 4 enabled
(yellow)
audio channel disabled
timer recording
digital zoom on (yellow) / off
USB mouse connected
LAN connected / Internet connected / no network connection
USB flash drive connected
Hard disk overwrite (default)
key lock on
PTZ mode
sequence mode
motion mode
recording mode
alarm mode
administrator logged on
operator logged on
Note that actual screen icons might differ slightly from the ones shown above.
Quick menu bar
Note: only available when USB mouse is connected.
•Move the pointer towards the left of the monitor to open the quick menu bar:
Open channel switch panel.
Show playback control panel.
Zoom-in mode (select desired channel first before entering zoom-mode).
Select audio channel (live mode only live channels can be selected).
Enter PTZ mode and show PTZ control panel
Click to show the power off panel to either halt or reboot the system.
Recording
•Check whether the camera(s) is (are) properly connected and a HDD is present inside the device.
•When the auto-recording and pre-alarm functions are enabled, the device will start recording
images.
•Default the recording icon ( ) is shown.
•In case the motion or alarm detection is activated and a motion or alarm is detected, the motion
( ) resp. alarm ( ) icon is shown.
•When timed recording is enabled, the timed recording icon ( ) is showed and the timed recording
LED is on.
•Default, the device is in HDD overwrite mode and the icon ( ) is shown.

DVR4H3 Rev. 01
18/01/2012 ©elleman nv
9
Play-back
•Make sure the control panel is not locked and press the PLAY button on the control panel or use
the quick menu bar to open the playback control panel:
A progress bar D information
B playback control E close
C event search F set repeat function A→B / open backup menu
Note: play-back needs at least 8192 recorded images to work properly (e.g. with IPS=30, the
recording must be at least 273 seconds long).
•The fast forward ( ) and fast rewind ( ) buttons will increase resp. decrease the play-back
speed. Repeatedly pressing the button will increase/decrease speed to 4x, 8x 16x or 32x (max.).
•Press the pause button ( ) to temporary suspend video play-back.
•Press the stop button ( ) to return to live monitoring.
•Press the SLOW button once to set play-back speed to 1/4
th
and twice for 1/8
th
.
Search
•There are four ways to search recorded files: by record list, motion list, alarm list or by timer list.
•To search an event, press the LIST button on the front panel (make sure the control panel is not
locked). An overview of the recorded file types (ALARM, MANUAL, MOTION, SYSTEM and FULL
LIST) is shown.
•Select the desired list and recording from the list.
•Press ENTER to start play-back.
Note: the recorded files can also be searched via the included ideo iewer software.
9. Technical specifications
video system PAL
video compression H.264 (FRAME)
video input 4 channels, composite video signal 1 pp / 75 ohms BNC
video output composite video signal 1 pp / 75 ohms BNC
GA – max. 1600 x 1200 pixels
maximum recording rate
(PAL)
frame 704 x 576 pixels with 100 IPS (PAL)
image quality setting best - high - normal - basic
hard disk storage built-in SATA type, support 1x HDD, support HDD capacity over
1TB (HDD not incl)
recording mode manual / timer / motion / network / alarm controlled
refresh rate 100 IPS for PAL
audio I/O 4x audio in, 1x audio out (mono)
motion detection area 16 x 12 grids per channel
motion detection sensitivity 4 adjustable parameters for accurate detection
pre-alarm recording 8MB
backup device USB 2.0 flash drive (for backup and firmware updates)
web transmitting / compression
format H.264
Ethernet 10/100 Base-T, supports network control and Live iew via
Ethernet
web interface supports licensed “video viewer” software (Windows & MAC OS)/

DVR4H3 Rev. 01
18/01/2012 ©elleman nv
10
Internet Explorer, Mozilla Firefox, safari & Google Chrome web
browser
network connection supports TCP/IP, PPPoE, DHCP and DDNS function
digital zoom 2x (live & playback)
key lock
yes
video loss detection yes
camera title up to 12 characters
video adjustments hue / colour / contrast / brightness
date display format YY/MM/DD, DD/MM/YY, MM/DD/YY, and off
power source 19 DC
power consumption < 40W
operating temperature 10°C ~ 40°C (50°F ~ 104°F)
system recovery system auto recovery after power reconnected
dimensions 343 x 223 x 59mm
Use this device with original accessories only. Velleman nv cannot be held responsible in
the event of damage or injury resulted from (incorrect) use of this device. For more info
concerning this product, please visit our website www.velleman.eu. The information in
this manual is subject to change without prior notice.
© COPYRIGHT NOTICE
The copyright to this manual is owned by Velleman nv. All worldwide rights reserved.
No part of this manual or may be copied, reproduced, translated or reduced to any electronic
medium or otherwise without the prior written consent of the copyright holder.

DVR4H3 Rev. 01
18/01/2012 ©elleman nv
11
Beknopte installatiehandleiding
1. Inleiding
Aan alle ingezetenen van de Europese Unie
Belangrijke milieu-informatie betreffende dit product
Dit symbool op het toestel of de verpakking geeft aan dat, als het na zijn levenscyclus
wordt weggeworpen, dit toestel schade kan toebrengen aan het milieu. Gooi dit toestel (en
eventuele batterijen) niet bij het gewone huishoudelijke afval; het moet bij een
gespecialiseerd bedrijf terechtkomen voor recyclage. U moet dit toestel naar uw verdeler of
naar een lokaal recyclagepunt brengen. Respecteer de plaatselijke milieuwetgeving.
Hebt u vragen, contacteer dan de plaatselijke autoriteiten betreffende de verwijdering.
Dank u voor uw aankoop! Lees deze handleiding grondig voor u het toestel in gebruik neemt. Werd
het toestel beschadigd tijdens het transport, installeer het dan niet en raadpleeg uw dealer.
OPMERKING:
Dit document is een beknopte installatiehandleiding. Raadpleeg de volledige handleiding op de
cd-rom voor meer informatie (enkel beschikbaar in het Engels, Frans, Duits en Spaans).
Inhoud: •1x D R4H3
•1x voedingsadapter 100-240 AC~50/60 Hz naar 19 DC 2,21 A + voedingskabel
•1x montagebeugel voor harde schijf + schroeven
•1x cd-rom met volledige handleiding
2. Veiligheidsinstructies
Houd buiten het bereik van kinderen en onbevoegden.
Elektrocutiegevaar bij het openen van het toestel. Raak geen kabels aan die onder
stroom staan om dodelijke elektroshocks te vermijden.
Trek de stekker uit het stopcontact (trek niet aan de kabel!) voordat u het toestel reinigt
en als u het niet gebruikt.
3. Algemene richtlijnen
Raadpleeg de Velleman® service- en kwaliteitsgarantie achteraan de handleiding.
Enkel voor gebruik binnenshuis.
Bescherm dit toestel tegen regen, vochtigheid en opspattende vloeistoffen. Plaats
geen object gevuld met vloeistof op het toestel.
Bescherm tegen stof.
Bescherm tegen extreme hitte. Zorg dat de verluchtingsopeningen niet verstopt
geraken. oorzie een ruimte van minstens 2,5 cm tussen het toestel en elk ander
object.
Bescherm tegen schokken en vermijd brute kracht tijdens de bediening.
•Leer eerst de functies van het toestel kennen voor u het gaat gebruiken.
•Om veiligheidsredenen mag u geen wijzigingen aanbrengen.
•Gebruik het toestel enkel waarvoor het gemaakt is. Bij onoordeelkundig gebruik vervalt de
garantie.
•De garantie geldt niet voor schade door het negeren van bepaalde richtlijnen in deze handleiding
en uw dealer zal de verantwoordelijkheid afwijzen voor defecten of problemen die hier
rechtstreeks verband mee houden.
•Leef bij gebruik van dit toestel de wetgeving betreffende de privacy na.

DVR4H3 Rev. 01
18/01/2012 ©elleman nv
12
4. Eigenschappen
•GUI-display en bediening via USB-muis
•berichtgeving via Google mailserver zoals Gmail of andere mailservice
•afzonderlijke lokale en afstandsbediening
•videocompressie H.264
overbeterde videokwaliteit voor monitoring en opnames
olangere opnameduur dankzij een verminderde bestandgrootte
osnellere transfer via netwerk met lagere bitsnelheid
•multiplexing: simultane liveweergave, opname, playback en back-up
•ondersteunt simultane composiet- en GA-video uitgang
•back-upfunctie: ondersteunt back-up via USB 2.0 flash drive
•geavanceerde mobiele bewaking via gratis EAGLE EYES software:
ocompatibel met iPad, iPhone, Android Teblet, Android smartphone,
Blackberry,Windows Mobile en Symbian.
•bewaking op afstand via PC
ovoor besturingssystemen: compatibel met Windows & MAC
ovoor webbrowsers: compatibel met Internet Explorer, Mozilla Firefox, Google Chrome
& Safari
ovoor CMS software: bedrijfsontwikkelde en gratis software " ideo iewer", zowel op
Windows als op MAC besturingssystemen
oook via Apple's media player, QuickTime
•opname door bewegingswaarneming
ogeavanceerde opname door bewegingswaarneming
oopname door bewegingswaarneming met geprogrammeerde starttijd (1 instelbare
parameter)
osnelzoekfunctie (tijdstip/bewegingswaarneming/alarm)
ode opname start enkel op het kanaal met de gebeurtenis om het geheugen op de
harde schijf op de meest doeltreffende manier te benutten
•meertalige OSD: Engels, Frans, Nederlands, Duits, Italiaans, Portugees, Spaans, Tsjechisch,
Hongaars en Grieks
•audio/video: opname met geluid langs 4 audio-ingangen en 1 audio-uitgang
•uitgebreide handleiding: Engels, Frans, Duits, Spaans
•ondersteunt SATA harde schijven
•PTZ-besturing: ondersteunt PELCO-D protocol
•alarmin-/uitgang: 4 ingangen/1 uitgang
•overschakeling naar zomer- of wintertijd
•opnamemodi: manueel / timer / beweging / via netwerk
•automatisch herstel van het systeem nadat de voeding opnieuw is aangesloten
•harde schijven in optie: 500 GB (HD500GB/S) of 1TB (HD1TB/S) (niet meegeleverd)
•ondersteunt TCP/IP, PPPoE, DHCP en DDNS netwerkaansluiting
5. Omschrijving
Raadpleeg de figuren op pagina 2 van deze handleiding.
Frontpaneel
Leds
HDD De harde schijf leest of neemt data op.
ALARM Het alarm werd ingeschakeld.
TIMER De geprogrammeerde opnamefunctie is ingeschakeld.
PLAY De D R speelt de opname af.
POWER De D R is ingeschakeld.
NA IGATIE
Druk op een van de toetsen om de cursor te verplaatsen: omhoog
( ), omlaag ( ), links ( ) of rechts ( ).
Druk tijdens het afspelen op om het bestand af te spelen/te
pauzeren, op om het bestand te stoppen, op om het bestand
terug te spoelen of op om het bestand verder te spoelen.
Druk tijdens het instellen op of om de instellingen te wijzigen.
MENU Druk op MENU om het menu weer te geven.
ENTER Druk op ENTER om te bevestigen.

DVR4H3 Rev. 01
18/01/2012 ©elleman nv
13
LIST Lijst van de opnamebestanden.
QUICK SEARCH / RECORD / MOTION / ALARM / TIMER / FULL LIST
PLAY Druk op PLAY om de opname af te spelen.
SLOW Druk op SLOW om het afgespeelde bestand traag af te spelen.
ZOOM
Druk op ZOOM om het beeld in het geselecteerde kanaal te vergroten.
SEQ Druk op SEQ om alle kanalen achtereenvolgens op het volledige scherm weer te
geven. Druk opnieuw om de functie te verlaten.
Druk op om de 4-kanaals display weer te geven.
1 ~ 4 Druk op een cijfertoets om het desbetreffende kanaal te selecteren.
SEARCH Druk op SEARCH om de zoekfunctie in te schakelen. Geef de tijdruimte in en druk op
START om alle opnames in die tijdruimte weer te geven.
AUDIO = SLOW + ZOOM
Druk gelijktijdig op SLOW en ZOOM om de geluidsopties te selecteren.
P.T.Z. = SLOW +
Druk gelijktijdig op SLOW en om de PTZ-functie in of uit te schakelen.
USB-poort
(2x)
Sluit een USB flashdrive aan op een USB-poort voor back-upopnames. Sluit een USB-
muis aan op de andere USB-poort.
Opmerking: Sluit geen twee flashdrives of muizen aan op de USB-poorten.
Achterpaneel
LAN-poort Aansluiting voor een LAN-netwerk.
GA Aansluiting voor videomonitor*
AUDIO IN 4 audio-ingangen voor 4 externe audiobronnen, bv. camera met audio.
AUDIO OUT
1 audio-uitgang naar een audiotoestel, bv. luidspreker (mono).
IDEO IN 4 video-ingangen voor 4 externe videobronnen, bv. camera’s.
MONITOR 1 video-uitgang naar de hoofdmonitor.
EXTERNAL
I/O
Sluit een extern signaal aan, zoals een alarm of PTZ-camera, via een 9-pin DSUB-
stekker.
oedingsschakelaar.
DC 19 oedingsingang.
6. Installatie van de hardware
Installatie van de harde schijf (HDD)
Raadpleeg de figuren op pagina 2 van deze handleiding.
•Deze D R is geschikt voor gebruik met een compatibele HDD (niet meegeleverd), type SATA
(Serial Advanced Technology Attachment). Formatteer eerst de HDD schijf indien nodig.
•Ontkoppel eerst de D R van het lichtnet. Raak het elektronische circuit niet aan om elektrocutie te
vermijden.
•Draai de 6 schroeven los (1 aan elke zijde en 4 achteraan).
•Open de D R.
•Bevestig de montagebeugels op de HDD met de meegeleverde schoreven.
Opmerking: Installeer de HDD met de printplaat naar boven gericht in de D R.
•Sluit de SATA datakabel en de voedingskabel aan de HDD.
•Schroef de HDD onderaan de D R vast met de meegeleverde schroeven.
•Sluit de D R en draai de 6 schroeven vast.
Aansluiting van een videomonitor
•Sluit een compatibele monitor (niet meegeleverd) aan de BNC of GA video-uitgang achteraan uw
D R.
Aansluiting van de voedingsadapter
•Steek de DC-stekker van de adapter in de 19 DC-ingang achteraan de D R.
WAARSCHUWING: Gebruik enkel de meegeleverde voedingsadapter.

DVR4H3 Rev. 01
18/01/2012 ©elleman nv
14
•Koppel de voedingskabel aan de adapter en koppel de adapter vervolgens aan het lichtnet.
Schakel de D R nog niet in.
Aansluiting van een camera
•Deze D R is geschikt voor gebruik met 4 compatibele camera’s (niet meegeleverd). Elke
aangesloten camera heeft een eigen voeding nodig.
•Sluit de video-uitgang van de camera aan de BNC video-ingang achteraan de D R. Het nummer
naast de aansluiting duidt op het kanaalnummer.
Audioaansluiting
•De DVR heeft vier audio-ingangen. Sluit de audio-uitgang van de audiobron aan de audio-ingang
van de D R. Zorg ervoor dat u het audiokanaal aansluit op het correcte videokanaal. Gebruik
hiervoor een stekker van het type BNC.
•De DVR heeft ook een BNC audio-uitgang naar een extern audiotoestel, bv. een luidspreker.
Aansluiting aan een LAN-netwerk
•Sluit de D R via een netwerkkabel aan een LAN-netwerk. Gebruik hiervoor een stekker van het
type 8P8C (RJ45). De instellingen gebeuren via het instelmenu.
7. Basisinstellingen
•Schakel de D R en de aangesloten camera’s in. De opstarttijd duurt 10 à 15 seconden.
Menuoverzicht
•Druk op MENU en geef het paswoord in om het menu weer te geven.
Opmerking: Het standaard paswoord is 0000 (4x nul).
QUICK START GENERAL - TIME SETUP
DATE SETUP DATE INFO - DAYLIGHT
SYSTEM TOOLS - SYSTEM INFO - BACKUP DATA – BACKUP LOG
EVENT
INFORMATION
QUICK SEARCH - E ENT SEARCH - HDD INFO - E ENT LOG
ADVANCED
CONFIG
CAMERA – DETECTION – ALERT – NETWORK – DISPLAY – RECORD -
REMOTE
SCHEDULE
SETTING
RECORD – DETECTION - ALARM
Raadpleeg de uitgebreide handleiding voor meer details.
Instellen van het uur en de datum
•Stel voor het eerste gebruik de datum en het uur in.
•Druk op MENU en geef het administratorpaswoord in om het menu weer te geven.
•Selecteer QUICK START.
•erplaats met de navigatietoetsen de cursor naar het submenu TIME SETUP.
Opmerking: Het is aan te raden de ingestelde datum en het uur niet meer te wijzigen eens
een opname is gestart.
Opmerking: Laat een pas ingestelde D R gedurende 48 uur ingeschakeld.

DVR4H3 Rev. 01
18/01/2012 ©elleman nv
15
Instellen van een paswoord
•Druk op MENU en geef het paswoord in om het menu weer te geven.
•Selecteer het submenu SYSTEM.
•Ga naar TOOLS. Selecteer ADMIN PASSWORD (of OPERATOR PASSWORD) en druk op ENTER.
Opmerking: Een gewone gebruiker heeft geen toegang tot het hoofdmenu, enkel tot de
menubalk (zie hieronder).
•Stel het nieuwe paswoord in met de toetsen of , en bevestig met ENTER. U kunt de
gewenste digit ook met de muis selecteren. Herhaal voor de resterende digits.
Opmerking: Het standaard paswoord is 0000 (4x nul).
Instellen van de opnamefunctie
•Druk op MENU en geef het paswoord in om het menu weer te geven.
•Selecteer het submenu QUICK START.
•Selecteer het submenu GENERAL met de navigatietoetsen.
•Stel beeldgrootte, beeldkwaliteit en aantal beelden per seconde in.
•Raadpleeg de uitgebreide handleiding op de meegeleverde cd-rom voor meer details.
Afspelen van audio
•Druk gelijktijdig op SLOW en ZOOM om het audiokanaal te selecteren of gebruik de menubalk (zie
hieronder). Het geselecteerde audiokanaal staat in de statusbalk weergegeven.
Selecteren van de gebruiker
•De D R kan door een administrator ( ) of een gebruiker ( ) bediend worden. Het symbool staat
in de statusbalk weergegeven.
•Klik op het gewenste symbool ( of ) om als administrator of gebruiker in te loggen ( ).
•Druk op en geef het paswoord van het gewenste profiel in.
8. Gebruik
Display
De figuur hieronder geeft de displaylay-out weer.
A
datum en uur
B
algemene status
C
beschikbare ruimte
D
kanaalstatus

DVR4H3 Rev. 01
18/01/2012 ©elleman nv
16
inschakelen liveaudio kanaal 1~4
afspelen audiokanaal 1~4 (geel)
audiokanaal uitgeschakeld
geprogrammeerde opname
digitale zoom in-
(geel)/uitgeschakeld
USB-muis aangesloten
LAN-aansluiting/internetaansluiting/geen netwerkaansluiting
USB flashdrive aangesloten
overschrijven harde schijf (standaard)
vergrendeling
PTZ-functie
sequentiefunctie
beweging waargenomen
opname
alarm
ingelogd als administrator
ingelogd als gebruiker
De iconen kunnen verschillen met de iconen op uw scherm.
Menubalk
Opmerking: Enkel zichtbaar indien er een USB-muis aangesloten is.
•erplaats de muiscursor naar de linkerkant van het scherm om de menubalk weer te geven:
kanaalpaneel openen
afspeelpaneel openen
zoomfunctie (selecteer eerst het kanaal)
audiokanaal
PTZ-functie
Klik om het systeem uit te schakelen of te herstarten.
Opname
•Sluit de camera(’s) en de HDD correct aan op de D R.
•De D R start de opname indien de automatische opname- en de prealarmfunctie ingeschakeld
zijn.
Opmerking: De D R overschrijft 8 GB van de oudste gegevens.
•De icoon verschijnt automatisch op de display.
•Bij een bewegingswaarneming of alarm (functie is ingeschakeld) wordt de icoon of
weergegeven.
•Bij een geprogrammeerde opname verschijnt de icoon en licht de opnameled op.
•Standaard staat de D R in overschrijfmodus en wordt weergegeven.

DVR4H3 Rev. 01
18/01/2012 ©elleman nv
17
Weergave
•Schakel de toetsvergrendeling uit en druk op PLAY of open het afspeelpaneel met de muis.
A afspeelbalk D informatie
B bedieningstoetsen E sluiten
C zoekfunctie F kies herhaalfunctie A→B / open backup menu
Opmerking: Het bestand moet minstens 8192 beelden bevatten (bv. ips = 30, de opname
moet minstens 273 seconden lang zijn).
•Druk op om de opname verder te spoelen of op om de opname terug te spoelen. Druk
meermaals op de toets om de spoelsnelheid aan te passen: 4x, 8x 16x of 32x (max.).
•Druk op om de opname te pauzeren.
•Druk op om naar de liveweergave terug te keren.
•Druk eenmaal op SLOW om de opname aan 1/4 afspeelsnelheid af te spelen, of druk tweemaal om
de opname aan 1/8 afspeelsnelheid af te spelen.
Zoekfunctie
•Er zijn vier zoekfuncties beschikbaar: volgens opname, beweging, alarm of tijdstip.
•Druk op LIST op het frontpaneel. U krijgt een lijst met alle opnametypes (ALARM, MANUAL,
MOTION, SYSTEM EN FULL LIST).
•Selecteer de gewenste lijst en het bestand.
•Druk op ENTER om het bestand af te spelen.
Opmerking: de bestanden kunnen ook via ideo iewer opgezocht worden.
9. Technische specificaties
videoformaat PAL
videocompressie H.264 (FRAME)
video-ingang 4 kanalen, composiet videosignaal 1 pp/75 Ω BNC
video-uitgang composiet videosignaal 1 pp/75 Ω BNC
GA – max. 1600 x 1200 pixels
maximum recording rate
(PAL)
frame 704 x 576 pixels with 100 IPS (PAL)
regeling beeldkwaliteit best - high - normal - basic
opslag harde schijf ingebouwd SATA type, ondersteunt 1x HDD, capaciteit van HDD is
meer dan 1 TB (harde schijf niet meegelev.)
opnamemodus manueel, timer, beweging, netwerk, alarm
beeldfrequentie 100 ips (PAL)
audio I/O 4x audio-ingang, 1x audio-uitgang (mono)
zone voor bewegingsdetectie rooster 16 x 12 per kanaal
gevoeligheid bewegingsdetectie 4 instelbare parameters voor precieze waarneming
opname pre-alarm 8 MB
back-uptoestel USB 2.0 flash drive (voor back-up en updates van firmware)
Ethernet 10/100 Base-T (ondersteunt afstandsbediening en Live iew via
Ethernet)
webinterface ondersteunt gelicentieerde video viewer software
(Windows & MAC
OS)/ Internet Explorer, Mozilla Firefox, safari & Google Chrome
web browser

DVR4H3 Rev. 01
18/01/2012 ©elleman nv
18
netwerkaansluiting ondersteunt TCP/IP, PPPoE, DHCP en DDNS
digitale zoom 2x (live & playback)
toetsvergrendeling ja
detectie beeldverlies ja
cameratitels tot 12 karakters
videoregelingen kleurschakering/kleur/contrast/helderheid
formaat tijdsweergave YY/MM/DD, DD/MM/YY, MM/DD/YY, en uitgeschakeld
voeding 19 DC
verbruik < 40 W
bedrijfstemperatuur 10°C ~ 40°C (50°F ~ 104°F)
systeemherstel
automatisch na herinschakeling van de voeding
afmetingen 343 x 223 x 59 mm
Gebruik dit toestel enkel met originele accessoires. Velleman nv is niet aansprakelijk voor
schade of kwetsuren bij (verkeerd) gebruik van dit toestel. Voor meer informatie over dit
product, zie www.velleman.eu. De informatie in deze handleiding kan te allen tijde
worden gewijzigd zonder voorafgaande kennisgeving.
© AUTEURSRECHT
Velleman nv heeft het auteursrecht voor deze handleiding. Alle wereldwijde rechten
voorbehouden. Het is niet toegestaan om deze handleiding of gedeelten ervan over te nemen, te
kopiëren, te vertalen, te bewerken en op te slaan op een elektronisch medium zonder voorafgaande
schriftelijke toestemming van de rechthebbende.

DVR4H3 Rev. 01
18/01/2012 ©elleman nv
19
GUIDE D’INSTALLATION RAPIDE
1. Introduction
Aux résidents de l'Union européenne
Des informations environnementales importantes concernant ce produit
Ce symbole sur l'appareil ou l'emballage indique que l’élimination d’un appareil en fin de
vie peut polluer l'environnement. Ne pas jeter un appareil électrique ou électronique (et
des piles éventuelles) parmi les déchets municipaux non sujets au tri sélectif ; une
déchèterie traitera l’appareil en question. Renvoyer les équipements usagés à votre
fournisseur ou à un service de recyclage local. Il convient de respecter la réglementation
locale relative à la protection de l’environnement.
En cas de questions, contacter les autorités locales pour élimination.
Nous vous remercions de votre achat ! Lire la présente notice attentivement avant la mise en
service de l’appareil. Si l’appareil a été endommagé pendant le transport, ne pas l’installer et
consulter votre revendeur.
REAMRQUE :
Ce document est un guide d’installation rapide. Pour plus de détails, se reporter à la notice
d’emploi complète sur le cédérom.
Contenu :
•1x enregistreur numérique 4 canaux D R4H3
•1x alimentation 100-240 CA~50/60 Hz vers 19 CC 2,21 A + câble
•1x étrier d’installation pour le disque dur + vis de fixation
•1x cédérom contenant la notice d’emploi complète
2. Consignes de sécurité
Garder hors de la portée des enfants et des personnes no autorisées.
Risque d’électrocution lors de l’ouverture du boîtier. Toucher un câble sous tension
peut causer des électrochocs mortels.
Débrancher l’appareil s’il n’est pas utilisé ou pour le nettoyer. Tirer la fiche pour
débrancher l'appareil ; non pas le câble.
3. Directives générales
Se reporter à la garantie de service et de qualité Velleman
®
en fin de notice.
Pour usage à l’intérieur uniquement.
Protéger contre la pluie, l’humidité et les projections d’eau. Ne jamais placer d’objet
contenant un liquide sur l’enregistreur.
Protéger contre la poussière.
Protéger contre la chaleur extrême. eiller à ce que les fentes de ventilation ne
soient pas bloquées. Laisser une distance de minimum 2,5
cm entre l’enregistreur et
tout autre objet.
Protéger contre les chocs. Traiter l’appareil avec circonspection pendant
l’opération.
•Se familiariser avec le fonctionnement avant l’emploi.
•Toute modification est interdite pour des raisons de sécurité.
•N’utiliser qu’à sa fonction prévue. Un usage impropre annule d'office la garantie.
•La garantie ne s’applique pas aux dommages survenus en négligeant certaines directives de cette
notice et votre revendeur déclinera toute responsabilité pour les problèmes et les défauts qui en
résultent.
•Utiliser cet appareil en respectant les directives sur la protection de la vie privée.

DVR4H3 Rev. 01
18/01/2012 ©elleman nv
20
4. Caractéristiques
•affichage GUI et pilotage depuis souris USB
•notification via un serveur mail Google comme Gmail ou autre service mail
•pilotages locale et à distance séparées
•norme de compression vidéo H.264
oqualité d’image améliorée pour le monitorage et l’enregistrement
oréduction de la taille des fichiers pour une durée d’enregistrement prolongée
outilisation via réseau plus rapide avec un débit binaire réduit
•multiplexage : image directe, enregistrement, lecture et sauvegarde simultanés
•supporte simultanément la sortie vidéo composite et sortie vidéo- GA
•fonction de sauvegarde : supporte la sauvegarde via USB 2.0 flash drive
•surveillance à distance par PC
opour systèmes d'exploitation: compatible avec Windows & système d'exploitation MAC
opour navigateurs web: compatible avec Internet Explorer, Mozilla Firefox, Google
Chrome & Safari
opour logiciel CMS: logiciel développé pour une entreprise et logiciel " ideo iewer"
gratuit, pour Windows comme pour MAC
oégalement pour Media Player de Apple, QuickTime
•système de vidéosurveillance mobile intelligent avec le logiciel gratuit EAGLE EYES:
ocompatible avec iPad, iPhone, Android, Blackberry, Windows Mobile et Symbian.
•enregistrement par détection de mouvement
oenregistrement par détection de mouvement avancé
oenregistrement par détection de mouvement programmé (1 paramètre réglable)
ofonction de recherche rapide (heure/détection de mouvement/alarme)
oenregistrement uniquement sur le canal de détection de mouvement afin
d'économiser l'espace sur le disque dur
•OSD multilingue : anglais, français, néerlandais, allemand, italien, portugais, espagnol, tchèque,
hongrois et grec
•Audio/vidéo : enregistrement avec son depuis 4 entrées audio et 1 sortie audio
•notice d'emploi détaillée : anglais, français, allemand, espagnol
•supporte les disques durs SATA
•pilotage PTZ : supporte le protocole PELCO-D
•entrée/sortie alarme : 4 entrées/1 sortie
•passage à l'heure d'été/d'hiver
•enregistrement manuel / programmé / par détection de mouvement / depuis réseau
•auto-rétablissement du système après la remise sous tension
•disques durs en option : 500 Go (HD500GB/S) ou 1 To (HD1TB/S) (non inclus)
•supporte connexion au réseau TCP/IP, PPPoE, DHCP et DDNS
5. Description
Se référer aux illustrations en page 2 de cette notice.
Panneau frontal
DEL
HDD Lecture ou enregistrement en cours.
ALARM Alarme déclenchée.
TIMER Enregistrement programmé.
PLAY Lecture en cours.
POWER L’enregistreur est allumé.
NA IGATION
Déplacement du curseur vers le haut ( ), le bas ( ), la gauche
( ) ou la droite ( ).
Lecture/pause ( ), arrêt ( ), recul rapide ( ) ou avance rapide
( ) en mode de lecture du fichier.
Augmentation ( ) ou diminution ( ) de la valeur à configurer.
MENU Accès au menu.
ENTER Confirmation.
LIST Liste d’information des fichiers d’enregistrement.
QUICK SEARCH / RECORD / MOTION / ALARM / TIMER / FULL LIST
PLAY Lecture de l’enregistrement.
Other manuals for DVR4H3
1
Table of contents
Languages:
Other Velleman Voice Recorder manuals
Velleman
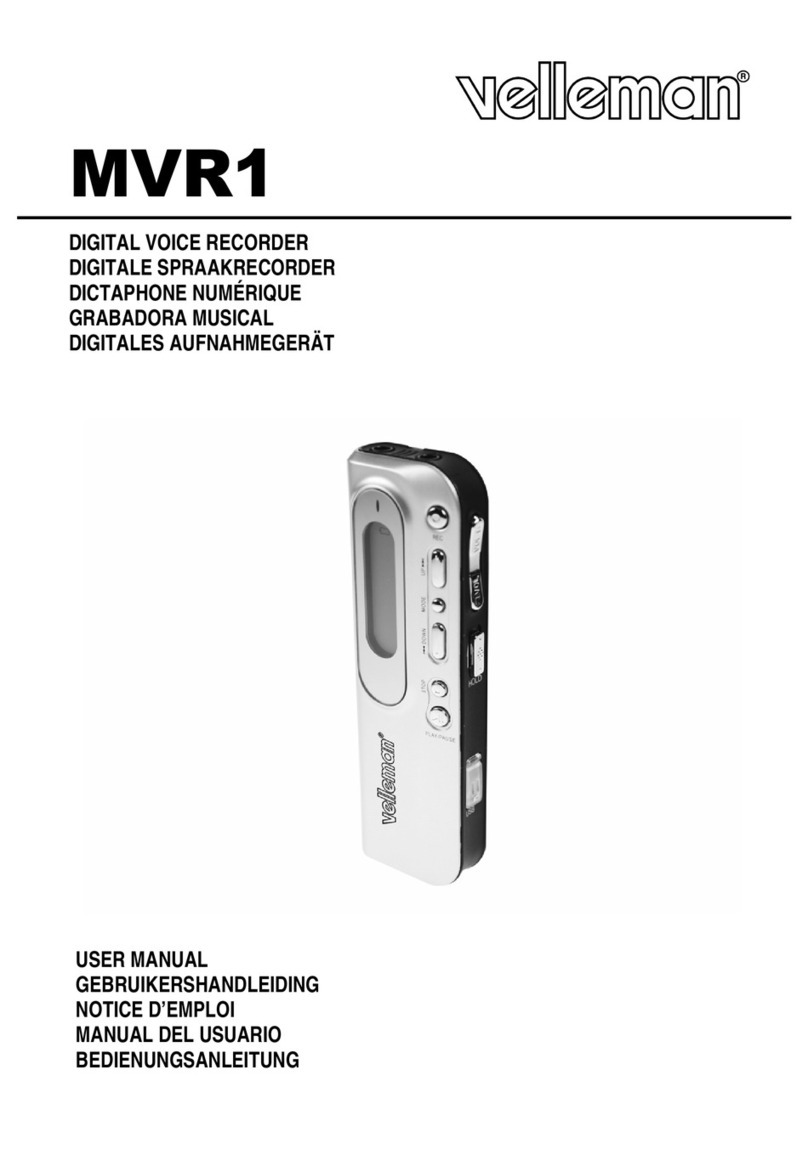
Velleman MVR1 User manual

Velleman
Velleman K8047 User manual
Velleman
Velleman MVR1N User manual
Velleman
Velleman DVR4MQAEB User manual
Velleman
Velleman MVR3 User manual
Velleman
Velleman DVR4T1 User manual
Velleman
Velleman PCRU01 User manual
Velleman
Velleman MVR2 User manual
Velleman
Velleman MVR4 User manual

Velleman
Velleman DVRSD1 User manual
