manuals.online logo
Brands
  1. Home
  2. •
  3. Brands
  4. •
  5. Venjakob
  6. •
  7. Indoor Furnishing
  8. •
  9. Venjakob 2363 User manual

Venjakob 2363 User manual

Aufbauanleitung / assembly instructions mod.
2363, 2364 Keramik-, Glas-Platte mit Frontauszug
ceramic or glass top with front extension
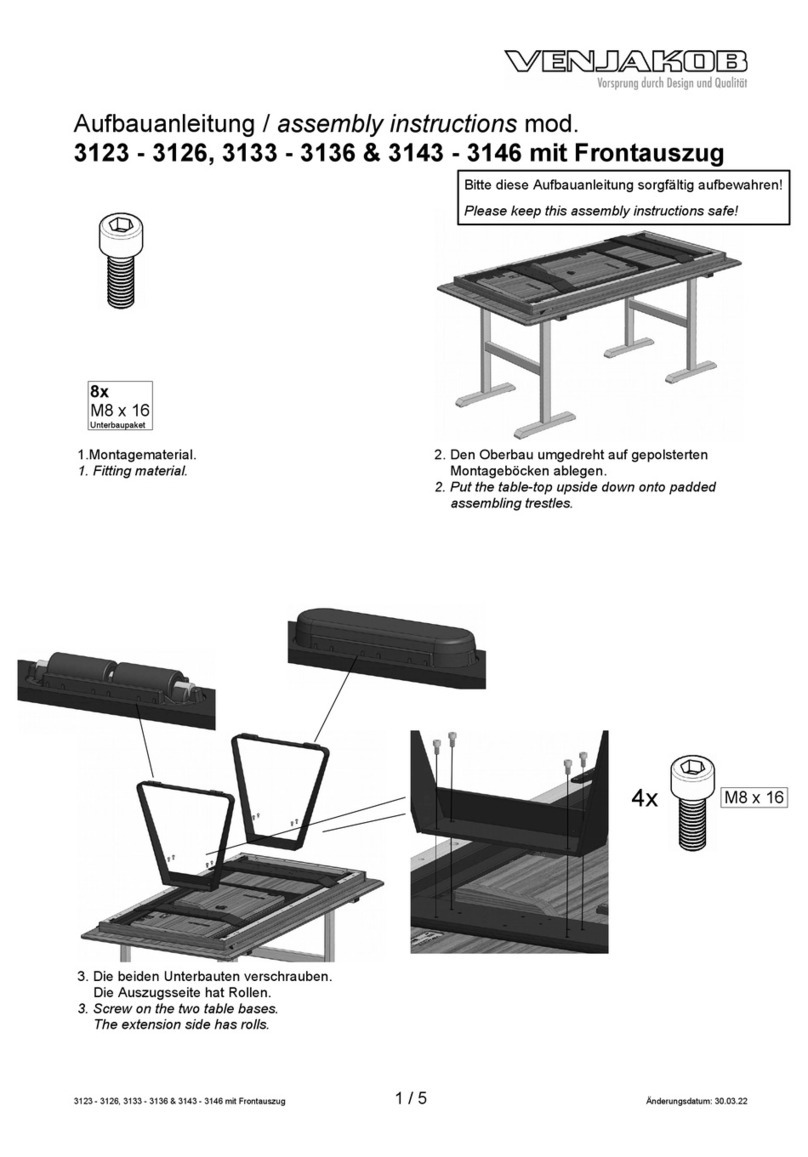
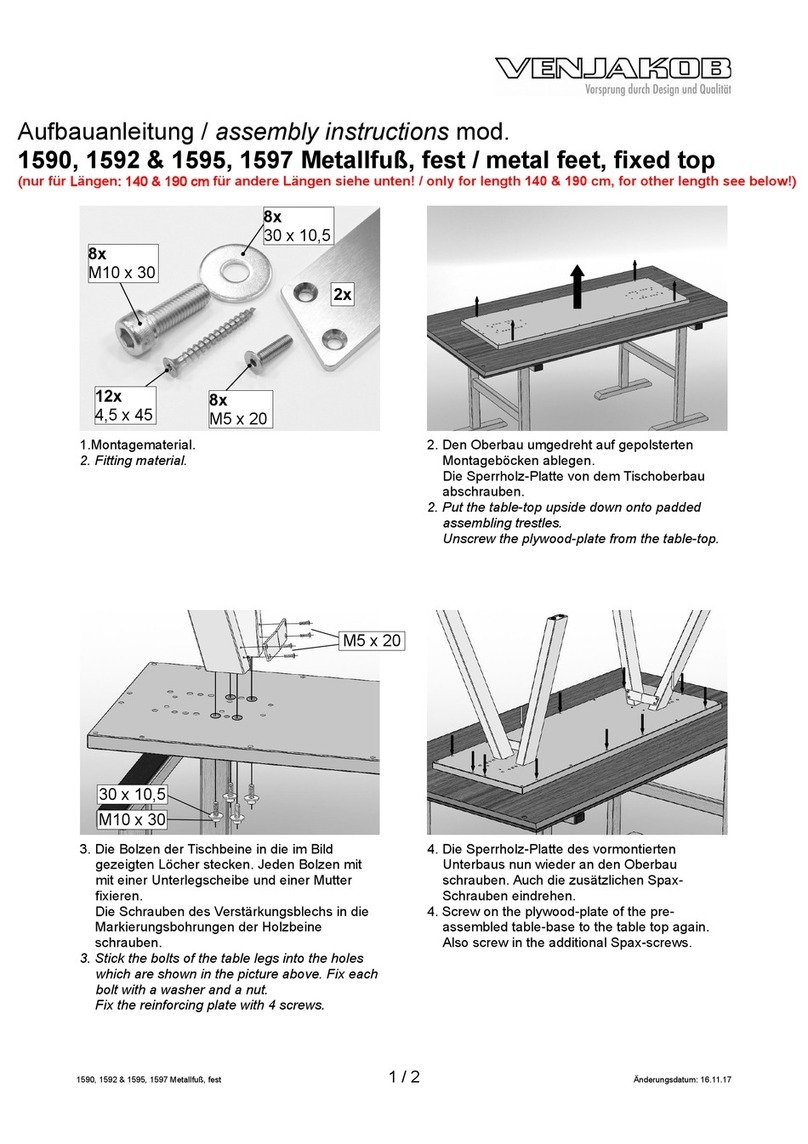
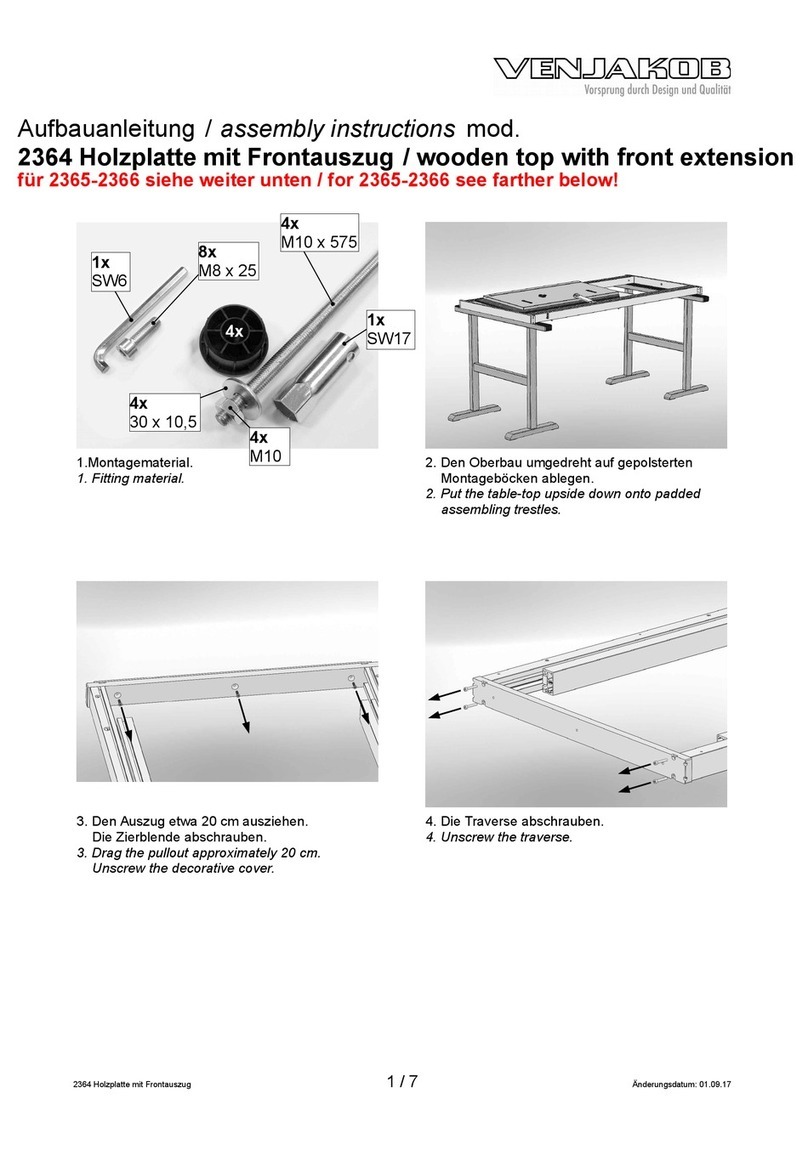
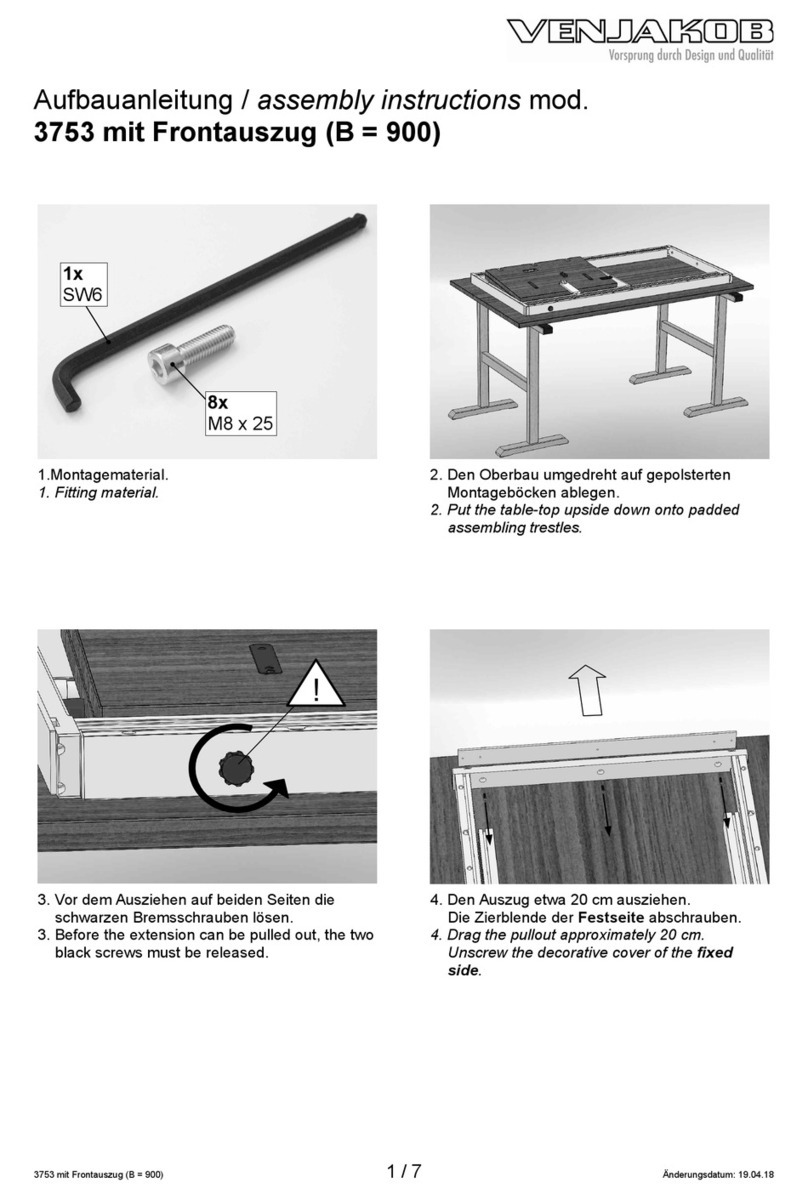
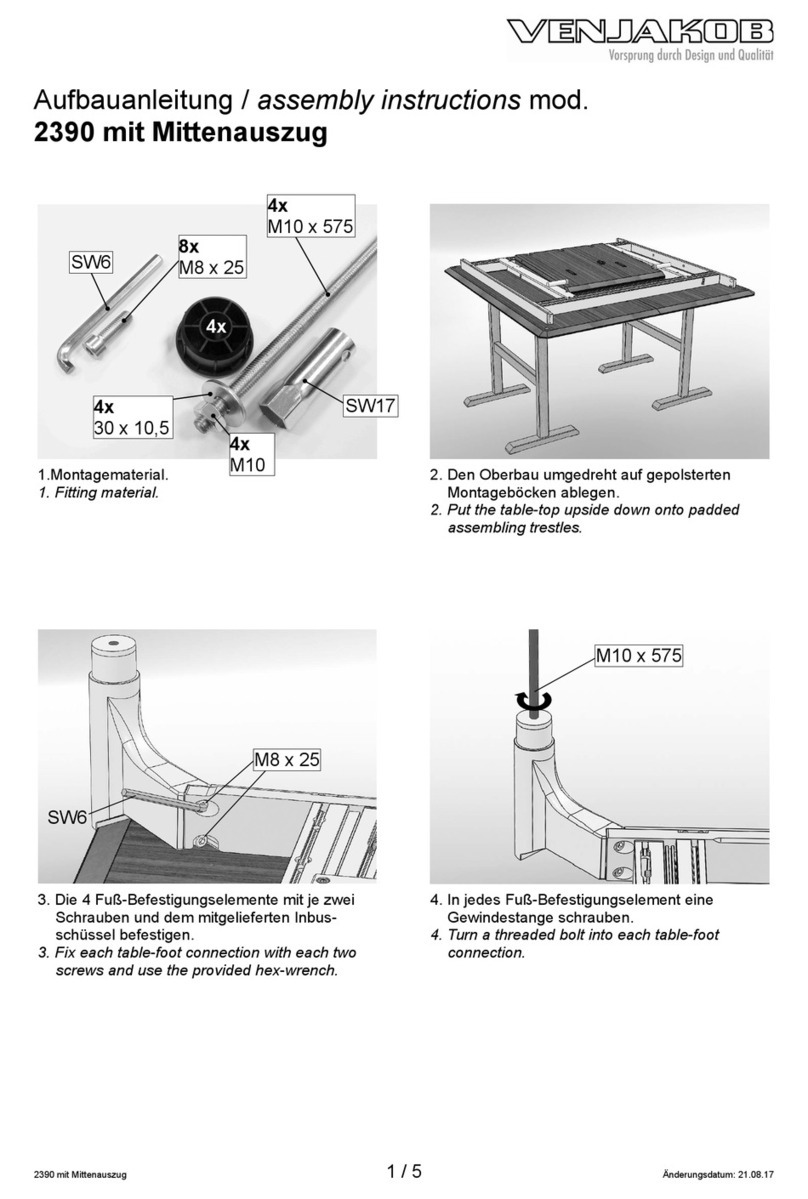
1.Montagematerial.
1. Fitting material.
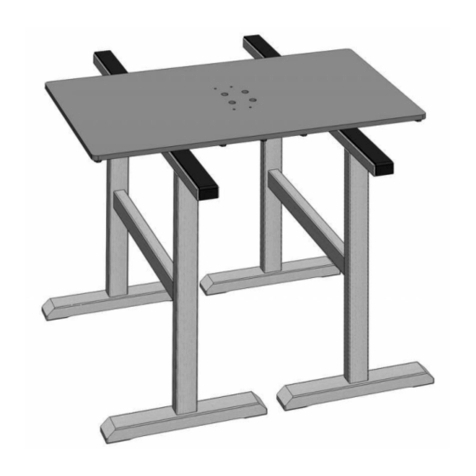
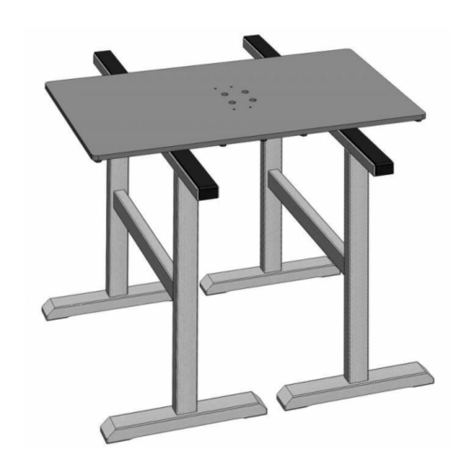
2. Den Oberbau umgedreht auf gepolsterten
Montageböcken ablegen.
2. Put the table top upside down onto padded
assembling trestles.
Montage Fü e / assembling of table legs
Festseite / fixed side:
3. Den Auszug etwa 20 cm ausziehen.
Die Zierblende abschrauben.
3. Drag the pullout approximately 20 cm.
Unscrew the decorati e co er.
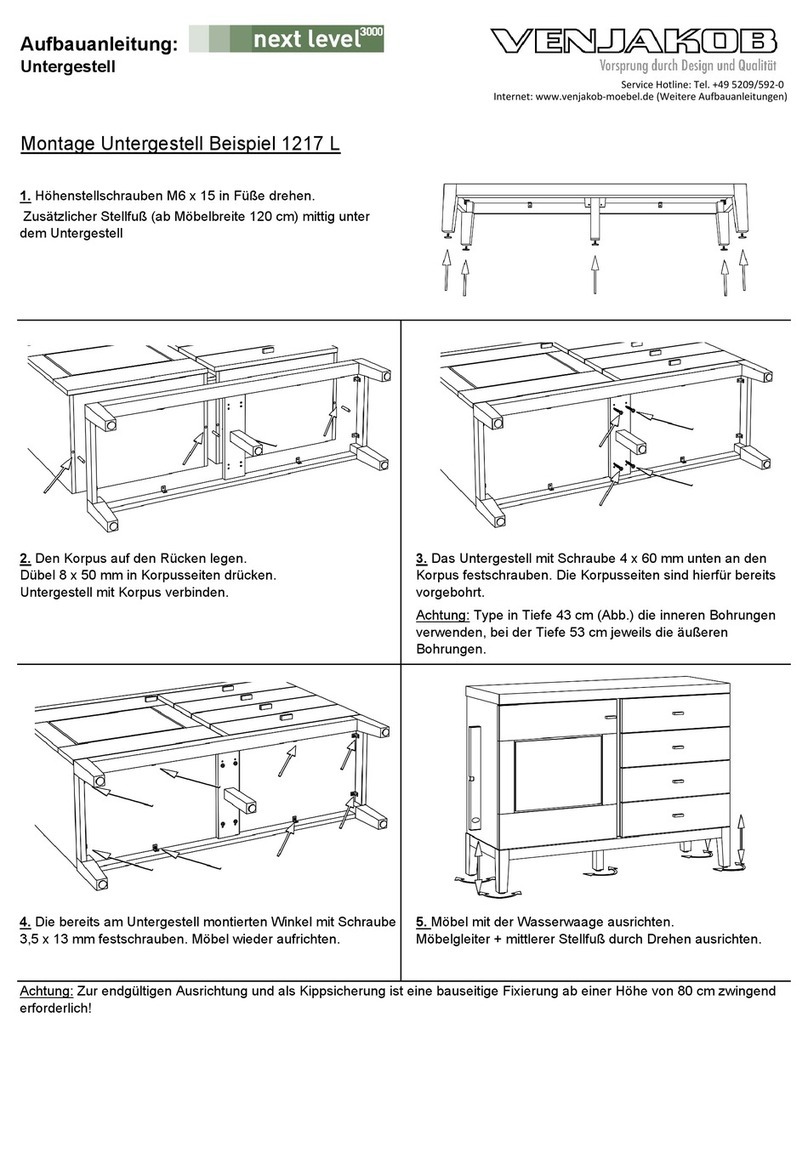
4. Die Traverse abschrauben.
4. Unscrew the tra erse.
2363, 2364 Keramik-, Glas-Platte mit Frontauszug 1 / 8 Änderungsdatum: 25.03.22
8x
M8 x 25
SW6
2363:
4x
M8 x 65
2364:
6x
M8 x 65
5. Die Traverse so mit dem Fu verbinden, dass
sich der gro e Lochabstand auf der Seite des
Fu -Anschlusses (s.a. Bild!) befindet.
Die beiden Befestigungselemente beim An-
schrauben nach o en drücken.
5. The holes, which ha e the higher distance to
the side of the ta erse, must be on top!
Fix both table legs with two screws each and
use the pro ided hex-wrench. Push up both
table legs while fixing them.
6. Beim Anschrauben wieder die jeweils inneren
Gewinde des Rahmens nutzen.
6. Screw on the tra erse again and reuse the
inner threadholes of the frame.
Auszugsseite / extension side:
7. Die Zierblende wieder anschrauben.
7. Screw on the decorati e co er again.
8. Die beiden Fü e mit je zwei Schrauben und
dem mitgelieferten Inbusschüssel befestigen.
Die beiden Fü e beim Anschrauben nach
unten drücken.
8. Fix both table legs with two screws each and
use the pro ided hex-wrench. Push down
both table legs while fixing them.
2363, 2364 Keramik-, Glas-Platte mit Frontauszug 2 / 8 Änderungsdatum: 25.03.22
M8 x 25
SW6 M8 x 25
SW6
Gro er Abstand
higher distance
!
SW6
M8 x 25
!
9. Den Tisch wenden, ohne die Fü e zu belasten
und dann gleichzeitig alle 4 Tischbeine auf
dem Boden absetzen.
9. Turn the table right-side-up without using the
feet. Then put the table down on all 4 legs at
once.
10. Die Platte auspacken und mittig auf dem
Gestell auflegen.
10. Unpack the board and put it onto the middle
of the frame.
11. Die Platte mit den Schrauben zunächst lose
anschrauben ...
11. Initially fix the board with the screws in a
loose way ...
12. … die Platte gleichmä ig zu den Fu -
Befestigungselementen ausrichten und erst
dann ...
12. … adjust the board to the middle and
finally ...
2363, 2364 Keramik-, Glas-Platte mit Frontauszug 3 / 8 Änderungsdatum: 25.03.22
M8 x 65
SW6
2363:
4x
2364:
6x
13. … mit dem mitgelieferten Inbusschlüssel alle
Schrauben vorsichtig anziehen.
13. …cautiously tighten the screws by using the
pro ided hex-wrench.
14. Prüfen, ob die Hauptplatte gegenüber den
Fü en etwa 3 mm höher ist.
Die Fü e können nach dem Lösen der
Schrauben (s.a. P. 5 + 8) vertikal etwas
verschoben werden. Anschlie end die
Schrauben wieder festziehen.
14. Check, if the board is aprox 3 mm higher than
the table legs. If needed, loose the screws
(q. . p. 5 + 8), adjust the table legs and finally
tighten the screws again.
15. Vor dem Ausziehen auf beiden Seiten die
schwarzen Bremsschrauben lösen.
15. Before the extension can be pulled out, the
two black screws must be released.
2363, 2364 Keramik-, Glas-Platte mit Frontauszug 4 / 8 Änderungsdatum: 25.03.22
!
~ 3 mm
SW6
max. 4 Nm
!
16. Prüfen ob die Oberkanten des Auszugs und
der Hauptplatte innen auf einer Höhe sind.
Nur wenn nicht …
16. Check in the middle if the upper surfaces of
the board and the extension are on one le el.
Only if not ...
17. … die Inbusschraube lösen, die Drehstange
entsprechend justieren und die Inbus-
schraube wieder festziehen.
17. … loosen the socket screw and adjust the
extenson-rod accordingly. Then tighten the
socket screw again.
18. Wenn nötig, auch die gegenüberliegende
Lagerung der Drehstange justieren. Dazu ggf.
die Hülse nach hinten ziehen und dann mit
einem Maulschlüssel die Mutter etwas lösen.
18. If needed, also adjust the opposite mount of
the extenson-rod. For this purpose the nut
can be loosened and after adjusting be
tightened.
2363, 2364 Keramik-, Glas-Platte mit Frontauszug 5 / 8 Änderungsdatum: 25.03.22
SW5
SW2,5
SW5
SW2,5
SW13
19. Prüfen ob die Oberkanten des Auszugs und
der Hauptplatte au en auf einer Höhe sind.
Wenn nicht …
19. Check at the outer sides, if the upper
surfaces of the board and the extension are
on one le el.
If not ...
Rechte Seite einstellen:
20a: Auszug einklappen.
20b: An beiden wei en Stellschrauben mit einem
Schlitz-Schraubendreher die Höhe
einstellen.
20c: Die Klappeinlage mit dem Ledergriff aus-
klappen, die Höhe rechts erneut kontrollie-
ren und wenn nötig erneut einstellen.
20a. Fold the table-extension.
20b. Adjust the hight by turning the two white
screws. Use a slotted screwdri er.
20c. Swing out the table-extension by using the
leather belt. Check the hight again; if
necessary adjust again.
2363, 2364 Keramik-, Glas-Platte mit Frontauszug 6 / 8 Änderungsdatum: 25.03.22
wei e Stellschrauben
white adjusting-screws
Linke Seite einstellen:
21a. Die Klappeinlage fassen und eide Teile
gleichzeitig vorsichtig hochklappen...
21a. Grab both pieces of the table-extension
and swing out both pieces of the table-
extension at the same time ...
21b. … und eide Halbteile ganz umklappen.
Die Höhe mit einem Kreuz-Schraubendreher
an den schwarzen Laschen einstellen.
21b. … and keel o er both pieces.
Turn the scews of the black plastic-straps to
adjust the hight.
21c. Beide Halbteile gleichzeitig zurückklappen.
Mit dem Ledergriff ganz ausklappen und die
Höhe kontrollieren. Ggf. erneut justieren.
21c. Swing in both pieces of the table-extension
at the same time.
Use the leather-blet to swing out the table-
extension and check the hight again.
If necessary, adjust again.
2363, 2364 Keramik-, Glas-Platte mit Frontauszug 7 / 8 Änderungsdatum: 25.03.22
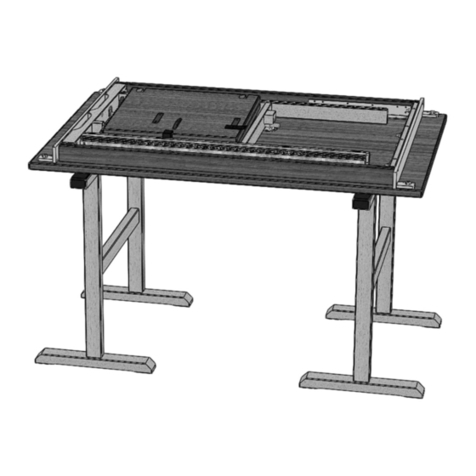
22. Fertiger Tisch; nicht ausgezogen.
Die Beine sind um etwa 1 Grad abgewinkelt.
22. Finished table; not extended.
The legs are angled about 1 degree.
23. Fertiger Tisch; ausgezogen.
23. Finished table; extended.
2363, 2364 Keramik-, Glas-Platte mit Frontauszug 8 / 8 Änderungsdatum: 25.03.22
Aufbauanleitung / assembly instructions mod. 2365, 2366
Keramik-, Glas-Platte mit Frontauszug
ceramic or glass top with front extension
1.Montagematerial.
1. Fitting material.
2. Den Oberbau umgedreht auf gepolsterten
Montageböcken ablegen.
2. Put the table top upside down onto padded
assembling trestles.
Montage Tischbeine / assembling of table legs
Auszugsseite / extension side: Festseite / fixed side:
3. Die beiden Tischbeine mit e zwei Schrauben
und dem mitgelieferten Inbusschüssel
befestigen. Die beiden Tischbeine beim
Anschrauben nach unten dr cken.
3. Fix both table legs with two screws each and
use the provided hex-wrench. Push down
both table legs while fixing them.
4. Die beiden Tischbeine mit e zwei Schrauben
und dem mitgelieferten Inbusschüssel
befestigen. Die Tischbeine beim Anschrauben
nach oben dr cken.
4. Fix both table legs with two screws each and
use the provided hex-wrench. Push up the
table legs while fixing them.
2365, 2366 Keramik-, Glas-Platte mit Frontauszug 1 / 7 Änderungsdatum: 25.03.22
SW6
M8 x 25 M8 x 25
SW6
8x
M8 x 25
SW66x
M8 x 65
5. Den Tisch wenden, ohne die Füße zu belasten
und dann gleichzeitig alle 4 Tischbeine auf
dem Boden absetzen.
. Turn the table right-side-up without using the
feet. Then put the table down on all 4 feet at
once.
6. Die Platte auspacken und mittig auf dem
Gestell auflegen.
6. Unpack the board and put it onto the middle of
the frame.
7. Die Platte mit den 6 Schrauben zunächst lose
anschrauben ...
7. Initially fix the board with 6 screws in a loose
way ...
8. … die Platte gleichmäßig zu den Fuß-
Befestigungselementen ausrichten und erst
dann ...
8. … adjust the board to the middle and finally ...
2365, 2366 Keramik-, Glas-Platte mit Frontauszug 2 / 7 Änderungsdatum: 25.03.22
M8 x 65
SW6
9. … mit dem mitgelieferten Inbusschlüssel alle
Schrauben vorsichtig anziehen.
9. …cautiously tighten the screws by using the
provided hex-wrench.
10. Prüfen, ob die Hauptplatte gegenüber den
Tischbeinen etwa 3 mm höher ist. Die
Tischbeine können nach dem Lösen der
Schrauben (s.a. P. 3 + 4) vertikal etwas
verschoben werden. Anschließend die
Schrauben wieder festziehen.
10. Check, if the board is aprox 3 mm higher than
the table legs. If needed, loose the screws
(q.v. p. 3 + 4), adjust the table legs and
finally tighten the screws again.
11. Vor dem Ausziehen auf beiden Seiten die
schwarzen Bremsschrauben lösen.
11. Before the extension can be pulled out, the
two black screws must be released.
2365, 2366 Keramik-, Glas-Platte mit Frontauszug 3 / 7 Änderungsdatum: 25.03.22
SW6
~ 3 mm
!
max. 4 Nm
!
12. Prüfen ob die Oberkanten des Auszugs und
der Hauptplatte innen auf einer Höhe sind.
Nur wenn nicht …
12. Check in the middle if the upper surfaces of
the board and the extension are on one level.
Only if not ...
13. … die Inbusschraube lösen. Nun durch
Drehen der in der Traverse befindlichen
Inbusschraube (SW2,5) die Höhe der
Drehstange einstellen. Anschließend die
Inbusschraube der Drehstange wieder
festziehen.
13. … loosen the socket screw. Adjust the
extenson-rod by turning the inner socket
screw. Then tighten the socket screw of the
extenson-rod again.
14. Wenn nötig, auch die gegenüberliegende
Lagerung der Drehstange ustieren. Dazu ggf.
die Hülse nach hinten ziehen und dann mit
einem Maulschlüssel die Mutter etwas lösen.
Nun durch Drehen der in der Traverse
befindlichen Inbusschraube (SW2,5) die Höhe
der Drehstange einstellen. Anschließend die
Mutter der Drehstange wieder festziehen.
14. If needed, also adjust the opposite mount of
the extenson-rod. For this purpose the nut
can be loosened. Adjust the extenson-rod by
turning the inner socket screw. Then tighten
the nut of the extenson-rod again.
2365, 2366 Keramik-, Glas-Platte mit Frontauszug 4 / 7 Änderungsdatum: 25.03.22
SW5
SW13
SW2,5
SW2,5
15. Prüfen ob die Oberkanten des Auszugs und
der Hauptplatte außen auf einer Höhe sind.
Wenn nicht …
1 . Check at the outer sides, if the upper
surfaces of the board and the extension are
on one level.
If not ...
Rechte Seite einstellen:
16a: Auszug einklappen.
16b: An beiden weißen Stellschrauben mit einem
Schlitz-Schraubendreher die Höhe
einstellen.
16c: Die Klappeinlage mit dem Ledergriff aus-
klappen, die Höhe rechts erneut kontrollie-
ren und wenn nötig erneut einstellen.
16a. Fold the table-extension.
16b. Adjust the hight by turning the two white
screws. Use a slotted screwdriver.
16c. Swing out the table-extension by using the
leather belt. Check the hight again; if
necessary adjust again.
2365, 2366 Keramik-, Glas-Platte mit Frontauszug 5 / 7 Änderungsdatum: 25.03.22
weiße Stellschrauben
white adjusting-screws
Linke Seite einstellen:
17a. Die Klappeinlage fassen und beide Teile
gleichzeitig vorsichtig hochklappen...
17a. Grab both pieces of the table-extension
and swing out both pieces of the table-
extension at the same time ...
17b. … und beide Halbteile ganz umklappen.
Die Höhe mit einem Kreuz-Schraubendreher
an den schwarzen Laschen einstellen.
17b. … and keel over both pieces.
Turn the scews of the black plastic-straps to
adjust the hight.
17c. Beide Halbteile gleichzeitig zurückklappen.
Mit dem Ledergriff ganz ausklappen und die
Höhe kontrollieren. Ggf. erneut ustieren.
17c. Swing in both pieces of the table-extension
at the same time.
Use the leather-blet to swing out the table-
extension and check the hight again.
If necessary, ad ust again.
2365, 2366 Keramik-, Glas-Platte mit Frontauszug 6 / 7 Änderungsdatum: 25.03.22
18. Fertiger Tisch; nicht ausgezogen.
Die Beine sind um etwa 1 Grad abgewinkelt.
18. Finished table; not extended.
The legs are angled about 1 degree.
19. Fertiger Tisch; ausgezogen.
19. Finished table; extended.
2365, 2366 Keramik-, Glas-Platte mit Frontauszug 7 / 7 Änderungsdatum: 25.03.22

This manual suits for next models

1

Other Venjakob Indoor Furnishing manuals
Venjakob 5454 User manual

Venjakob

Venjakob 5454 User manual

Venjakob 2822 User manual

Venjakob

Venjakob 2822 User manual

Venjakob 3453 User manual

Venjakob

Venjakob 3453 User manual

Venjakob 4770 User manual

Venjakob

Venjakob 4770 User manual

Venjakob 2543 User manual

Venjakob

Venjakob 2543 User manual

Venjakob 6665 User manual

Venjakob

Venjakob 6665 User manual

Venjakob 1580 User manual

Venjakob

Venjakob 1580 User manual

Venjakob 5652 User manual

Venjakob

Venjakob 5652 User manual

Venjakob 5612-5614 User manual

Venjakob

Venjakob 5612-5614 User manual

Venjakob 1630 User manual

Venjakob

Venjakob 1630 User manual

Venjakob 6555 User manual

Venjakob

Venjakob 6555 User manual

Venjakob 4400 User manual

Venjakob

Venjakob 4400 User manual

Venjakob 3123 User manual

Venjakob

Venjakob 3123 User manual

Venjakob 3753 User manual

Venjakob

Venjakob 3753 User manual

Venjakob 3772 User manual

Venjakob

Venjakob 3772 User manual

Venjakob 4275 User manual

Venjakob

Venjakob 4275 User manual

Venjakob Trema User manual

Venjakob

Venjakob Trema User manual

Venjakob 5354 User manual

Venjakob

Venjakob 5354 User manual
Venjakob 2683 User manual

Venjakob

Venjakob 2683 User manual

Venjakob 4603 User manual

Venjakob

Venjakob 4603 User manual

Venjakob 3525 PUH User manual

Venjakob

Venjakob 3525 PUH User manual

Venjakob 3553 User manual

Venjakob

Venjakob 3553 User manual

Venjakob 6342 User manual

Venjakob

Venjakob 6342 User manual

Venjakob 4118 User manual

Venjakob

Venjakob 4118 User manual

Popular Indoor Furnishing manuals by other brands

Schacht CRANBROOK LOOM BENCH FL5520 Assembly instructions

Schacht

Schacht CRANBROOK LOOM BENCH FL5520 Assembly instructions

Neutral Posture NP Series Replacement Disassembly Sheets

Neutral Posture

Neutral Posture NP Series Replacement Disassembly Sheets

Comfomatic Windsor owner's manual

Comfomatic

Comfomatic Windsor owner's manual

Monarch Specialties I 3425 Assembly instructions

Monarch Specialties

Monarch Specialties I 3425 Assembly instructions

Discovery World Furniture 2918 instructions

Discovery World Furniture

Discovery World Furniture 2918 instructions

Spectrum Industries 55496 Assembly instructions

Spectrum Industries

Spectrum Industries 55496 Assembly instructions

&Tradition Collect Hook SC46 quick start guide

&Tradition

&Tradition Collect Hook SC46 quick start guide

BELLATERRA HOME 804353 Assembly/installation instructions

BELLATERRA HOME

BELLATERRA HOME 804353 Assembly/installation instructions

Office Star Products 8120 operating instructions

Office Star Products

Office Star Products 8120 operating instructions

Elements DGC500DTT Assembly instructions

Elements

Elements DGC500DTT Assembly instructions

Axor Montreux 16502XX1 parts list

Axor

Axor Montreux 16502XX1 parts list

ROOMS TO GO MONTARA 73063124 Assembly instructions

ROOMS TO GO

ROOMS TO GO MONTARA 73063124 Assembly instructions

PAIDI 219 9800 instructions

PAIDI

PAIDI 219 9800 instructions

Coaster 223031KE Assembly instructions

Coaster

Coaster 223031KE Assembly instructions

Wholesale Interiors KING BED BBT 6735 Assembly instructions

Wholesale Interiors

Wholesale Interiors KING BED BBT 6735 Assembly instructions

Next ISABELLA 972213 Assembly instructions

Next

Next ISABELLA 972213 Assembly instructions

Horizon Home Furniture H8245-45-BT Assembly instructions

Horizon Home Furniture

Horizon Home Furniture H8245-45-BT Assembly instructions

Amisco Delaney quick start guide

Amisco

Amisco Delaney quick start guide

manuals.online logo
manuals.online logoBrands
  • About & Mission
  • Contact us
  • Privacy Policy
  • Terms and Conditions

Copyright 2025 Manuals.Online. All Rights Reserved.