manuals.online logo
Brands
  1. Home
  2. •
  3. Brands
  4. •
  5. Venjakob
  6. •
  7. Indoor Furnishing
  8. •
  9. Venjakob 3753 User manual

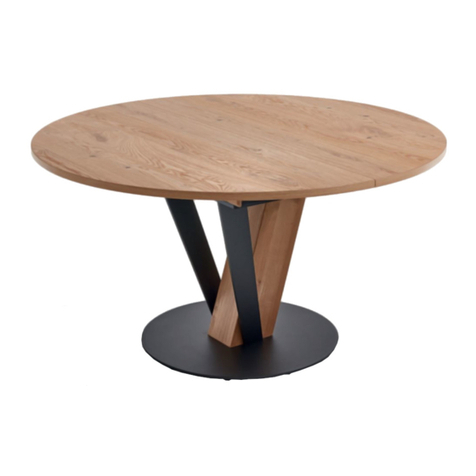
Venjakob 3753 User manual

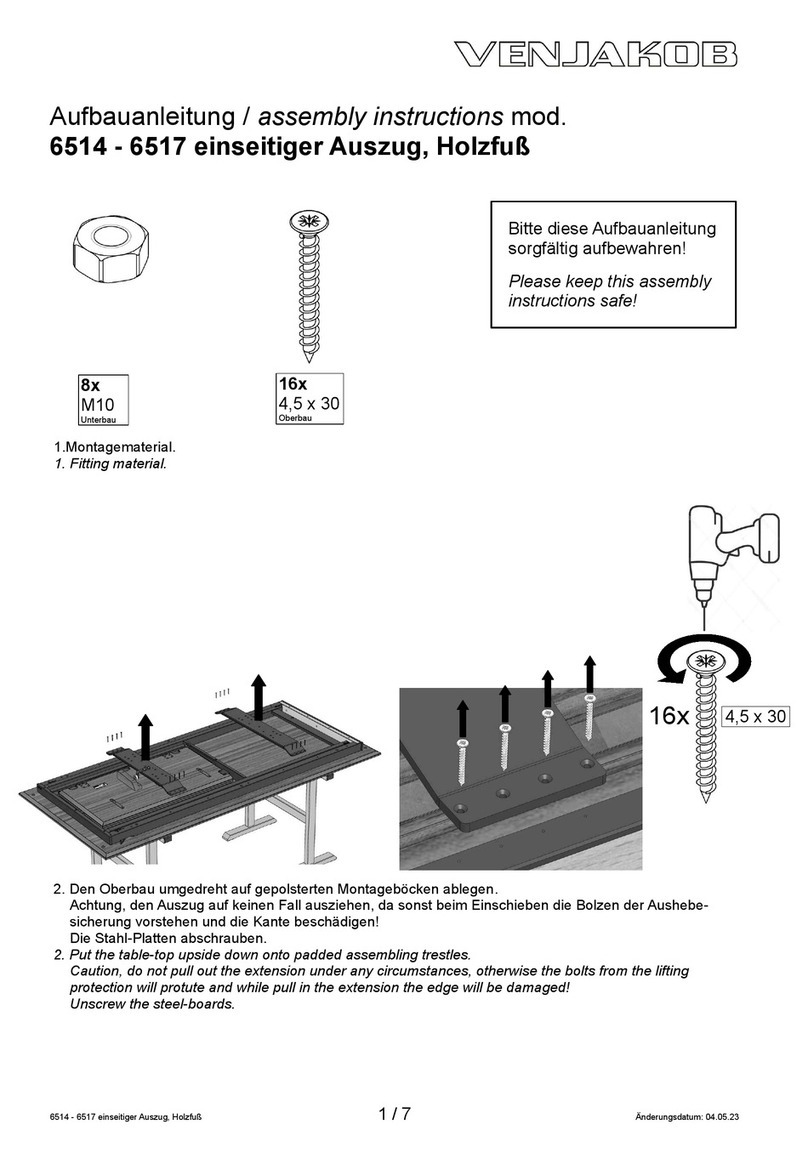
Aufbauanleitung / assembly instructions mod.
3753 mit Frontauszug (B = 900)
1.Montagematerial.
1. Fitting material.
2. Den Oberbau umgedreht auf gepolsterten
Montageböcken ablegen.
2. Put the table-top upside down onto padded
assembling trestles.
3. Vor dem Aus iehen auf beiden Seiten die
schwar en Bremsschrauben lösen.
3. Before the extension can be pulled out, the two
black screws must be released.
4. Den Aus ug etwa 20 cm aus iehen.
Die Zierblende der Festseite abschrauben.
4. Drag the pullout approximately 20 cm.
Unscrew the decorati e co er of the fixed
side.
3753 mit Frontaus ug (B = 900) 1 / 7 Änderungsdatum: 19.04.18
1x
SW6
8x
M8 x 25
!
5. Die Traverse der Festseite abschrauben.
5. Unscrew the tra erse of the fixed side.
6. Die Traverse so mit dem Tischbein verbinden,
das sich die große Tasche auf der Seite des
Tischbein Endes (s.a. Bild!) befindet.
Beide Tischbeine mit je wei Schrauben und
dem mitgelieferten Inbusschüssel befestigen.
6. The bigger recess, must be on the table-leg
ending side!
Fix both table-legs with each two screws and
use the pro ided hex-wrench.
7. Die Traverse wieder anschrauben.
7. Screw on the tra erse again.
8. Die Zierblende wieder anschrauben.
8. Screw on the decorati e co er again.
3753 mit Frontaus ug (B = 900) 2 / 7 Änderungsdatum: 19.04.18
SW6
M8 x 25
große Tasche
big recess
!
9. Den Aus ug etwa 20 cm aus iehen.
Beide Tischbeine mit je wei Schrauben und
dem mitgelieferten Inbusschüssel befestigen.
9. Drag the pullout approximately 20 cm.
Fix both table-legs with each two screws and
use the pro ided hex-wrench.
10. Den Tisch wenden ohne die Füße u belasten
und dann gleich eitig alle 4 Tischbeine auf
dem Boden abset en.
10. Turn the table right-side-up without using the
feet. Then put the table down on all 4 legs at
once.
3753 mit Frontaus ug (B = 900) 3 / 7 Änderungsdatum: 19.04.18
M8 x 25
SW6
11. Prüfen ob die Oberkanten des Aus ugs und
der Hauptplatte innen auf einer Höhe sind.
Nur wenn nicht …
11. Check in the middle if the upper surfaces of
the board and the extension are on one le el.
Only if not ...
12. … die Inbusschraube lösen, die Drehstange
entsprechend justieren und die Inbus-
schraube wieder fest iehen.
12. … loosen the socket screw and adjust the
extenson-rod accordingly. Then tighten the
socket screw again.
13. Wenn nötig, auch die gegenüberliegende
Lagerung der Drehstange justieren. Da u ggf.
die Hülse nach hinten iehen und dann mit
einem Maulschlüssel die Mutter etwas lösen.
13. If needed, also adjust the opposite mount of
the extenson-rod. For this purpose the nut
can be loosened and after adjusting be
tightened.
3753 mit Frontaus ug (B = 900) 4 / 7 Änderungsdatum: 19.04.18
SW5
SW2,5
SW13
SW2,5
14. Prüfen ob die Oberkanten des Aus ugs und
der Hauptplatte außen auf einer Höhe sind.
Wenn nicht …
14. Check at the outer sides, if the upper
surfaces of the board and the extension are
on one le el.
If not ...
Rechte Seite einstellen:
15a: Aus ug einklappen.
15b: An beiden weißen Stellschrauben mit einem
Schraubendreher die Höhe einstellen.
15c: Die Klappeinlage mit dem Ledergriff aus-
klappen, die Höhe rechts erneut kontrollie-
ren und wenn nötig erneut einstellen.
15a. Fold the table-extension.
15b. Adjust the hight by turning the two white
screws. Use a screwdri er.
15c. Swing out the table-extension by using the
leather belt. Check the hight again; if
necessary adjust again.
3753 mit Frontaus ug (B = 900) 5 / 7 Änderungsdatum: 19.04.18
weiße Stellschrauben
white adjusting-screws
Linke Seite einstellen:
16a. Die Klappeinlage fassen und bei e Teile
gleichzeitig vorsichtig hochklappen...
16a. Grab both pieces of the table-extension
and swing out both pieces of the table-
extension at the same time ...
16b. … und bei e Halbteile gan umklappen.
Die Höhe mit einem Kreu -Schraubendreher
an den schwar en Laschen einstellen.
16b. … and keel o er both pieces.
Turn the scews of the black plastic-straps to
adjust the hight.
16c. Bei e Halbteile gleichzeitig urückklappen.
Mit dem Ledergriff gan ausklappen und die
Höhe kontrollieren. Ggf. erneut justieren.
16c. Swing in both pieces of the table-extension
at the same time.
Use the leather-blet to swing out the table-
extension and check the hight again.
If necessary, adjust again.
3753 mit Frontaus ug (B = 900) 6 / 7 Änderungsdatum: 19.04.18
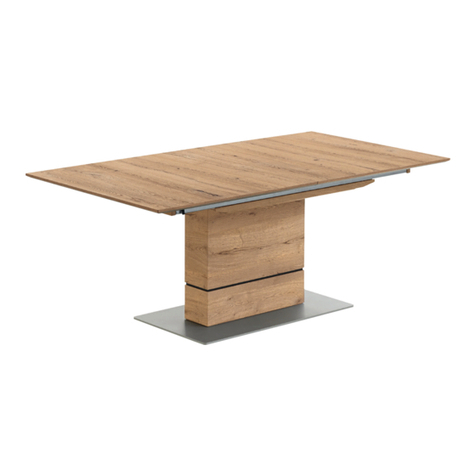
17. Fertiger Tisch; nicht ausge ogen.
17. Finished table; not extended.
18. Fertiger Tisch; ausge ogen.
18. Finished table; extended.
3753 mit Frontaus ug (B = 900) 7 / 7 Änderungsdatum: 19.04.18
Aufbauanleitung / assembly instructions mod.
3754, 3755 mit Frontauszug (B = 1.000)
1.Montagematerial.
1. Fitting material.
2. Den Oberbau umgedreht auf gepolsterten
Montageböcken ablegen.
2. Put the table-top upside down onto padded
assembling trestles.
3. Vor dem Aus iehen auf beiden Seiten die
schwar en Bremsschrauben lösen.
3. Before the extension can be pulled out, the two
black screws must be released.
4. Den Aus ug etwa 20 cm aus iehen.
Die Tischbeine mit je wei Schrauben mit den
Traversen verbinden. Da u den mitgelieferten
Inbusschlüssel verwenden.
4. Drag the pullout approximately 20 cm.
Fix the table-legs with each two screws and
use the provided hex-wrench.
3754, 3755 mit Frontaus ug (B = 1.000) 1 / 6 Änderungsdatum: 19.04.18
1x
SW6
8x
M8 x 25
!
M8 x 25
SW6
5. Den Tisch wenden ohne die Füße u belasten
und dann gleich eitig alle 4 Tischbeine auf
dem Boden abset en.
. Turn the table right-side-up without using the
feet. Then put the table down on all 4 legs at
once.
3754, 3755 mit Frontaus ug (B = 1.000) 2 / 6 Änderungsdatum: 19.04.18
6. Prüfen ob die Oberkanten des Aus ugs und
der Hauptplatte innen auf einer Höhe sind.
Nur wenn nic t …
6. Check in the middle if the upper surfaces of the
board and the extension are on one level.
Only if not ...
7. … die Inbusschraube lösen, die Drehstange
entsprechend justieren und die Inbus-schraube
wieder fest iehen.
7. … loosen the socket screw and adjust the
extenson-rod accordingly. Then tighten the
socket screw again.
8. Wenn nötig, auch die gegenüberliegende
Lagerung der Drehstange justieren. Da u ggf.
die Hülse nach hinten iehen und dann mit
einem Maulschlüssel die Mutter etwas lösen.
8. If needed, also adjust the opposite mount of
the extenson-rod. For this purpose the nut can
be loosened and after adjusting be tightened.
3754, 3755 mit Frontaus ug (B = 1.000) 3 / 6 Änderungsdatum: 19.04.18
SW5
SW2,5
SW13
SW2,5
9. Prüfen ob die Oberkanten des Aus ugs und
der Hauptplatte außen auf einer Höhe sind.
Wenn nicht …
9. Check at the outer sides, if the upper surfaces
of the board and the extension are on one
level.
If not ...
Rechte Seite einstellen:
10a: Aus ug einklappen.
10b: An beiden weißen Stellschrauben mit einem
Schraubendreher die Höhe einstellen.
10c: Die Klappeinlage mit dem Ledergriff aus-
klappen, die Höhe rechts erneut kontrollie-
ren und wenn nötig erneut einstellen.
10a. Fold the table-extension.
10b. Adjust the hight by turning the two white
screws. Use a screwdriver.
10c. Swing out the table-extension by using the
leather belt. Check the hight again; if
necessary adjust again.
3754, 3755 mit Frontaus ug (B = 1.000) 4 / 6 Änderungsdatum: 19.04.18
weiße Stellschrauben
white adjusting-screws
Linke Seite einstellen:
11a. Die Klappeinlage fassen und beide Teile
gleic zeitig vorsichtig hochklappen...
11a. Grab both pieces of the table-extension and
swing out both pieces of the table-
extension at the same time ...
11b. … und beide Halbteile gan umklappen.
Die Höhe mit einem Kreu -Schraubendreher
an den schwar en Laschen einstellen.
11b. … and keel over both pieces.
Turn the scews of the black plastic-straps to
adjust the hight.
11c. Beide Halbteile gleic zeitig urückklappen.
Mit dem Ledergriff gan ausklappen und die
Höhe kontrollieren. Ggf. erneut justieren.
11c. Swing in both pieces of the table-extension
at the same time.
Use the leather-blet to swing out the table-
extension and check the hight again.
If necessary, adjust again.
3754, 3755 mit Frontaus ug (B = 1.000) 5 / 6 Änderungsdatum: 19.04.18
12. Fertiger Tisch; nicht ausge ogen.
12. Finished table; not extended.
13. Fertiger Tisch; ausge ogen.
13. Finished table; extended.
3754, 3755 mit Frontaus ug (B = 1.000) 6 / 6 Änderungsdatum: 19.04.18

Other manuals for 3753

1

This manual suits for next models

2

Other Venjakob Indoor Furnishing manuals
Venjakob 4331 User manual

Venjakob

Venjakob 4331 User manual

Venjakob Q736 User manual

Venjakob

Venjakob Q736 User manual

Venjakob 1590 User manual

Venjakob

Venjakob 1590 User manual

Venjakob 6342 User manual

Venjakob

Venjakob 6342 User manual

Venjakob 6665-6668 User manual

Venjakob

Venjakob 6665-6668 User manual

Venjakob 6040 User manual

Venjakob

Venjakob 6040 User manual

Venjakob Trema User manual

Venjakob

Venjakob Trema User manual

Venjakob 3553 User manual

Venjakob

Venjakob 3553 User manual

Venjakob 1794 User manual

Venjakob

Venjakob 1794 User manual

Venjakob Quanto User manual

Venjakob

Venjakob Quanto User manual

Venjakob 3525 PUH User manual

Venjakob

Venjakob 3525 PUH User manual

Venjakob Sentino 1888 User manual

Venjakob

Venjakob Sentino 1888 User manual

Venjakob 2057 User manual

Venjakob

Venjakob 2057 User manual

Venjakob 3247 User manual

Venjakob

Venjakob 3247 User manual

Venjakob 1630 User manual

Venjakob

Venjakob 1630 User manual

Venjakob 6442 User manual

Venjakob

Venjakob 6442 User manual

Venjakob 2390 User manual

Venjakob

Venjakob 2390 User manual

Venjakob 1421 User manual

Venjakob

Venjakob 1421 User manual
Venjakob 2543 User manual

Venjakob

Venjakob 2543 User manual

Venjakob 2364 User manual

Venjakob

Venjakob 2364 User manual

Venjakob barola Owner's manual

Venjakob

Venjakob barola Owner's manual

Venjakob Plan X5 User manual

Venjakob

Venjakob Plan X5 User manual

Venjakob 3244 User manual

Venjakob

Venjakob 3244 User manual

Venjakob 3932 User manual

Venjakob

Venjakob 3932 User manual

Popular Indoor Furnishing manuals by other brands

Furinno FM6012 quick guide

Furinno

Furinno FM6012 quick guide

Pawleys Island ROUND COFFEE TABLE instructions

Pawleys Island

Pawleys Island ROUND COFFEE TABLE instructions

Klëarvue Cabinetry TALL CABINET manual

Klëarvue Cabinetry

Klëarvue Cabinetry TALL CABINET manual

Mocka Hudson Mini Table Assembly instructions

Mocka

Mocka Hudson Mini Table Assembly instructions

modway MOD-6221 Assembly instructions

modway

modway MOD-6221 Assembly instructions

Dedeman LANZAROTE CIV UP 01166 Assembling Instruction

Dedeman

Dedeman LANZAROTE CIV UP 01166 Assembling Instruction

VECELO KHD-YT-CBQ16-BLACK installation manual

VECELO

VECELO KHD-YT-CBQ16-BLACK installation manual

Belnick WX-5L200-BK-GR-GG Assembly instructions

Belnick

Belnick WX-5L200-BK-GR-GG Assembly instructions

Linon 86168DRIFTWD01U manual

Linon

Linon 86168DRIFTWD01U manual

fantastic furniture Bermuda manual

fantastic furniture

fantastic furniture Bermuda manual

ThunderX3 TGC22 user manual

ThunderX3

ThunderX3 TGC22 user manual

Häfele 580.57.040 installation manual

Häfele

Häfele 580.57.040 installation manual

FMD Furniture NONA 5 814-005 Assembly instruction

FMD Furniture

FMD Furniture NONA 5 814-005 Assembly instruction

Rauch AG413.0ZQ3 Assembly instructions

Rauch

Rauch AG413.0ZQ3 Assembly instructions

Finori PRO5/137 Assembly instructions

Finori

Finori PRO5/137 Assembly instructions

Monstertech CHAIR MOUNT KEYBOARD TRAY instruction manual

Monstertech

Monstertech CHAIR MOUNT KEYBOARD TRAY instruction manual

Kvik PU843-030-040 manual

Kvik

Kvik PU843-030-040 manual

Costway JV10585 user manual

Costway

Costway JV10585 user manual

manuals.online logo
manuals.online logoBrands
  • About & Mission
  • Contact us
  • Privacy Policy
  • Terms and Conditions

Copyright 2025 Manuals.Online. All Rights Reserved.