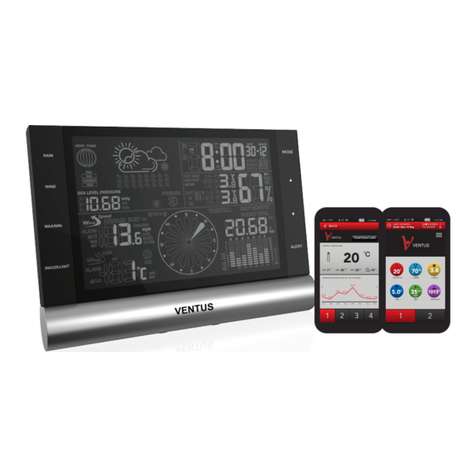
Ventus W225 User manual

Manual | Brugsanvisning | Instruktionsbok | Ohjeet
Weather station
Vejrstation
Väderstation
Sääasemat
Art. no. W225
EAN 5705858718460
Size: 196 x 125 x 25 mm Imported by / Importeret af
NSH NORDIC A/S
Virkefeltet 4
DK-8740 Braedstrup
Made in PRC

Weather Station Instruction Manual
• Weather station x 1
• Outdoor sensor x 1
• Power adapter for base unit x 1
• Instruction manual x 1
Device overview (main unit) LCD display and function keys (main unit)
1. WIFI signal identication
2. DST mark
3. Date
4. time
5. Week
6. Alarm clock on/o sign
7. Indoor equipment battery indicator
8. Alarm week setting logo
9. Indoor temperature alarm mark
10. Indoor comfort indicator
11. The sign of MAX/MIN indoor temperature and humidity
12. Indoor humidity
13.Indoor temperature
14. Today’s weather forecast-UV index
15. Today’s weather forecast-weather conditions
16-17. Today’s weather forecast-MAX/MIN temperature
18-20. 5 days weather forecast
22. Outdoor temperature alarm mark
23. Outdoor temperature and humidity MAX/MIN sign
24.-25. Outdoor humidity / temperature
26. Outdoor sensor receiving sign
27. Outdoor sensor battery indicator
28. Outdoor sensor channel identication
GB

Sensor
Function keys (outdoor sensor)
1. Current channel
2. Outdoor temperature
3. Outdoor humidity
4. Red pilot light
5. Loop for hanging
6. Sliding swith 1 2 3: Set sensor number (transmission channel)
7. Battery compartment
Setup
Follow the instructions in the order described and rst put the batteries in the wireless sensor. This is
the only way for the weather station to function without any problems. Do not press any buttons while
switching the device on.
Battery operation
1. Remove the battery compartment cover.
2. Insert 3 AAA / 1.5 V batteries facing in the direction indicated on the bottom of the battery
compartment. Make sure that the poles of the batteries are correct (+/-).
3. Put the battery compartment cover back in place and close it.
4. Wait several minutes. The base unit needs this time to collect all the weather data and to receive
radio signals from the time signal transmitter.
GB

YOU SHOULD INSTALL THE APP, AS FOLLOWS:
1.Download Tuya Smart APP 2.Click 1to install the app
3.Fill in 1 and 2to register account 4.Click 1to add a device
GB

5.To enter this interface, you need to long press the device SNOOZE.LIGHT button, click
1to automatically discover the device or add a device when 2appears.
6. After the addition is complete, enter the ve-day weather control interface.
GB

Opration instructions!
Manual adjustment
1.Power on or reset, and enter the RF receiving state at the same time
➢ RF symbol, ashes exits the receiving state after 3 minutes, and Out displays the temperature
and humidity of the corresponding CH.
General operation
A total of 6 buttons: Mode, Channel, Alert, +, -, Snooze/Light
1. Single press Mode key to switch display: →time AL1AL2AL3 ---
2. When the Alarm is displayed, press and hold the ”Mode” key for >3 seconds to enter the
corresponding Alarm setting.
3. Single press ”Alert” to turn on or o the Alert alarm.
4. Press and hold the ”Alert” key for >3 seconds to enter the Alert setting
5. Single press ”+” key to view Max/MIN records,
6. When the MAX/MIN value is displayed, press and hold the ”+” key for >3 seconds to clear the
MAX/MIN record
7. Single press the ”-” key to switch the temperature unit: °C/°F
8. Press and hold the ”-” key for >3 seconds to switch the air pressure unit hpa/InHg
9. Press and hold the ”Channel” key for >3 seconds to clear the RF record and re-register.
10. Single press the ”Snooze/ Light” button to turn on the backlight for 10 seconds
(battery powered)
11. Press and hold the ”Snooze/ Light” button for >3 seconds to update the time & weather forecast
All settings must be made quickly, otherwise the setting screen will automatically revert back to the
normal time dipsplay mode.
Time setting
-In the normal mode, press and hold the ”MODE” button for 3 seconds to enter the time setting mode
-The year will ash, you can press the button to set, and then press ”MODE” to conrm.
-MD will ash, you can press ”UP” or ”DONW” key to set, and then press ”MODE” to conrm.
-The month will ash, you can press the ”UP” or ”DONW” key to set, and then press ”MODE” to
conrm.
-The date will ash, you can press the ”UP” or ”DOWN” key to set, and then press ”MODE” to
conrm.
-24/12 HR will ash, you can press ”UP” or ”DOWN” key to set, and then press ”MODE” to conrm.
-The time zone will ash, you can press the ”UP” or ”DONW” key to set, and then press ”MODE” to
conrm.
-The hour will ash, you can press the ”UP” or ”DOWN” key to set, and then press ”MODE” to
conrm.
-The minutes will ash, which can be set by pressing the ”UP” or ”DOWN” key, and then press
”MODE” to conrm.
-Press the ”UP” or ”DOWN” button, the seconds will ash and clear, then press ”MODE” to conrm.
-If the button is not operated within 20 seconds, the setting mode will automatically exit and the set
value will be saved.
GB
Alarm & Settings
There are 3 groups of alarms by default. The default time 7:00 shows:
1. Setting operation:
➢Press Mode key to switch display A1 A2 A3
➢Press ”+” or ”-” to on/o the corresponding Alarm
➢Long press the Alarm key for 2 seconds to enter the corresponding Alarm setting
➢Setting sequence: Hour →Minute →Mode →Exit
➢Mode sequence: All →weekdays →weekends
➢During the setting process, single press ”+” or ”-” to move forward or backward by 1 step.
Long press for 3 seconds to quickly set 8 steps per second
➢After the setting is completed, the corresponding Alarm will be turned on automatically
➢10 seconds without any operation, it will save the existing settings and return to the time display,
automatically turn on the corresponding Alarm
2. Alarm:
When the Alarm is triggered,
➢The alarm sound is divided into 4 sections, 1~10S Bi once, 10~20S BiBi 2 beeps, 20~30S BiBiBiBi
4 beeps, long beeps after 30 seconds.
➢The alarm symbol ashes
➢Alarm time: 2 minutes
➢When the Alarm conicts, the new Alarm will take precedence.
➢Press the ”Snooze” button, the alarm will be delayed for 5 minutes
➢Press any key to cancel Alarm.
➢In Snooze state, press any key to cancel Snooze.
Min / Max function:
In the normal time display mode, single press the ”UP” key to display the MIN and MAX values
measured on the day.
Only the maximum values appear, then the minimum values and the current values again.
Meanwhile, “MAX” or “MIN” is displayed above the values.
-In the MAX/MIN value display mode, long press the ”UP” key to clear the MAX/MIN value
-Automatically clear the MAX/MIN value at zero every day
Comfort level indicator (8)
1. Dry: Indoor humidity less than 40%
2. Comfort: when Indoor temperature is 20-28%, humidity between 40-70%
3. Wet: Indoor humidity greater than 70%
4. No display: When the temperature is not 20°C - 28°C and the humidity is 40-70%, there is no
comfort indicator
GB

Temperature alarm & setting
1. Single press the Alert key, on/o Alert, is lit to indicate Alert on.
2. Press and hold the Alert key for >3 seconds to enter the Alert setting:
➢Setting sequence: select indoor alarm/outdoor alarm, upper limit temperature and lower limit
temperature
➢When indoor or outdoor is selected, the corresponding will ash
➢During the setting process, single press ”+” or ”-” to move forward or backward by 1 step.
Long press for 3 seconds to quickly set 8 steps per second
➢If there is no operation for 10 seconds, the existing settings will be saved and return to normal
display.
➢There can be no situation where the lower limit is higher than the upper limit.
3. When the temperature alarm is triggered,
➢The temperature and alarm signs will ash.
➢The buzzer will beep once every second, every 10 seconds, stop for 50 seconds, and last for 5
minutes.Press any key to stop the alarm sound, and the corresponding temperature and alarm mark
will continue to ash.
➢If the temperature returns within the threshold, the alarm sound will stop and normal display will be
restored.
Memory
1. Press the ”+” key to switch the display: current temperature MAX temperature MIN temperature
current temperature
2. When MAX or MIN is displayed, long press the ”+” key> 3 seconds to clear the memory data, the
buzzer will beep once, and the temperature will display ”--.-” for 3 seconds, and then return to the
current temperature.
3. When displaying MAX or MIN, if there is no operation for 10 seconds, it will return to the current
temperature display.
Unit conversion
1. Press the ”-” key to switch the temperature unit: °C, °F
GB

Time & weather forecast
1. Press the ”Snooze/Light” button to update the weather & time
2. The meaning of weather graphics
Sunny Cloud Overcast Thunder thundershower/
thundershower
with hail
Thunderstorm
Rain Moderate rain Heavy rain Rainstorm Rain shower Heavy shower
Snow Moderate snow Heavy snow Snowstorm
(icon ashes)
Sleet Small snow
showers
Snow showers Fog Haze Floating dust Sandstorm
(icon ashes)
When the sign is lit, it means entering DST time.
GB

Technical specications
Main unit
Batteries: 3 x AAA / 1.5 V (Not included)
Temperature measuring range: 0°C to +50°C
Resolution: 0.1 °C
Temperature accuracy: 0°C ~ 40°C: +/-1°C, over 40°C: +/-2°C
Humidity measuring range: 20 % to 95 % relative humidity
Humidity measuring accuracy: +/- 5 % with a measuring range of 30% to 80%, +/- 8% for other
measuring range
Resolution: 1 %
Sensor
Batteries: 2 x AAA / 1.5 V (Not included)
Temperature measuring range: - 50°C to 70°C
Temperature accuracy: 0°C ~ 40°C: +/-1°C, -50°C ~ 0°C and 40°C ~ 70°C: +/-2°C
Transmission frequency: 433 MHz
Range: max. 50 meters (in open area)
Power adapter
Power supply: 230-240V~, 50 Hz 50 mA
Output: 5.0V 150 mA
GB

DK
Brugsanvisning for VENTUS vejrstation W225
Indhold:
• Vejrstation x 1
• Udendørs sensor x 1
• 230 volt adapter x 1
• Brugsanvisning x 1
Vejrstation overblik LCD display symbol forklaring
1. WIFI signal indikator
2. DST symbol (sommertid)
3. Dato
4. time
5. Uge dag
6. Alarm on/o symbol
7. Vejrstations batteri indikator
8. Alarm uge indstillings symbol
9. Indendørs temperatur alarm symbol
10. Indendørs komfort indikator
11. MAX/MIN indendørs temperatur og luftfugtigheds symbol
12. Indendørs temperatur 13. Indendørs luftfugtighed
14. UV indeks i dag (forecast)
15. Vejrudsigt i dag
16-17. MAX/MIN temperaturer for i dag (forecast)
18-20. 5 dages vejrudsigt
22. Udendørs temperatur alarm symbol
23. Udendørs temperatur og luftfugtigheds MAX/MIN symbol
24.-25. Udendørs luftfugtighed / temperatur
26. Udendørs sensor modtagelses symbol
27. Udendørs sensor batteri indikator
28. Udendørs sensor kanal indikator

Udendørs sensor
Funktion og symbol forklaring
1. Nuværende kanal
2. Udendørs temperatur
3. Udendørs luftfugtighed
4. Signal indikator
5. Ophængshul
6. Skyde knap for valg af kanal (1-2-3)
7. Batter kammer
Opstart
Følg instruktionerne i den rækkefølge som beskrevet. Start med at isætte batterier i den trådløse
udendørs sensor. Denne rækkefølge / måde er den eneste rigtige måde, for at få vejrstationen til
at fungere uden problemer. Tryk IKKE på noget knapper, mens opsætning foregår.
Isætning af batterier
1. Fjern låget til batteri kammeret.
2. Isæt 3 AAA / 1.5 V batterier, bemærk retning/polaritet som er vist i bunden af batteri kammeret
3. Sæt låget på plads igen og skru det fast.
4. Tilslut 230 volt til vejrstationen eller isæt batterier. Vejrstationen skal bruge tid til at indhente alle
vejrdata og radio tids signaler. Dette kan tage ere minutter, så derfor hav tålmodighed.
DK

Installer Tuya app’en på følgende måde:
1.Download Tuya Smart APP 2. Tryk 1for at installere app’en
3.Udfyld 1 og 2 for at oprette konto (gratis) 4.Tryk 1for at tilføje enhed (add device)
DK

5. For at tilslutte vejrstationen til app’en, holdes SNOOZE.LIGHT knappen nede i 5 sekunder.
Tryk på Auto Scan 1 eller tryk 2når ”go to add” fremkommer.
6. Efter tilslutningen til App’en kan du se din 5 dages vejrudsigt. Indstille alarmer m.m. fra din mobil
DK

Brugsanvisning!
Manuel indstilling
1.Sæt strøm til vejrstationen og RF symbolet for udendørs sensoren starter med at søge/blinke.
RF Symbolet blinker i 3 minutter, hvorefter den udendørs temperatur, luftfugtighed og tilhørende
Kanal vises i displayet. (RF = radio frekvens) Hvis forbindelse ikke opnås, hold knappen CHANNEL
nede i 3 sekunder og processen starter igen. Når forbindelse er opnået stopper RF symbolet med at
blinke
General anvendelse
Vejrstation har 6 knapper placeret på toppen af displayet: Mode, Ch, Snooze/Light, Alert, Up, Down.
1. Tryk 1 gang på MODE for indstilling af alarm tid: → time AL1AL2AL3
2. Når alarm vises på displayet, tryk og hold ”Mode” knappen nede i 3-5 sekunder for at kunne
indstille alarm tidspunkt.
3. Tryk på ”Alert” knappen for at afbryde eller aktivere alarmen.
4. Tryk og hold ”Alert” knappen nede i 3-5 sekunder for at indstille temperatur alarm inde/ude.
5. Tryk på UP knappen for at aæse MAX/MIN informationer.
6. Når MAX/MIN informationer vises i displayet, tryk igen og hold UP knappen nede i 3 sekunder, for
at slette MAX/MIN informationer.
7. Tryk på DOWN knappen for at skifte temperaturen fra °C til °F eller omvendt.
8. Tryk og hold DOWN knappen nede i 3 sekunder, for at skifte lufttrykket mellem hpa / InHg
9. Tryk og hold ”Channel” knappen nede i 3 sekunder, for at afbryde RF signalet og re-registrer.
10. Tryk på ”Snooze/ Light” knappen for at tænde/slukke baggrundslyset. Hvis vejrstationen kun
”kører på batteri, slukker lyset automatisk efter 10 sekunder.
Time setting
-In the normal mode, press and hold the ”MODE” button for 3 seconds to enter the time setting mode
-The year will ash, you can press the button to set, and then press ”MODE” to conrm.
-MD will ash, you can press ”UP” or ”DONW” key to set, and then press ”MODE” to conrm.
-The month will ash, you can press the ”UP” or ”DONW” key to set, and then press ”MODE” to
conrm.
-The date will ash, you can press the ”UP” or ”DOWN” key to set, and then press ”MODE” to
conrm.
-24/12 HR will ash, you can press ”UP” or ”DOWN” key to set, and then press ”MODE” to conrm.
-The time zone will ash, you can press the ”UP” or ”DONW” key to set, and then press ”MODE” to
conrm.
-The hour will ash, you can press the ”UP” or ”DOWN” key to set, and then press ”MODE” to
conrm.
-The minutes will ash, which can be set by pressing the ”UP” or ”DOWN” key, and then press
”MODE” to conrm.
-Press the ”UP” or ”DOWN” button, the seconds will ash and clear, then press ”MODE” to conrm.
-If the button is not operated within 20 seconds, the setting mode will automatically exit and the set
value will be saved.
DK

Alarm Indstilling
Der er mulighed for, at indstille 3 forskellige alarm tidspunkter.
1. Indstilling af alarm tidspunkt:
➢ Tryk på Mode knappen for at vælge / skifte mellem alarm A1 A2 A3
➢ Tryk derefter på MODE i 3 sekunder for at indstille alarmtidspunkt. Time, minut. Dage kan indstilles
i følgende intervaller: Alle dage, Alle hverdage eller weekend, her trykkes på UP/Down knapperne.
➢ Tryk på UP eller Down knappen for at aktivere / deaktivere den valgte alarm.
➢ Ved indstilling af tid / dage vil et tryk på UP eller DOWN ytte 1 step. Holdes knappen nede
i 3 sekunder yttes 8 step i sekundet.
➢ Når indstilling er tilendebragt tilsluttes den valgte alarm automatisk
➢ Ved 10 sekunder uden nogen form for indstilling, vender vejrstationen automatisk tilbage til normal
udgangspunkt og en eventuelt indstillet alarmtid gemmes og aktiveres.
2. Alarm:
Når alarmen er udløst
➢ Alarm lyden har ere lyd intervaller/trin, efter 30 sekunder lang kontinuerlig lyd.
➢ Alarm symbolet blinker.
➢ Alarmtid: 2 minutter.
➢ Hvis en alarm konikter med en anden alarm vil den nyeste alarm have præference.
➢ Tryk på ”Snooze” knappen og alarmen udsættes i 5 minutter.
➢ Tryk på en vilkårlig knap og alarmen annulleres.
➢ I Snooze tilstand, tryk på en vilkårlig knap for at annullere Snooze.
Indstilling af temperatur alarm
1. Tryk på Alert knappen for at aktivere/deaktiver alarm.
2. Tryk og hold Alert knappen nede i 3 sekunder for at komme til indstilling af alarm.
➢ Indstillings rækkefølge: Indendørs høj/ lav temperatur, derefter udendørs høj/lav temperatur
➢ Når inde-/udendørs er valgt blinker det valgte område.
➢ Indstil det valgte områdes temperatur, ved at trykke på enten UP eller DOWN knappen.
➢ Efter 10 sekunder uden indstilling gemmes den valgte temperatur og vejrstationen vender
automatisk retur til normal udgangspunkt.
➢ Den laveste limit temperatur kan ikke indstilles højere end højeste limit temperatur.
3. Når temperatur alarmen lyder:
➢ Temperatur og alarm symboler blinker.
➢ Alarmen lyder i 10 sekunder, stopper i 50 sekunder og fortsætter således i 5minutter.Tryk på en
vilkårlig knap for at stoppe lyden. Det til alarmen tilhørende temperatur og alarm symbol vil fortsætte
med at blinke.
➢ Hvis / når temperaturen vender tilbage indenfor de valgte rammer, vil alarmlyd og blink stoppe.
DK

Hukommelse
1. Tryk på UP knappen for at skifte temperaturen mellem nuværende, MAX og MIN temperatur .
2. Når MAX eller MIN temperatur vises, tryk på UP knappen i 3 sekunder for at nulstille MAX/MIN.
Der vise ”--.-” i displayet i 3 sekunder, hvorefter displayet returnerer til nuværende temperatur.
3. Når der vises MAX eller MIN i displayet, vil displayet automatisk vende tilbage til nuværende tem-
peratur efter 10 sekunder.
Måleenhed
1. Tryk på DOWN knappen for at skifte mellem Celcius og Fahrenheit. (°C, °F)
Comfort level indicator (8)
1. Dry: Indoor humidity less than 40%
2. Comfort: when Indoor temperature is 20-28%, humidity between 40-70%
3. Wet: Indoor humidity greater than 70%
4. No display: When the temperature is not 20°C - 28°C and the humidity is 40-70%, there is no
comfort indicator
DK

Time & weather forecast
1. Press the ”Snooze/Light” button to update the weather & time
2. The meaning of weather graphics
Sunny Cloud Overcast Thunder thundershower/
thundershower
with hail
Thunderstorm
Rain Moderate rain Heavy rain Rainstorm Rain shower Heavy shower
Snow Moderate snow Heavy snow Snowstorm
(icon ashes)
Sleet Small snow
showers
Snow showers Fog Haze Floating dust Sandstorm
(icon ashes)
When the sign is lit, it means entering DST time.
DK

Tekniske specikationer
Vejrstation
Batterier: 3 x AAA / 1.5 V (medfølger ikke)
Temperatur måle område: 0°C til +50°C
Temperatur tolerance: 0°C ~ 40°C: +/-1°C, over 40°C: +/-2°C
Luftfugtigheds måle område: 20 % til 95 % relativ luftfugtighed
Luftfugtigheds tolerance: +/- 5 % i området 30% to 80%, +/- 8% for andre områder
Sensor
Batterier: 2 x AAA / 1.5 V (medfølger ikke)
Temperatur måle område: - 50°C til 70°C
Temperatur tolerance: 0°C ~ 40°C: +/-1°C, -50°C ~ 0°C og fra 40°C ~ 70°C: +/-2°C
Transmission frekvens: 433 MHz
Rækkevidde: maks 50 meter i åben areal
Adapter
Strøm: 230-240V~, 50 Hz 50 mA Output: 5.0V150 mA
DK
Sunny Cloud Overcast Thunder thundershower/
thundershower
with hail
Thunderstorm
Rain Moderate rain Heavy rain Rainstorm Rain shower Heavy shower
Snow Moderate snow Heavy snow Snowstorm
(icon ashes)
Sleet Small snow
showers
Snow showers Fog Haze Floating dust Sandstorm
(icon ashes)

Table of contents
Languages:
Other Ventus Weather Station manuals

Ventus
Ventus W154 User manual

Ventus
Ventus W266 User manual

Ventus
Ventus W820 User manual

Ventus
Ventus W194 User manual

Ventus
Ventus lonobox User manual

Ventus
Ventus W157 User manual

Ventus
Ventus W831 User manual

Ventus
Ventus W928-ULTIMATE User manual

Ventus
Ventus W850 User manual

Ventus
Ventus W177 User manual